
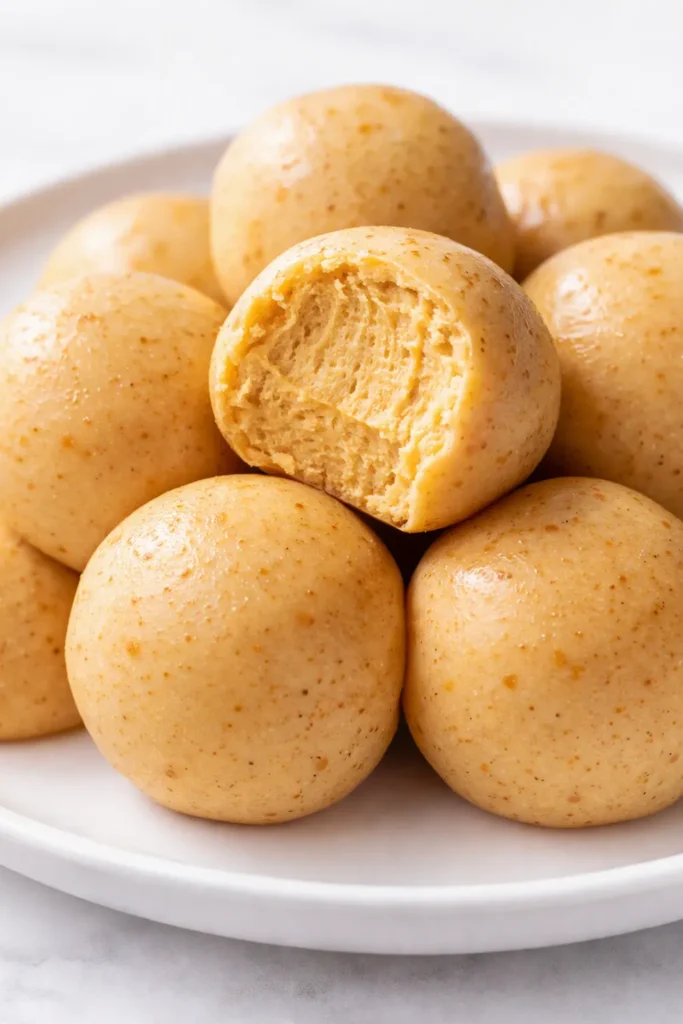
There’s a little snap when you bite into one, the white chocolate shell cracking cleanly before the soft, spiced filling lets go underneath. It’s cold the way cheesecake should be cold, and the pumpkin flavor settles in after the sweetness instead of getting lost in it. I ate two standing at the refrigerator door the first time I made these, and my daughter Simone caught me with my hand in the container. She asked if she could have one for breakfast. I said “after lunch.” She said “what about a pre-breakfast snack?” We settled on after lunch. I lost that argument.
These pumpkin cheesecake truffles are the thing I bring to any gathering where I actually like the people. No oven required, 30 minutes of hands-on work, and they taste like November in a single bite.
The short version: No-bake pumpkin cheesecake truffles that set up firm, dip cleanly in chocolate, and get eaten faster than anything else on the table.
I’ve made this recipe five times since October — for Friendsgiving, for Simone’s class party, and once because Marcus asked for “something pumpkin” three days in a row. The batch that disappeared at Friendsgiving is the version I’m giving you here.
- Serves: 18–20 truffles, as a dessert or holiday gift
- Hands-On Time: 30 min | Total Time: 2 hours (mostly chilling)
- Difficulty: Easy — the only hard part is waiting for them to chill
- Cost per serving: About $0.50 per truffle
- Calories: ~160 per truffle
- Dietary Notes: Vegetarian; gluten-free and dairy-free versions below
(Photo above: a shallow white platter of pumpkin cheesecake truffles with pale white chocolate shells, dusted with cinnamon and crushed graham cracker, one truffle cut in half to show the soft orange filling inside, soft afternoon light from a kitchen window, a few fallen leaves on the table because it’s October and I can’t help myself.)
Why These Set Up Firm (Instead of a Melty Mess)
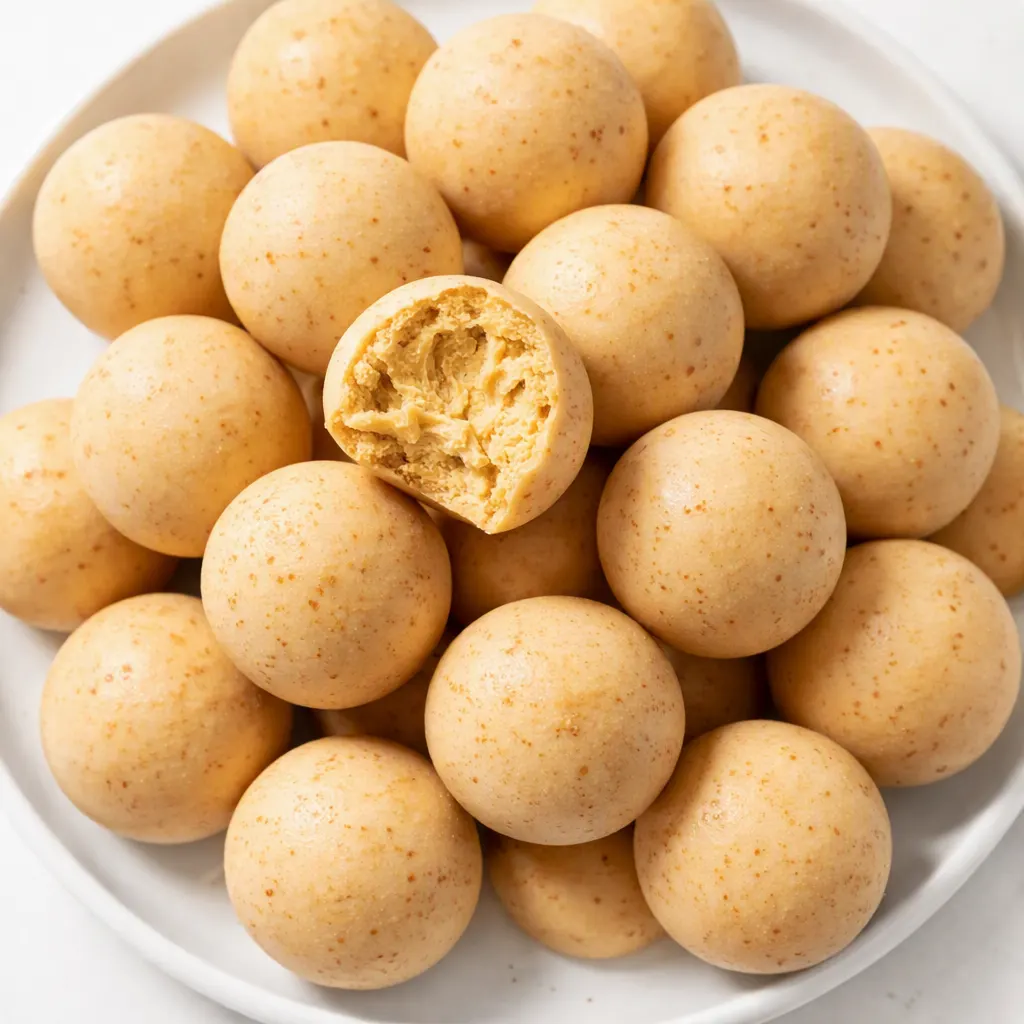
The three things that keep this from turning into a sticky, sad pile are simple ones. First, you drain the pumpkin. Canned pumpkin has more water in it than you’d think, and that water is exactly what makes the filling too soft to roll. Five minutes on a paper towel solves the whole problem before it starts.
Second, you freeze the truffle centers before dipping them. The warm chocolate sets around a cold, solid ball without pulling the filling apart or dragging it off the fork. This is the step that separates a truffle from a blob, and it’s worth every minute of waiting.
Third, you serve them cold. Cold is not optional here. It’s the difference between a clean little snap and a chocolate-covered puddle. Celestine never made a truffle in her life and would have called the name fussy, but she understood the principle underneath all three steps: let the food tell you when it’s ready. The filling tells you by holding its shape. The chocolate tells you by snapping instead of bending. You don’t rush any of it.
The Ingredients That Matter (Plus a Few Notes From Me)
- 8 oz cream cheese, softened: Full-fat, brick style. Not the whipped tub — whipped cream cheese has air in it, and air is not your friend in a truffle filling. Set it out on the counter about an hour before you start, like you’re warming up before a conversation.
- ½ cup pumpkin purée: Canned is perfect. Look for “100% pumpkin” on the label and steer clear of anything labeled “pumpkin pie filling” — that’s pre-sweetened and pre-spiced and it will throw the whole balance off. Fresh pumpkin is lovely for other things; it’s not what you want here. Canned is more consistent and this recipe is about the cream cheese and chocolate anyway.
- 1½ cups graham cracker crumbs: About 12 full sheets. I crush mine in a zip-top bag with a rolling pin. Simone likes to do this part, and she is extremely thorough. She has also been known to eat a percentage of the crumbs, so buy extra. Kid test passed: the crumbs she doesn’t eat make the texture exactly right.
- ½ cup powdered sugar: This sweetens the filling without adding grit. Regular granulated sugar will make the truffles grainy in a way you can’t un-taste. Don’t swap it. I know it’s tempting. Just don’t.
- 1 teaspoon vanilla extract: The good stuff. Imitation vanilla works in a pinch but the real thing does something quieter and better in the background.
- 1 teaspoon pumpkin pie spice: Or measure your own: ½ teaspoon cinnamon, ¼ teaspoon nutmeg, ¼ teaspoon ginger, and a pinch each of cloves and allspice. If you have whole spices and ten extra minutes, toast them gently in a dry pan before grinding. The flavor goes from nice to deep. That’s the difference worth cooking for.
- ¼ teaspoon kosher salt: Not negotiable. Salt is what makes the spice and the chocolate taste like themselves instead of just sweet. Celestine seasoned every layer of everything she made. Salt at the beginning, salt in the middle, salt at the end. This is the end of a dessert, but the principle is the same.
- 10 oz white chocolate chips or melting wafers: White chocolate is picky. Use a brand you trust — Ghirardelli and Guittard are my favorites — or use melting wafers if you want the smoothest result. If white chocolate feels like too much sweetness, the dark chocolate version in the swaps section is your friend.
- Cinnamon and finely crushed graham cracker, for the top: Just a little dusting while the chocolate is still wet. It’s not decoration; that cinnamon hits your nose before the sweetness hits your mouth.
What to Pull Out Before You Start
- A rimmed baking sheet lined with parchment paper
- An electric hand mixer — or strong arms and a bowl and a spatula
- A medium mixing bowl
- A small microwave-safe bowl for the chocolate
- A fork or a dipping tool
- A cookie scoop or a regular tablespoon measure
- Paper towels — more than you think you need
Let’s Make Them (No Oven, No Sweat)
Read through these once before you start. It’s not complicated, but the order matters — the freeze time is where all the magic happens, and you’ll want to know that before you’re standing there with warm chocolate and a soft ball of filling.
Line the baking sheet: Cover your baking sheet with parchment paper. This sheet is where the truffles will live until they’re done, so make it comfortable.
- Drain the pumpkin: Spread the pumpkin purée over a few layers of paper towels, fold the towels over it, and press down gently. Let it sit for five minutes. The paper will pull out the excess water that would otherwise make your filling too sticky to roll. This is the step everyone skips, and skipping it is the number one reason truffles turn into blobs.
- Beat the cream cheese: In a medium bowl, beat the softened cream cheese until it’s completely smooth. Scrape the sides once or twice. No lumps, no hurry. If your cream cheese isn’t fully soft, you’ll get little white flecks in the filling and they’ll stay there. Let it warm up properly.
- Add the flavor: Add the drained pumpkin, powdered sugar, vanilla, pumpkin pie spice, and salt. Beat until everything is completely uniform. Taste it here — this is the moment that tells you whether the final version will be right. It should taste like the holidays in a bowl. (📸 Photo tip: the filling at this stage, a smooth pale orange with a slight sheen, the way you’d want it to look before it ever gets rolled.)
- Add the crumbs: Add the graham cracker crumbs a little at a time, mixing until a stiff dough forms. The mixture should hold together when you squeeze it and pull apart cleanly when you break it — like a cookie dough, not like a cake batter.
- Roll the truffles: Scoop level tablespoons and roll them into neat balls with your hands. If the mixture sticks to your palms, run your hands under cold water, shake off the excess, and roll again. Cold hands are the trick. (📸 Photo tip: a row of round, evenly sized truffle balls lined up on the parchment, catching the light, looking like pale orange moons waiting for their chocolate bath.)
- Freeze them solid: Freeze the truffle balls for 45 minutes. They need to be firm all the way through before they go anywhere near melted chocolate. This is not the place to save time. Set a timer and don’t negotiate with yourself about it.
- Melt the chocolate: When the truffles are nearly done freezing, melt the white chocolate in a microwave-safe bowl in 30-second bursts, stirring after each one, until it’s just smooth. It should be barely warm and completely liquid. White chocolate seizes into a thick, dull mess when it gets too hot, so low and slow is the only way. If you’re really tired and want dessert without the extra step, here’s my honest shortcut: skip the chocolate entirely and roll the frozen truffle balls in crushed graham crumbs. That version is delicious, and Simone actually prefers it. I’m not sure what that says about my chocolate dipping skills.
- Dip, tap, set: Take the truffles out of the freezer in small batches and keep the rest cold while you work. Drop a ball into the chocolate, roll it with the fork until it’s coated, lift it, and tap the fork gently on the edge of the bowl to let the extra chocolate fall back. Slide the coated truffle onto the parchment. The tap is important — that’s what keeps the bottom from having a giant chocolate foot.
- Finish them: While the chocolate is still wet, sprinkle each truffle with a little cinnamon or crushed graham cracker. Then refrigerate the tray for 30 minutes until the shells are fully set.
- Keep them cold: Move the truffles to an airtight container and keep them refrigerated. When you bite into one, the shell should crack with a clean little snap. That’s the sign you did it right.
Make-Ahead Notes (Because the Holidays Don’t Wait for You)
These are my standard “I’ll bring dessert” move for every fall gathering, because they’re genuinely better when you make them a day ahead. The flavors settle overnight and the whole thing pulls together in a way it doesn’t quite reach on day one. I make a double batch on a Sunday while Simone is at school, and by the time the party rolls around on Thursday, I just put them on a plate and look like I have my life together. It’s a nice illusion.
- Fridge: Store in an airtight container for up to one week. Serve them straight from the fridge — that cold snap is part of the experience.
- Freezer: Yes, they freeze beautifully. Freeze them in a single layer on the parchment sheet until solid, then transfer to a zip-top bag. They’ll keep for two months. I’ve never personally seen one last that long, but I’m told it’s possible.
- Reheat: Don’t. They’re meant to be cold. If you absolutely want them softer, let them sit at room temperature for five minutes and not a second more.
Things I Wish I’d Known the First Time Around
- The draining step is not a suggestion: The first batch I ever made was too sticky to roll, and I blamed the recipe before I realized the culprit was the water in the pumpkin I hadn’t drained. Five minutes on a paper towel saves you twenty minutes of fighting with sticky dough. Trust me on this one. Even if you mess it up, though, it’s fixable — add two extra tablespoons of graham crumbs and chill the bowl for ten minutes before you try again.
- Cold hands make round truffles: Run your hands under cold water before you start rolling, and dry them thoroughly. The warmth of your palms softens the filling at the edges, which is what causes lopsided balls. Cold hands, round truffles. My husband thought I was overthinking it until he tried both versions.
- White chocolate is a diva: It seizes and stiffens if you rush it or overheat it. Melt it in short 30-second bursts and stop the second it looks smooth. If it does seize on you, stir in a teaspoon of coconut oil or vegetable shortening, gently, and it usually comes back. I’ve rescued more than one batch this way.
- Make them a day ahead: The flavors settle overnight in a way that makes the truffles taste deeper and rounder. Day one, they’re delicious. Day two, they’re the thing everyone asks you to bring next time. I don’t know exactly what happens in the fridge overnight, and I don’t need to know for the recipe to be true.
Swaps That Actually Work
- Dark chocolate version: Use semisweet or bittersweet chips instead of white chocolate. The dark chocolate is less sweet, and it balances the pumpkin filling beautifully. This is the version I make when there will be adults at the table. My nephew, who can’t do dairy, gets the dairy-free version below and he loves it — I’ve tested it on him twice.
- Dairy-free: Use dairy-free cream cheese (Kite Hill works well in this recipe) and dairy-free white chocolate chips or a dark dairy-free chocolate bar. The filling will be slightly softer, so don’t skip the freeze step. I haven’t tested every brand on the market, but readers have reported good results with both.
- Gluten-free: Use gluten-free graham crackers or crushed gluten-free vanilla cookies. The texture holds up just fine, and honestly most people won’t notice the difference if you don’t tell them.
- The grown-up spicy version: Add ¼ teaspoon of cayenne pepper to the filling along with the pumpkin pie spice. It doesn’t announce itself as heat — it just makes the cinnamon and the chocolate taste more interesting. My sister-in-law calls it “the one with the little kick.”
- Kid-friendly no-dip version: Roll the frozen truffle balls in crushed cinnamon graham crackers and skip the chocolate entirely. Simone says these are “basically pumpkin-cinnamon cookies, but round.” That’s the highest praise she gives, so I’ll take it.
The Questions I Get Every Fall
Q: Why did my truffles turn out sticky and impossible to roll?
A: Ugh, I’ve been there. Almost always it’s extra water — either the pumpkin wasn’t drained well or the cream cheese was softer than room temperature. You can fix it without starting over: add a couple of tablespoons of graham crumbs, give it a stir, and pop the bowl in the freezer for ten minutes before you try rolling again. It’ll still be good. I’ve done it and it tastes the same; the texture just needs a little help.
Q: Can I use dark chocolate instead of white chocolate?
A: Absolutely. Semisweet or bittersweet chips work beautifully and the darker chocolate actually balances the sweet pumpkin filling really well. Melt it exactly the same way — 30-second bursts, stir between each one, don’t rush it.
Q: How long do these keep? Can I freeze them?
A: Up to one week in the fridge in an airtight container, and up to two months in the freezer. Layer them between parchment so they don’t stick together, and serve them cold straight from the fridge. The microwave is not your friend here — they’re meant to be cold, and the cold is part of the point.
Q: What do you serve with pumpkin cheesecake truffles?
A: Hot coffee or cold apple cider — both are the right answer. On a dessert table, they’re great next to almost any pie, and if you’re feeling fancy, set out a mix of white and dark chocolate versions so people can choose. My family just eats them at the fridge with the door open, so take my pairing suggestions with a grain of salt. They also make a really good hostess gift if you can get them out of the house without anyone opening the container first.
More Recipes My Family Makes on Repeat
If these disappear as fast as they do at my house, here are a few more that get the same treatment:
- [INTERNAL LINK PLACEHOLDER: Sweet Potato Pie Bars] — The dessert that outshines the actual pie at my Thanksgiving table, and I say that with love for the pie.
- [INTERNAL LINK PLACEHOLDER: Brown Butter Pecan Ice Cream] — Tastes like a warm kitchen turned into a cold dessert, and you don’t need an ice cream maker.
- [INTERNAL LINK PLACEHOLDER: Bourbon Maple Pumpkin Bread] — The one I make when I want the whole house to smell like the holidays from a single loaf.
These pumpkin cheesecake truffles are the recipe I’ll make every time it’s my turn to bring the dessert this fall. They don’t need an oven, they don’t need a reason, and they never, ever come home with leftovers. Celestine would have called them “nice little sweets” and passed the plate with her coffee. Then she would have claimed she was full and reached for a second one anyway.
If you make them, drop a comment below and tell me which version your family chose — I love hearing how it goes for you. And tag me on Pinterest so I can see your holiday table. The dark chocolate version, the kiddie graham version, all of it. I want to see it.
📌 Pumpkin cheesecake truffles that set up firm, dip cleanly, and vanish fast — save this no-bake recipe for your Thanksgiving dessert table.
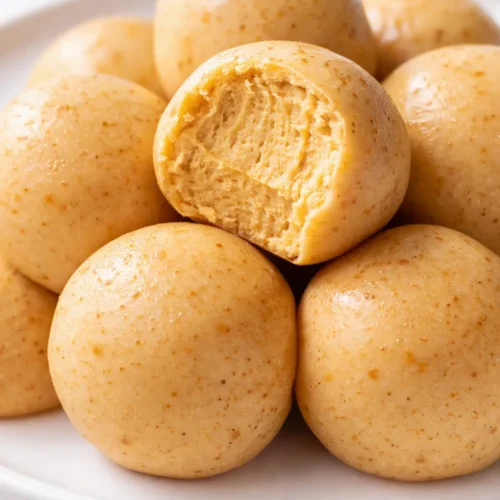
No-Bake Pumpkin Cheesecake Truffles
Equipment
- Rimmed Baking Sheet
- Parchment Paper
- Electric hand mixer
- Medium Mixing Bowl
- Small microwave-safe bowl
- Fork or dipping tool
- Cookie scoop or tablespoon measure
- Paper Towels
Ingredients
For the Truffle Filling
- 8 oz cream cheese, softened
- 0.5 cup pumpkin purée (not pumpkin pie filling)
- 1.5 cups graham cracker crumbs (about 12 full sheets)
- 0.5 cup powdered sugar
- 1 teaspoon vanilla extract
- 1 teaspoon pumpkin pie spice
- 0.25 teaspoon kosher salt
For the Coating and Finish
- 10 oz white chocolate chips or melting wafers
- Cinnamon and finely crushed graham cracker, for dusting
Instructions
- Line a rimmed baking sheet with parchment paper and set it aside.
- Drain the pumpkin: spread the pumpkin purée over a few layers of paper towels, fold the towels over it, and press gently. Let it sit for five minutes so the paper pulls out the excess water.
- Beat the softened cream cheese in a medium bowl until completely smooth, scraping the sides once or twice.
- Add the drained pumpkin, powdered sugar, vanilla, pumpkin pie spice, and salt. Beat until everything is completely uniform. Taste it here to check the balance.
- Add the graham cracker crumbs a little at a time, mixing until a stiff dough forms. The mixture should hold together when squeezed and pull apart cleanly.
- Scoop level tablespoons and roll them into neat balls with your hands. If the mixture sticks, run your hands under cold water, shake off the excess, and roll again.
- Freeze the truffle balls for 45 minutes until they are firm all the way through before dipping.
- Melt the white chocolate in a microwave-safe bowl in 30-second bursts, stirring after each one, until it is just smooth and barely warm. Do not overheat.
- Working in small batches, dip the frozen truffle balls into the chocolate. Lift with a fork, tap the fork gently on the bowl edge to let the extra chocolate fall back, and slide the coated truffle onto the parchment.
- While the chocolate is still wet, sprinkle each truffle with cinnamon or crushed graham cracker. Refrigerate the tray for 30 minutes until the shells are fully set.
- Move the truffles to an airtight container and keep them refrigerated. Serve cold so the shell cracks with a clean snap.
Notes
Related posts:
 Frozen Chocolate Covered Strawberry Bites That Taste Like Pure Summer (3 Ingredients, No Oven)
 Ninja Creami Salted Caramel Ice Cream That’s Creamy, Dreamy, and Ready in 24 Hours
 Fall Pumpkin Marshmallow Coffee Syrup That Beats the Coffee Shop — in 10 Minutes
 Chocolate Banana Mummies That Come Together in 20 Minutes of Actual Work — No Oven Required