
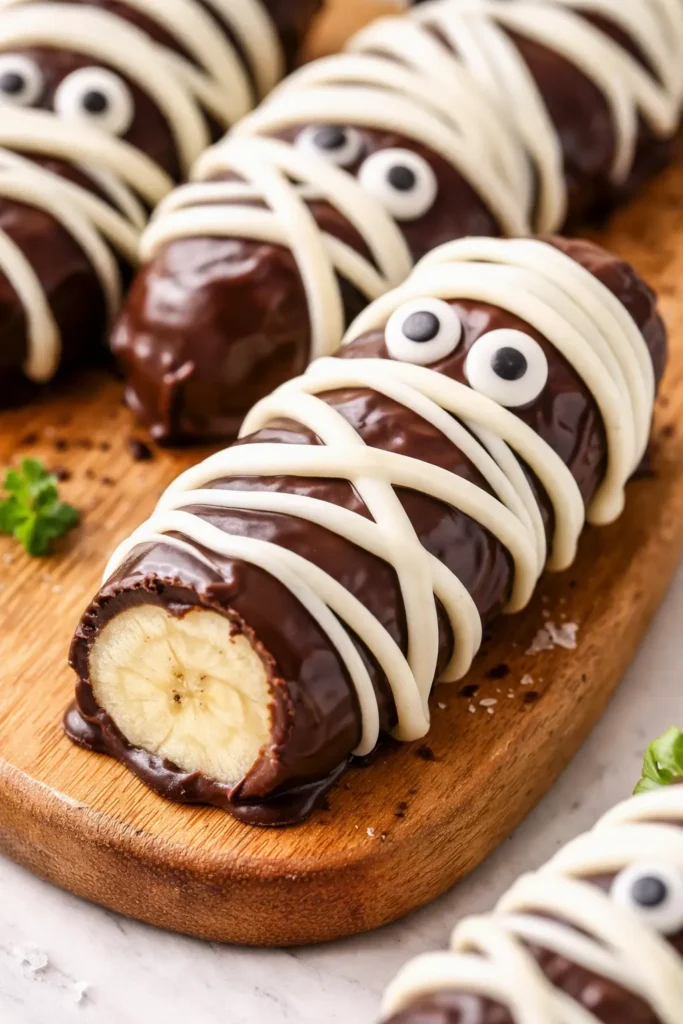
The first batch of chocolate banana mummies I ever made looked less like mummies and more like something the mummy had already clawed its way out of. The chocolate slid off the bananas in thick, sad sheets, and the banana underneath went soft before anyone got a bite. I have fixed the problem. These are the version I’ve made every Halloween since — the chocolate stays put, the white chocolate bandages actually read as bandages, and Simone’s third-grade class asked for the recipe two years in a row!
The short version: Frozen banana segments on sticks, dipped in dark chocolate, wrapped in white chocolate bandages, with candy eyes that stare right back at you. Twenty minutes of hands-on work, one quiet hour in the freezer, zero baking.
I’ve made these three Halloweens straight — once for the class party, once for the neighbors, and once because Simone asked for them on a random Tuesday in October. That Tuesday request is how you know they’re real.
- Serves: 8 to 10 as a dessert (makes 8–12 mummies, depending on banana size)
- Hands-On Time: 20 min | Total Time: 90 min (includes freezing)
- Difficulty: Easy enough that a kid can help — Simone does the eyes every time
- Cost per serving: About $0.75
- Calories: ~180 per mummy
- Dietary Notes: Naturally vegetarian and nut-free; dairy-free option included below
(Photo above: overhead shot of the chocolate banana mummies lined up on a parchment-covered baking sheet, white chocolate bandages drizzled by a slightly messy but confident hand, candy eyes looking up at the camera, one mummy tipped over to show the chocolate shell and the frozen banana inside, cool afternoon light coming from the left.)
The Trick That Keeps the Chocolate On (I Learned This the Hard Way)
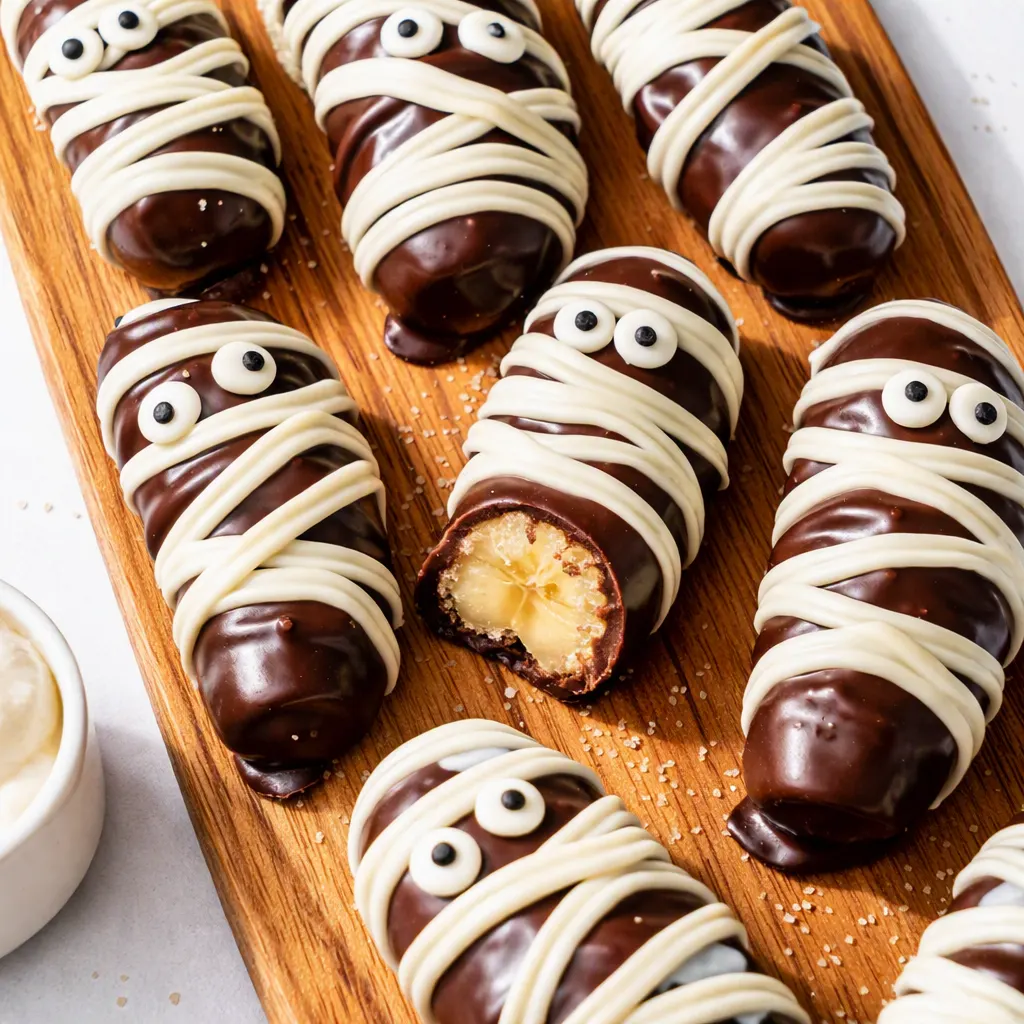
Everything about this recipe comes down to one word: cold. The bananas have to be fully frozen before they meet the chocolate. When they are, the chocolate sets against the cold surface almost instantly, and the whole thing stays firm enough for a kid to hold by the stick. When they’re not — and I have made this mistake — the chocolate slides off the banana, the banana turns to mush, and you have a very sad dessert situation.
The second thing nobody tells you is to pat the bananas dry before freezing. Bananas are wet. Even frozen, that surface moisture makes the chocolate slip. Thirty seconds with a paper towel before they go in the freezer fixes the entire problem.
And then there’s the coconut oil. You’ll see it in the ingredient list and wonder if you can skip it. Don’t. A spoonful of coconut oil thins melted chocolate just enough that it coats the banana cleanly instead of clumping on thick, and it gives the finished shell a slight shine that makes the mummies look, well, alive. As alive as a chocolate mummy should look.
What Goes In (Plus Which Ingredients Actually Matter)
- 4 ripe-but-firm bananas: “Ripe” meaning yellow with a few brown spots, not the bruised sad ones. Overripe bananas belong in bread, not in a mummy. Simone will try to hand you the bruisey one. Hand it back.
- 1½ cups dark or milk chocolate chips: I use dark because the contrast against the white bandages is exactly what makes it read as a mummy. Milk chocolate works fine. White chocolate works too, if you’re feeding someone who refuses to believe dark chocolate is even chocolate.
- ½ cup white chocolate chips: Look for real white chocolate, not white candy coating. The coating melts into something waxy and the taste gives it away. My rule: read the bag, and if it says “vanilla coating,” put it back.
- 1 tablespoon coconut oil, divided: Half for the dark chocolate, half for the white. It’s the difference between a smooth coat and a clumpy one.
- 1 bag candy eyes: The little sugar half-spheres that show up in the baking aisle around October. Simone’s job is placing the eyes, a responsibility she takes extremely seriously.
- 8 to 12 popsicle sticks: Regular craft sticks work. Insert them about halfway into the banana so you’re not holding a mummy by a stick that’s barely hanging on.
What to Pull Out Before You Start
- A baking sheet lined with parchment — your mummy morgue. I mean, your landing zone
- A small microwave-safe bowl for the dark chocolate
- A second small bowl for the white chocolate (or wash the first one between uses)
- A paper towel or two, for patting bananas dry
- A fork or small spoon for dipping — a fork lets the excess chocolate drip back into the bowl instead of pooling at the bottom
- A zip-top bag for piping the white chocolate — snip the tiniest corner off; you can always cut more, but you can’t uncut
Making the Mummies, Start to Finish
This goes faster than you’d think, so read the whole thing before you start. The freezer does most of the work.
- Prep the bananas: Peel all four bananas and cut each one into two or three segments, about two inches long. Pat each segment completely dry with a paper towel — the thirty-second step that decides whether the chocolate sticks or slides. Insert a popsicle stick about halfway into one flat end of each segment.
(📸 Photo tip: banana segments on sticks, lined up on the parchment like little lollipops, frost just starting to develop on the edges.) - Freeze them solid: Lay the segments on the baking sheet and freeze for 30 to 45 minutes, until they are completely hard. Not mostly hard — completely. Give one a gentle squeeze; there should be no give at all.
- Melt the dark chocolate: Combine the dark chocolate chips with half the coconut oil in a microwave-safe bowl. Microwave in 30-second bursts, stirring between each, until the chocolate is smooth and glossy. Stop before it’s hot enough to scald — chocolate that’s too hot will melt the banana’s surface and turn everything to soup. This is not the step to walk away from.
- Dip in small batches: Take three or four banana segments out of the freezer at a time. Leave the rest where they are — they warm up fast, and a warm banana won’t take a clean chocolate coat. Drop each segment into the chocolate, turn it with a fork to coat all sides, and let the excess drip back into the bowl.
- Add the eyes immediately: While the chocolate is still wet, press two candy eyes into the front of each mummy. Do not wait. If the chocolate sets first, the eyes fall off. Simone and I have reattached a lot of fallen eyes over the years, and it is nobody’s favorite activity.
- Chill to set: Put the sheet back in the freezer for 10 minutes, until the dark chocolate is firm.
- Melt the white chocolate: Combine the white chips with the remaining coconut oil in a bowl and microwave in 20-second bursts — white chocolate scorches faster than dark, so be patient. Pour it into a zip-top bag and snip a tiny corner off the bottom.
- Wrap the bandages: Drizzle the white chocolate back and forth across each mummy in a few diagonal passes, leaving a gap around the eyes. You’re going for mummy, not snowman. If the lines are uneven, that’s correct — mummies are supposed to look like they got wrapped in a hurry.
(📸 Photo tip: the finished mummies with the white chocolate bandages still wet, candy eyes peeking through the gaps, one mummy lying on its side in the foreground.) - Final freeze: Back into the freezer for 15 minutes, until the white chocolate is completely set. Keep them frozen right up until serving.
Making These Before Halloween Week (Trust Me, Do This)
This is the Halloween recipe you can make on Sunday and forget about until Thursday. I do a double batch the weekend before the class party and we are covered — the party gets twelve, the neighbors get six, and Simone gets the two that “fall off the stick” while I’m packing the container.
- Fridge: No. The bananas turn brown and weep within a few hours. These are freezer treats, full stop.
- Freezer: Yes — this is where they live. Store in an airtight container with parchment between the layers for up to 2 weeks. They taste best in the first week.
- Reheat: You don’t. Serve straight from the freezer, because they soften fast at room temperature. Set the plate down and let everyone descend.
What I’ve Learned After Way Too Many Batches
- Cold is the whole game: The 30-to-45-minute freeze is not a suggestion. I know it feels like a long time to wait for a banana. Set a timer, drink some coffee, and let the freezer do its job. A fully frozen banana holds the chocolate and holds its shape. A half-frozen banana gives you a chocolate-covered droop.
- Work in threes, not in dozens: The segments warm up within a couple of minutes on the counter. If you take everything out at once, you’ll be racing the clock, and the banana will win. Three or four at a time means a clean coat every time.
- Let the white chocolate sit before you pipe: White chocolate straight from the microwave is hot enough to melt the dark chocolate it lands on and pool into a white blob. Let it rest in the bag for a few minutes until it’s warm but not hot, and test your first drizzle on a corner of the parchment. You’ll see immediately whether you’re ready.
- Messy is the aesthetic: These are mummies. If the bandages are uneven, if a little chocolate pooled at the base, if one mummy lost an eye, that is on brand. Simone’s very first batch looked like they’d been dug up in a hurry. She was thrilled. Even if your bandage technique isn’t perfect, the chocolate is still chocolate and the banana is still banana. It will taste good. I’ve done it.
- Give the kids the eye station: I dip, Simone places the eyes. It keeps the chocolate off the ceiling and keeps her invested in the outcome. She takes eye placement very personally, and the mummies are better for it.
Swaps and Twists That Actually Work
- Dairy-free: Use dairy-free chocolate chips — the ones in the purple bag work perfectly, and nobody at the party will know. I make a dairy-free batch every year for Simone’s friend Liam, who has walked past a lot of Halloween desserts that weren’t for him. These are for him.
- Nut-free: The recipe is naturally nut-free, but chocolate chips are sometimes processed on shared equipment, so check the bag before you promise anything.
- Peanut butter twist: Drizzle a thin ribbon of warm peanut butter over the dark chocolate before you do the white bandages. This is the version I make after Simone’s in bed, because Marcus pairs peanut butter and banana the way other people pair wine and cheese.
- Sprinkle version: Out of white chocolate? Roll the dipped bananas in Halloween sprinkles while the dark chocolate is still wet. Half the work, still festive, still gone by the end of the party.
- For the grown-up table: Sprinkle a tiny pinch of flaky salt on the chocolate before it sets. It is the difference between a good Halloween dessert and one that gets eaten in silence by adults who should be supervising the candy.
The Questions I Get About These Every October
Q: Why did my chocolate slide right off the banana?
A: That was my first batch, too. The banana either wasn’t fully frozen — it needs the full 30 to 45 minutes, not the 20 I gave it because I was impatient — or it wasn’t patted dry before freezing. That surface moisture acts like a barrier and the chocolate just slides around on top of it. Pat the segments dry, freeze them solid, and it clicks into place. You’ve got this next time.
Q: Can I make these without coconut oil?
A: You can, but the chocolate will be thick and it will clump instead of coating cleanly. If you don’t have coconut oil, a teaspoon of butter does the same job. It changes the flavor slightly, but it works. Melt it in with the chocolate and go.
Q: How long do these last in the freezer?
A: Up to two weeks in an airtight container with parchment between the layers. They’re best in the first week — after that the banana texture softens a little under the chocolate shell. Still good. Still completely edible. No kid at a Halloween party has ever cared about a mummy that’s eleven days old.
Q: What do you serve with these?
A: They can carry the dessert table alone, honestly. For the full spread, I put them on a platter with popcorn balls and a bowl of clementines. Simone likes them with apple slices — she says the crunch is “a good contrast,” which is a direct quote and the best review this recipe has ever received! For the grown-ups: cold milk. Coffee if it’s Halloween on a Tuesday and it’s already been a week.
More Recipes My Family Makes on Repeat
If you’re already in Halloween-planning mode, these are the other things that rotate through our kitchen every October:
- [INTERNAL LINK PLACEHOLDER: Halloween Night Gumbo] — the real food I make before the sugar hits — dark roux, andouille, and enough flavor to survive a costume emergency
- [INTERNAL LINK PLACEHOLDER: Celestine’s Pralines] — she would have raised an eyebrow at a chocolate banana mummy and then eaten two of them. These are her actual pralines
- [INTERNAL LINK PLACEHOLDER: Simone’s Favorite Popcorn Balls] — buttery, sticky, and the only snack that keeps an eight-year-old away from the candy bowl for twenty solid minutes
Halloween week at our house is controlled chaos — the costume that arrives two days late, the class party sign-up email I almost missed, the trick-or-treat route that somehow takes an hour and a half. These mummies are the one thing that doesn’t need me on the day. They sit in the freezer, cold and patient, waiting for the exact moment a small hand reaches in.
If you make them, drop a comment below and tell me how the bandage technique went. I like a mummy with a little personality. And tag me on Pinterest — I genuinely love seeing the eye placements you come up with.
📌 Save this chocolate banana mummies recipe for October — it stays crisp and cold in the freezer, ready for class parties and last-minute Halloween treats.
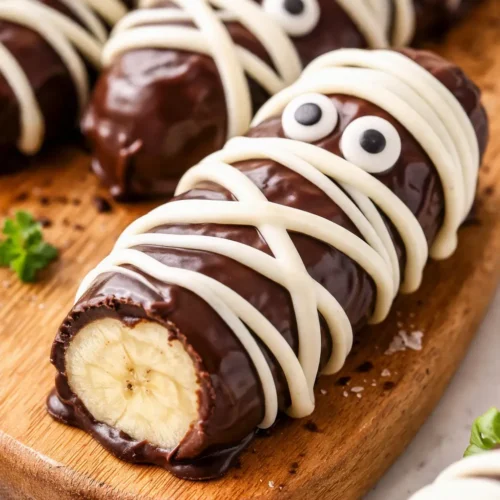
Chocolate Banana Mummies That Come Together in 20 Minutes of Actual Work – No Oven Required
Equipment
- Baking Sheet
- Parchment Paper
- Microwave-safe bowl
- Popsicle Sticks
- Zip-top bag
- Fork
Ingredients
For the Mummy Base
- 4 ripe-but-firm bananas, peeled and cut into 2-inch segments
- 8 to 12 popsicle sticks
For the Chocolate Coat
- 1 1/2 cups dark or milk chocolate chips
- 1/2 cup white chocolate chips
- 1 tablespoon coconut oil, divided
- 1 bag candy eyes
Instructions
- Peel the bananas and cut each one into two or three segments, about two inches long. Pat every segment completely dry with a paper towel, then insert a popsicle stick about halfway into one flat end of each piece.
- Lay the banana segments on a parchment-lined baking sheet and freeze for 30 to 45 minutes, until they are completely hard with no give when gently squeezed.
- Combine the dark chocolate chips with half the coconut oil in a microwave-safe bowl. Microwave in 30-second bursts, stirring between each, until smooth and glossy. Stop before the chocolate gets hot enough to scald.
- Take the bananas out of the freezer in batches of three or four at a time. Dip each segment into the chocolate, turn it with a fork to coat all sides, and let the excess drip back into the bowl.
- While the chocolate is still wet, press two candy eyes onto the front of each mummy. Work immediately; if the chocolate sets first, the eyes will fall off.
- Return the sheet to the freezer for 10 minutes until the dark chocolate is firm.
- Melt the white chocolate chips with the remaining coconut oil in 20-second bursts, since white chocolate scorches faster than dark. Pour into a zip-top bag and snip a tiny corner off the bottom.
- Let the white chocolate rest until warm rather than hot, then drizzle it back and forth across each mummy in a few diagonal passes, leaving a gap around the eyes. Uneven bandages are exactly right for a mummy.
- Freeze the finished mummies for 15 minutes until the white chocolate is completely set. Keep them frozen right up until serving.
Notes
Related posts:
 Frozen Chocolate Covered Strawberry Bites That Taste Like Pure Summer (3 Ingredients, No Oven)
 Summer Berry Trifle for a Crowd: Creamy, Tangy, and Completely No-Bake
 Ninja Creami Salted Caramel Ice Cream That’s Creamy, Dreamy, and Ready in 24 Hours
 Fall Pumpkin Marshmallow Coffee Syrup That Beats the Coffee Shop — in 10 Minutes