
I’ve been burned by dry, chalky “protein” baked goods more times than I can count. Store-bought protein biscuits? Dusty hockey pucks. Every single one. So I went on a mission in my own kitchen, testing different flours, fats, and protein powders so you don’t have to. These breakfast protein biscuits? They pass the picky-eater test — my 7-year-old called them “cheesy clouds,” which is basically a Michelin star in our house. They come together in one bowl, bake in 25 minutes, and actually keep you full until lunch. I make a double batch every Sunday, and we grab them on the way out the door all week long.
The short version: High-protein, fluffy, savory biscuits that disappear in minutes — even my kids forget they’re “healthy.”
I tested six different protein powders so you don’t have to. Spoiler: unflavored collagen peptides are the secret to a tender crumb that doesn’t taste like a chalky fitness supplement. Let’s make these.
- Serves: 8 biscuits
- Hands-On Time: 10 min | Total Time: 25 min
- Difficulty: Easy enough for a Tuesday morning (I promise)
- Cost per serving: ~$0.80
- Calories: ~220 per biscuit
- Dietary Notes: High-protein, adaptable for gluten-free
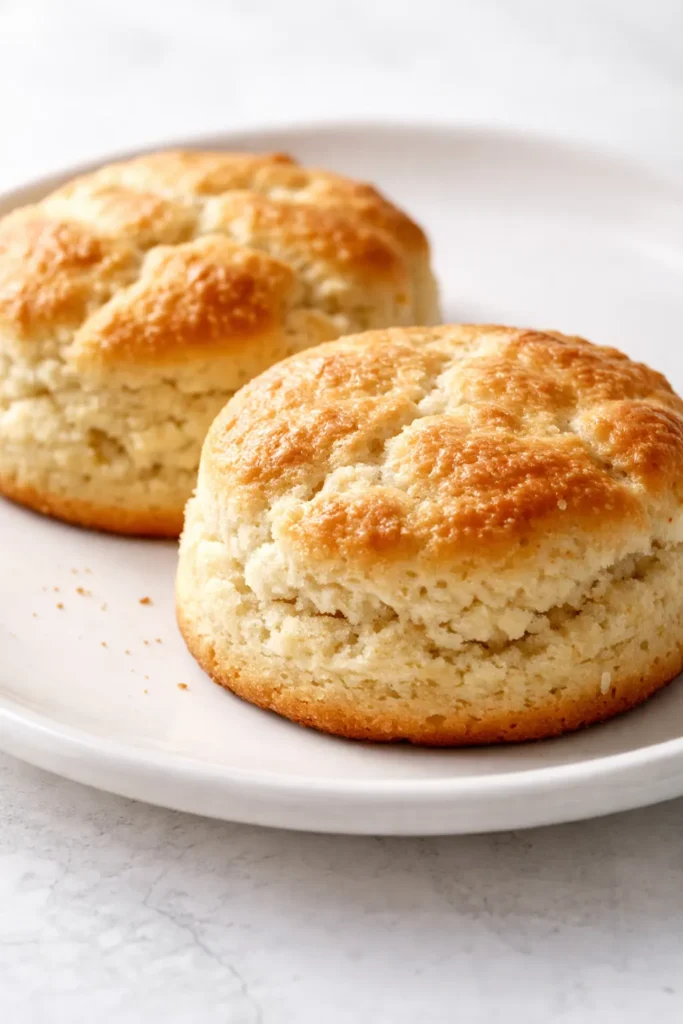
(Photo above: Overhead shot of golden biscuits on a wire rack, a steamy cross-section showing melty cheddar flecks, crumbs scattered on a blue plate, warm morning sunlight streaming in from the left.)
The Secret to Protein Biscuits That Aren’t Dry

Most protein biscuits fail because the protein powder acts like a sponge — it soaks up every drop of moisture and leaves you with a dense, dry crumb. My fix is two-fold: I replace some of the all-purpose flour with almond flour (which stays tender), and I add a generous amount of full-fat Greek yogurt and cold butter. The result is a biscuit that bends, fluffs, and crumbles exactly the way a good Southern-style biscuit should.
The other trick is grating the butter straight from the freezer. Those tiny butter shards create little steam pockets as they bake, and those pockets turn into the flaky layers we all chase. No pastry blender required — just a box grater and some frozen butter.
What Goes In (Plus My Real-Talk Notes)
- 1 scoop unflavored collagen or whey protein powder (~30g): This is the MVP. Collagen blends in so smoothly you’d never know it’s there. Do NOT use plant-based pea protein unless you want a greenish, gritty biscuit. I speak from sad experience.
- 6 tbsp cold butter, grated: Must be freezer-cold. Grating it is the hack. My 9-year-old loves helping with this part — it’s like cheese, but for baking.
- 1/2 cup full-fat Greek yogurt: Keeps them tender and adds even more protein. I use full-fat because we’re not counting macros that hard, but 2% works too.
- 1 cup sharp cheddar, shredded from a block: Buy a block and shred it yourself. The pre-shredded stuff is coated in cellulose and doesn’t melt the same. Yes, it matters. My husband tested both and confirmed the difference.
- Everything Bagel Seasoning (2 tbsp): For the tops. Adds that salty, savory crunch. My kids call them “fancy sprinkles” and I don’t correct them.
- 1 cup all-purpose flour + 1/2 cup almond flour: The almond flour is the trick for keeping these soft and moist. It also adds a little healthy fat.
- 1 tbsp baking powder + 1/2 tsp salt: Standard leavening. Make sure your baking powder isn’t expired — flat biscuits are sad biscuits.
- 1 large egg: Binds everything together and adds structure.
The Tools (Nothing Fancy)
- A large mixing bowl.
- A box grater (for the frozen butter).
- A pastry blender or fork (for cutting in butter, if you don’t have the grater).
- A baking sheet lined with parchment paper.
- A 2-inch biscuit cutter (or the rim of a drinking glass, in a pinch).
Seriously, if you have these five things, you’re ready to go.
Let’s Make Protein Biscuits (Easy, I Promise)
Preheat your oven to 425°F. Grate your frozen butter. Yes, take a picture of that buttery pile — it’s peak food porn.
- Mix dry ingredients: In a large bowl, whisk together the all-purpose flour, almond flour, protein powder, baking powder, and salt until everything looks like one cohesive blend — no streaks of white protein powder left.(📸 Photo tip: Whisk until the almond flour and protein powder disappear into the flour. You’re looking for a uniform pale beige color.)
- Cut in the cold butter: Toss the grated frozen butter into the flour mixture. Use your fingers or a pastry blender to gently work it in. Stop when it looks like coarse sand with some pea-sized butter bits remaining. Those pea-sized bits are what create flaky layers.(📸 Photo tip: Imagine wet sand at the beach — that’s the texture you want. Small pebbles of butter are good!)
- Add the wet ingredients: Make a well in the center. Add the Greek yogurt, beaten egg, and shredded cheddar. Stir with a fork until just combined. The dough will look shaggy and a little sticky. DO NOT keep mixing. Overmixing = tough biscuits.
- Pat and fold (the layering step): Turn the dough out onto a lightly floured surface. Pat it into a 1-inch thick rectangle. Fold it over itself like a letter. Pat it down again. Repeat this folding process 3 times. This builds the layers that make a biscuit rise tall and flaky instead of spreading flat.
- Cut the biscuits: Pat the dough to 3/4-inch thickness. Dip your biscuit cutter in flour. Press straight down — DO NOT TWIST. Twisting seals the edges and kills the rise. Cut them as close together as possible to minimize re-rolling scraps.
- Top and bake: Place the biscuits on your parchment-lined baking sheet, edges barely touching (this helps them rise straight up). Brush the tops with a little milk or melted butter and sprinkle generously with everything bagel seasoning. Bake for 12-15 minutes, until golden brown on top and bottom.
Let them cool on the pan for 2 minutes (if you can wait) before moving to a wire rack. The hardest part of this recipe is not eating them all immediately.
How I Meal Prep These for the Week
I make a double batch every single Sunday. They disappear by Wednesday, but here’s how to make them last so you actually have breakfast on Thursday and Friday:
- Fridge: Baked biscuits in an airtight container for up to 5 days. Reheat in the microwave for 20 seconds or air fryer at 350°F for 3 minutes. They taste fresh-baked.
- Freezer: Yes! These freeze like a dream. Cool them completely, flash freeze on a baking sheet for 1 hour, then transfer to a freezer bag. They keep for 3 months.
- Reheat from frozen: Microwave for 45-60 seconds. Air fryer at 350°F for 5 minutes for a crisp exterior. Don’t thaw first — it makes them soggy.
I wrap them individually in paper towels before putting them in the freezer bag. My secret: the kids can grab one straight from the freezer and heat it up themselves on school mornings. Independence! Breakfast! Protein!
My Honest Advice (After Making These 20+ Times)
- Don’t overmix the dough. I know I sound like a broken record, but the more you mix, the more gluten develops, and the tougher they get. Stop mixing when you still see a few floury spots. The shaggier the dough, the more tender the biscuit.
- Grate your own cheese. I tested both in the same batch. The pre-shredded bagged cheese gave me dry, crumbly biscuits. The block cheese gave me gooey, melty pockets of cheddar. It’s the anti-caking coating on the pre-shredded stuff that messes with the texture. Buy a block. It takes two minutes.
- Keep everything cold. Cold butter, cold yogurt, cold egg. If your kitchen is warm (like mine in July), pop the cut biscuits on the baking sheet into the fridge or freezer for 10-15 minutes before baking. Chilled dough rises higher and spreads less.
- Don’t skip the almond flour. It’s not just for the gluten-free crowd. The fat in the almond flour keeps these biscuits tender and moist for days. If you substitute it with more AP flour, they’ll be noticeably drier. If you’re nut-free, use an equal amount of spelt flour or white whole wheat flour, and add an extra tablespoon of butter.
Make It Yours (Swaps That Actually Work)
- Gluten-Free: Use a high-quality 1:1 gluten-free flour blend (like King Arthur Measure for Measure). The almond flour already helps with the texture. Bake an extra 2-3 minutes, checking for doneness.
- Dairy-Free: Use vegan butter sticks (like Miyoko’s or Country Crock Plant Butter) and a thick plain dairy-free yogurt (like Kite Hill or Culina). I’ve tested this and the texture is slightly more tender, but the flavor is still incredible. This is the version I make for my nephew who can’t do dairy — he asks for the recipe!
- Kid-Friendly (Mild): Skip the everything bagel seasoning on top. Add 1/2 cup of finely diced cooked ham or crumbled bacon to the dough. My kids call these “breakfast cookies” and eat them in the car.
- Spicy Adult Version: Add 1 finely diced jalapeño (seeds removed if you’re sensitive) or 1/4 tsp cayenne pepper to the dough. Serve warm with a drizzle of honey or spicy honey. The sweet-heat combo is incredible.
- Sweet Version: Reduce the salt to 1/4 tsp. Omit the cheese and bagel seasoning. Add 2 tbsp maple syrup or honey to the wet ingredients, 1 tsp cinnamon, and 1/2 cup dried fruit or chocolate chips. Drizzle with a simple glaze (powdered sugar + milk). My daughter requests these for her school breakfast.
The Questions My Readers Always Ask About These Biscuits
Q: Why did my biscuits turn out flat and dense instead of tall and fluffy?
A: Ugh, I’ve been there. It’s almost always a temperature issue. If your butter melted into the flour instead of staying in cold little shards, the steam can’t do its job and puff up the layers. Pop your cut biscuits in the freezer for 15 minutes before baking. Also, check that your baking powder is fresh — it loses potency after 6 months. You’ve got this next time!
Q: Can I use a different type of protein powder? I only have whey or plant-based.
A: You can, but results vary a lot. Unflavored collagen is my #1 recommendation because it dissolves completely. Whey protein will work but can make the biscuits slightly more cake-like and dry — add an extra tablespoon of Greek yogurt to compensate. I haven’t had great luck with plant-based protein powders (they tend to be gritty and absorb a ton of moisture), but if you try it, definitely add an extra 2-3 tbsp of yogurt or milk.
Q: How long do these last? Can I freeze them?
A: They keep in the fridge for up to 5 days in an airtight container. For freezing, flash freeze them on a baking sheet, then transfer to a freezer bag for up to 3 months. Reheat straight from frozen in the microwave for about 45-60 seconds, or in an air fryer at 350°F for 5 minutes for a crisp exterior. They’re a lifesaver on busy mornings.
Q: What do you serve with these? Any good pairings?
A: We love them with a simple side of scrambled eggs and fruit for a complete breakfast. But honestly, my favorite way is to split one open and stuff it with a sausage patty and a drizzle of maple syrup — it’s like a McGriddle, but better for you. My kids like them plain, straight out of the lunchbox as an afterschool snack. They’re versatile!
More Recipes My Family Makes on Repeat
If these biscuits are a hit at your house (they will be), here are a few other favorites from my kitchen that save our mornings:
- [INTERNAL LINK PLACEHOLDER: Make-Ahead Egg Bites] — Protein-packed, freezer-friendly, and my toddler eats them in the car without a mess.
- [INTERNAL LINK PLACEHOLDER: Savory Oatmeal with Cheddar and a Runny Egg] — Don’t knock it till you try it. It’s like risotto for breakfast and takes 10 minutes.
- [INTERNAL LINK PLACEHOLDER: Banana Oat Muffins (No Flour, No Refined Sugar)] — Another grab-and-go hero that passes the picky-eater test every single time.
These protein biscuits have genuinely saved our chaotic weekday mornings. I hope they give you the same feeling — a hot, homemade breakfast with zero stress and full bellies.
If you try them, drop a comment below and let me know which variation your family loved most! I’m always testing new mix-ins and love hearing what works in your kitchen. Tag me on Pinterest or Instagram so I can see your gorgeous golden biscuits!
📌 Fluffy Breakfast Protein Biscuits ready in 25 minutes — save this easy, meal prep-friendly recipe for your next busy weekday morning!

Breakfast Protein Biscuits That Are Actually Fluffy
Equipment
- Large Mixing Bowl
- Box Grater
- Pastry Blender or Fork
- Baking Sheet
- Parchment Paper
- 2-inch Biscuit Cutter or Drinking Glass
Ingredients
Dry Ingredients
- 1 cup all-purpose flour
- 1/2 cup almond flour
- 1 scoop (about 30g) unflavored collagen or whey protein powder
- 1 tbsp baking powder
- 1/2 tsp salt
Wet Ingredients & Add-Ins
- 6 tbsp cold butter, grated (must be frozen)
- 1/2 cup full-fat Greek yogurt
- 1 large egg, beaten
- 1 cup sharp cheddar cheese, shredded from block
Topping
- 2 tbsp Everything Bagel Seasoning
- optional milk or melted butter for brushing
Instructions
- Preheat oven to 425°F. Grate the frozen butter and set aside.
- In a large bowl, whisk together the all-purpose flour, almond flour, protein powder, baking powder, and salt until uniform and no streaks remain.
- Add the grated frozen butter to the flour mixture. Using your fingers or a pastry blender, work the butter in until the mixture resembles coarse sand with some pea-sized butter bits remaining.
- Make a well in the center. Add the Greek yogurt, beaten egg, and shredded cheddar. Stir with a fork until just combined — the dough will be shaggy and slightly sticky. Do not overmix.
- Turn the dough out onto a lightly floured surface. Pat into a 1-inch thick rectangle. Fold the rectangle over itself like a letter, then pat down again. Repeat this folding process 3 times to build layers.
- Pat the dough to 3/4-inch thickness. Dip a biscuit cutter in flour and press straight down without twisting. Cut biscuits as close together as possible to minimize re-rolling scraps.
- Place biscuits on a parchment-lined baking sheet with edges barely touching. Brush tops with milk or melted butter and sprinkle generously with Everything Bagel Seasoning. Bake for 12–15 minutes, until golden brown on top and bottom. Let cool on the pan for 2 minutes before transferring to a wire rack.