
The first time I made these, Marcus took one bite and said, “These are better than the original.” High praise from a man who grew up stashing Bounty bars in his desk drawer. Simone helped me press the filling into the pan, which meant we had extra coconut mixture to snack on before it even hit the freezer. These are dangerously easy. Dangerously. You’ll see.
The short version: Sweetened condensed milk, shredded coconut, dark chocolate, and a little patience give you the best homemade bounty bars you’ll ever eat — in under 30 minutes of hands-on work.
I’ve made these for Super Bowl parties, bake sales, and the random Tuesday when Simone asked for “something chocolate and coconut.” They disappear every single time. One batch makes 12 generous bars — enough to share, but I won’t judge if you don’t.
- Serves: 12 bars
- Hands-On Time: 20 min | Total Time: 2 hr 20 min (includes freezing)
- Difficulty: Easy — even for a first-time candy maker
- Cost per serving: ~$0.85
- Calories: ~280 per bar
- Dietary Notes: Adaptable for dairy-free
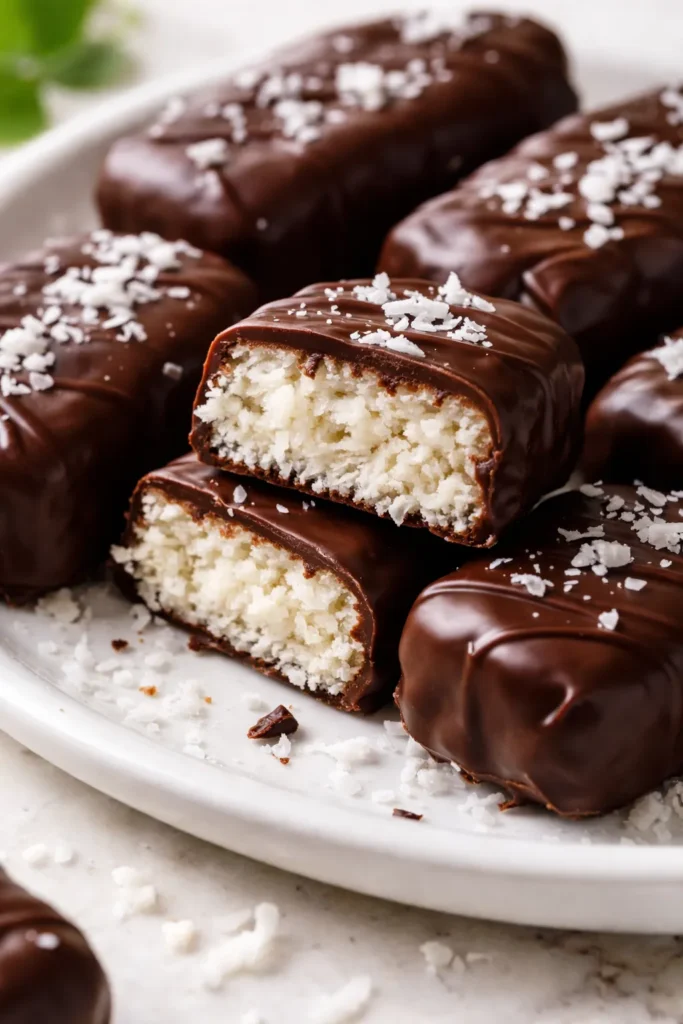
(Photo above: Overhead shot of dark chocolate coconut bars on a marble slab, half of one broken open to show the chewy coconut center, natural light from a kitchen window, with a few toasted coconut flakes scattered around for texture.)
Why These Actually Taste Like the Original
I’ve tested a lot of coconut bar recipes over the years, and the ones that miss the mark usually go wrong in one of two ways: the filling is too dry, or the chocolate coating is too thick. Here’s why this version lands every time.
The sweetened condensed milk does something magic to coconut flakes — it turns them into a chewy, almost fudge-like center that has exactly the texture of the original Bounty bar. Not too wet, not too crumbly. Just that dense, slightly chewy bite that makes you reach for another piece.
The dark chocolate coating isn’t just for looks. It balances the sweetness of the filling so the whole thing tastes mature, not like a sugar bomb. You can use milk chocolate if that’s what you have, but dark chocolate turns these into a grown-up candy bar that still makes kids happy. Simone confirmed this. She ate three.
The 4 Ingredients You Need (And My Honest Notes)
- 4 cups sweetened flaked coconut (14-16 oz bag): This is important — get the sweetened bag, not the unsweetened shredded kind you find in the health food aisle. Sweetened flakes have the moisture and texture you need. Unsweetened will give you a dry, brittle filling.
- 1 can (14 oz) sweetened condensed milk: The glue. Don’t substitute evaporated milk, cream, or any dairy alternative unless it’s a specifically labeled sweetened condensed milk alternative. I’ve tested this. It matters.
- 1 tsp vanilla extract: Celestine always said a little vanilla rounds out any sweet filling. She was right as usual. It makes the coconut taste more like a bakery treat than a bag of shreds.
- 2 cups dark chocolate chips (about 12 oz): I like Ghirardelli dark chocolate chips for an easy melt. You can use milk chocolate if you want a sweeter bar, but I promise the dark chocolate makes it taste like a premium version of the original.
What to Pull Out Before You Start
- 8×8-inch baking pan
- Parchment paper (two long sheets so you can lift the block out easily)
- Large mixing bowl
- Rubber spatula
- Sharp chef’s knife
- Microwave-safe bowl for melting chocolate
- Fork for dipping
That’s it. No candy thermometer, no special molds. If you have these, you’re ready.
Let’s Make Bounty Bars (Step by Step)
This goes fast, so read through once before you start. Most of the time here is freeze-and-wait, not actual work.
Prep the pan: Line your 8×8 pan with two sheets of parchment paper, leaving overhang on two opposite sides so you can lift the block out later.
- Mix the filling: In a large bowl, combine the 4 cups of sweetened flaked coconut, the entire can of sweetened condensed milk, and the vanilla extract. Stir with a rubber spatula until every flake is coated. It’ll look wet at first — give it a minute to absorb. The mixture should hold together when you press it between your fingers. (📸 Photo tip: The mixture should look uniformly glossy, with no dry patches of coconut.)
- Press into the pan: Transfer the mixture to your parchment-lined pan. Spread it into an even layer. Here’s the trick — wet your hands with a little cold water and press down firmly. The water keeps the coconut from sticking to your palms and helps you get a flat, even surface. I learned this the hard way after a lot of sticky fingers.
- Freeze until firm: Place the pan in the freezer for at least 2 hours, or until the block is completely solid. You can leave it overnight — just cover it with foil or plastic wrap after it’s frozen solid. (📸 Photo tip: Once frozen, lift the block out using the parchment overhang and place it on a cutting board.)
- Cut into bars: Use a sharp chef’s knife to cut the frozen block into 12 even bars — 3 cuts lengthwise, 3 cuts crosswise. A sharp knife is key here — a butter knife will tear the edges and make a mess. If the bars seem too soft at any point, pop them back in the freezer for 10 minutes.
- Melt the chocolate: Place the dark chocolate chips in a microwave-safe bowl. Microwave in 30-second bursts, stirring well after each, until the chocolate is smooth and glossy. Don’t rush this — it usually takes me about 90 seconds total. Overheating will seize the chocolate.
- Dip the bars: Working with one bar at a time, drop it into the melted chocolate. Use a fork to turn it and coat all sides. Lift it out with the fork and tap the handle gently on the edge of the bowl to let the excess chocolate drip off. This gives you that thin, snappy shell. Set the dipped bar on a parchment-lined baking sheet. Repeat with all 12 bars.
- Set the chocolate: If you’re impatient like me, pop the tray back in the freezer for 5 minutes to set the chocolate. If you have more patience than I do, let them sit at room temperature for about 30 minutes. Both work perfectly.
How I Meal Prep These for the Week
These are my favorite kind of treat to batch-make because they keep beautifully. I usually make a double batch on a Sunday afternoon, and we’re set for school lunches, after-school snacks, and the occasional late-night craving for two weeks. Marcus hides his in the back of the freezer — he thinks I don’t know.
- Fridge: Store in an airtight container with parchment between layers. They’ll keep for up to 2 weeks. I doubt they’ll last that long.
- Freezer: Yes! Layer them in a freezer-safe container with parchment between layers. They keep for up to 3 months. I pull one straight from the freezer into my lunch bag — it thaws by the time I’m ready for it.
- Reheat: Let them sit at room temperature for 5-10 minutes if you want a softer bite, or eat them cold for a snappy, candy-bar texture. Don’t microwave them — it’ll ruin the chocolate coating.
Things I Wish I’d Known the First Time
- Wet hands for pressing: This is the one trick that saves your sanity. The coconut mixture is sticky, and a wet hand keeps it from turning into a disaster. I keep a small bowl of water next to the pan and dip my fingers between presses.
- Use a sharp knife for cutting: I cannot stress this enough. A dull knife will pull the edges of the frozen filling and give you ragged bars. A sharp chef’s knife gives clean cuts. Even if they aren’t perfectly even, they’ll taste the same — I promise.
- Tap that fork: Don’t skip tapping the excess chocolate off the bar. If you leave too much chocolate on, the coating gets thick and heavy and overwhelms the delicate coconut center. You want a thin, snappy shell that cracks when you bite into it, not a thick armor.
- Let the bars sit out for 2 minutes after dipping: If you transfer them straight from the chocolate bowl to the freezer, the sudden temperature change can cause the chocolate to bloom (those white streaks that aren’t mold, but look unsettling). Let them sit at room temperature for just 2 minutes on the parchment, then freeze to set. Perfect finish every time.
Swaps That Actually Work
- Dairy-Free: This is surprisingly easy. Use dairy-free sweetened condensed milk (Nature’s Charm makes a good one) and dairy-free chocolate chips. I’ve tested this for my sister-in-law who’s dairy-free, and she said they’re better than any store-bought dairy-free candy bar she’s had.
- Milk Chocolate Version: If you’re making these for a kids’ party or just prefer a sweeter bar, swap the dark chocolate chips for milk chocolate chips. The filling is sweet already, so the milk chocolate makes it a sweeter treat. My kids love this version.
- White Chocolate Bounty Bars: Use white chocolate chips or melting wafers instead of dark chocolate. This is the version I make for my friend’s holiday cookie trays — they look elegant and taste completely different but equally delicious.
- Toasted Coconut Finish: After dipping, immediately sprinkle the wet chocolate with toasted coconut flakes (or even crushed almonds if you have them on hand). It adds texture and makes them look fancy with zero extra effort.
Questions I Get About This Recipe All the Time
Q: Why did my chocolate crack or bloom after I dipped the bars?
A: Ugh, I’ve been there. This usually happens if the coconut bars are too cold when they hit the warm chocolate. Let the frozen bars sit at room temperature for just 2-3 minutes before dipping. And don’t rush the tempering — if you let the bars set gradually, the chocolate will stay smooth. You’ve got this next time!
Q: Can I use unsweetened shredded coconut instead of sweetened flaked?
A: I really don’t recommend it. The sweetened flakes have the moisture content you need to bind with the condensed milk. Unsweetened coconut is drier, and the bars end up crumbly and less sweet. If that’s all you have, add an extra tablespoon or two of condensed milk, but honestly, just stick with the sweetened bag for the real deal.
Q: How long do these last? Can I freeze them?
A: In an airtight container on the counter, they last about a week (if they make it that long). In the fridge, they keep for 2 weeks. In the freezer, you’re looking at 3 months perfectly good. I make a double batch and stash half in the freezer for last-minute treats. Just let them sit at room temperature for 5 minutes before eating.
Q: What do you serve with these for a party?
A: They’re perfect on their own, but if I’m building a dessert table, I pair them with something fruity and tart to balance the richness. Fresh raspberries or strawberries are my go-to. My kids love them with a glass of cold milk, and Marcus insists they’re the best with a strong cup of black coffee after dinner.
More Recipes My Family Makes on Repeat
If you liked these, here are a few others that get the same reaction at our table:
- My Grandma’s 7-Layer Bars — The one that disappears faster than anything else on the dessert table, every single time.
- Simone’s Favorite Chocolate Oatmeal Cookies — Soft, chewy, and the only cookie my daughter asks for by name.
- Easy Pecan Pralines — Celestine’s recipe, exactly as she taught it to me. Sweet, buttery, and so simple.
I hope these homemade bounty bars bring a little sweetness to your week the way they do ours. There’s something about that first bite — the crack of the chocolate, the chewy coconut center — that feels like a small celebration. And honestly, we could all use more of those.
If you try them, drop a comment below and let me know how they turned out. I love hearing about your kitchen wins — and even your learning moments. We’re all cooking and learning together here.
📌 Homemade bounty bars recipe that tastes just like the real thing — save it for your next candy-making afternoon.
Homemade Bounty Bars (4-Ingredient)
Equipment
- 8×8-inch baking pan
- Parchment Paper
- Large Mixing Bowl
- Rubber spatula
- Sharp chef’s knife
- Microwave-safe bowl
- Fork
Ingredients
Filling
- 4 cups sweetened flaked coconut (14-16 oz bag)
- 1 can (14 oz) sweetened condensed milk
- 1 tsp vanilla extract
Coating
- 2 cups dark chocolate chips (about 12 oz)
Instructions
- Line an 8×8-inch baking pan with two sheets of parchment paper, leaving overhang on two opposite sides so you can lift the block out later.
- In a large bowl, combine 4 cups sweetened flaked coconut, the entire can of sweetened condensed milk, and 1 tsp vanilla extract. Stir with a rubber spatula until every flake is coated. The mixture should hold together when pressed between your fingers.
- Transfer the mixture to the prepared pan. Wet your hands with cold water and press the mixture into an even, flat layer. Freeze for at least 2 hours, until completely solid.
- Lift the frozen block out using the parchment overhang. Use a sharp chef’s knife to cut into 12 even bars – 3 cuts lengthwise, 3 cuts crosswise. Return to freezer for 10 minutes if they soften.
- Place 2 cups dark chocolate chips in a microwave-safe bowl. Microwave in 30-second bursts, stirring after each, until smooth and glossy.
- Working one bar at a time, drop into the melted chocolate. Use a fork to turn and coat all sides. Lift out with the fork and tap the handle gently on the bowl edge to let excess drip off. Place on a parchment-lined baking sheet. Repeat with all 12 bars.
- Let the dipped bars sit at room temperature for 2 minutes, then transfer to the freezer for 5 minutes to set the chocolate. Or let them set at room temperature for about 30 minutes.
Notes
Related posts:
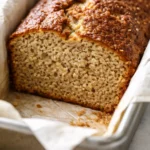 Low Calorie Banana Bread That Doesn’t Taste Like a Compromise — Finally
 Coconut Flour Banana Bread Muffins That Stay Moist for Days (Not Crumbly)
 This Raspberry Lemon Cake With White Chocolate Is the Only Layer Cake You Need for Spring Celebrations
 Puff Pastry Apple Tarts That Look Like a Bakery Made Them — with Only 15 Minutes of Effort