

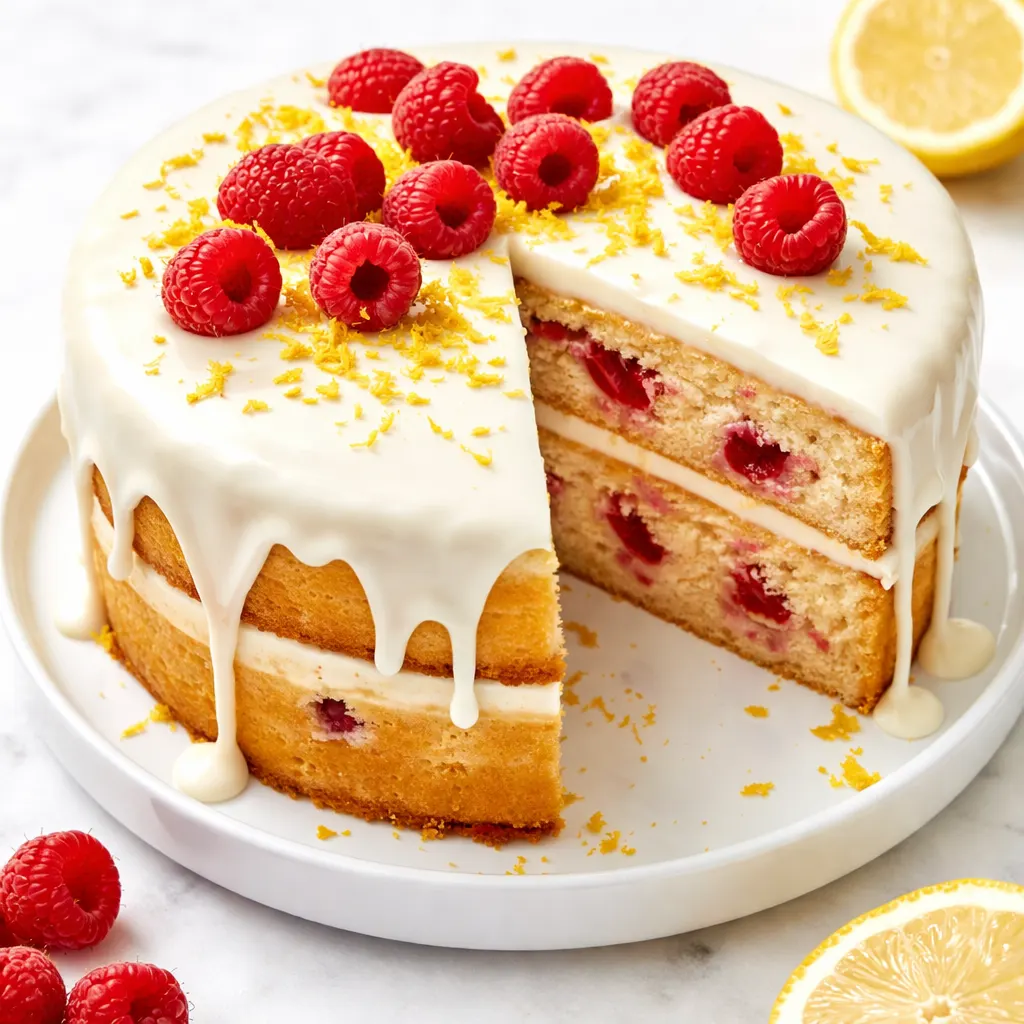
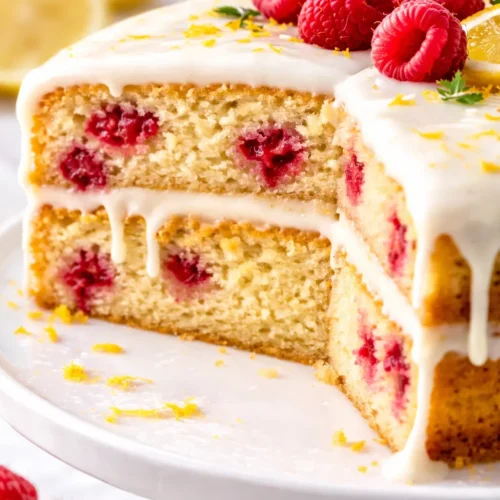
The first slice tells the whole story — a tender, dense crumb brushed with tart lemon syrup, pockets of raspberry that have burst into jammy streaks, and a white chocolate glaze that cracks just slightly when you cut through it. My sister-in-law texted me at 9pm on a Tuesday after making it: “I ate a slice standing over the counter. No plate.” That’s the exact energy I was going for. This isn’t just a pretty cake for Easter brunch or Mother’s Day (though it absolutely nails that brief). This is the cake I make when I want a dessert that tastes as good as it looks, with a crumb that stays moist for four days and a flavor balance that’s actually tart enough to cut through the richness. My daughter Simone, who is eight and has strong opinions about frosting, gave it the highest compliment: “Mom, this is the best one you’ve made this year.” I have the text receipts.
The short version: A tender, moist lemon cake studded with raspberries, brushed with lemon syrup, and topped with a creamy white chocolate glaze that comes together in under two hours.
I’ve tested this cake seven times to get the balance exactly right — tart enough that you taste the lemon in every bite, rich enough from the white chocolate that it feels decadent, and simple enough that you don’t need a pastry degree to pull it off. This is the one.
- Serves: 10-12 as a celebration layer cake
- Hands-On Time: 35 min | Total Time: 1 hr 45 min
- Difficulty: Doable on a weekend — looks fancy, bakes like a standard layer cake
- Cost per serving: ~$2.50
- Calories: ~420 per serving
- Dietary Notes: Vegetarian. Can be made gluten-free with a 1:1 flour blend.
(Photo above: A two-layer round cake on a white stand, drizzled generously with white chocolate glaze that drips down the sides, scattered with fresh raspberries and thin lemon slices on top — photographed in bright afternoon light on a wood kitchen table with a linen napkin underneath.)
Why This Cake Stands Out From Every Lemon Raspberry Recipe I’ve Tried
Most lemon cakes taste like lemon extract and sadness. They rely on juice alone, which gives you acid but no depth. Here’s the trick: I rub the lemon zest into the granulated sugar with my fingertips until it smells like a lemon grove and the sugar is damp and fragrant. This releases the essential oils and distributes the lemon flavor throughout the entire cake, not just the parts where a zest speck happens to land. This one step changes everything.
The white chocolate is the real secret weapon. I melt four ounces into the batter, and it keeps the crumb tender and moist for days — not dry and crumbly like so many lemon cakes. Plus, the floral sweetness of a good white chocolate (use a real one, not the waxy chips) pairs beautifully with the tart raspberries and bright lemon. The third piece of the puzzle is the lemon syrup. After the cakes come out of the oven, I brush them generously with a warm syrup made from fresh lemon juice and sugar. This soaks into the crumb and guarantees every single bite is moist and intensely lemony, even on day three.
Ingredients That Matter (Plus My Honest Notes)
- 3 large lemons: You need the zest of 2 for the cake and the juice of all 3 for the syrup. Do not skip the syrup — it’s what keeps this cake tasting fresh and moist even when it’s been sitting on the counter for a few days.
- 6 oz fresh or frozen raspberries (about 1 1/4 cups): If you use frozen, do not thaw them first. Toss them in a tablespoon of the measured flour before folding them into the batter. This prevents them from bleeding too much and sinking to the bottom of the pan. I’ve done this with both, and honestly, frozen works beautifully in a pinch.
- 10 oz good-quality white chocolate: 4 oz for the batter, 6 oz for the glaze. Do not use white melting wafers or white morsels that are mostly oil and sugar. Use a real white chocolate bar like Ghirardelli or Lindt. Chop it yourself — it melts smoother and tastes creamier. My kids can taste the difference, and so will yours.
- 1 cup full-fat sour cream, at room temperature: Do not use light sour cream here. The acidity tenderizes the gluten and the fat keeps the cake rich and moist. If you don’t have sour cream, full-fat Greek yogurt works as a swap.
- 1/2 cup unsalted butter, softened: Let it sit out for at least an hour before you start. Cold butter doesn’t cream properly, and the texture of the cake depends on that first step.
- 1 3/4 cups all-purpose flour: I use unbleached. If you’re going gluten-free, use a 1:1 baking flour blend that contains xanthan gum — I’ve done this with Bob’s Red Mill and it worked perfectly.
What You’ll Need (The Short List)
- Two 8-inch round cake pans — I use light metal ones. If you use dark nonstick, reduce the oven temp by 25°F.
- Parchment paper for lining the bottoms
- Stand mixer or hand mixer — either works, just make sure your butter is properly softened
- Rubber spatula — for folding the raspberries without crushing them
- Pastry brush — for brushing the lemon syrup onto the warm cakes
That’s it. No special equipment required. I’ve made this with a hand mixer and a whisk, and it still comes out beautiful.
Making the Cake: My Exact Process
This batter comes together quickly, so preheat your oven and prep your pans before you start. Read through the steps once so you know where you’re going.
Preheat and prep: Set your oven to 350°F. Grease and flour two 8-inch round cake pans. Line the bottoms with parchment paper rounds. This step is non-negotiable — the parchment ensures clean release every time.
- Zest the sugar: In a large mixing bowl, combine the granulated sugar and the zest of 2 lemons. Use your fingertips to rub the zest into the sugar until it’s fragrant, damp, and pale yellow. This takes about 60 seconds and it’s the most important step in the entire recipe. (📸 Photo tip: The sugar should look like wet sand and smell intensely of lemon.)
- Cream the butter and sugar: Add the softened butter to the sugar mixture. Beat with a hand mixer or stand mixer fitted with the paddle attachment on medium speed for 3-5 minutes, until it’s light, fluffy, and pale in color. Scrape down the sides of the bowl once or twice.
- Add the eggs: Add the eggs one at a time, beating well after each addition until fully incorporated. Scrape down the sides again. The mixture should look smooth and creamy.
- Combine the dry ingredients: In a separate bowl, whisk together the flour, baking powder, baking soda, and salt. This aerates the flour and ensures the leavening is evenly distributed.
- Combine the wet ingredients: In a liquid measuring cup, whisk together the sour cream, milk, and vanilla extract. It won’t be perfectly smooth — that’s fine.
- Alternate the additions: Add the dry ingredients to the butter mixture in three additions, alternating with the sour cream mixture, starting and ending with the dry. Mix on low speed until just combined after each addition. Do not overmix here — once the flour is incorporated, stop.
- Add the white chocolate: Melt 4 oz of chopped white chocolate in the microwave in 30-second intervals, stirring between each, until smooth. Let it cool slightly, then fold it into the batter with a rubber spatula.
- Fold in the raspberries: Toss the raspberries with 1 tablespoon of flour. Gently fold them into the batter with a rubber spatula. Make 8-10 folds only — you want ribbons of raspberry throughout, not a fully pink batter. (📸 Photo tip: The batter should look like a thick cloud scattered with pockets of red. Stop folding when the flour streaks disappear.)
- Bake: Divide the batter evenly between the two prepared pans. Smooth the tops. Bake for 28-32 minutes, until the tops are golden brown and a toothpick inserted into the center comes out clean or with a few moist crumbs. Let them cool in the pans for 15 minutes, then turn them out onto a wire rack to cool completely.
- Syrup soak: While the cakes are still warm, whisk together the juice of 1 lemon and 1/4 cup of powdered sugar until smooth. Use a pastry brush to brush this syrup generously over the tops of both cake layers. Let them cool completely before glazing.
Make-Ahead Notes (Because Celebrations Don’t Have to Be Stressful)
This cake is actually better on day two. The flavors settle, the syrup soaks deeper into the crumb, and the white chocolate glaze sets into a perfect creamy shell. I often make the cake layers on Friday evening and glaze them Saturday morning for a weekend gathering.
- Fridge: Store the glazed cake in an airtight container at room temperature for up to 3 days. If it’s warm in your kitchen, refrigerate it — the glaze can soften.
- Freezer: Yes, this freezes beautifully. Freeze the unglazed cake layers wrapped tightly in plastic wrap and then foil for up to 3 months. Thaw at room temperature, then make the glaze fresh.
- Reheat: Serve at room temperature. If refrigerated, let it sit out for 30 minutes before slicing. Microwaving a slice for 10 seconds is acceptable — the white chocolate gets slightly soft and it’s incredible.
Things I Learned After Making This 7 Times (So You Don’t Have To)
- Room temperature ingredients matter here: I know it’s annoying to wait for butter and eggs to warm up. But cold sour cream will seize the batter and give you a dense, tough crumb. Set everything out an hour before you start. The texture difference is dramatic.
- Don’t overmix the raspberries: Stir them in with a gentle hand. Eight folds maximum. If you stir too aggressively, they break down and turn the whole batter pink. A few streaks of pink are lovely. A fully pink cake looks sad and tastes less bright.
- Leveling the cakes is worth the extra step: After the cakes cool completely, use a long serrated knife to level the tops. This gives you a flat surface for the glaze and makes the cake look professional even if you’re serving it on a plastic platter.
- Chill the glaze slightly for the perfect drip: Whisk the melted white chocolate and heavy cream together until smooth. Let it sit at room temperature for 5-10 minutes to thicken slightly. Pour it into the center of the cake and use an offset spatula to push it to the edges — it will drip down naturally and beautifully.
Swaps That Actually Work
- Gluten-Free: Use a 1:1 gluten-free baking flour blend that contains xanthan gum. I’ve used Bob’s Red Mill 1:1 and King Arthur Measure for Measure — both worked perfectly. No other changes needed.
- Dairy-Free: Use a high-quality dairy-free butter (like Miyoko’s) and full-fat canned coconut cream instead of heavy cream in the glaze. Use a dairy-free white chocolate like Hu Kitchen. The texture will be slightly different but still delicious.
- Different berries: Blueberries and blackberries work beautifully here. If you use blueberries, add an extra tablespoon of flour to the toss to prevent them from sinking.
- Kid-Friendly Version: My daughter Simone prefers the cake without the syrup soak — she says it’s “sweet enough already.” If your kids agree, skip the syrup and let the cake stand on its own. It’s still delicious.
- Bundt Cake Version: Grease and flour a 10-cup bundt pan. Bake at 350°F for 45-50 minutes. Brush the syrup over the warm cake, let it cool completely, then drizzle the glaze over the top. It’s less formal but just as good.
The Questions My Readers Keep Asking
Q: Why did my raspberries sink to the bottom?
A: This happens for two reasons. Either the batter was too thin (make sure you measured your flour correctly — spoon it into the measuring cup and level it off) or the raspberries were too heavy with moisture. Tossing them in flour creates friction that holds them in place. If you’re using frozen berries, do not thaw them first.
Q: Can I use a different size pan?
A: You can use three 6-inch pans for a taller, more dramatic layer cake — reduce the bake time to 20-24 minutes. Or you can use a 9×13 baking dish and bake for 30-35 minutes. Just keep an eye on it and test with a toothpick.
Q: Can I make the white chocolate glaze ahead of time?
A: I don’t recommend it. White chocolate glaze sets firmly as it cools, and reheating can cause it to seize. Make it fresh while the cake is cooling. It takes less than 5 minutes.
Q: How long does this cake last?
A: At room temperature in an airtight container, it stays moist and delicious for 3-4 days. In the fridge, it lasts up to a week. Let it come to room temperature before serving for the best texture and flavor.
Q: What do you serve with this cake?
A: A dollop of lightly sweetened whipped cream and a handful of fresh raspberries on top is my favorite. My kids love it with a scoop of vanilla ice cream. For a coffee pairing, it’s beautiful with a strong black tea or a cold brew.
More Recipes My Family Makes on Repeat
If you liked this one, here are a few others that get the same reaction at our table:
- [INTERNAL LINK PLACEHOLDER: Celestine’s Praline Bundt Cake] — The caramelized brown sugar glaze sinks into the crumb and my grandmother’s recipe has never failed me once.
- [INTERNAL LINK PLACEHOLDER: Lemon Cornmeal Cookies with Icing] — These come together in 20 minutes and have the same bright lemon flavor with a slightly crunchy edge.
- [INTERNAL LINK PLACEHOLDER: Strawberry Shortcake with Buttermilk Biscuits] — The biscuit-based version that my family requests for every birthday and summer gathering.
- [INTERNAL LINK PLACEHOLDER: Simple White Chocolate Bread Pudding] — The perfect way to use leftover white chocolate and day-old bread, with a vanilla custard that soaks through every piece.
This cake has become my signature for spring celebrations, and I hope it becomes yours too. It’s the one I bring to Easter brunches, Mother’s Day lunches, and the occasional Tuesday when everyone just needs something beautiful and delicious. The raspberries burst into jammy pockets, the lemon syrup keeps every bite moist, and the white chocolate glaze makes it feel like you spent hours in the kitchen when really, you just followed a few smart steps.
If you try it, drop a comment below — I love hearing how it goes for you. Tag me on Pinterest so I can see your beautiful glaze drip!
📌 Pin this moist raspberry lemon cake with white chocolate glaze for your next spring celebration, Mother’s Day brunch, or weekend baking project — it stays fresh for days and everyone asks for the recipe.
This Raspberry Lemon Cake With White Chocolate Is the Only Layer Cake You Need for Spring Celebrations
Equipment
- Two 8-inch round cake pans
- Parchment Paper
- Stand mixer or hand mixer
- Rubber spatula
- Pastry brush
Ingredients
For the Cake
- 3 large lemons (zest of 2, juice of all 3)
- 6 oz fresh or frozen raspberries (about 1 1/4 cups)
- 10 oz good-quality white chocolate (4 oz for batter, 6 oz for glaze)
- 1 cup full-fat sour cream, at room temperature
- 1/2 cup unsalted butter, softened
- 1 3/4 cups all-purpose flour
- 1 cup granulated sugar
- 2 large eggs
- 1 1/2 tsp baking powder
- 1/2 tsp baking soda
- 1/2 tsp salt
- 1/2 cup whole milk
- 1 tsp vanilla extract
- 1 tbsp flour (for tossing raspberries)
For the Lemon Syrup
- 1/4 cup powdered sugar
- Juice of 1 lemon
For the White Chocolate Glaze
- 6 oz white chocolate, chopped
- 1/4 cup heavy cream
Instructions
- Preheat oven to 350°F. Grease and flour two 8-inch round cake pans. Line bottoms with parchment paper rounds.
- In a large bowl, rub lemon zest into sugar with your fingertips until fragrant and pale yellow (about 60 seconds).
- Add softened butter to sugar mixture. Beat on medium speed for 3-5 minutes until light and fluffy. Scrape sides.
- Add eggs one at a time, beating well after each. Scrape sides again.
- In a separate bowl, whisk together flour, baking powder, baking soda, and salt.
- In a liquid measuring cup, whisk together sour cream, milk, and vanilla.
- Add dry ingredients in three additions, alternating with sour cream mixture, starting and ending with dry. Mix on low until just combined.
- Melt 4 oz white chocolate in microwave in 30-second intervals. Cool slightly, then fold into batter with rubber spatula.
- Toss raspberries with 1 tablespoon flour. Gently fold into batter with 8-10 folds — do not overmix.
- Divide batter evenly between pans. Smooth tops. Bake for 28-32 minutes until golden and toothpick comes clean. Cool in pans 15 minutes, then turn out onto wire rack.
- While cakes are warm, whisk lemon juice and powdered sugar for syrup. Brush generously over tops of both layers. Cool completely.
- For glaze: melt remaining 6 oz white chocolate with heavy cream in microwave or double boiler. Stir until smooth. Let sit 5-10 minutes to thicken slightly.
- Place one cake layer on serving plate. Pour half the glaze in center, spread to edges. Top with second layer. Pour remaining glaze over top, letting it drip down sides. Decorate with fresh raspberries and lemon slices if desired.