
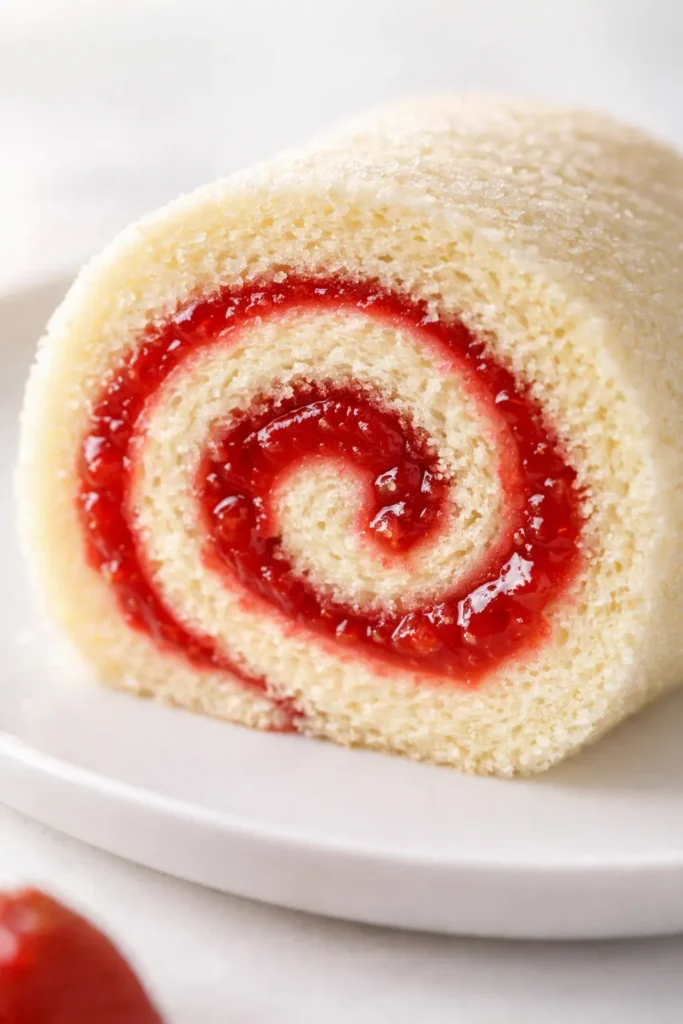
That first slice is how you know — the spiral holds together, the cream stays put, and the strawberry color bleeds just a little into the cake in the way that makes everyone lean in for a closer look. I ruined a lot of strawberry swiss rolls before I figured out the secret isn’t in the rolling at all. It’s in the oven.
The short version: A light, tender strawberry swiss roll that takes 45 minutes of hands-on time and rolls up without cracking — if you follow the one step everyone skips.
I’ve made this eleven times since strawberry season started, and the only cracked one was the batch I rushed through while Marcus and Simone argued over the remote in the next room. This is the version that works even when you’re distracted.
- Serves: 8 as dessert
- Hands-On Time: 45 min | Total Time: 2 hours (includes 1 hour chill)
- Difficulty: Medium — the roll is the adventure, and I’ll walk you through it
- Cost per serving: ~$1.50
- Calories: ~320 per slice
- Dietary Notes: Adaptable for gluten-free; naturally nut-free
(Photo above: a single slice of the strawberry swiss roll cut to show the full spiral — the cream layered with bright strawberry slices, the cake pale golden and soft, dusted with powdered sugar and sitting on a white plate in the morning light from the kitchen window.)
Why This One Doesn’t Crack (It’s Not Luck)
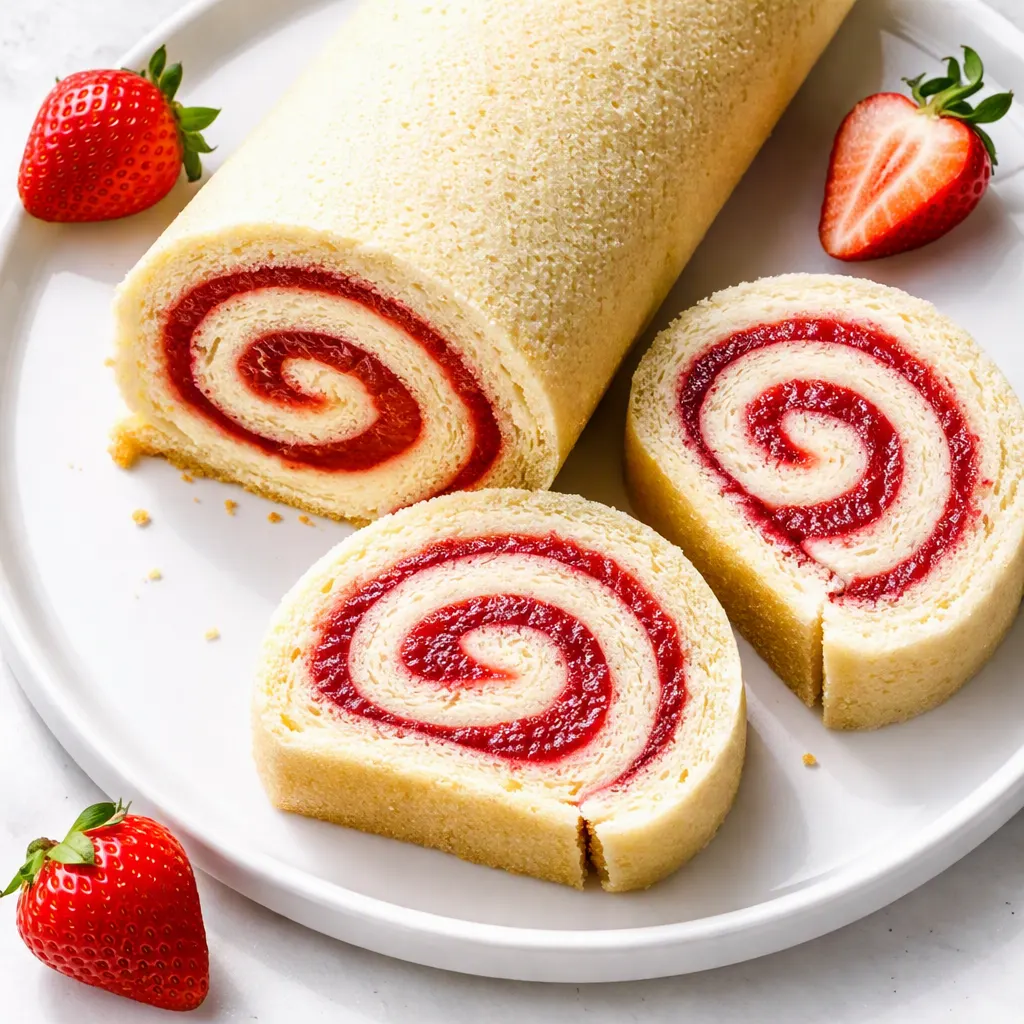
The cake cracks when it’s dry, and it gets dry in the oven — not on the counter. I spent a whole summer making sponges that looked perfect coming out and then shattered the second I tried to roll them. The fix was boring and simple: bake at 350°F for 12 to 13 minutes, not until the pan looks “done.” A warm sponge still has the moisture and flexibility to bend around itself. A dry one has decided what it is.
The second part is rolling it while it’s still warm. You roll the cake up in a towel, let it cool curled instead of flat, and that’s what teaches it to hold the curve. It sounds fussy, but it’s the difference between slicing a clean spiral and chasing crumbs around the counter.
And the jam layer — the thin one you’ll be tempted to pile on — is doing more work than flavor. It seals the sponge so the cream stays on top instead of soaking in and making the whole roll fragile. Trust the thin layer. I’ve tested the thick one.
Everything You Need — Plus My Honest Notes
- 4 large eggs, room temperature: Cold eggs don’t whip as well, and whipping is the whole trick here. Set them out 30 minutes before you start. I’m usually still digging for the sifter at that point, so it works out.
- 3/4 cup granulated sugar, divided: A quarter cup goes with the yolks, the rest goes into the whites as they whip. There’s a reason for the split — the yolks need less to get thick and pale, and the whites need the slow stream for stability. That’s the whole explanation, I promise.
- 1 tsp vanilla extract: Real vanilla. Not the bottle that’s been in the cabinet since 2019. A dessert this simple only has a few voices, so make sure every one is worth hearing. The strawberry and the vanilla hold a conversation, and if the vanilla is imitation, it talks over everything.
- 3/4 cup cake flour: Cake flour makes the crumb noticeably softer, which matters when you’re asking the cake to roll. If you only have all-purpose, sift it twice and be extra gentle with the folding. Don’t go buy a whole bag of cake flour for this if you hate clutter — all-purpose works, I’ve made it work many times.
- 1/4 tsp salt: Just salt. It makes the sweetness taste like itself.
- 3 tbsp unsalted butter, melted and cooled: This is the flexibility step. The butter gives the sponge just enough fat to bend instead of break, and it keeps the crumb tender. Don’t skip it to save a few minutes. I did once. We don’t talk about it.
- 1 cup heavy cream, cold: For the filling. Cold cream, cold bowl, cold beaters — throw the bowl and beaters in the freezer for 10 minutes before you whip. It’s the difference between soft peaks and soup.
- 1/4 cup powdered sugar: For the cream. Plus extra for dusting the towel and the finished roll. Powdered sugar is also how you’ll apologize to the cake if it cracks anyway. It’s good at forgiveness.
- 1/2 cup strawberry preserves: Buy the good jar. The one where the first ingredient is strawberries, not corn syrup. If you made a batch of jam in June, this is the place to use it — Celestine kept a whole shelf of strawberry jars, and I swear they got better every month. Warm it for 10 seconds in the microwave so it spreads thin instead of tearing the cake.
- 1 cup fresh strawberries, hulled and sliced thin: Pat them dry with paper towels after slicing. I know it feels like an extra step, but wet berries leak juice into the cream while the roll chills, and that’s how you end up with a soggy spiral. Simone tried to convince me once that skipping the pat-dry step was fine. It wasn’t!
The Setup — Minimal, I Promise
- A 15×10-inch jelly roll pan — the rimmed half-sheet’s smaller sibling. A 13×18 sheet pan works, but the cake will be thinner, so start checking it at 9 minutes.
- Parchment paper — for lining the pan.
- Hand mixer or stand mixer — I use my hand mixer for this. Less to wash, and the whole thing fits in one bowl.
- A clean, lint-free kitchen towel — old flour sack towels are perfect. Not the fuzzy bath towel. The cake will stick to the fuzz, and you’ll be picking lint out of dessert.
- A sifter — or a fine mesh strainer. Flour straight from the bag gets lumpy in a sponge.
- Offset spatula — the $8 kind. It spreads batter into corners and cream into even layers like nothing else.
- Wire rack and a serrated knife — for cooling and for clean slices.
Making This Strawberry Swiss Roll: My Exact Process
Read through this once before you start. The steps themselves are quick — the eggs are the boss, and they won’t wait while you read.
- Preheat and line the pan: Preheat the oven to 350°F. Line the jelly roll pan with parchment, leaving a couple inches of overhang on the two long sides — that’s your handle for lifting the finished cake.
- Separate the eggs: Crack the eggs and put the whites in a large, completely clean bowl, the yolks in a smaller one. Wipe the whites bowl with a paper towel dipped in lemon juice before you start — a trace of grease or stray yolk will stop the whites from whipping, and you don’t want to find that out after you’ve cracked your fourth egg. (📸 Photo tip: the whites should look clear and undisturbed, no yolk flecks floating in them — this is the step that saves you later.)
- Beat the yolks: Add 1/4 cup of the sugar to the yolks and beat on high until they’re pale, thick, and fall in ribbons when you lift the beater — about 2 minutes. Then beat in the vanilla.
- Whip the whites: Clean and dry the beaters completely. Beat the whites on medium until frothy, then add the remaining 1/2 cup sugar a spoonful at a time. Keep beating until you get soft peaks — lift the beater and the tip of the peak folds over softly, like a wave that didn’t quite break.
- Fold the batters together: Add the yolk mixture to the whites and fold gently with a rubber spatula — big, slow sweeps down the middle and around the side, turning the bowl as you go. Stop the moment you can’t see yolk streaks. This is where sponges get deflated. (📸 Photo tip: the batter should look like a light, fluffy cloud with maybe a few faint streaks still visible — that’s the sweet spot, not fully uniform.)
- Sift in the flour, then the butter: Sift the flour and salt over the batter in two additions, folding gently each time until no flour is visible. Then drizzle the melted butter around the edge and fold it in just until it disappears. This is the flexibility step that keeps the sponge from cracking later.
- Bake: Pour the batter into the pan and spread it evenly to the corners — an offset spatula makes this take ten seconds instead of a minute. Tap the pan once on the counter to pop any big bubbles. Bake for 12 to 13 minutes, until the top springs back when you press it gently and a toothpick in the center comes out clean. Golden but not brown. (📸 Photo tip: the surface should look dry and pale gold, not browned or pulled away from the edges — that’s your sign you caught it in time.)
- Roll it warm: Run a knife around the inside edge of the pan to release the cake. Dust a clean kitchen towel generously with powdered sugar. Flip the cake out onto the towel, peel off the parchment — it should come away clean — and roll the cake up from a short end, towel and all. The towel rolls up inside the cake; that’s correct. Let it cool completely, seam side down. This is the training roll, and it’s what keeps your final roll from cracking.
- Whip the cream: While the cake cools, whip the cold cream with the powdered sugar and a small splash of vanilla until it holds medium peaks — soft enough to spread smoothly, firm enough to stay put in the roll.
- Unroll and fill: Gently unroll the cooled cake. It will want to curl back into its remembered shape — good, that’s what you want. Warm the preserves for a few seconds so they’re spreadable, then spread a thin layer over the entire cake right to the edges. Spread the cream over the jam, leaving a clear one-inch border on the far short end. Lay the strawberry slices over the cream in an even layer. And if you’re tired, a butter knife does the job — the inside of the roll forgives imperfection. (📸 Photo tip: clean cream layer, berries spaced evenly, that bare strip at the far short end waiting to seal the roll.)
- Roll it for real: Use the towel to help lift the near edge of the cake over the filling, tuck it gently so the filling hugs the curve, and roll forward, pulling the towel back as you go so it doesn’t get caught inside. End with the seam side down on your serving plate.
- Chill: Refrigerate for at least 1 hour. This is non-negotiable — it sets the cream so your slices come out as spirals instead of smears.
- Slice and serve: Trim the two ends with a serrated knife — that’s the cook’s cut, and it’s the most honest bite of the whole day. Dust the top with powdered sugar and slice into eight pieces.
Make-Ahead Notes (Because Sunday Counts)
This is a great get-ahead dessert because it needs that chill time anyway. I make it Sunday morning, let it sit in the fridge all afternoon, and pull it out after dinner like I planned it that way. That’s my kind of planning — the kind that looks like it was the plan.
- Fridge: Wrapped tightly in plastic, the filled roll keeps for up to 3 days. Slice only what you’re serving — the cut edge dries out first.
- Freezer: The filled roll freezes, but the cream texture changes. Better plan: freeze the baked, towel-rolled sponge (before filling) for up to a month. Thaw it overnight in the fridge, then unroll, fill, and roll fresh.
- Reheat: You don’t. Take it out of the fridge 15 minutes before serving so the cake softens slightly and the cream stays cold. The microwave is not invited to this party.
Things I Learned the Hard Way So You Don’t Have To
- The oven is the whole game: 12 to 13 minutes feels too short, especially when the kitchen smells incredible and you want to be sure it’s done. Trust the spring-back test and pull it. A dry sponge cracks; a moist one bends. I’ve tested both versions many times.
- Roll it warm, even if it feels wrong: Rolling a warm cake into a towel seems like a good way to break it. It’s not. The warmth is what lets the cake ease into the curve. Cool it flat, and you’re asking it to hold a shape it never learned.
- Pat the berries dry: It’s the least glamorous step in this recipe, and the one I’ve skipped when I was in a hurry. Every time, I’ve regretted it. Wet strawberries make the cream weep and the slice turn slidey instead of clean.
- If it cracks anyway, it still tastes like a strawberry swiss roll: Now this is what I want to say bluntly. Even if you mess this up, it will still be good. Press the crack together, dust it heavily with powdered sugar, call it rustic, and serve it with confidence. Nobody has ever looked at a slice of homemade cake and said no. Simone once asked me to make the “cracked version” on purpose. Eight-year-olds are brutal and correct.
Swaps That Actually Work
- Gluten-free: Use a 1:1 gluten-free baking flour instead of the cake flour. I’ve tested it — it rolls just as clean, and nobody at the table has to know a thing until you tell them.
- Dairy-free: Swap the heavy cream for a well-chilled coconut whipped cream and use plant-based butter in the sponge. Readers have made it work. Just chill the finished roll extra long so the coconut cream sets before slicing.
- Lemon-strawberry: Zest one lemon into the yolks before you whip them, and add a teaspoon of lemon juice to the cream. This is the version I make in early May, when strawberries show up at the market and I can’t think about anything except summer.
- Chocolate-berry: Sift 2 tablespoons of cocoa powder in with the flour. The strawberry still comes through, and Simone thinks she’s getting away with something. She is.
Questions I Get About This Recipe All the Time
Q: Why did my swiss roll crack when I rolled it?
Ugh, I’ve been there. Nine times out of ten, it’s an overbaked sponge. The cake needs to stay tender to bend, so pull it at 12 to 13 minutes when it springs back — don’t wait for the edges to change color. And it has to be rolled warm in the towel, not after it’s cooled flat. If it still cracks, dust it with powdered sugar and keep going. You’ve got this next time.
Q: Can I use frozen strawberries instead of fresh?
For the flavor layer, use good strawberry preserves — that’s the backbone. For the slices inside the roll, frozen berries thaw into mush and leak juice into the cream. If frozen is all you have, pat them very dry and put them on top as a garnish instead. The roll will still be wonderful.
Q: How long does a strawberry swiss roll last? Can I freeze it?
It keeps in the fridge, wrapped tightly, for up to 3 days. Slice as you go, because the cut edge dries first. For the freezer, I freeze the baked, unfilled sponge for up to a month, then thaw it in the fridge and fill it fresh — that gives you the best texture when it’s time to serve.
Q: What do you serve with a strawberry swiss roll?
Coffee in the afternoon, or cold sweet tea on the porch. I also make it for summer birthdays in place of a taller cake — it slices easier, and nobody fights over the corner piece. The corner piece is mine. Simone drinks a glass of cold milk with hers and eats the trimmed ends before dinner is over.
More Recipes My Family Makes on Repeat
If this one lands on your table, here are a few others that get the same reaction at our house:
- [INTERNAL LINK PLACEHOLDER: My Grandmother’s Pralines] — The only candy I make without a thermometer, and the one that makes the kitchen smell like Celestine’s did.
- [INTERNAL LINK PLACEHOLDER: Brown Butter Peach Galette] — The summer dessert that makes the whole table go quiet.
- [INTERNAL LINK PLACEHOLDER: Buttermilk Biscuit Strawberry Shortcake] — The version we actually make when the strawberries are finally good.
This is the dessert I make when I want to prove to myself I can still be patient. The rolling takes practice, but here’s the thing about a strawberry swiss roll — even the imperfect one tastes like summer. Simone said it’s her new favorite, which from an eight-year-old who considers mac and cheese a food group is the full review.
If you make one, come back and drop a comment — I want to hear how the roll went. The cracked ones and the perfect ones both count.
📌 This strawberry swiss roll recipe rolls without cracking — save it for strawberry season and summer birthdays.
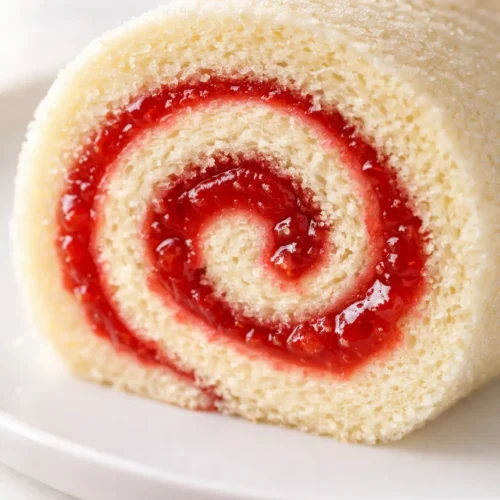
Strawberry Swiss Roll That Doesn’t Crack When You Roll It — Finally
Equipment
- 15×10-inch Jelly Roll Pan
- Parchment Paper
- Hand mixer or stand mixer
- Lint-Free Kitchen Towel
- Sifter or fine mesh strainer
- Offset spatula
- Wire rack
- Serrated Knife
Ingredients
For the Sponge
- 4 large eggs, room temperature
- 3/4 cup granulated sugar, divided
- 1 tsp vanilla extract, divided
- 3/4 cup cake flour
- 1/4 tsp salt
- 3 tbsp unsalted butter, melted and cooled
For the Filling and Finish
- 1 cup heavy cream, cold
- 1/4 cup powdered sugar, plus more for dusting
- 1/2 cup strawberry preserves
- 1 cup fresh strawberries, hulled and thinly sliced
Instructions
- Preheat the oven to 350°F. Line a 15×10-inch jelly roll pan with parchment, leaving overhang on the two long sides.
- Separate 4 eggs: whites in a large clean bowl, yolks in a smaller bowl. Wipe the whites bowl with lemon juice to remove any grease.
- Beat yolks with 1/4 cup sugar on high until pale, thick, and ribbon-like, about 2 minutes. Beat in 1 teaspoon vanilla.
- Clean the beaters. Beat egg whites on medium until frothy, then add remaining 1/2 cup sugar a spoonful at a time. Beat to soft peaks.
- Fold the yolk mixture into the whites with big, slow sweeps until barely combined.
- Sift flour and salt over the batter in two additions, folding gently after each. Fold in melted butter until just incorporated.
- Pour batter into the pan, spread evenly, tap once. Bake at 350°F for 12–13 minutes until the top springs back.
- Run a knife around the edge. Dust a clean towel with powdered sugar, flip the cake onto it, peel off parchment, and roll the cake up from a short end with the towel. Cool completely seam side down.
- Whip 1 cup cold cream with 1/4 cup powdered sugar and a small splash of vanilla to medium peaks.
- Unroll the cooled cake. Warm 1/2 cup strawberry preserves briefly, then spread a thin layer over the cake. Spread cream over the jam, leaving a 1-inch border at the far short end. Lay sliced strawberries over the cream.
- Use the towel to lift the near edge over the filling, tuck gently, and roll forward, pulling the towel back as you go. Place seam side down.
- Chill the roll for at least 1 hour.
- Trim the ends with a serrated knife, dust with powdered sugar, and slice into 8 pieces.
Notes
Related posts:
 This Raspberry Lemon Cake With White Chocolate Is the Only Layer Cake You Need for Spring Celebrations
 Peach Cobbler That Bakes Its Own Crust (Golden, Juicy, 40 Minutes)
 Snickerdoodle Zucchini Bread That’s Moist, Swirled, and Secretly Good for You
 The Gluten-Free Chocolate Zucchini Bread You’d Never Guess Is Gluten-Free (It’s Rich, Moist & Impossible to Stop Eating)