

Every now and then, I make something so perfectly pretty that even my eight-year-old, Simone, gets quiet — which is saying something, because Simone has never been quiet about her opinions on food. The first time I made these little strawberry cream sandwiches, she stood on her tiptoes at the counter and watched me assemble them like I was performing some kind of magic trick. Then she asked if they tasted as good as they looked. I told her to be the judge. She ate three. That is the full review.
The short version: Sweet, tangy, pillowy little tea sandwiches that take 25 minutes of active work and look like you spent all day making them.
I’ve made these for six baby showers, two Easter brunches, and one very rainy Tuesday when we needed something to smile about. They disappear every single time. Marcus usually doesn’t go for “tea party food,” but I caught him eating a fourth one standing over the kitchen sink, so.
- Serves: 12 (makes 24 small tea sandwiches) as an appetizer or tea party snack
- Hands-On Time: 25 min | Total Time: 40 min (includes 15 min for macerating and 30 min chilling)
- Difficulty: Easy — the only “tricky” part is whipping the cream to stiff peaks, and I’ll walk you through it
- Cost per serving: ~$1.50
- Calories: ~180 per sandwich
- Dietary Notes: Vegetarian; can be adapted gluten-free and dairy-free
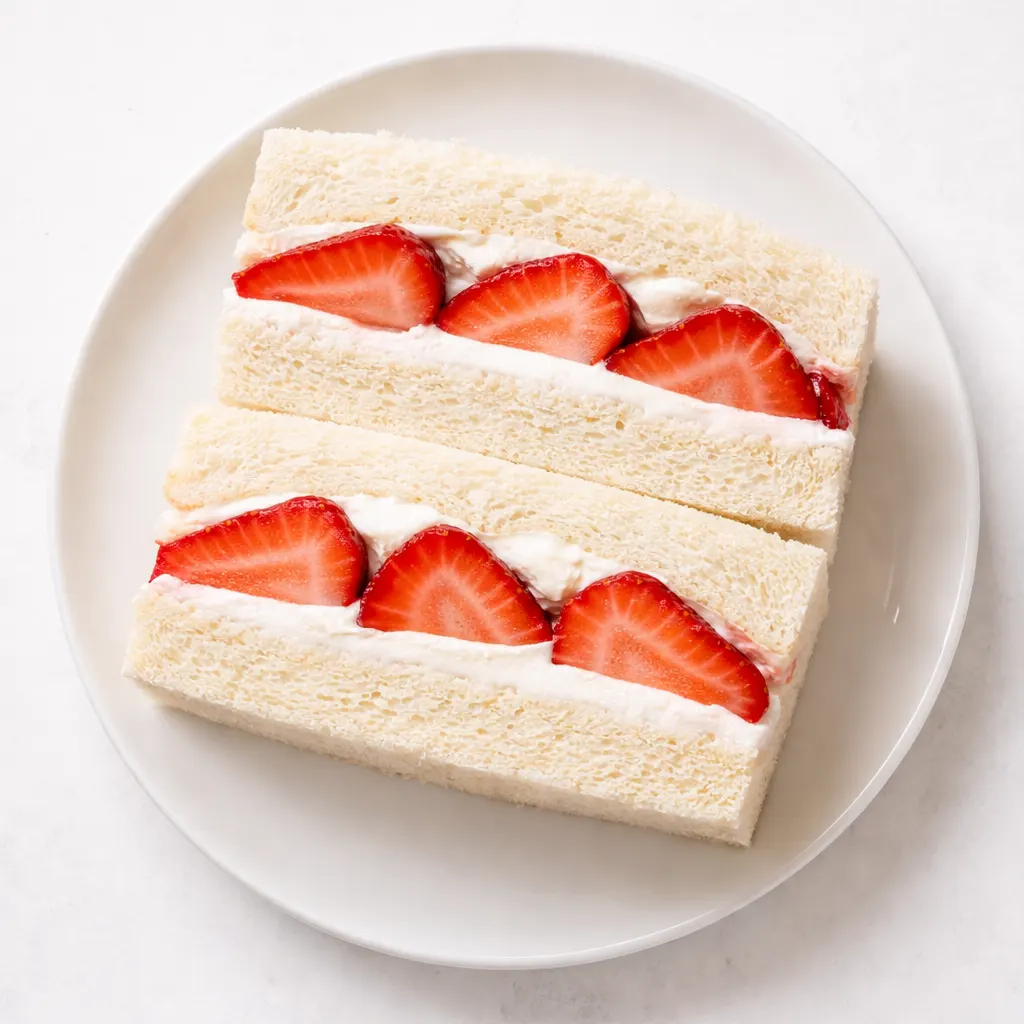
(Photo above: An overhead shot of a vintage milk-glass cake stand piled high with tiny, pillowy white bread sandwiches, their pink strawberry cream filling visible at the edges, garnished with delicate mint leaves. Warm morning light streams in from the left, casting soft shadows. Linen napkin underneath.)
The Trick to a Strawberry Sandwich That Doesn’t Turn Soggy
The enemy of a strawberry cream sandwich is the water inside the strawberries. If you just slice them and layer them onto fresh bread, you end up with a sad, wet situation by the time you’re ready to serve. Here’s how we fix that without any fancy equipment or culinary school tricks.
First, we macerate the berries. That’s just a fancy way of saying we toss them with sugar and let them sit until they release their liquid. Then we drain every drop of that liquid before we fold them into the cream. It sounds like an extra step, but it’s the only thing standing between you and a perfect sandwich.
Second, we build a waterproof barrier inside the bread. The cream cheese and mascarpone base is thick and tangy, and it seals the bread so the moisture from the berries never touches it. This is the same principle Celestine used when she made her strawberry shortcake — she’d spread a layer of cream on the biscuit first, then pile the berries on top, and the biscuit stayed crisp. She couldn’t explain the science, but she sure knew it worked.
Third, we let the bread sit out for an hour before we start. Slightly stale bread is your friend here. Fresh bread turns into paste when you spread cream on it. Leave the slices on the counter, uncovered, for about an hour. You want them just dry enough to hold up to a generous spread.
That’s it. Three small decisions that turn a potentially soggy mess into the most elegant, crowd-pleasing little sandwich you’ll ever bring to a party.
What You Need (Plus Why This Cream Cheese Brand Matters)
- 1 loaf soft white bread or brioche (about 20–24 slices): Pepperidge Farm white bread works beautifully in a pinch. If you have a bakery nearby, get challah or brioche. The slight sweetness matches the filling perfectly. Leave it out to stale for an hour before you start.
- 1 pint fresh strawberries, finely diced: Ripe but firm. If they’re too soft, they’ll turn to mush when you stir them into the cream. Look for berries that smell like strawberries when you bring them up to your nose — that’s the sign they’re ready.
- 2 tablespoons brown sugar: This is the Celestine move. The molasses in the brown sugar makes the berry flavor deeper and more complex than plain granulated sugar does. I tested it with white sugar once. Don’t do it. My daughter noticed the difference and asked why the “deep flavor” was missing. Eight years old. I’m not kidding.
- 1 teaspoon vanilla bean paste or extract: The paste gives you those beautiful little black specks that make the cream look like it came from a bakery. Extract works, but the paste is worth finding. Vanilla bean paste lives in my pantry right next to the salt, always.
- Pinch of kosher salt (plus more for the cream): Celestine taught me that salt in something sweet makes the sweetness actually taste like itself. A tiny pinch in the berries and another in the cream. Try leaving it out and you’ll taste the difference.
- 4 oz cream cheese, softened: Full fat. Do not use the low-fat version. It has too much water and your cream will be loose. Philadelphia is the standard for a reason.
- 4 oz mascarpone cheese, softened: This is the secret ingredient that makes the filling taste like a cloud. Mascarpone is richer and softer than cream cheese, and it adds a luxurious texture that you cannot get any other way. Find it in the specialty cheese section at your grocery store.
- 1/4 cup powdered sugar: Dissolves instantly into the cream base with no grittiness.
- 1/2 teaspoon lemon zest: A whisper of lemon brightens the whole thing. Do not skip it. My grandmother used to say lemon and strawberry are cousins, and she wasn’t wrong.
- 3/4 cup heavy cream: Needs to be cold. Stick it in the freezer for 10 minutes before you whip it if your kitchen is warm. Cold cream whips up faster and holds its shape longer.
- Fresh mint leaves for garnish: Optional, but it makes the sandwiches look like they belong on a fancy platter at a bridal luncheon.
What You’ll Pull Out of the Drawers
- Electric mixer (handheld or stand) for whipping the cream and beating the cream cheese. You can do the cream by hand with a whisk if you’re feeling strong, but I’m not here to test your arm endurance.
- Two baking sheets or large plates for holding the assembled sandwiches while they chill.
- Serrated knife for slicing off the crusts. A sharp serrated blade glides through soft bread without squishing it.
- Chef’s knife for the final clean cuts into fingers or triangles.
- Small offset spatula for spreading the cream. It’s my favorite tool for this job — my grandmother’s old one lives in my utensil drawer and I’d grab it before any fancy gadget.
- Fine-mesh strainer for draining the macerated strawberries. This is non-negotiable.
Let’s Make These Little Clouds
This goes fast once you start, so read through the steps once before you begin. Don’t let the number of steps fool you — most of them take about two minutes each.
Start the berries first: Get the strawberries macerating while you measure the rest of your ingredients. That way, by the time you’re ready to fold them in, they’ll have released all their liquid.
- Macerate the berries: In a small bowl, combine the finely diced strawberries, brown sugar, vanilla bean paste, and a tiny pinch of salt. Stir to coat every piece. Let sit for 15 minutes. After 15 minutes, pour the entire mixture into a fine-mesh strainer set over a bowl. Let every drop of the pink liquid drain out. Do not skip this. (📸 Photo tip: The drained berries should look glossy but not wet. The reserved syrup is amazing in lemonade or spooned over ice cream.) Reserve the syrup for another use.
- Make the cream base: In a large bowl (or the bowl of a stand mixer fitted with the paddle attachment), beat the softened cream cheese and mascarpone together on medium speed until completely smooth and lump-free. This takes about 2 minutes. Scrape down the sides of the bowl halfway through. Add the powdered sugar, lemon zest, and another tiny pinch of salt. Beat until combined, about 30 seconds.
- Whip the cream: In a separate bowl (a clean mixing bowl or a large glass bowl), whip the heavy cream to stiff peaks. If you’re using a stand mixer, switch to the whisk attachment. If you’re using a handheld mixer, wash the beaters first. Stiff peaks hold their shape when you lift the beater — the cream stands up in a point that doesn’t flop over. This takes 2–4 minutes depending on how cold your cream is. Do not overwhip or it will turn into butter. I learned this the hard way one Thanksgiving. You don’t want to learn it the hard way.
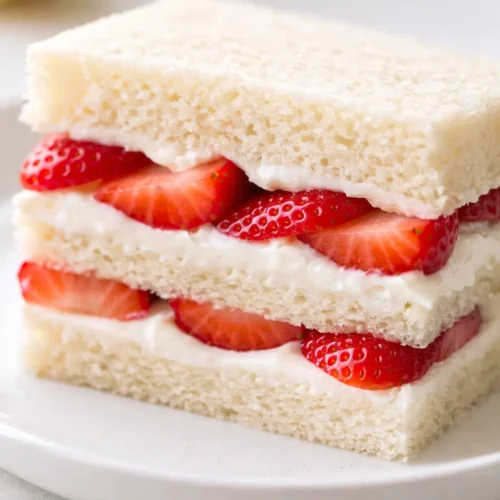
- Fold it together: Take about a third of the whipped cream and stir it into the cream cheese mixture to lighten it up. Then gently fold in the remaining whipped cream until just combined. Finally, gently fold in the drained strawberries. Be careful not to overmix — you want the cream to stay light and airy. A few streaks of white and pink are perfectly fine. (📸 Photo tip: The final cream should look like a soft cloud with flecks of pink and tiny vanilla bean specks.)
- Assemble: Lay out 10–12 slices of bread on your work surface. Using your offset spatula, spread a generous layer (about 2–3 tablespoons) of the strawberry cream onto each slice, spreading it all the way to the edges. Top with the remaining slices of bread to create sandwiches.
- Chill: Place the assembled sandwiches on a baking sheet and refrigerate for at least 30 minutes. This is the most important step for clean slicing. The cream needs to firm up so it holds its shape when you cut. “Chill them,” Celestine would say. “Everything sets better with a little patience.”
- Slice: Remove the sandwiches from the fridge. Using a serrated knife, cut off the crusts along all four sides. Then use a sharp chef’s knife to cut each sandwich into fingers (strips) or triangles. Fingers are more traditional for tea parties, but triangles are easier for little hands. I make both so everyone’s happy.
- Serve: Arrange on a platter, garnish with tiny mint leaves if you’re feeling fancy, and serve chilled. They’re best within 4–6 hours of assembly. Simone asked if she could take them for show and tell. I said no. But I saved her a few.
Making These for a Party? Here’s My Timeline.
I make these for every baby shower I host, and I’ve dialed in the timeline so I’m not running around like a crazy person when guests arrive.
- Fridge: Assembled, unsliced sandwiches can rest in the fridge for up to 4 hours. Slice them right before serving for the prettiest presentation. The cream is very stable because of the cream cheese and mascarpone, so it won’t weep or soften the bread.
- Freezer: I do not recommend freezing the assembled sandwiches. The texture of the cream will change, and the bread will get icy when it thaws. However, you can make the cream base (without the berries) up to 1 month ahead and freeze it in a sealed container. Thaw overnight in the fridge, then whip up the fresh cream and fold in the berries the morning of your event.
- Reheat: These are served cold or at room temperature. Take them out of the fridge about 15 minutes before you plan to serve them so the cream softens slightly and the flavors come forward.
What I’ve Learned After Making These for Every Baby Shower I’ve Thrown
- Stale bread is non-negotiable: I know I said it already, but I’m saying it again because this is the mistake I see people make most often. Fresh bread turns into paste. Leave the slices out on the counter for an hour before you start. If you forgot, you can pop them in a 250°F oven for 5 minutes to dry them out. Let them cool completely before you spread the cream.
- Don’t skip draining the strawberries: I’ve made these in a hurry and skipped the draining step. The result was a pretty pink cream that looked beautiful for about 20 minutes and then slowly turned into soup. The liquid from the berries will always find its way out. Drain them. Save the syrup for cocktails or lemonade.
- Taste the cream before you spread: The cream should be tangy first, sweet second. If it tastes flat, add another pinch of salt. If it’s too sweet, add a squeeze of lemon juice. You can’t fix it after it’s on the bread, so taste it now. I let Simone taste it and she nodded her approval. That’s my quality control system.
- Use a serrated knife for the crusts and a sharp chef’s knife for the final cut: The serrated knife saws through the crust without compressing the bread. The chef’s knife gives you clean, smooth edges on the final cut. If you use a dull knife, you’ll squish the cream out the sides. It’s worth switching knives.
Swaps and Twists (Because I Know Not Everyone Loves Bourbon)
- Kid-Friendly Version: Skip any vanilla bean paste that has alcohol in it (some brands do). Use vanilla extract instead. If you’re in a hurry, mix 4 oz cream cheese with 1/2 cup good strawberry jam and fold in 1 cup of thawed whipped topping. It’s not as fancy, but it’s what Simone asks for when I’m short on time.
- Dairy-Free Version: Use Kite Hill cream cheese and a dairy-free mascarpone alternative. Whip full-fat coconut cream (the solid part from a can of coconut milk) instead of heavy cream. The texture is slightly softer, but the flavor is still wonderful. I’ve tested this, and it works. Just don’t skip the chilling step.
- Gluten-Free Version: Schar gluten-free white bread is the best option for this recipe. It’s sturdy enough to hold up to the cream and it doesn’t crumble the way some GF breads do. Leave it out to stale for an hour — it needs that drying time even more than regular bread does.
- Peach Cream Version: Swap the strawberries for ripe diced peaches. Add a splash of bourbon to the macerating liquid if you’re making the adult version. The combination of peach and brown sugar is stunning.
- Lemon-Blueberry Version: Fold in 1/2 cup lemon curd and 1/2 cup fresh blueberries instead of the strawberries. Use lemon zest in the cream and skip the vanilla. This is my personal favorite for a summer tea party.
- Fancy Guest Version: Add a thin slice of prosciutto or a fresh basil leaf inside the sandwich. The salty-sweet combination is the kind of thing that makes people stop mid-bite and say, “Wait, what is that?” It’s my mother-in-law’s favorite variation.
Questions I Get About These Sandwiches
Q: Why did my cream turn out runny?
A: Ugh, I’ve been there. Two likely causes. One: the heavy cream wasn’t whipped stiff enough. It needs to hold a firm peak before you fold it in. Two: the strawberries weren’t drained well enough. Even a tablespoon of extra strawberry liquid can loosen the whole batch. Next time, whip the cream to stiff peaks and really press on those berries in the strainer. You’ve got this.
Q: Can I make these the night before?
A: You can make the filling the night before and store it in a piping bag in the fridge. You can also macerate the berries and store them in a covered bowl in the fridge. But assemble the sandwiches no more than 4–6 hours ahead of serving. The bread will start to soften after that, and you want these to be perfect.
Q: How far ahead can I make the filling?
A: The cream base (cream cheese, mascarpone, powdered sugar, lemon zest) can be made up to 3 days ahead and stored in the fridge. Take it out 30 minutes before you want to mix it with the whipped cream so it softens slightly. The whipped cream should be made fresh the day you serve the sandwiches. The macerated strawberries can sit in their sugar for up to 24 hours in the fridge, just drain them before folding them in.
Q: How do I transport these without them becoming a mess?
A: Lay the sliced sandwiches in a single layer in a baking dish with a tight-fitting lid. Nestle a slightly damp paper towel against the side of the dish (not touching the sandwiches) to keep the air from drying them out. They should hold up beautifully for about an hour of travel time.
Q: What else can I serve with these at a tea party?
A: My standard tea party spread includes these strawberry cream sandwiches, my classic cucumber sandwiches with dill and chive cream cheese, mini scones with clotted cream and jam, and a plate of Simone’s favorite lemon bars. If it’s a brunch situation, I add a big bowl of fruit salad and a pitcher of sweet tea with mint.
More Recipes My Family Makes on Repeat
If you liked this one, here are a few others that get the same reaction at our table:
- My Grandmother’s Buttermilk Biscuits — Flaky, tall, and golden, the way Celestine taught me.
- [INTERNAL LINK PLACEHOLDER: Classic Southern Cucumber Tea Sandwiches] — Cream cheese, dill, fresh chives, and perfectly thin cucumber slices.
- Simone’s Favorite Lemon Bars — The ones she calls “perfect.” Tangy, buttery, and absolutely worth the extra step.
- [INTERNAL LINK PLACEHOLDER: Easy Bourbon-Peach Jam] — No canning required. Spoon it over biscuits or swirl it into yogurt.
These little strawberry cream sandwiches feel fancy but come together in about half an hour — they’re the kind of thing that makes a Tuesday feel like a celebration. I love that they’re pretty enough for a baby shower but simple enough for an afternoon treat when your eight-year-old wants something special.
If you try them, drop a comment below and let me know — I love hearing if your little ones loved them as much as my Simone did. And if you find a better combination than strawberry and lemon zest, I’d like to hear about that too.
📌 Strawberry cream tea party sandwiches that taste like a cloud — save this easy, make-ahead recipe for your next baby shower, bridal luncheon, or spring brunch.
Strawberry Cream Tea Party Sandwiches
Equipment
- Electric Mixer
- Baking Sheet
- Serrated Knife
- Offset spatula
- Fine-mesh strainer
Ingredients
Macerated Strawberries
- 1 pint fresh strawberries, finely diced
- 2 tablespoons brown sugar
- 1 teaspoon vanilla bean paste or extract
- pinch kosher salt
Cream Cheese Base
- 4 oz cream cheese, softened
- 4 oz mascarpone cheese, softened
- 1/4 cup powdered sugar
- 1/2 teaspoon lemon zest
- pinch kosher salt
- 3/4 cup heavy cream, cold
Assembly
- 1 loaf soft white bread or brioche (20-24 slices)
- fresh mint leaves for garnish
Instructions
- Macerate the berries: In a small bowl, combine the finely diced strawberries, brown sugar, vanilla bean paste, and a tiny pinch of salt. Let sit for 15 minutes. Pour into a fine-mesh strainer set over a bowl and let every drop of liquid drain out. Reserve the syrup for another use.
- Make the cream base: In a large bowl, beat the softened cream cheese and mascarpone together on medium speed until completely smooth, about 2 minutes. Scrape down the sides. Add powdered sugar, lemon zest, and another tiny pinch of salt. Beat until combined, about 30 seconds.
- Whip the cream: In a separate bowl, whip the heavy cream to stiff peaks, 2–4 minutes. Do not overwhip.
- Fold it together: Stir a third of the whipped cream into the cream cheese mixture to lighten it. Gently fold in the remaining whipped cream until just combined. Then gently fold in the drained strawberries. Do not overmix.
- Assemble: Lay out 10–12 slices of bread. Spread a generous layer (about 2–3 tablespoons) of the strawberry cream onto each slice, spreading to the edges. Top with remaining slices to create sandwiches.
- Chill: Place assembled sandwiches on a baking sheet and refrigerate for at least 30 minutes. This is essential for clean slicing.
- Slice: Using a serrated knife, cut off the crusts. Then use a sharp chef’s knife to cut each sandwich into fingers or triangles.
- Serve: Arrange on a platter, garnish with mint leaves, and serve chilled. Best within 4–6 hours of assembly.
Notes
Related posts:
 Baked Protein Pancake Bowls That Don’t Taste Like Cardboard — Finally
 Low Calorie Banana Bread That Doesn’t Taste Like a Compromise — Finally
 Coconut Flour Banana Bread Muffins That Stay Moist for Days (Not Crumbly)
 This Raspberry Lemon Cake With White Chocolate Is the Only Layer Cake You Need for Spring Celebrations