

Every “healthy” biscuit I tried before landing on this recipe was a straight-up tragedy. Dry, dense, completely sad, and the kind of thing you had to smother in jam just to get through one bite. These are none of those things. These are golden on the outside, tender on the inside, and they happen to pack about 9 grams of protein per biscuit. My daughter Simone asked for one in her lunchbox the other day — that’s the kind of win that makes a mom feel like she’s actually got this whole breakfast thing figured out.
The short version: Fluffy, buttery-tasting breakfast biscuits with about 9g of protein each, and nobody at the table has to know they’re packed with cottage cheese and eggs.
I tested this recipe about 15 times to get the ratio right — enough cottage cheese for the protein boost, but enough butter so they still taste like a real biscuit. This version is the one I actually make on busy mornings. Not the one I aspire to make. The one I make.
- Serves: 8 biscuits
- Hands-On Time: 10 min | Total Time: 25 min
- Difficulty: Easy enough for a weekday morning — I promise
- Cost per serving: ~$0.90
- Calories: ~210 per biscuit
- Dietary Notes: High-Protein, Vegetarian. Easily adaptable for dairy-free or gluten-free.
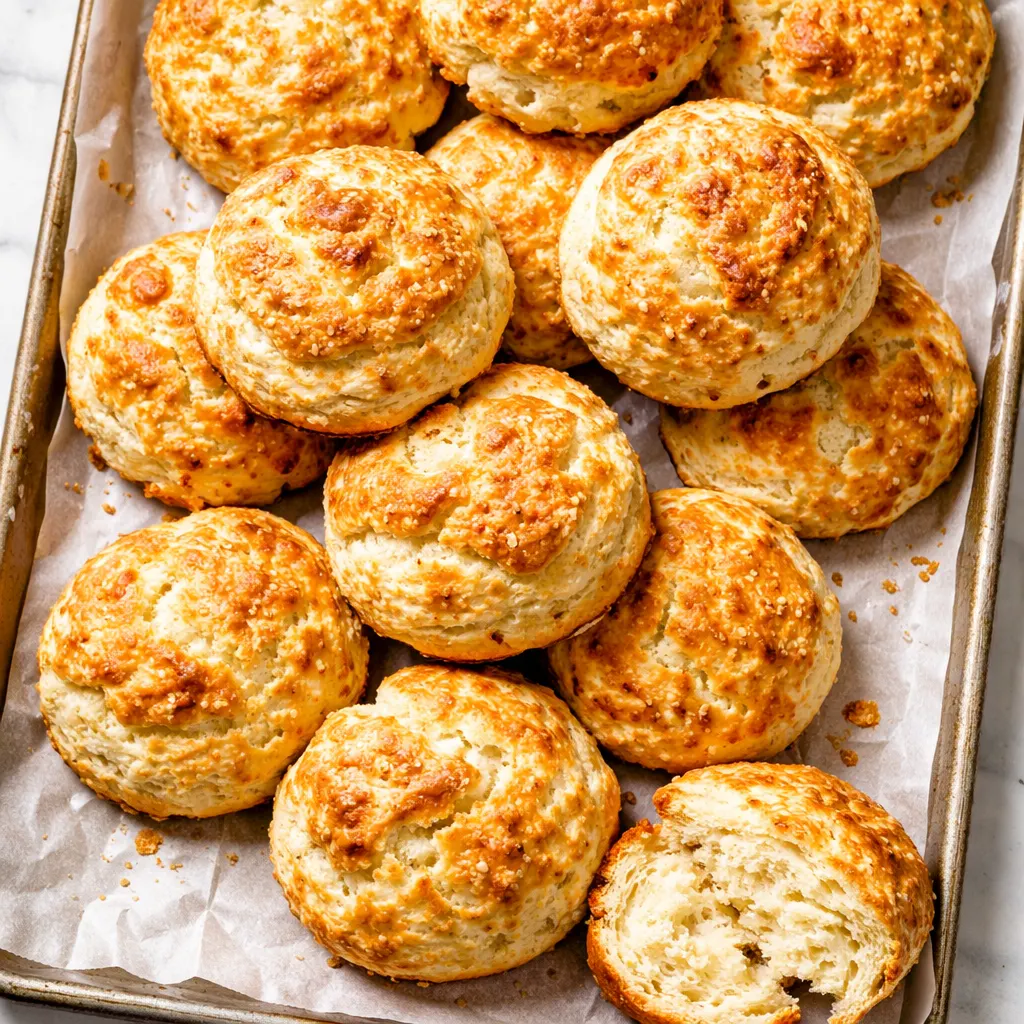
(Photo above: overhead shot of a cast-iron skillet lined with a red gingham napkin, piled high with golden-brown biscuits. One biscuit is broken open, steam rising, with tiny visible curds of cottage cheese and a pat of butter melting into the center. Morning light from the left, coffee cup in the background.)
The Trick That Makes High-Protein Biscuits Fluffy (Not Dense)
The problem with most high-protein biscuits is that they swap out too much fat for protein, and protein powders turn things rubbery. This recipe uses cottage cheese and eggs for the protein boost, but the real trick is blotting the cottage cheese dry. Cottage cheese holds a lot of water, and that water is the enemy of a fluffy biscuit. Get the moisture out, and you’re left with all that protein and none of the sogginess.
The second trick is grating frozen butter into the flour. This creates little pockets of fat that steam and lift the dough as they bake. No cutting in, no food processor, no mess — just a box grater and about 30 seconds. My grandmother Celestine would have called it common sense. I call it the only way I make biscuits now.
The result is a biscuit that tastes like a real biscuit. Golden crust, soft center, and a protein count that makes you feel genuinely good about feeding them to your kid at 7am on a Tuesday.
Everything You Need (Plus a Few Notes From My Kitchen)
- 2 cups self-rising flour: If you don’t have self-rising, whisk 2 cups all-purpose flour with 1 tablespoon baking powder and 1/2 teaspoon salt. I keep self-rising in the pantry specifically for biscuit mornings — it makes the whole process faster and the texture is more consistent.
- 6 tablespoons cold butter, grated: This is the fat that makes them taste like a biscuit and not a protein bar. Grate it straight from the freezer on the large holes of a box grater. My Marcus thought I was extra the first time I did this. Then he ate one and stopped questioning my methods.
- 1.5 cups small-curd cottage cheese, blotted dry: Full-fat is best here for flavor, but low-fat works if that’s what you keep on hand. The blotting step is the one everyone wants to skip. Don’t be everyone. I squeeze mine in a clean kitchen towel over the sink — you’ll be shocked how much liquid comes out.
- 2 large eggs: These add structure and protein. Take them out of the fridge when you start so they’re not ice cold, but don’t stress if you forget.
- 1/4 cup buttermilk: The acid in buttermilk tenderizes the gluten and helps the biscuits rise. Regular milk with a tablespoon of lemon juice works in a pinch. I’ve done it in a desperate moment and it worked fine.
- Flaky salt for tops: Maldon or any big-flake salt. It’s not optional in my kitchen. It finishes the biscuit the way a good closing sentence finishes a paragraph.
The Setup (It’s Minimal, I Promise)
- A box grater (for the frozen butter)
- A large mixing bowl
- A sheet pan lined with parchment paper
- A clean kitchen towel or fine-mesh strainer (for blotting the cottage cheese)
- A sharp knife or bench scraper
That’s it. No biscuit cutter needed — I just cut them into squares. Fewer scraps, less fuss, same result.
Let’s Make Them (Step by Step)
This goes fast, so read through once before you start. The oven needs to be screaming hot before anything goes in.
Preheat: Preheat your oven to 425°F with a rack in the upper third. Line a sheet pan with parchment paper.
- Blot the cottage cheese: Place the cottage cheese in a clean kitchen towel and squeeze firmly over the sink until no more liquid drips out. Or press it through a fine-mesh strainer with the back of a spoon. You should end up with a crumbly, dry curd that looks almost like ricotta. (📸 Photo tip: The blotted cottage cheese should look dry and crumbly — if it’s still shiny and wet, keep going.)
- Grate the butter: Grate the frozen butter on the large holes of the box grater into the mixing bowl. Add the self-rising flour and toss with your fingers to coat the butter shreds. Work quickly so the butter stays cold.
- Mix the wet ingredients: In a small bowl, whisk the blotted cottage cheese, eggs, and buttermilk together until smooth. It will look a little lumpy from the curds — that’s exactly right.
- Combine: Pour the wet mixture into the flour mixture. Stir with a spatula just until the dough comes together. It will look shaggy and a little sticky. Stop stirring the second there’s no more dry flour visible. Overmixing is the fastest way to a tough biscuit. (📸 Photo tip: The dough should look rough and irregular, not smooth like bread dough.)
- Pat and cut: Turn the dough onto a lightly floured surface. Pat it into a rectangle about 1 inch thick. Don’t use a rolling pin — the heat from your hands is enough. Cut into 8 squares with a sharp knife. Press straight down, don’t twist.
- Bake: Place the biscuits on the prepared pan about 1 inch apart. Sprinkle the tops with flaky salt. Bake for 14-16 minutes until deep golden brown and the kitchen smells like a real bakery.
- Rest: Let them sit on the pan for 5 minutes before pulling them apart. This sets the texture and keeps them from crumbling.
How I Make These for School Mornings
I make a double batch on Sundays. They’re usually gone by Wednesday, but here’s the system that works when I’m actually planning ahead:
- Fridge: Store in an airtight container for up to 4 days. Warm in a toaster oven for 5 minutes — the microwave makes them soft instead of crisp.
- Freezer: Yes, they freeze beautifully. Freeze baked biscuits on a sheet pan, then transfer to a zip-top bag. Reheat straight from frozen in a 350°F oven for 10 minutes, or in the toaster oven on the defrost setting.
- Reheat: Toaster oven is the winner here. It brings back that golden edge that makes a biscuit worth eating. The microwave works in a 30-second pinch, but I won’t pretend it’s the same.
Things I Wish I’d Known the First Time
- Don’t skip blotting the cottage cheese. I know it’s annoying. I know it adds two minutes. But if you skip it, your biscuits will steam instead of bake, and they’ll be flat and dense. I learned this the hard way so you don’t have to.
- Keep everything cold. The butter, the eggs, the buttermilk. Cold ingredients create steam pockets in the oven. Warm dough spreads instead of rising, and you end up with a flat biscuit that has zero lift.
- High heat is non-negotiable. 425°F seems high for a biscuit. It’s not. That initial blast of heat sets the crust and forces the butter to release steam. Drop the temperature and you lose the lift.
- Don’t twist the knife. When you cut the biscuits, press straight down and pull straight up. Twisting seals the edges, which prevents them from rising as high. It’s a tiny thing that makes a visible difference.
Make Them Your Way: Easy Variations
- Dairy-Free: Use a plant-based butter (the kind in a stick, not a tub) and a dairy-free yogurt in place of buttermilk. The texture changes slightly — they’re a little more tender and less crisp — but they still taste great. I tested this for a friend’s kid who can’t do dairy, and her son asked for seconds.
- Gluten-Free: Use a 1:1 gluten-free baking flour blend. The dough will be stickier and the biscuits will be a bit more delicate, so handle them gently. Bake for an extra 2 minutes.
- Cheesy: Add 1/2 cup shredded sharp cheddar to the flour mixture before adding the wet ingredients. This makes them more of a savory scone situation, and my kid will eat them cold out of the lunchbox.
- Sweet: Add 2 tablespoons of sugar and 1/2 teaspoon of cinnamon to the flour mixture. Serve with honey butter. I do this on weekends when we want something that tastes like a treat but still has the protein to get us through the morning.
The Questions I Always Get About These Biscuits
Q: Why didn’t my biscuits rise?
A: Most likely the oven wasn’t hot enough, or the butter warmed up before baking. Pop the pan in the freezer for 10 minutes before baking if your kitchen is warm. Also check your baking powder — if it’s old, it won’t lift. Self-rising flour loses its oomph after about 6 months.
Q: Can I use a cottage cheese substitute?
A: Greek yogurt or ricotta work, but both change the texture. Greek yogurt makes the biscuits slightly more tender and less fluffy. Ricotta adds richness but less protein. I’ve done both on mornings when I ran out of cottage cheese, and they were still good — just different. Worth making, but not quite the same.
Q: How long do these last? Can I freeze them?
A: They keep in the fridge for up to 4 days in an airtight container. And yes, they freeze great — I do it every Sunday. Freeze them flat on a sheet pan, then transfer to a zip-top bag. Reheat straight from frozen in the toaster oven for about 10 minutes.
Q: What do you serve with these?
A: We eat them three ways in my house. (1) Split with butter and jam for a quick breakfast. (2) As a sandwich with a fried egg and cheese — this is Marcus’s go-to. (3) Crumbled over a bowl of chili for dinner. Don’t knock the chili thing until you try it. Simone prefers them plain, straight out of the basket, still warm.
More Recipes My Family Makes on Repeat
If you liked these biscuits, here are a few others that get the same reaction at our table:
- Cheesy Potato Egg Scramble — These are my go-to for school mornings when we need something we can grab and eat in the car.
- Fluffy Pancakes — Fluffy, golden, and the only pancake recipe Simone will eat without complaint.
- [INTERNAL LINK PLACEHOLDER: Sheet Pan Sweet Potato Hash] — Roasted sweet potatoes, onions, and sausage all on one pan. Zero fuss, maximum flavor.
These biscuits have genuinely made my mornings easier. I know exactly what I’m feeding my kid — protein, real ingredients, no weird stuff — and she actually eats them happily. That’s the kind of win I’ll take every single time.
If you make a batch, tag me on Pinterest or drop a comment below. I love seeing how they turn out in other kitchens — especially the variations.
📌 Save this high-protein cottage cheese breakfast biscuit recipe for busy school mornings when you need something fast, filling, and fluffy enough to actually look forward to waking up for.

High-Protein Cottage Cheese Breakfast Biscuits
Equipment
- Box Grater
- Large Mixing Bowl
- Sheet pan
- Parchment Paper
- Clean kitchen towel or fine-mesh strainer
- Sharp knife or bench scraper
Ingredients
For the Biscuits
- 2 cups self-rising flour
- 6 tablespoons cold butter, grated
- 1.5 cups small-curd cottage cheese, blotted dry
- 2 large eggs
- 1/4 cup buttermilk
For Topping
- Flaky salt (like Maldon)
Instructions
- Preheat oven to 425°F with rack in upper third. Line a sheet pan with parchment paper.
- Blot the cottage cheese: Place cottage cheese in a clean kitchen towel and squeeze firmly over sink until no more liquid drips out. Alternatively, press through a fine-mesh strainer with back of a spoon. You should end up with a crumbly, dry curd.
- Grate the frozen butter on large holes of box grater into mixing bowl. Add self-rising flour and toss with fingers to coat butter shreds. Work quickly to keep butter cold.
- In a small bowl, whisk together blotted cottage cheese, eggs, and buttermilk until smooth. It will be lumpy from the curds – that is correct.
- Pour wet mixture into flour mixture. Stir with a spatula just until dough comes together, no more. Dough will be shaggy and sticky. Stop when no dry flour remains.
- Turn dough onto lightly floured surface. Pat into a rectangle about 1 inch thick. Cut into 8 squares with a sharp knife, pressing straight down without twisting.
- Place biscuits on prepared pan about 1 inch apart. Sprinkle tops with flaky salt. Bake for 14-16 minutes until deep golden brown and kitchen smells like a bakery.
- Let biscuits rest on pan for 5 minutes before serving. This sets the texture and prevents crumbling.