

That first bite — the one where the creamy, tangy sour cream hits your tongue right before the crispy, buttery, salty onion topping crunches — is the one that makes my whole family stop talking at the table. Every single time. I’ve been making this version for about two years now, and it’s the only baked chicken dish that my daughter Simone asks for by name. She calls it “the crunchy chicken,” which is accurate and also means I’ve earned her trust on this one.
The short version: Juicy, tender chicken under a golden, crunchy onion crust that tastes just like your favorite chip — dinner done in 30 minutes with zero fuss.
I tested this about a dozen times to get that topping to stay crunchy and the chicken to stay moist without any weird shortcuts or fussy techniques. Simone polished off her plate and asked for seconds the first time I got it right, which is her version of a five-star review. Marcus went back for a third piece, which is his.
- Serves: 4 as a main
- Hands-On Time: 10 min | Total Time: 30 min
- Difficulty: Easy enough for a Tuesday night
- Cost per serving: ~$3.50
- Calories: ~450 per serving
- Dietary Notes: Can be made gluten-free with easy swaps
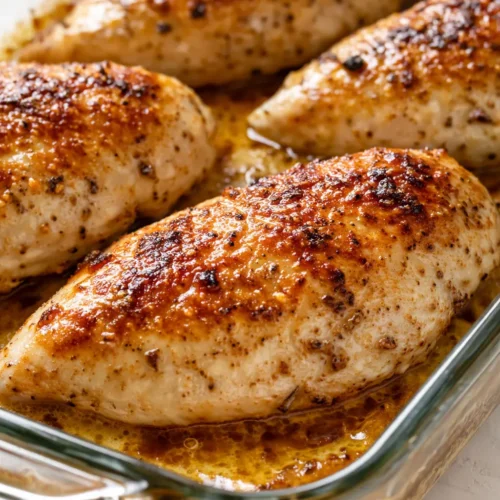
(Photo above: An overhead shot of the golden-brown chicken breasts arranged on a warm white platter, garnished with fresh chives and cracked black pepper. A small ramekin of extra sour cream sits on the side. Warm afternoon light from the right, with a crumpled linen napkin in the corner.)
The Two Things That Keep This From Turning Out Soggy

The first is the sour cream itself. It’s not just there for flavor — it’s doing the work of keeping the chicken tender while the heat gets high enough to crisp the topping. Full-fat sour cream won’t curdle or break the way lighter dairy can, so it stays creamy and stable in the oven. The second is the topping. I use a mix of crushed kettle chips and panko breadcrumbs. The chips give you that instant nostalgia flavor, and the panko gives the crunch something to hold onto so it doesn’t slide off the chicken in one sad sheet when you go to serve it. I learned that the hard way after one too many naked chicken breasts.
What You Need (Plus My Notes on What Actually Matters)
- Chicken breasts (about 1.5 lbs): Look for even thickness so they cook at the same rate. If they’re huge, butterfly them or pound them out to about an inch thick. I’ve found that the even cooking matters more than the brand or the farm — just get them roughly the same size.
- Sour cream (1 cup): Full fat is best here. The low-fat stuff has more water and can get grainy in the oven. Celestine never kept low-fat anything in her house, and she was right. My kids can tell the difference with low-fat — I’m not joking.
- Onion soup mix (1 packet) or homemade caramelized onions (1/2 cup): I’m going to let you use the packet. I know. It’s fine. It has the right salty, savory, allium punch that you want here, and it dissolves perfectly into the sour cream. Just don’t use the “low sodium” kind — it’s missing the balance and the dish will taste flat. If you have time to caramelize your own onions, the dish becomes something else entirely — deeper, sweeter, more sophisticated. But the packet is what makes this a 30-minute dinner.
- Kettle chips (1 cup, crushed): I use the classic sea salt kind. Don’t get the flavored ones — they have too much going on and can burn in the oven. Crush them yourself in a bag with a rolling pin. It’s also a great stress reliever after a long day.
- Panko breadcrumbs (1/2 cup): They stay crispy way longer than regular breadcrumbs. If you’re gluten-free, use the certified GF panko or crushed Rice Chex. Regular breadcrumbs absorb too much moisture and get dense. Panko keeps that light, shattery texture.
- Butter (2 tbsp, melted): Ties the topping together and helps it brown. Olive oil works in a pinch but you lose that rich, golden finish.
- Chives (for garnish): Not just for looks — the fresh onion flavor cuts right through the richness of the sour cream. I use kitchen shears to snip them right over the dish. Simone calls them “green sprinkles.”
The Tools You’ll Need (Nothing Fancy)
- A 9×13 baking dish — glass, ceramic, or metal all work here. If you don’t have one, a sheet pan with edges is fine.
- Mixing bowls — one small for the topping, one medium for the sour cream mixture.
- A zip-top bag or your hands for crushing chips. Getting your hands in there is more fun and you can control the texture better.
- An instant-read thermometer — not strictly necessary, but it helps if you’re nervous about overcooking the chicken. I use mine every time.
Let’s Make It (Step by Step)
This one comes together fast, so preheat your oven to 400°F first and give yourself a clear counter. Read through these steps once before you start — it goes quick.
Prep the chicken: Pat the chicken breasts dry with paper towels. This is non-negotiable — wet chicken steams instead of baking, and we want it tender and juicy, not watery. Season both sides with salt and pepper. Place them in your greased 9×13 dish.
- Mix the cream layer: Stir the sour cream and onion soup mix together in a medium bowl until completely smooth. Spread it evenly over the chicken, making sure every piece is fully coated. Don’t overthink it — just get it covered.
- Make the topping: In a separate bowl, combine the crushed kettle chips, panko, and melted butter. Stir with a fork until it looks like wet sand. (📸 Photo tip: You should be able to squeeze a clump together in your hand and it holds its shape. If it crumbles apart, add a tiny bit more melted butter.)
- Bake it: Press the topping firmly onto the sour cream layer. I know it seems fussy, but pressing it helps it adhere so you don’t lose it all when you pull the dish out of the oven. Bake for 20-25 minutes, until the topping is deep golden brown and the chicken registers 165°F at the thickest part.
- Rest and serve: Let it rest for 5 minutes before serving. I know the house smells incredible and everyone is hovering. This is the hardest step. The chicken needs those 5 minutes to reabsorb its juices. Cut into it too early and it will be dry on the plate even though it was perfect in the pan. Garnish with fresh chives and a little flaky salt.
How to Prep This Ahead of Time
If you’re trying to get a jump on a busy week, you can assemble the whole thing — steps 1 through 3 — in the baking dish, cover it tightly with plastic wrap, and keep it in the fridge for up to 24 hours. Just add about 5-7 minutes to the bake time since you’re starting from cold. I do this on Sunday nights when I know Monday is going to be a scramble.
- Fridge: Baked leftovers keep in an airtight container for up to 3 days. Reheat in the oven at 350°F for 10 minutes to keep the topping crisp. The microwave will make the topping soggy — I’m telling you now so you don’t have to learn the hard way.
- Freezer: Not ideal for this one. The sour cream layer can get grainy when thawed, and the topping loses its crunch entirely. It’s one of those dishes that’s best made fresh or within a day.
- Reheat: Oven is your friend here. 350°F for 10 minutes. If you’re really in a rush, you can use the air fryer at 350°F for about 5-6 minutes.
A Few Things I Learned the Hard Way
- Pound for evenness: If your chicken breasts are different thicknesses, the thin parts will dry out before the thick parts are done. A quick pound with a rolling pin between two sheets of plastic wrap fixes this in 30 seconds. I know it’s an extra step, but it makes the difference between “good” and “everyone finishes at the same time.”
- Don’t skip the rest: I already said this in the steps, but I’m saying it again because it’s that important. Those 5 minutes of rest are what keep the chicken from leaking all its juices onto the cutting board. Even if you mess something else up, the rest will save you.
- Crush the chips yourself: The pre-crushed crumbs you buy at the store are too fine. You want some pea-sized pieces in there for texture. Put the chips in a zip-top bag and go at it with a rolling pin — it’s genuinely satisfying and gives you a better result.
- Make a little extra topping: I always make an extra quarter-batch of the topping and keep it on the side. Halfway through baking, if the topping looks like it’s sinking into the sour cream, I sprinkle a little more on. No one has ever complained about too much crunchy topping.
Ways to Make It Your Own
- Gluten-free: Use certified GF panko or crushed Rice Chex instead of regular panko. The rest of the ingredients (chicken, sour cream, chips, butter) are naturally gluten-free. I make this version for my neighbor who has celiac and she says it’s the only crunchy chicken she trusts.
- Dairy-free: Use a good dairy-free sour cream — I like Tofutti or Forager — and substitute the butter with olive oil or a plant-based butter. I’ve tested this and it works well, though the topping is slightly less golden. It still tastes great.
- Extra veggies: Lay a bed of thinly sliced fennel or leeks under the chicken before you add the sour cream. It roasts down in the juices and becomes sweet and soft — a nice surprise at the bottom of the dish. My kids don’t even notice they’re eating fennel.
- Spicy version: Add a teaspoon of smoked paprika and a pinch of cayenne to the topping mix. Or use jalapeño kettle chips if you’re feeling wild. I do the spicy version after the kids go to bed sometimes, just for Marcus and me.
Questions I Get All the Time About This Chicken
Q: Why did my topping get soggy?
A: Ugh, I’ve been there. This usually happens if the chicken wasn’t patted dry before adding the sour cream, or if the dish was covered while baking. You want the oven’s dry heat to crisp it up. If it’s looking brown but not crispy, uncover it and give it 5 more minutes. You can also try pressing the topping on a little more firmly next time.
Q: Can I use chicken thighs instead?
A: Absolutely. Thighs are even more forgiving and juicier. You’ll need to add about 5-8 minutes to the cook time depending on their size. The internal temp should still reach 165°F, but thighs can go a little higher without drying out. This is actually my preferred version for meal prep.
Q: Can I make this ahead and freeze it?
A: I don’t recommend freezing this one after it’s baked. The sour cream changes texture when it thaws — it gets a little grainy and separates. You can absolutely assemble it, refrigerate, and bake it the next day though. That’s my preferred way to get ahead when I know I have a busy week coming.
Q: What do you serve with this?
A: I usually keep it simple — a bright green salad with lemon vinaigrette to cut through the richness, or some roasted green beans. Rice or egg noodles are great for catching any extra creamy bits from the pan. My kids love it with buttered egg noodles. In the summer, I serve it with a cold cucumber salad and that’s the whole meal.
More Recipes My Family Makes on Repeat
If you liked this one, here are a few others that get the same reaction at our table:
- [INTERNAL LINK PLACEHOLDER: Creamy Tuscan Garlic Chicken] — This one uses that same skillet magic that makes a weeknight feel special, and the sauce is absurdly good.
- [INTERNAL LINK PLACEHOLDER: Crunchy Baked Chicken Thighs] — If you love that crispy topping, these thighs are a total weeknight workhorse and stay juicy every time.
- [INTERNAL LINK PLACEHOLDER: The Easiest Weeknight Pot Pie] — When you need something cozy and the whole family rallies around a bowl, this is the one.
This is the kind of dinner that doesn’t need a side of apology. It’s fast, it’s crunchy, and it’s got that tangy, savory thing that makes everyone at the table actually finish their plate. That’s a win no matter what day of the week it is.
If you make it, tag me in your photo or drop a comment below. I love seeing the crunchy topping in action and hearing how it went for your crew.
📌 This creamy, crunchy sour cream and onion chicken recipe stays juicy every single time — save it for those busy nights when you need a guaranteed win that the whole family will actually eat.
Sour Cream and Onion Chicken That’s Unbelievably Juicy — Ready in 30 Minutes
Equipment
- 9×13 baking dish
- Mixing Bowls
- Instant-read thermometer
- Zip-top bag
Ingredients
Chicken Base
- 1.5 lbs chicken breasts, patted dry and seasoned with salt and pepper
- 1 cup full-fat sour cream
- 1 packet onion soup mix (or 1/2 cup caramelized onions)
Topping
- 1 cup kettle chips (classic sea salt), crushed
- 1/2 cup panko breadcrumbs (use certified GF if needed)
- 2 tbsp butter, melted
- Fresh chives, chopped, for garnish
- Optional: smoked paprika and cayenne for spicy version
Instructions
- Prep the chicken: Pat the chicken breasts dry with paper towels. Season both sides with salt and pepper. Place them in a greased 9×13 baking dish.
- Mix the cream layer: In a medium bowl, stir sour cream and onion soup mix until completely smooth. Spread evenly over the chicken, coating every piece fully.
- Make the topping: In a separate bowl, combine crushed kettle chips, panko, and melted butter. Stir with a fork until it looks like wet sand. You should be able to squeeze a clump that holds its shape.
- Bake it: Press the topping firmly onto the sour cream layer. Bake at 400°F for 20–25 minutes until the topping is deep golden brown and the chicken registers 165°F at the thickest part.
- Rest and serve: Let the chicken rest for 5 minutes before serving. This step is non-negotiable — the chicken needs those minutes to reabsorb its juices. Garnish with fresh chives and flaky salt.