
The first time I made these I was honestly just trying to use up half a roll of sausage and a bag of frozen hash browns before they got freezer burn. It was one of those mornings — Simone had a friend over, both girls were circling the kitchen asking what was for breakfast, and I needed something that felt like a treat without taking an hour. I pulled a few tortillas from the back of the fridge, remembered the jalapeño crema that had been my go-to for taco nights, and folded everything up tight like a present. The sound that first crunchwrap made when I pressed it into the hot skillet — that immediate sizzle and the smell of toasting tortilla — I knew we were onto something. Both girls ate an entire one each, which is my gold standard for any recipe worth repeating.
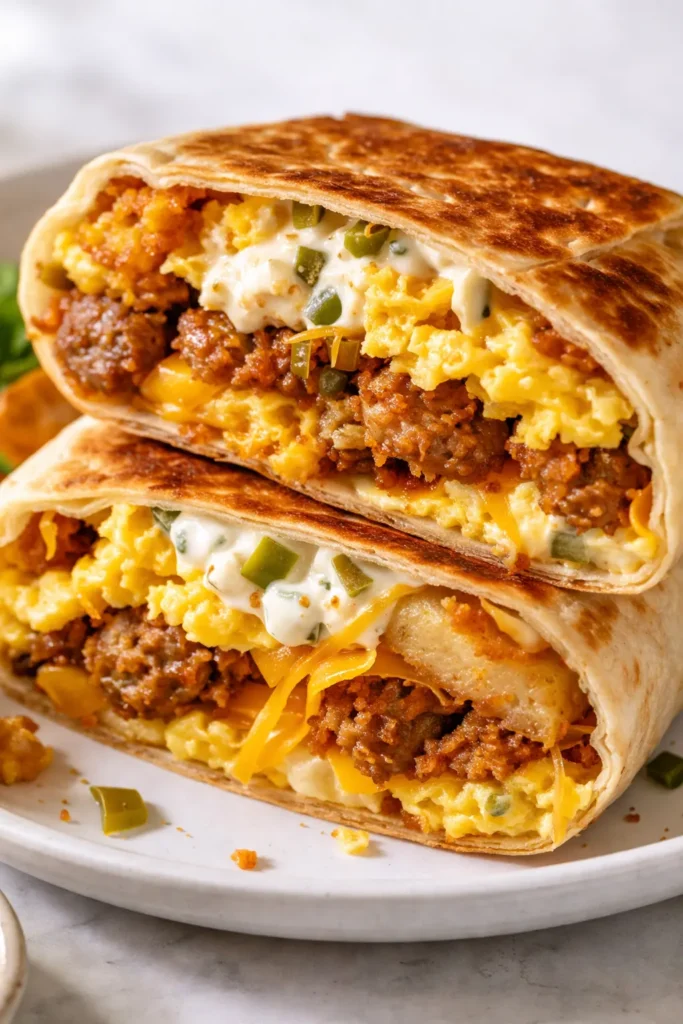
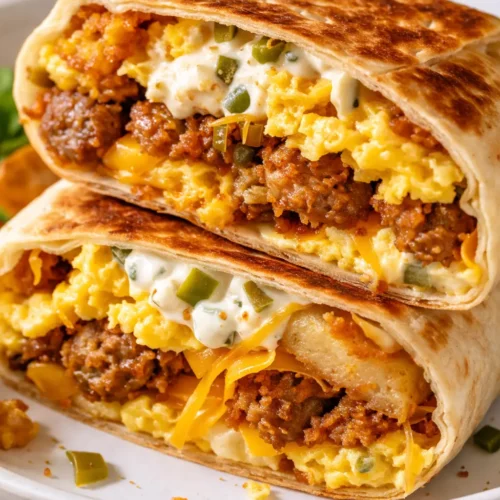
The short version: A seared, golden tortilla shell holds a full breakfast of sausage, soft eggs, crispy hash browns, melty cheddar, and a creamy pickled jalapeño sauce — on the table in about half an hour.
I’ve made these for slow weekend mornings with coffee and the newspaper, for school-day breakfasts when we’re running late, and for a group of eight adults who stood around the counter eating them with their hands. They work for every single situation I’ve thrown at them.
- Serves: 4 as a main breakfast
- Hands-On Time: 25 min | Total Time: 30 min
- Difficulty: Easy — even on a morning when you haven’t had coffee yet
- Cost per serving: ~$3.50
- Calories: ~560 per serving
- Dietary Notes: Adaptable for gluten-free with GF tortillas; vegetarian swap available
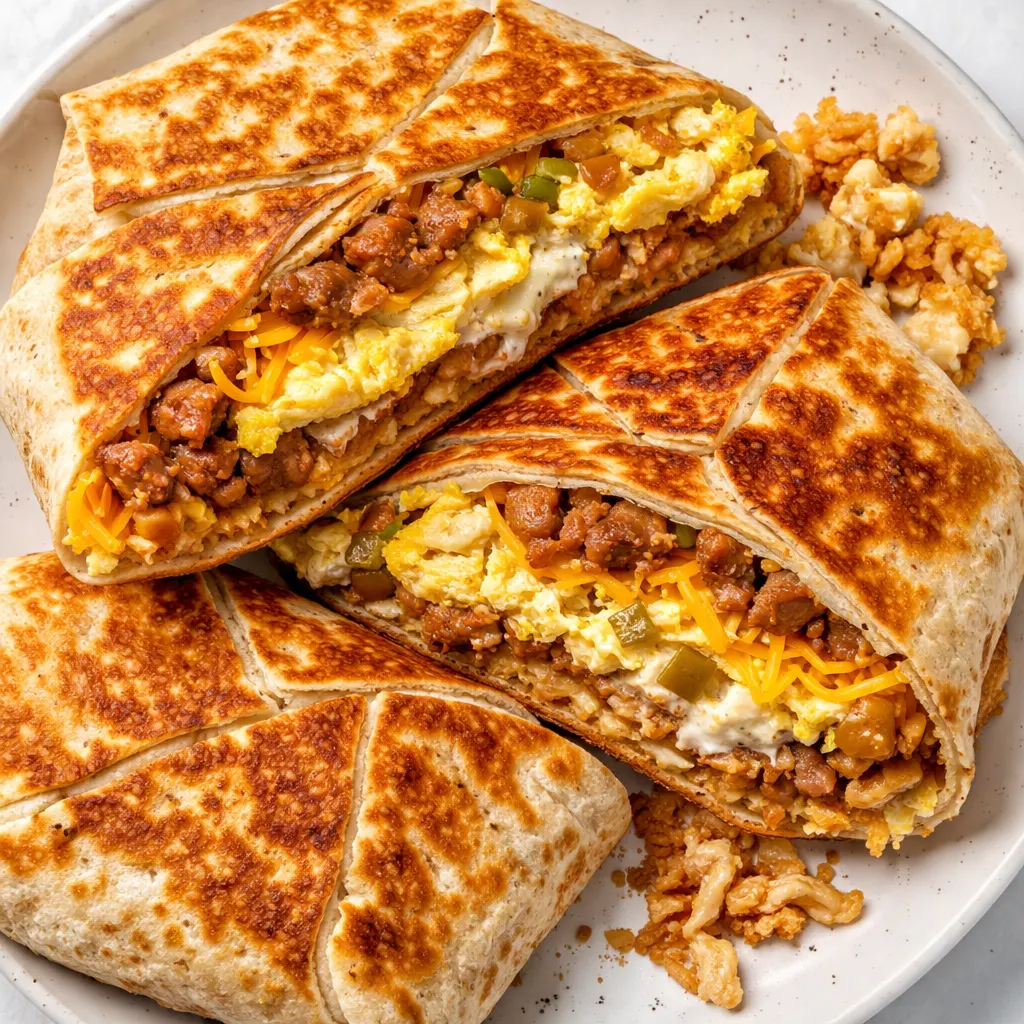
(Photo above: overhead shot of two quartered crunchwraps resting on a cast iron skillet, cut open to reveal the layers of scrambled eggs, crumbled sausage, shredded cheddar, and a golden hash brown patty, with a small bowl of creamy jalapeño sauce alongside for dipping — natural morning light coming from the left.)
The One Step That Keeps Them from Going Soggy
The difference between a crunchwrap that holds up and one that falls apart in your hands is the sear. You have to get that tortilla deeply golden and crisp on the outside. It creates a barrier that keeps the filling warm and the bread from turning into a sad, steamy mess halfway through eating. I learned this the hard way after making a batch that looked beautiful coming out of the pan and then collapsed into a puddle on the plate about sixty seconds later. Embarrassing.
A hot skillet — medium-low so the outside gets crispy before the inside overheats — and a little patience on each side is the whole trick. You want the tortilla to turn that deep amber color, the kind that crackles when you press it with a spatula. Once you nail that, the rest is just assembly.
What Goes In — Plus My Honest Notes
- 1 tablespoon mayonnaise & 3 tablespoons sour cream: The base of our creamy jalapeño sauce. The mayo gives it body, the sour cream gives it tang. I use full-fat sour cream here — the low-fat stuff gets watery when you mix it with the pickle juice and it makes the sauce thin.
- 1 tablespoon diced pickled jalapeños + 1 teaspoon juice: Don’t skip the juice. That splash of brine cuts through the richness of the eggs and sausage in a way that fresh jalapeño just can’t. I keep a jar of pickled jalapeños in my fridge door at all times specifically for this sauce.
- Spices: garlic powder, onion powder, chili powder, smoked paprika, cumin: Just a pinch of each. The smoked paprika is the one that makes this taste like something you’d wait in line for. If you only have regular paprika, add an extra pinch of cumin to make up for the missing smokiness.
- 4 frozen hash brown patties: The patties are non-negotiable here. They’re already shaped, they get perfectly crispy in a dry skillet or the oven, and they fit neatly inside the tortilla without overlapping or leaving gaps. If you only have shredded hash browns, press them really dry in a kitchen towel before cooking, and shape them into a rough square the size of the tortilla.
- ½ pound bulk breakfast sausage: Bulk sausage, not links. You want that crumbly, seasoned goodness distributed evenly throughout the wrap. If you can find a local brand with a little sage in it, that’s the one.
- 6 large eggs: Lightly beaten, cooked low and slow until just set. I take them off the heat while they still look a tiny bit wet — they finish cooking in the wrap and stay tender.
- 4 burrito-size flour tortillas (10 inches): This size matters. Anything smaller and you’ll struggle to close the wrap without the fillings spilling out the sides. I use the Mission brand burrito-size ones — they’re flexible enough to fold without tearing.
- ½ cup shredded cheddar: Sharp cheddar is best here. It melts beautifully and holds everything together when the wrap sears. Pre-shredded from a bag works fine in a pinch, but freshly grated melts smoother.
What You’ll Need
- A 12-inch nonstick skillet for searing the wraps
- A small skillet for the sausage and eggs
- A small bowl for the creamy jalapeño sauce
- A baking sheet or large plate for holding the assembled wraps
Let’s Make These Crunchwraps — Step by Step
This goes fast once you start cooking, so read through the steps once before you begin. I like to make the sauce first so it’s ready to go, then cook everything else in sequence.
- Make the sauce: In a small bowl, stir together the mayonnaise, sour cream, diced pickled jalapeños, jalapeño juice, garlic powder, onion powder, chili powder, smoked paprika, cumin, and a pinch of salt. Mix until it’s fully combined and smooth. Set it aside. (📸 Photo tip: The sauce should look creamy and slightly thick, with little flecks of jalapeño and spice throughout.)
- Cook the hash browns: Follow the package directions — I usually bake them on a sheet pan at 425°F for about 12 minutes, flipping halfway, until they’re deeply crispy on both sides. You can also pan-fry them in a dry nonstick skillet over medium heat. Set them aside on a paper-towel-lined plate so they stay crisp.
- Cook the sausage: In a small skillet over medium heat, add the bulk sausage and cook it, breaking it up with a spatula as it browns. Cook until it’s no longer pink and has some browned edges — about 5 minutes. Drain off any excess grease and transfer the sausage to a small bowl.
- Scramble the eggs: Wipe out the same skillet and add the butter over medium-low heat. Pour in the beaten eggs, season with a pinch of salt, and cook, stirring gently with a rubber spatula. Pull them off the heat when they’re still slightly soft and custardy — they’ll finish cooking inside the wrap. Overcooked eggs make the whole crunchwrap dry, and nobody wants that.
- Assemble the wraps: Lay one tortilla flat on your work surface. Spread about ¼ of the creamy jalapeño sauce in a generous circle in the center — leaving a 1-inch border around the edges so you can seal it. Place one hash brown patty right in the center. Top with ¼ of the cooked sausage, ¼ of the scrambled eggs, and ¼ of the shredded cheddar. (📸 Photo tip: Keep the fillings stacked in a compact mound — not spread out — so the folding is tight and clean.)
- Fold them tight: Take the side of the tortilla closest to you and fold it firmly into the center. Then fold in the right side, holding the first fold in place. Continue working your way around in small sections, folding the tortilla over the fillings until everything is completely enclosed. Press gently to seal. Place the wrap seam-side down on a plate or baking sheet while you assemble the rest.
- Sear the wraps: Heat your large nonstick skillet over medium-low heat. Place two of the wraps seam-side down in the pan — don’t crowd them. Cook for 3-4 minutes, until the bottom is deeply golden and crisp. I lift the edge with a spatula to peek. Flip carefully and cook the other side for another 2-3 minutes, until it’s equally golden and the cheese inside has melted. The tortilla should feel tight and sound crisp when you press it with the spatula.
- Rest and serve: Transfer the seared wraps to a cutting board and let them rest for about a minute before slicing. This keeps the fillings from spilling out when you cut. Slice in half or into quarters, serve immediately, and repeat with the remaining two wraps.
Making These for the Week — Yes, They Reheat Well
I make a double batch on Sundays so we’re set for the week. The key to reheating is not reaching for the microwave if you can help it — it softens the tortilla, and you worked too hard on that sear to undo it now.
- Fridge: Wrap each cooled crunchwrap tightly in foil and store up to 4 days.
- Freezer: Wrap each in foil, place in a freezer bag, and freeze for up to 2 months. They thaw overnight in the fridge beautifully.
- Reheat: Air fryer at 350°F for 6-8 minutes, flipping once, until the tortilla gets crispy again. A toaster oven set to 350°F for 10 minutes also works. The microwave will soften the shell — still tastes good, but you lose the crunch. If you use the microwave, finish it in a dry skillet for a minute to crisp it back up.
A Few Things I’ve Learned After Making These Dozens of Times
- Don’t overstuff the tortilla. Leave about an inch of space around the fillings so you have enough tortilla to fold over and seal. I know it’s tempting to pile it high, but a tight, compact wrap stays closed in the pan and eats better.
- The cheese is the glue. Make sure the shredded cheddar sits right on top of the hot fillings so it starts melting immediately. When you press the tortilla into the skillet, that melted cheese fuses the fold shut. No cheese on the edge means the wrap will come undone.
- Let them rest before searing. After you fold each wrap, let it sit seam-side down on the plate for a minute or two. This gives the tortilla time to hold its shape — if you put it straight into the pan, it might relax and unfold.
- Pressure test the sear. When you flip the crunchwrap, press down gently with the spatula for about ten seconds. This ensures even contact with the pan and gives you that deep, all-over golden crust. It makes a tangible difference in the texture.
Swaps That Actually Work
- Vegetarian: Use plant-based breakfast sausage and your favorite egg substitute. The hash browns and cheese do a lot of the heavy lifting here. My sister-in-law makes these for her family and says nobody misses the meat.
- Spicy: Add a drizzle of hot honey before folding, or swap the cheddar for pepper jack cheese. I also sometimes add a thin layer of refried black beans under the hash brown for extra depth.
- Dairy-free: Use a dairy-free cheddar-style shred (I like the Violife brand) and replace the creamy jalapeño sauce with a simple smashed avocado + lime + pickled jalapeño mixture. Different, but very good in its own way.
- Protein swap: Use chopped bacon or crumbled chorizo instead of breakfast sausage. If you use chorizo, drain the grease well before adding the eggs — it can make the scramble greasy if you skip that step.
Questions People Always Ask Me About These
Q: Why did my crunchwrap unfold in the pan?
A: That usually means the tortilla didn’t get hot enough to seal the fold, or you overstuffed it. Make sure your pan is at medium-low heat — not too hot, not too cold — and let the wrap cook seam-side down for a full 3 minutes before you even think about flipping it. The cheese needs time to melt and act as glue.
Q: Can I make these ahead for a crowd?
A: Absolutely. Assemble them the night before, keep them in the fridge uncooked (tightly wrapped in plastic), and sear them fresh in the morning. If they’re cold straight from the fridge, add about a minute to each side of the sear time so the inside gets hot all the way through.
Q: How do I reheat these so they stay crispy?
A: Air fryer at 350°F for 6-8 minutes is my favorite method, hands down. A toaster oven at the same temp for about 10 minutes also works well. The microwave will soften the tortilla, but if you’re in a rush, it’s fine — just finish it in a dry skillet for a minute afterward to bring the crisp back.
Q: What do you serve with these?
A: A simple fruit salad or a side of black beans is my go-to. Sometimes we do a little pile of roasted potatoes for maximum starch. And always, always extra creamy jalapeño sauce on the side for dipping — I double the recipe on purpose now so there’s plenty left over.
More Recipes My Family Makes on Repeat
If you liked this one, here are a few others that get the same reaction at our table:
- The Best Loaded Breakfast Tacos — The ones with the crispy potatoes and the crema that takes exactly two minutes to make.
- Hash Brown Egg Cups — For mornings when you want all these same flavors but without the folding.
- Green Chile Breakfast Burrito — If you want to go down a slightly different, very delicious road with hatch chiles and monterey jack.
Whether you’re feeding a crowd on a sleepy Saturday morning or packing a freezer for the week ahead, this crunchwrap knows exactly what to do. It’s become our Saturday morning tradition, and I have a feeling it might become yours too.
If you make it, drop a comment below and let me know how it went — I love hearing about it. Or tag me on Instagram so I can see your golden, perfectly seared results.
📌 Pin this crispy breakfast crunchwrap recipe for your next weekend brunch or meal prep Sunday — it stays golden even after reheating and my kids ask for it every single week.
Golden Crispy Breakfast Crunchwraps
Equipment
- 12-inch nonstick skillet
- Small skillet
- Small Bowl
- Baking sheet or large plate
Ingredients
Creamy Jalapeño Sauce
- 1 tablespoon mayonnaise
- 3 tablespoons sour cream
- 1 tablespoon diced pickled jalapeños
- 1 teaspoon pickled jalapeño juice
- 1 pinch garlic powder
- 1 pinch onion powder
- 1 pinch chili powder
- 1 pinch smoked paprika
- 1 pinch cumin
- Salt to taste
Filling
- 4 frozen hash brown patties
- 1/2 pound bulk breakfast sausage
- 6 large eggs
- 1 tablespoon butter (for eggs)
- 4 burrito-size flour tortillas (10 inches)
- 1/2 cup shredded sharp cheddar cheese
Instructions
- Make the sauce: In a small bowl, stir together the mayonnaise, sour cream, diced pickled jalapeños, jalapeño juice, garlic powder, onion powder, chili powder, smoked paprika, cumin, and a pinch of salt. Mix until fully combined and smooth. Set aside.
- Cook the hash browns: Follow the package directions — bake on a sheet pan at 425°F for about 12 minutes, flipping halfway, until deeply crispy on both sides. You can also pan-fry in a dry nonstick skillet over medium heat. Set aside on a paper-towel-lined plate.
- Cook the sausage: In a small skillet over medium heat, cook the bulk sausage, breaking it up with a spatula, until no longer pink and browned edges form — about 5 minutes. Drain off excess grease and transfer to a small bowl.
- Scramble the eggs: Wipe out the same skillet and add butter over medium-low heat. Pour in beaten eggs, season with salt, and cook, stirring gently with a rubber spatula. Pull off heat when still slightly soft and custardy.
- Assemble the wraps: Lay one tortilla flat. Spread about 1/4 of the sauce in a generous circle in the center, leaving a 1-inch border. Place one hash brown patty in the center. Top with 1/4 of the sausage, 1/4 of the eggs, and 1/4 of the shredded cheddar.
- Fold them tight: Fold the tortilla side closest to you into the center, then fold in the right side, holding the first fold. Continue folding in small sections until the filling is completely enclosed. Press gently to seal. Place seam-side down.
- Sear the wraps: Heat a large nonstick skillet over medium-low heat. Place two wraps seam-side down in the pan. Cook for 3-4 minutes until deeply golden and crisp. Flip carefully and cook the other side for 2-3 minutes until golden and cheese has melted.
- Rest and serve: Transfer seared wraps to a cutting board and let rest for a minute before slicing. Slice in half or quarters and serve immediately. Repeat with remaining wraps.