
The enemy of a good wrap isn’t the filling. It’s the sogginess that creeps in while you’re not looking. I learned this the hard way, making version after version that fell apart halfway through, leaving a sad heap of Caesar salad on the plate instead of the tidy, handheld lunch I was chasing. The fix wasn’t less dressing or drier chicken. It was one simple step that takes about 90 seconds and changes everything. Now these wraps are a regular in our dinner rotation, and even Simone — who has opinions about everything and isn’t shy about sharing them — asks for them by name.
The short version: Air-fried crispy chicken tossed with a trusty Caesar salad kit, rolled tight into a flour tortilla, and toasted until golden on both sides.
I’ve made these for school lunches, for quick dinners when Marcus is working late, and for weekend lunches when we want something that feels like a treat but takes almost no effort. I’ve also made the mistakes so you don’t have to. What you’re getting here is the version I landed on after all of that testing — the one that holds together, tastes like something you’d pay for at a cafe, and comes together in the time it takes to preheat the oven.
- Serves: 3 as a main (or 6 as a snack or appetizer)
- Hands-On Time: 15 min | Total Time: 20 min
- Difficulty: Easy enough for a school night — no special skills needed
- Cost per serving: ~$3.50
- Calories: ~480 per serving
- Dietary Notes: Adaptable for dairy-free (see swaps below)
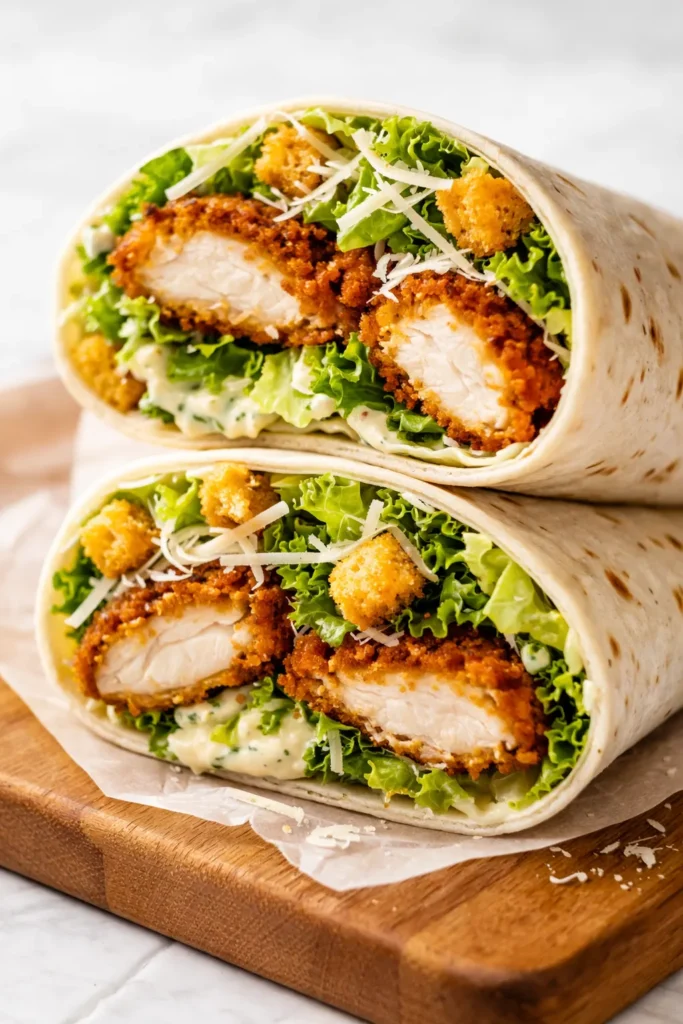
(Photo above: overhead shot of two golden-brown wraps sliced in half on a bias, resting on a rustic wooden cutting board. The cross-section reveals a hearty mix of chopped chicken, shredded Parmesan, and crisp romaine, with a few extra croutons scattered nearby and a small bowl of extra Caesar dressing for dipping. Natural morning light from the left.)
Why Toasting the Outside Changes Everything
A cold wrap made with raw tortillas is fine. I’ve eaten plenty of them. But a toasted wrap is a different thing entirely. The skillet sears the tortilla, creating a crust that keeps the inside from turning into a mess. It also warms the filling just enough to wake up the flavors without wilting the lettuce. The contrast between the shatteringly crisp exterior and the cool, creamy interior is what makes these feel special.
Without that step, you’re eating a salad rolled in bread. With it, you’re eating something that holds its own against a panini. The olive oil in the skillet adds a subtle richness that complements the Caesar dressing, and the heat helps the cheese melt slightly into the surrounding ingredients, binding everything together in a way that cold wrapping never achieves.
This is the principle Celestine understood instinctively — that heat is a tool for transforming texture, not just for cooking proteins. A quick toast turns a good wrap into one you’ll actually remember.
Ingredients That Do the Heavy Lifting
This recipe is built on smart shortcuts. Here’s what you need and why each one matters.
- 3 large crispy chicken strips (from the freezer): These do the heavy lifting in terms of flavor and texture. The coating stays crunchy even after being chopped and tossed with dressing, which is more than I can say for leftover grilled chicken. I’ve tested both, and the frozen crispy strips win every time for structural integrity.
- 1 (11 oz) bag Caesar Chopped Salad Kit: A good Caesar kit is the backbone of a fast weeknight dinner. I don’t apologize for using it. Look for one that includes a separate packet of shredded Parmesan, croutons, and a creamy dressing. The quality of the dressing is what separates a good kit from a great one. I’ve tried the budget brands that taste like bottled ranch — spend the extra dollar on a brand that lists anchovy paste in the ingredients.
- 3 large flour tortillas (burrito-sized): Not the small fajita ones. You need the real estate to roll a proper burrito without overstuffing. A burrito-sized tortilla gives you room to fold the sides in and roll snugly, which is the whole trick to keeping the filling contained. If you can find uncooked tortillas, cook them halfway in a dry skillet before filling — they’re more pliable and taste significantly better.
- 1 tablespoon olive oil: For the skillet. It gives a better, more even crust than cooking spray, and the flavor adds a subtle fruitiness that plays well with the Caesar dressing. Don’t substitute butter here — it browns too fast and burns before the tortilla is fully toasted.
What You Need to Get Started
- Air fryer: This is the fastest, crispiest way to cook the chicken strips. If you don’t have one, a 400°F oven on a sheet pan will work fine.
- Large nonstick skillet (12-inch is ideal): You need enough surface area to toast the wraps without crowding them. A nonstick surface helps achieve even browning without excessive oil.
- Large mixing bowl: For tossing the chicken, lettuce, and dressing together. A bowl with a wide opening makes mixing and portioning easier.
- Knife: A sharp serrated knife makes the cleanest cut through the crispy exterior.
How to Make Them (The Step-by-Step)
This comes together fast, so I recommend setting everything up before you start. Read through once so you know where you’re going.
- Air fry the chicken: Cook the chicken strips according to the package directions. Usually that means 10 to 12 minutes at 375°F, flipping halfway through. When they’re done, let them cool for at least a minute before chopping. The steam needs to escape, or it will wilt the lettuce the second it hits the bowl. (📸 Photo tip: The chicken should be deep golden brown and visibly crispy. A pale chicken strip will result in a pale, sad wrap.)
- Chop and mix: Dice the cooked chicken into bite-sized pieces — small enough to distribute evenly, but large enough that you still feel the texture. Place the chicken into a large mixing bowl. Open the salad kit and add the chopped lettuce, crouton crumbs (I crush them slightly with my hands before adding), and shredded Parmesan. Pour the dressing over the top and gently toss with your hands or salad tongs until everything is evenly coated. Taste it here. If it needs more salt — and it might, depending on the kit — add a pinch. (📸 Photo tip: Every leaf should be lightly coated in dressing, not pooling at the bottom of the bowl. If there’s excess liquid, drain it off before rolling.)
- Roll the wraps: Divide the filling evenly between the three tortillas, placing it in a log shape near the bottom edge. Leave about two inches of space on the sides. Fold the bottom flap over the filling, pull it toward you firmly but gently to compress the log, then fold the sides in tight. Roll the tortilla away from you, keeping it snug, until it’s a tight cylinder. The seam should be facing down. If the tortilla resists, microwave it for 10 seconds to make it more pliable — this makes a huge difference in preventing tears. (📸 Photo tip: A tight, uniform roll is the difference between a professional-looking wrap and one that falls apart. Take your time here.)
- Toast the outside: Heat the olive oil in a large nonstick skillet over medium heat. Place the wraps seam-side down in the skillet, spacing them apart. Cook until the bottom is deep golden brown, about 45 to 60 seconds. Flip carefully using tongs and cook the other side until golden brown, another 45 to 60 seconds. The tortilla should be crisp to the touch. Don’t walk away during this step — the transition from toasted to burnt happens fast. (📸 Photo tip: Look for an even, nutty brown color with no pale spots. A few darker patches are fine and add flavor.)
- Slice and serve: Transfer the wraps to a cutting board and let them rest for 30 seconds. This brief rest allows the structure to set. Slice in half on a bias using a sharp serrated knife — the sawing motion cuts through the crust without squishing the filling. Serve immediately while the outside is still crispy and the inside is warm.
Prep Ahead Notes for the Week
I make a double batch of the filling on Sunday evenings and keep it ready to go. It takes almost no extra time and makes weekday lunches feel like a reward instead of a chore.
- Fridge: Store the filling (chicken, lettuce, Parmesan, croutons, and dressing) in an airtight container for up to three days. I place a dry paper towel on top before sealing to absorb any excess condensation. Roll and toast fresh each day.
- Freezer: Not recommended for fully assembled wraps. The lettuce gets watery upon thawing, and the texture degrades significantly. If you want to freeze, store the cooked, chopped chicken strips and a stash of the croutons in separate freezer bags. Combine with fresh lettuce and dressing when you’re ready to eat.
- Reheat: The best way to bring a leftover toasted wrap back to life is the air fryer at 350°F for three or four minutes. The oven works too — 375°F for about six minutes. The microwave will make it soft and sad, so I only use that if I have absolutely no other option.
My Best Advice for a Perfect Wrap
- Don’t overstuff the tortilla: It’s tempting to pile in the filling because it all fits in the bowl, but a bulging wrap is a leaky wrap. Use a generous but contained portion — about a heaping cup of filling per burrito-sized tortilla. You want a compact log that leaves room for the edges to fold.
- Crush the croutons before adding them: Whole croutons create sharp edges that poke through the tortilla as you roll. Crushing them into coarse crumbs ensures they distribute evenly throughout the filling and eliminates the tear risk.
- Let the toasted wrap rest before slicing: I know it’s tempting to cut into it immediately, but that 30-second rest lets the structure set. The filling compresses slightly and adheres to the tortilla, so the halves hold together rather than spilling out.
- Use a serrated knife to cut: A sharp serrated knife saws through the crisp exterior without compressing the soft interior. A chef’s knife will squish it. This small detail makes a noticeable difference.
Ways to Switch It Up
This base recipe welcomes adaptation. Here are the variations I’ve tested and the ones my family reaches for most often.
- Dairy-Free: Use a dairy-free Caesar dressing (there are several good bottled options now) and omit the Parmesan or substitute a nut-based alternative like cashew Parm. This is the version I make for my nephew who has a dairy sensitivity — he finishes every bite.
- Spicy: Add a pinch of cayenne pepper or a dash of your favorite hot sauce to the dressing before tossing. A few pickled jalapeños layered into the roll also add heat and tang. My husband Marcus does this version and calls it his “grown-up lunch.”
- Protein Swap: Grilled shrimp or leftover rotisserie chicken works beautifully if you want to skip the frozen strips. If you use rotisserie chicken, warm it slightly before adding to the bowl so the dressing coats it better.
- Gluten-Free: Use large gluten-free flour tortillas. Handle them gently — they tend to tear more easily than standard tortillas. Warm them thoroughly before rolling to improve pliability.
- Vegetarian: Skip the chicken and double down on the texture. Add roasted chickpeas, extra croutons, and a handful of shaved Parmesan for a satisfying meatless version.
Common Questions People Ask
Q: Why did my tortilla tear when I rolled it?
A: Usually the tortilla was too cold or you overstuffed it. Warm the tortillas in the microwave for 10 to 15 seconds before rolling — they become much more pliable and forgiving. Also check your filling volume. A heaping cup is plenty for a burrito-sized tortilla.
Q: Can I use homemade Caesar dressing?
A: Absolutely. This is the one part where a good homemade version can elevate a shortcut meal into something memorable. A quick version with mayo, anchovy paste, lemon juice, garlic, and grated Parmesan will be thinner than bottled dressing. Keep in mind that thinner dressing makes the wrap more prone to sogginess, so don’t go overboard.
Q: How long do these wraps last once assembled and toasted?
A: Eat them within a few hours for the best texture. The crispness fades as the moisture from the filling migrates into the tortilla. If you have leftovers, store them in the fridge and reheat in the air fryer to reclaim some of the crunch.
Q: What do you serve with these wraps?
A: I keep it simple. A piece of fresh fruit or a handful of chips is all you need. Simone likes hers with apple slices. Marcus goes for sweet potato fries if we have them in the freezer. On weekends, I’ll add a cup of tomato soup for dipping — that salty-savory-sweet combination is hard to beat.
More Recipes You’ll Love
If these wraps become a staple in your home the way they have in mine, here are a few other recipes from the kitchen that earn the same kind of repeat requests.
- [INTERNAL LINK PLACEHOLDER: Quick Buttermilk Cornbread] — Sweet, golden, and ready in under 25 minutes.
- [INTERNAL LINK PLACEHOLDER: Simple Red Beans and Rice] — Celestine’s influence in every bite, but streamlined for a weeknight.
- [INTERNAL LINK PLACEHOLDER: Simone’s Panko-Crusted Chicken Tenders] — The ones she actually finishes without being asked to.
These wraps have saved more weeknights than I can count. They’re the answer to the question of what to make when you want something that feels like a treat but takes almost no effort. The crispy exterior, the cool creamy filling, the way it holds together in your hand — it’s a small victory every time.
If you make them, drop a comment below. I love to hear what changes you made and how they turned out for you.
📌 Save this easy chicken Caesar salad wrap recipe for busy weeknights when you need dinner on the table in just 20 minutes.
Crispy Chicken Caesar Wraps
Equipment
- Air fryer (or oven with sheet pan)
- Large nonstick skillet (12-inch)
- Large Mixing Bowl
- Sharp serrated knife
Ingredients
- 3 large frozen crispy chicken strips
For the Caesar Salad
- 1 (11 oz) bag Caesar chopped salad kit (includes lettuce, croutons, Parmesan, dressing)
For Assembly
- 3 large flour tortillas (burrito-sized)
- 1 tablespoon olive oil
- Salt to taste (optional)
Instructions
- Air fry the chicken strips according to package directions, typically 10-12 minutes at 375°F, flipping halfway. Let cool for at least 1 minute before chopping to allow steam to escape.
- Dice the cooked chicken into bite-sized pieces. In a large bowl, combine the chicken, chopped lettuce from the salad kit, crushed croutons (crush them slightly with your hands), and shredded Parmesan. Pour the dressing over the top and toss gently until evenly coated. Taste and add a pinch of salt if needed.
- Divide the filling evenly among the three tortillas, forming a log near the bottom edge. Fold the bottom flap over the filling, pull firmly to compress, then fold in the sides. Roll tightly into a cylinder, seam-side down. If tortillas resist, microwave for 10 seconds to soften.
- Heat olive oil in a large nonstick skillet over medium heat. Place wraps seam-side down and cook until deep golden brown, 45-60 seconds. Flip and cook the other side another 45-60 seconds until crisp.
- Transfer to a cutting board and let rest 30 seconds. Slice in half on a bias using a serrated knife. Serve immediately while the outside is crispy and the inside is warm.