
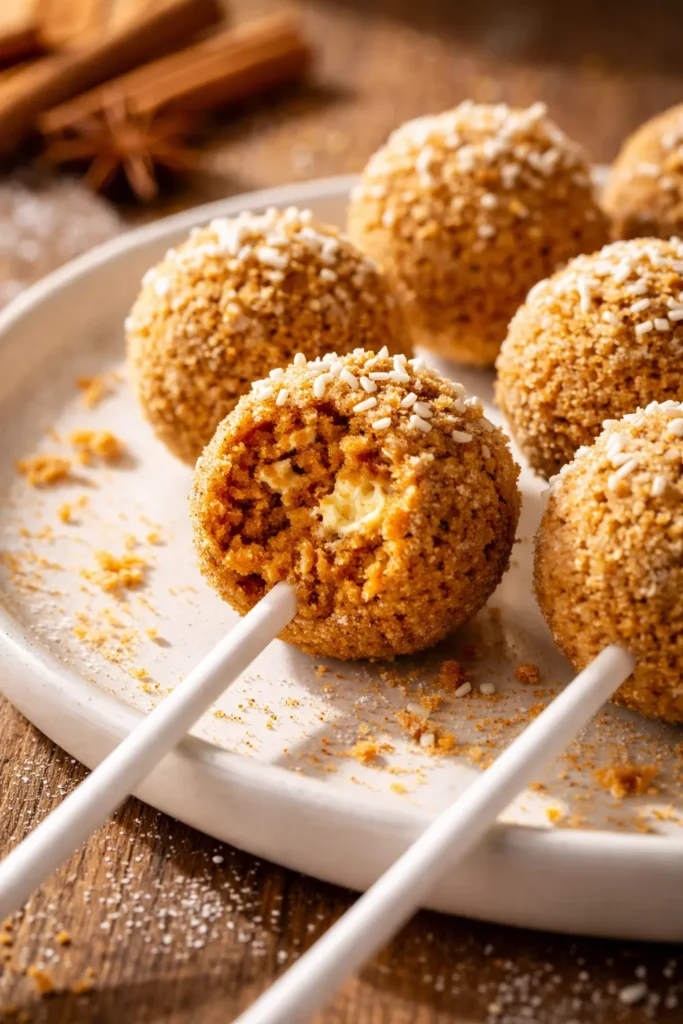
TLDR: These pumpkin cake pops skip the eggs and oil, using just pumpkin purée and cream cheese frosting to bind a spice cake mix. The trick is chilling the cake balls twice — once before inserting the sticks, and once after — so they hold their shape perfectly when dipped. You get a creamy, pumpkin-pie-like center with a crunchy white chocolate shell.
Every batch of cake pops I made before this one ended up sliding right off the stick into the melted chocolate. It was frustrating — all that work crumbling cake and rolling perfect little balls, only to have them fall apart at the dip. I tried adding more frosting to make them stick, which made them too soft. I tried freezing them solid, which made the chocolate crack. This version? It actually works. The trick is using pumpkin purée in place of the eggs and oil — it binds the cake mix into a dense, moist dough that stays put once it’s chilled. Add a dip of the stick into melted chocolate before inserting, and those cake pops aren’t going anywhere. I’ve made them for Halloween parties, Thanksgiving dessert tables, and random fall Fridays when I just want something cute and easy.
The first time I tried making cake pops from scratch, I used a standard vanilla cake recipe. They tasted fine, but they were crumbly and dry — I needed a whole jar of frosting to get them to hold together, and even then, they fell off the sticks. For this pumpkin version, I realized the pumpkin purée itself acts as a binder and moisture agent. By replacing the eggs and oil with a full cup of pumpkin, the cake turns out denser and more forgiving. The final batch held together beautifully — smooth to roll, firm after a 30-minute chill, and the white chocolate coating snapped cleanly when I bit into it. The kitchen filled with the warm aroma of cinnamon and nutmeg as the cake baked, and the finished pops had that unmistakable pumpkin pie spice scent lingering in every bite.
- Serves: 24 cake pops (as a dessert or party treat)
- Hands-On Time: 30 min | Total Time: 1 hr 45 min (incl. cooling & chilling)
- Difficulty: Easy — great for beginners, but requires patience for dipping
- Cost per serving: ~$0.80 per pop
- Nutrition Estimate: 180 Calories, 2g Protein, 24g Carbs, 9g Fat, 5g Saturated Fat, 1g Fiber, 150mg Sodium per serving
- Dietary Notes: Naturally vegetarian. Adaptable for dairy-free
(Photo above: Overhead shot of a white ceramic platter stacked with cake pops on lollipop sticks, drizzled with extra white chocolate and sprinkled with orange and gold fall jimmies. Warm, soft natural lighting from a kitchen window hits the glossy coating. A mini pumpkin and a few cinnamon sticks sit in the background for styling.)
Testing This Recipe: What I Learned Along the Way
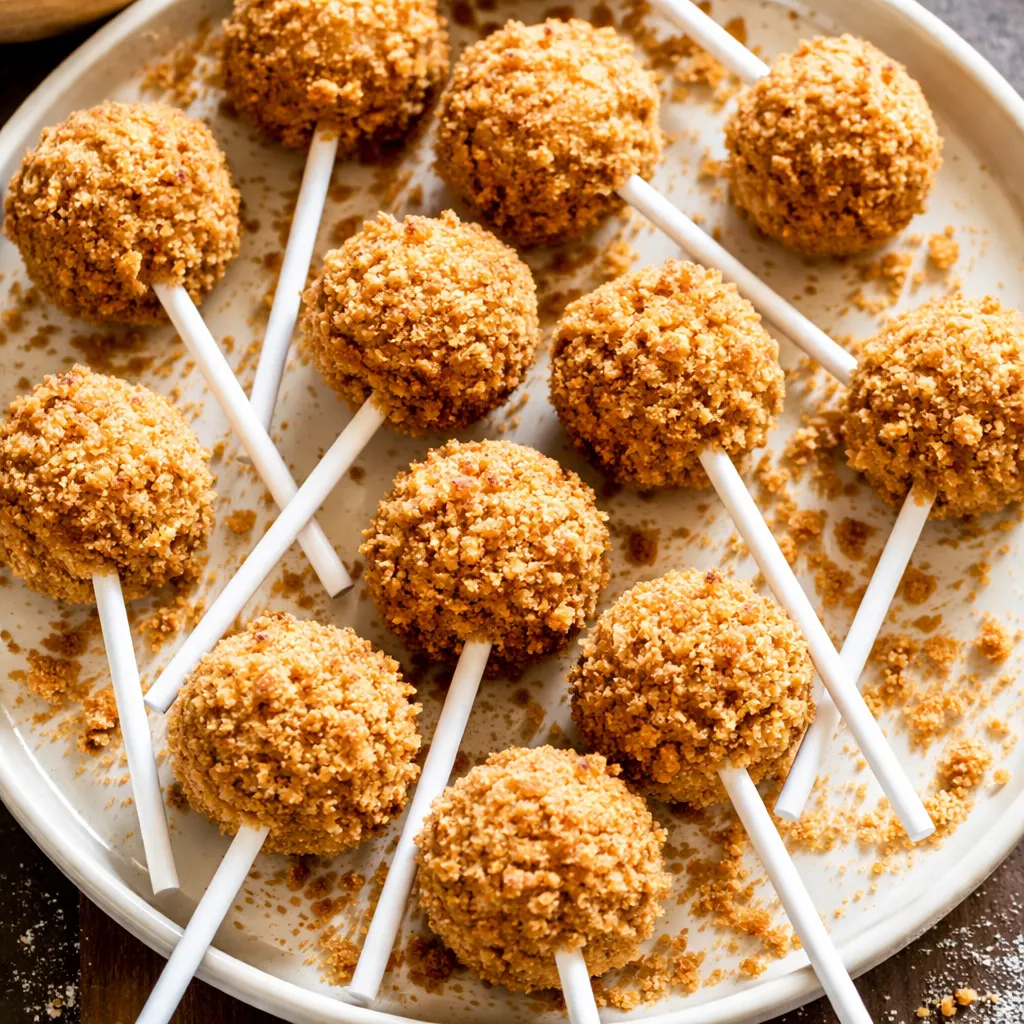
I tested this recipe five times before I got it right. The first batch used the standard eggs-and-oil method — the crumbs were too light, and the pops fell apart in the chocolate. The second batch overdid the frosting, turning the centers greasy. By the third try, I swapped in pumpkin purée and instantly saw a difference: the dough held together like a dense cookie dough, not a crumbly cake. I tested chilling times — 15 minutes wasn’t enough; 45 minutes made the dough too hard to roll. Thirty minutes was the sweet spot. I also tried dipping without the chocolate “glue” on the stick, and about half the pops slid off. A quick dip of the stick tip in melted chocolate before insertion? None of them moved. That final batch, the one you see here, worked exactly as intended — smooth, stable, and delicious.
Everything You Need (And My Honest Notes on Each Ingredient)
- 1 box spice cake mix (15.25 oz): The base of the whole operation. If you can’t find spice cake, use yellow cake mix and stir in 2 teaspoons of pumpkin pie spice yourself.
- 1 cup pumpkin purée (not pumpkin pie filling): This replaces the eggs and oil. Make sure it’s 100% pure pumpkin — the sweetened pie filling has different sugar levels and will make the pops too soft to handle.
- ½ cup cream cheese frosting (store-bought or homemade): You need just enough to bring the crumbs together into a dough. Stick to one brand for consistent results — homemade cream cheese frosting is softer, so use a little less.
- 12 oz white chocolate chips or candy melts (plus 1 tsp coconut oil if needed): Candy melts are more stable for dipping, but good-quality white chocolate chips taste better. The coconut oil thins out the chocolate so it coats smoothly.
- Lollipop sticks: Standard 6-inch sticks work perfectly. Dip the tip in chocolate before inserting for extra grip.
- Optional: Fall sprinkles, crushed graham crackers, or cookie crumbs for garnish.
What to Pull Out Before You Start
- 9×13-inch baking pan — for baking the cake base.
- Parchment paper — to line the tray for chilling.
- Large tray or baking sheet — needs to fit in your fridge or freezer.
- Lollipop sticks — at least 24, in case some snap.
- Foam block or tall jar — for drying the dipped pops upright. A clean takeout container with holes poked in the lid works in a pinch.
Here’s How I Do It (Step by Step)
As the cake bakes, your kitchen will fill with the toasty scent of ginger and cloves — exactly the warm smell of fall you want. The process is simple, but the chilling steps are non-negotiable — trust me, I’ve tried skipping them.
- Bake the cake: Preheat your oven to 350°F. In a large bowl, combine the spice cake mix with 1 cup of pumpkin purée. Mix until fully combined — the batter will be thick. Spread it into a parchment-lined 9×13 pan and bake for 18-22 minutes, until the edges pull away from the pan and the center springs back when lightly touched. Cool completely.
- Crumble & mix: Once the cake is cool, crumble it into fine crumbs using your hands or a food processor. Stir in ½ cup of cream cheese frosting until the mixture forms a soft dough that holds together when squeezed.
- Shape & chill: Roll the dough into 1-inch balls and place them on a parchment-lined tray. Chill for exactly 30 minutes — this firms them up so they can handle the sticks. The dough will feel pliable but not sticky.
- Insert sticks: Melt 2 tablespoons of white chocolate (or candy melts). Dip the tip of each lollipop stick into the melted chocolate, then insert it about halfway into a chilled cake ball. This “glues” the pop to the stick. Chill for another 15 minutes to set the chocolate grip.
- Dip & decorate: Melt the remaining white chocolate with 1 tsp coconut oil (if using) in a deep, narrow mug. Dip each pop straight down and pull it straight up, letting the excess drip off. Gently tap the stick on the rim of the mug to release any air bubbles — the coating will settle into a smooth, glossy shell. Add sprinkles before the coating sets.
- Set & serve: Stand the finished pops upright in a foam block or tall jar. If you don’t have one, lay them on a parchment-lined tray — just know they’ll develop a flat spot on the bottom. Let them set completely, about 20 minutes at room temperature. The white chocolate will harden to a snappy texture.
Make-Ahead Notes (Because We’re All Busy)
You can absolutely prep these in stages. I’ll often bake the cake and crumble it on a Sunday, then roll and dip the pops the next day. The undipped cake balls freeze beautifully, which means you’re always ready for a last-minute party invite.
- Fridge: Store finished pops in an airtight container in the fridge for up to 5 days. Place them in a single layer, or use parchment between layers.
- Freezer: Yes! Freeze the undipped cake balls in a single layer on a tray, then transfer to a zip-top bag for up to 3 months. Dip them straight from the freezer — just add 1 minute to the final chill.
- Reheat: Cake pops are best served cold or at room temperature. Let them sit out for 5 minutes if they’re straight from the fridge.
Things I Wish I’d Known the First Time I Made These
- Don’t overmix the frosting: Add the ½ cup of frosting and stir just until it’s combined. If you keep mixing, the dough will become greasy and the pops won’t hold their shape.
- Chill between every step: It sounds like a hassle, but 30 minutes in the fridge between rolling, sticking, and dipping makes the difference between a pop that stays on the stick and one that slides off.
- Use a deep, narrow container for dipping: A tall glass or a specialized dipping cup lets you submerge the pop fully without drowning your fingers in chocolate. Even if you mess this part up a little, it’ll still taste good — I’ve done it.
- Tap gently to remove excess: Before you add sprinkles, tap the stick lightly against the rim of the cup. This pops any air bubbles and gives you a smooth, professional finish.
Swaps That Actually Work (For Every Kind of Eater)
- Dairy-Free: Use a dairy-free spice cake mix, dairy-free cream cheese frosting, and dairy-free white chocolate. The 1 tsp of coconut oil in the chocolate is already dairy-free.
- Gluten-Free: Yes, a good gluten-free yellow cake mix works here. Add 2 tsp of pumpkin pie spice to replace the spice cake flavor.
- Kid-Friendly (No Chocolate): Kids who don’t love white chocolate can skip the dip entirely. Dust the cake balls with powdered sugar or roll them in crushed graham crackers for a “naked” version.
- Fancy Guest Version: Drizzle the finished pops with salted caramel sauce and a pinch of flaky sea salt. It turns a humble cake pop into a holiday dessert centerpiece.
Troubleshooting Common Issues
Q: Why did my cake pops fall apart in the melted chocolate?
A: This usually happens when the cake balls aren’t chilled long enough. Make sure they’ve had a full 30-minute chill in the fridge. Also, check that your white chocolate isn’t too hot — if it’s warm, it will melt the fat in the frosting and loosen the ball.
Q: Can I use pumpkin pie filling instead of pumpkin purée?
A: Don’t. Pumpkin pie filling has added sugar, corn syrup, and spices that will make the dough too sticky to roll. Stick with 100% pumpkin purée from a can.
Q: How do I know when the cake is done baking?
A: The edges will be golden and pulling away from the pan. The center should spring back when you press it gently with your finger — a toothpick inserted should come out clean.
Q: Can I make these vegan?
A: Yes, with one big swap. Use a vegan cake mix (most spice cake mixes are naturally vegan), vegan cream cheese frosting, and vegan white chocolate. The pumpkin purée works perfectly as an egg replacer in the cake, so no extra flax eggs are needed.
How to Store Your Cake Pops
Q: How long will these cake pops last, and how should I store them?
A: Stored in an airtight container in the fridge, they’ll stay fresh for up to 5 days. I like to layer them with parchment paper so the sprinkles don’t smudge against each other.
Q: Can I make them ahead of time / freeze them?
A: Absolutely. You can freeze the undipped cake balls for up to 3 months. Dip them straight from the freezer after a brief 10-minute thaw at room temperature. Fully dipped pops can also be frozen for up to 2 months.
Q: What’s the best way to reheat them?
A: Reheating isn’t really necessary for cake pops — they’re meant to be served cold or at room temperature. If you want a warm treat, microwave a pop for 5 seconds to soften the chocolate slightly.
Q: What do you serve with these?
A: A hot cup of coffee or a chai latte is the classic pairing. For a full fall dessert board, arrange them alongside caramel apples, mini pumpkin pies, and a bowl of cinnamon-roasted almonds.
I hope these little pops make your fall baking a little more fun — they’ve definitely become my go-to for Halloween parties, Friendsgiving dinners, and those cozy weekends when I just want to be in the kitchen.
If you give them a try, drop a comment and let me know how they turned out — and tag me on Pinterest so I can see your beautiful creations!
📌 These pumpkin pie cake pops stay on the stick and taste like fall in every bite — save this recipe for your Thanksgiving dessert board or next Halloween party!
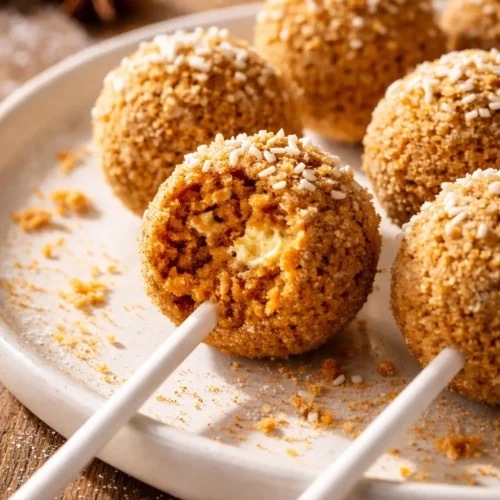
Pumpkin Pie Cake Pops That Don’t Fall Apart — Made with a Box Mix Hack
Equipment
- 9×13-inch baking pan
- Parchment Paper
- Large tray or baking sheet
- Lollipop sticks
- Foam block or tall jar
- Deep narrow mug for dipping
Ingredients
For the Cake Pops
- 1 box spice cake mix (15.25 oz)
- 1 cup pumpkin purée not pumpkin pie filling
- ½ cup cream cheese frosting store-bought or homemade
For Dipping and Assembly
- 12 oz white chocolate chips or candy melts
- 1 teaspoon coconut oil optional, to thin chocolate
- 24 lollipop sticks 6-inch sticks
Optional Garnishes
- fall sprinkles
- crushed graham crackers or cookie crumbs
Instructions
- Bake the cake: Preheat your oven to 350°F. In a large bowl, combine the spice cake mix with 1 cup of pumpkin purée. Mix until fully combined — the batter will be thick. Spread it into a parchment-lined 9×13 pan and bake for 18-22 minutes, until the edges pull away from the pan and the center springs back when lightly touched. Cool completely.
- Crumble & mix: Once the cake is cool, crumble it into fine crumbs using your hands or a food processor. Stir in ½ cup of cream cheese frosting until the mixture forms a soft dough that holds together when squeezed.
- Shape & chill: Roll the dough into 1-inch balls and place them on a parchment-lined tray. Chill for exactly 30 minutes — this firms them up so they can handle the sticks.
- Insert sticks: Melt 2 tablespoons of white chocolate (or candy melts). Dip the tip of each lollipop stick into the melted chocolate, then insert it about halfway into a chilled cake ball. Chill for another 15 minutes to set the chocolate grip.
- Dip & decorate: Melt the remaining white chocolate with 1 tsp coconut oil (if using) in a deep, narrow mug. Dip each pop straight down and pull it straight up, letting the excess drip off. Gently tap the stick on the rim of the mug to release any air bubbles. Add sprinkles before the coating sets.
- Set & serve: Stand the finished pops upright in a foam block or tall jar. If you don’t have one, lay them on a parchment-lined tray. Let them set completely, about 20 minutes at room temperature.
Notes
- Fridge: Store finished pops in an airtight container in the fridge for up to 5 days. Place them in a single layer, or use parchment between layers.
- Freezer: Yes! Freeze the undipped cake balls in a single layer on a tray, then transfer to a zip-top bag for up to 3 months. Dip them straight from the freezer — just add 1 minute to the final chill.
- Reheat: Cake pops are best served cold or at room temperature. Let them sit out for 5 minutes if they’re straight from the fridge.
- Don’t overmix the frosting: Add the ½ cup of frosting and stir just until it’s combined. If you keep mixing, the dough will become greasy and the pops won’t hold their shape.
- Chill between every step: It sounds like a hassle, but 30 minutes in the fridge between rolling, sticking, and dipping makes the difference between a pop that stays on the stick and one that slides off.
- Use a deep, narrow container for dipping: A tall glass or a specialized dipping cup lets you submerge the pop fully without drowning your fingers in chocolate. Even if you mess this part up a little, it’ll still taste good — I’ve done it.
- Tap gently to remove excess: Before you add sprinkles, tap the stick lightly against the rim of the cup. This pops any air bubbles and gives you a smooth, professional finish.
Related posts:
 This Raspberry Lemon Cake With White Chocolate Is the Only Layer Cake You Need for Spring Celebrations
 Peach Cobbler That Bakes Its Own Crust (Golden, Juicy, 40 Minutes)
 The Gluten-Free Chocolate Zucchini Bread You’d Never Guess Is Gluten-Free (It’s Rich, Moist & Impossible to Stop Eating)
 Tender Vegan Mango Coconut Cake with Silky Mango Buttercream and Coconut Crust