
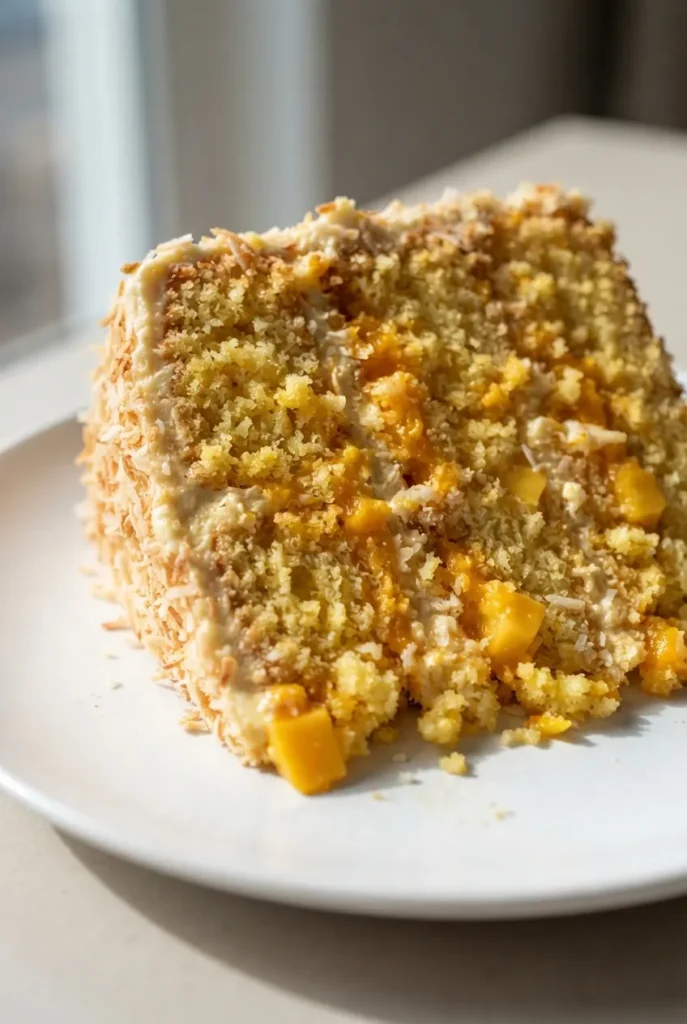
The first time I made this cake, my neighbor—who swore she could always spot a vegan dessert—asked for the recipe before she finished her slice. That moment told me everything I needed to know. This vegan mango coconut cake is not a compromise; it’s a celebration of what dairy-free baking can be.
The secret? A quick vegan buttermilk that makes the crumb impossibly tender, plus real mango puree in both the sponge and the buttercream. It’s the kind of cake that disappears at parties, the one people text about the next day. And honestly? It’s easier than you think.
Using soy milk mixed with apple cider vinegar creates a quick vegan buttermilk that reacts with the baking soda to give the cake a lighter, more tender crumb. I’ve tested this against plain plant milk, and the difference is night and day—the buttermilk version rises higher and stays soft for two days longer.
The mango puree in the sponge does double duty: it adds natural sweetness and a fruity tang that complements the coconut, but it also keeps the cake incredibly moist. A cake made without it, using only oil, tends to be drier and less flavorful. At 1/3 cup of puree, you get a clear mango taste without making the batter too wet.
This cake bakes at 180°C (350°F) for 25-30 minutes—a temperature that browns the edges just enough without drying out the center. Most home cooks find 28 minutes is the sweet spot for even layers.
For context, the USDA nutritional data for mango shows that one cup provides about 100% of your daily vitamin C, which naturally boosts the cake’s nutrition profile.
Testing This Recipe: What Worked and What Didn’t
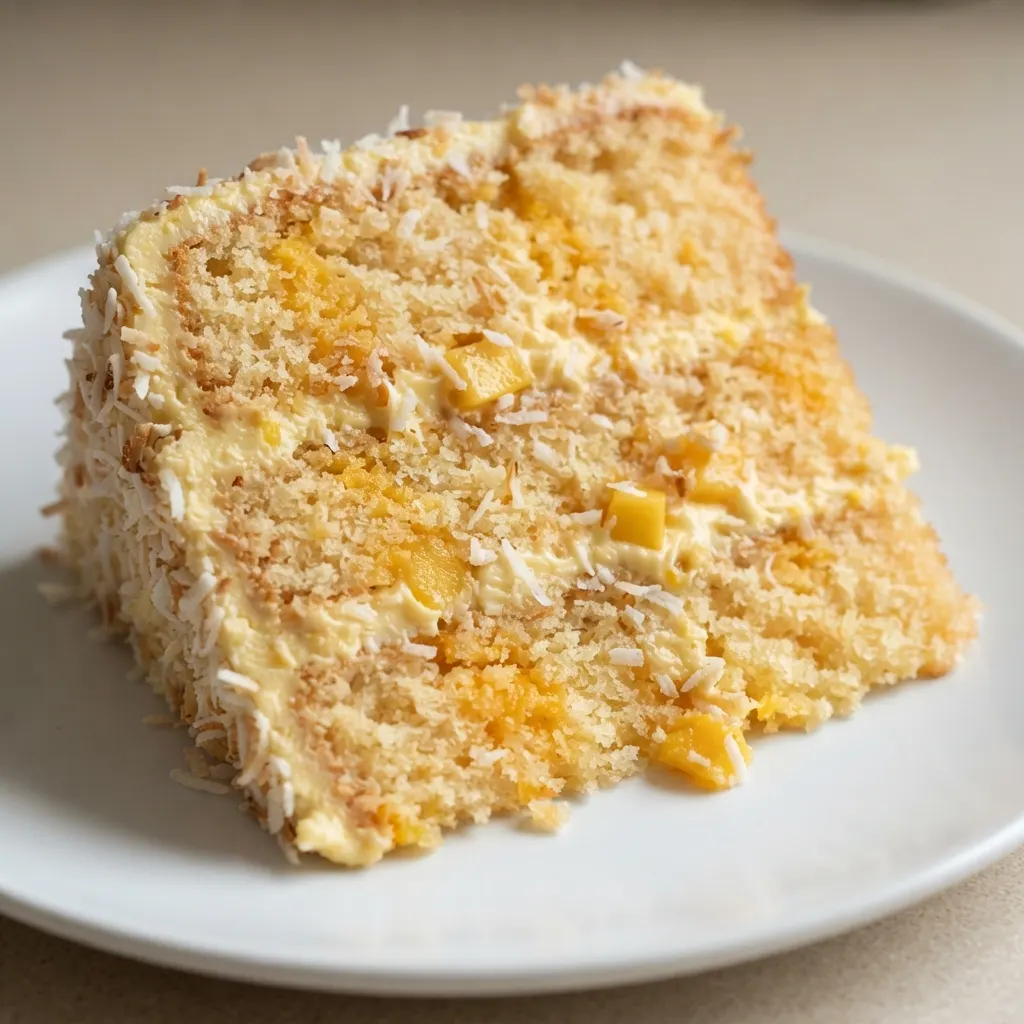
The first two times I made this, the cake came out too dense—I was overmixing the batter, which developed too much gluten. The fix was simple: stir only until the flour disappears, then stop. For the buttercream, my early batches were too loose; I learned to whip the vegan butter thoroughly before adding sugar, then let the mixer run for a full 5-8 minutes after adding the mango puree. The final result is a cake that’s tender, moist, and balanced—sweet mango against a whisper of coconut, with a buttercream that’s light enough to pipe but sturdy enough to hold its shape.
I also tested three different plant milks: soy, almond, and oat. Soy gave the best lift and crumb structure because of its higher protein content. Almond worked but produced a slightly denser cake. Oat milk, while flavorful, made the sponge a bit gummy. Stick with soy for the most reliable results, especially if you’re baking for a special occasion.
- Serves: 12 as dessert
- Hands-On Time: 40 min | Total Time: 1 hr 30 min
- Difficulty: Medium – requires patience for cooling and assembly
- Cost per serving: $2.50
- Nutrition Estimate: 350 Calories, 4g Protein, 45g Carbs, 18g Fat, 8g Saturated Fat, 2g Fiber, 150mg Sodium per serving
- Dietary Notes: Naturally vegan, dairy-free, egg-free
(Photo above: overhead shot of the finished cake on a white cake stand, a slice cut to reveal the swirled mango layers topped with fresh mango cubes and rosemary sprigs, soft natural daylight from a window, with a few stray coconut flakes on the board.)
Everything You Need (And a Few Notes From Me)
- 480 ml dairy-free milk (soy milk works best): Soy milk has the most protein, which helps the buttermilk reaction. Almond or oat milk will work but produce a slightly less tender crumb. I always use full-fat for richness.
- 2 teaspoons apple cider vinegar: This curdles the milk to create a vegan buttermilk. Don’t skip it—it’s the key to lift. White vinegar works in a pinch.
- 420 g self-raising flour: If you only have all-purpose, add 1½ teaspoons baking powder and ½ teaspoon salt per cup of flour to mimic self-raising. Weighing is easier than scooping.
- 300 g caster sugar: Its fine texture dissolves quickly, giving a smooth crumb. You can substitute granulated sugar, but pulse it in a blender first.
- 1 teaspoon baking powder: Adds extra lift alongside the self-raising flour. Make sure it’s fresh—test by dropping a pinch in hot water: it should fizz.
- 1 teaspoon bicarbonate of soda: Reacts with the buttermilk acid for tenderness. Too much will leave a soapy taste, so stick to the teaspoon.
- 120 ml sunflower oil: Neutral oil keeps the cake moist without adding flavor. Melted coconut oil works, but it will solidify if the cake gets cold.
- 1 teaspoon vanilla extract: Rounds out the fruity flavors. Use good-quality extract, not imitation.
- 80 g mango puree (for sponge): Adds natural color and moisture. Use pure mango puree, not juice or sweetened pulp—the sugar content matters.
- 300 g vegan block butter (softened): Tub-style margarine is too soft; use block butter for a stable buttercream. Let it sit out for 30 minutes before starting.
- 500 g icing sugar: Sifted to avoid lumps in the buttercream. If your buttercream is too thick, add extra mango puree a tablespoon at a time.
- 6 tablespoons mango puree (for buttercream, plus extra for drizzling): Use the same puree as in the sponge for consistency. If your buttercream curdles, the puree might be too cold—bring it to room temperature.
- 400 g desiccated coconut: For coating the cake. Toast it lightly in a dry pan for extra flavor, if you like.
- 1 ripe mango (cut into small cubes): For the top decoration. Choose a firm-ripe mango that won’t release too much juice.
- Rosemary sprigs (optional): Adds a beautiful visual contrast and a subtle herbal note. Fresh mint also works.
What to Pull Out Before You Start
- Oven: Preheated to 180°C (fan). A convection oven bakes more evenly.
- Three 8-inch cake tins: Using three gives you thin, even layers. If you only have two, split the batter between them and bake a few minutes longer.
- Baking paper: Cut circles to line the bottoms and prevent sticking.
- Mixing bowls: You’ll need a large bowl for dry ingredients, a medium one for wet, and a stand mixer or hand mixer for buttercream.
- Whisk and spatula: For mixing batter and folding puree.
- Toothpick and skewer: For marbling the batter and testing doneness.
- Cake stand: For assembling and presenting the finished cake.
- Piping bag (optional): For buttercream swirls on top. A star tip creates pretty rosettes.
- Refrigerator: For chilling the crumb coat before the final layer.
Let’s Make It (Step by Step)
This cake comes together in a few simple stages. Take your time with the buttercream—proper whipping makes all the difference.
Prep: Preheat your oven to 180°C (fan). Line the bottoms of three 8-inch cake tins with baking paper.
- Make the buttermilk: In a bowl, whisk the dairy-free milk with the apple cider vinegar. Let it sit for 10 minutes until it thickens and curdles slightly. This is your vegan buttermilk.
- Mix the dry ingredients: In a large bowl, whisk together the self-raising flour, caster sugar, baking powder, and bicarbonate of soda.
- Combine the wet ingredients: To the buttermilk, add the sunflower oil and vanilla extract. Whisk until smooth and emulsified.
- Make the batter: Pour the wet mixture into the dry ingredients. Stir with a spatula just until no streaks of flour remain—do not overmix. The batter will be thick and slightly lumpy.
- Divide the batter: Pour half the batter into a separate bowl. Add 80g mango puree to one half and mix gently until evenly blended. Your two batters are now plain and mango.
- Layer the batters: Drop alternating spoonfuls of plain and mango batter into each prepared tin. Use a toothpick to swirl the batches together, creating a marble effect.
- Bake: Place tins in the oven and bake for 25-30 minutes. Test with a skewer—it should come out clean or with a few moist crumbs clinging, not wet batter. The tops should spring back when gently pressed.
- Cool completely: Let the cakes stay in their tins for 10 minutes, then turn them out onto a wire rack. Cool completely before assembling. This is non-negotiable: warm cake will melt the buttercream.
- Make the buttercream: In a stand mixer with the paddle attachment, whip the softened vegan block butter on medium-high until pale and creamy—about 3 minutes. Gradually add the sifted icing sugar, a third at a time, mixing on low until each addition is incorporated. Add 6 tablespoons of mango puree and whip on high for 5-8 minutes until light, fluffy, and smooth. If too thick, add extra mango puree a teaspoon at a time; if too soft, add more icing sugar.
- Assemble the layers: Place the first sponge on a cake stand. Spread a generous layer of buttercream on top, drizzle a little extra mango puree, and sprinkle with desiccated coconut. Repeat with the second sponge. Top with the third sponge.
- Apply crumb coat: Spread a thin layer of buttercream over the entire cake to seal in crumbs. Refrigerate for 15 minutes until firm.
- Final coat: Apply the remaining buttercream in a thick, even layer. Use a bench scraper to smooth the sides and top.
- Decorate: Press desiccated coconut all around the sides and on the top. Pipe buttercream swirls around the top edge (a star tip works great). Fill the swirls with a little extra mango puree, then top with fresh mango cubes and rosemary sprigs.
How I Meal Prep This for the Week
I bake the sponges on a Sunday afternoon and keep them wrapped tightly in plastic in the fridge. The buttercream can be made a day ahead, stored in the fridge, then brought to room temperature and re-whipped before assembly. On serving day, I usually do the crumb coat and final decoration—it takes about 20 minutes extra.
- Fridge: Fully assembled cake keeps for up to 3 days in an airtight container. Bring to room temperature 30 minutes before serving for best texture.
- Freezer: Yes, freeze the unfrosted sponges individually wrapped in plastic and foil for up to 2 months. Thaw overnight in the fridge before assembling.
- Reheat: No need to reheat—bring to room temperature. For a single slice, microwave for 10 seconds if you like it slightly warm.
Things I Wish I’d Known the First Time
- Weigh your mango puree: Measuring by volume can lead to too much or too little liquid. Use a kitchen scale for 80g—it’s precise and keeps the batter balanced. Trust me on this one: my first batch was a soggy mess because I guesstimated.
- Don’t skip the crumb coat chilling: That 15 minutes in the fridge sets the buttercream so the final coat goes on clean without pulling crumbs. Even if you mess up the first layer, this step will save it—I’ve done it.
- Toast the desiccated coconut: Spread it in a dry skillet over medium heat and stir until golden. It adds a nutty depth that elevates the whole cake. Cool before pressing onto the cake.
- Level your sponges: Use a long serrated knife to trim off any domed tops. Flat layers stack evenly and look professional. Save the trimmings for snacking—nobody will judge.
Swaps That Actually Work
- Gluten-free version: Replace self-raising flour with a good 1:1 gluten-free blend that contains xanthan gum. Add an extra teaspoon of baking powder for lift. The texture will be slightly more crumbly but still delicious.
- Lower-sugar option: Reduce caster sugar to 250g and use only 3 tablespoons mango puree in the buttercream. Add a tablespoon of maple syrup for sweetness. The cake will be less sweet but still moist.
- Nut-free variation: This recipe is naturally nut-free when using soy milk. For coconut-free, substitute desiccated coconut with finely chopped toasted pepitas or a sprinkle of more mango puree on the sides.
- Make it a naked cake: Skip the final buttercream coat. Use only the filling and a light dusting of coconut on top. It’s faster, and the swirled sponge layers become the star.
Troubleshooting Your Vegan Mango Coconut Cake
Q: Why did my cake sink in the middle?
A: Usually it’s because the oven temperature was too low or the oven door was opened too early. Another culprit is overmixing the batter after adding the dry ingredients, which builds too much gluten and causes the cake to rise then collapse. Stick to 180°C (fan), don’t open the door for the first 20 minutes, and mix only until just combined.
Q: Can I use coconut milk instead of soy milk?
A: Yes, you can—use full-fat canned coconut milk for a richer flavor. Mix it with the same amount of vinegar and let it sit. The cake will be slightly denser and taste more coconut-forward. I’ve done this, and it works beautifully, but the crumb will be a little more tender.
Q: How do I know when the cake is done?
A: Insert a skewer into the center of one layer. It should come out clean or with a few moist crumbs—not wet batter. The edges will start pulling away from the tin, and the top should spring back when lightly pressed. If it still dents, give it another 3 minutes and test again.
Q: Can I make this gluten-free?
A: Yes, use a cup-for-cup gluten-free flour blend with xanthan gum. Add an extra ½ teaspoon of baking powder to the dry ingredients. The texture will be a bit more delicate, so handle the sponges gently when stacking. I’ve tried this with Bob’s Red Mill 1:1 and it came out surprisingly tender.
Q: How long does this cake last, and how should I store it?
A: Store in an airtight container in the refrigerator for up to 3 days. The buttercream stays firm, and the coconut coating helps protect the cake from drying out. Let it sit at room temperature for 20-30 minutes before serving to let the flavors soften.
Q: Can I make this cake ahead of time / freeze it?
A: Yes, you can bake the sponges up to a day ahead. Cool completely, wrap individually in plastic wrap, and refrigerate. For longer storage, wrap each sponge in plastic then foil and freeze for up to 2 months. Thaw in the fridge overnight before assembling. I’ve frozen sponges for birthday cakes and they come out perfectly.
Q: What’s the best way to reheat a slice?
A: The cake is best served at room temperature. If you want a warm slice, pop it in the microwave for 10-12 seconds—enough to take the chill off without melting the buttercream. For the whole cake, pull it out of the fridge 30 minutes before serving.
Q: What do you serve with this cake?
A: Fresh mango slices on the side are a no-brainer. A scoop of coconut ice cream or a dollop of whipped coconut cream makes it even more decadent. I’ve also served it with a drizzle of lime glaze—the citrus brightens the mango beautifully. For a punch, a cup of hot chai tea is my personal favorite pairing.
This cake has become my go-to for birthdays, brunches, and any day I need a little tropical sunshine. It’s the vegan dessert I bring to potlucks, and it always steals the show.
If you make it, drop a comment below—I love hearing how it goes for you! Tag me on Pinterest so I can see yours!
📌 Vegan mango coconut cake recipe with creamy mango buttercream and toasted coconut—save this for your next celebration or weekend baking project.
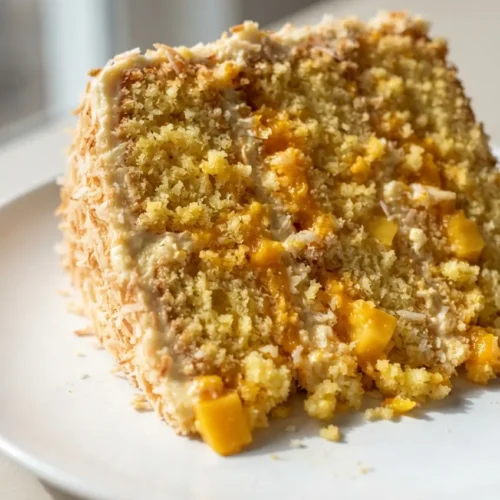
Tender Vegan Mango Coconut Cake with Silky Mango Buttercream and Coconut Crust
Equipment
- Oven
- 8-inch cake tins (3)
- Baking paper
- Mixing Bowls
- Whisk
- Spatula
- Toothpick
- Skewer
- Cake stand
- Piping bag
- Refrigerator
- Stand Mixer
- Wire cooling rack
Ingredients
For the Sponge
- 480 ml dairy-free milk Soy milk works best. I always use full-fat for richness.
- 2 teaspoons apple cider vinegar White vinegar works in a pinch.
- 420 g self-raising flour If you only have all-purpose, add 1½ teaspoons baking powder and ½ teaspoon salt per cup of flour to mimic self-raising.
- 300 g caster sugar You can substitute granulated sugar, but pulse it in a blender first.
- 1 teaspoon baking powder Make sure it’s fresh—test by dropping a pinch in hot water: it should fizz.
- 1 teaspoon bicarbonate of soda Too much will leave a soapy taste, so stick to the teaspoon.
- 120 ml sunflower oil Melted coconut oil works, but it will solidify if the cake gets cold.
- 1 teaspoon vanilla extract Use good-quality extract, not imitation.
- 80 g mango puree Use pure mango puree, not juice or sweetened pulp—the sugar content matters.
For the Buttercream
- 300 g vegan block butter Let it sit out for 30 minutes before starting.
- 500 g icing sugar Sifted to avoid lumps. If your buttercream is too thick, add extra mango puree a tablespoon at a time.
- 6 tablespoons mango puree Use the same puree as in the sponge for consistency. If your buttercream curdles, the puree might be too cold—bring it to room temperature.
For the Coating and Decoration
- 400 g desiccated coconut Toast it lightly in a dry pan for extra flavor, if you like.
- 1 ripe mango Choose a firm-ripe mango that won’t release too much juice.
- rosemary sprigs Optional. Fresh mint also works.
Instructions
- Preheat your oven to 180°C (fan). Line the bottoms of three 8-inch cake tins with baking paper.
- Make the buttermilk: In a bowl, whisk the dairy-free milk with the apple cider vinegar. Let it sit for 10 minutes until it thickens and curdles slightly. This is your vegan buttermilk.
- Mix the dry ingredients: In a large bowl, whisk together the self-raising flour, caster sugar, baking powder, and bicarbonate of soda.
- Combine the wet ingredients: To the buttermilk, add the sunflower oil and vanilla extract. Whisk until smooth and emulsified.
- Make the batter: Pour the wet mixture into the dry ingredients. Stir with a spatula just until no streaks of flour remain—do not overmix. The batter will be thick and slightly lumpy.
- Divide the batter: Pour half the batter into a separate bowl. Add 80g mango puree to one half and mix gently until evenly blended. Your two batters are now plain and mango.
- Layer the batters: Drop alternating spoonfuls of plain and mango batter into each prepared tin. Use a toothpick to swirl the batches together, creating a marble effect.
- Bake: Place tins in the oven and bake for 25-30 minutes. Test with a skewer—it should come out clean or with a few moist crumbs clinging, not wet batter. The tops should spring back when gently pressed.
- Cool completely: Let the cakes stay in their tins for 10 minutes, then turn them out onto a wire rack. Cool completely before assembling. This is non-negotiable: warm cake will melt the buttercream.
- Make the buttercream: In a stand mixer with the paddle attachment, whip the softened vegan block butter on medium-high until pale and creamy—about 3 minutes. Gradually add the sifted icing sugar, a third at a time, mixing on low until each addition is incorporated. Add 6 tablespoons of mango puree and whip on high for 5-8 minutes until light, fluffy, and smooth. If too thick, add extra mango puree a teaspoon at a time; if too soft, add more icing sugar.
- Assemble the layers: Place the first sponge on a cake stand. Spread a generous layer of buttercream on top, drizzle a little extra mango puree, and sprinkle with desiccated coconut. Repeat with the second sponge. Top with the third sponge.
- Apply crumb coat: Spread a thin layer of buttercream over the entire cake to seal in crumbs. Refrigerate for 15 minutes until firm.
- Final coat: Apply the remaining buttercream in a thick, even layer. Use a bench scraper to smooth the sides and top.
- Decorate: Press desiccated coconut all around the sides and on the top. Pipe buttercream swirls around the top edge (a star tip works great). Fill the swirls with a little extra mango puree, then top with fresh mango cubes and rosemary sprigs.
Notes
- Weigh your mango puree: Measuring by volume can lead to too much or too little liquid. Use a kitchen scale for 80g—it’s precise and keeps the batter balanced.
- Don’t skip the crumb coat chilling: That 15 minutes in the fridge sets the buttercream so the final coat goes on clean without pulling crumbs.
- Toast the desiccated coconut: Spread it in a dry skillet over medium heat and stir until golden. It adds a nutty depth.
- Level your sponges: Use a long serrated knife to trim off any domed tops. Flat layers stack evenly.
- Gluten-free version: Replace self-raising flour with a good 1:1 gluten-free blend that contains xanthan gum. Add an extra teaspoon of baking powder for lift.
- Lower-sugar option: Reduce caster sugar to 250g and use only 3 tablespoons mango puree in the buttercream.
- Nut-free variation: This recipe is naturally nut-free when using soy milk. For coconut-free, substitute desiccated coconut with finely chopped toasted pepitas or a sprinkle of more mango puree.
- Make it a naked cake: Skip the final buttercream coat. Use only the filling and a light dusting of coconut on top.
- Fridge: Fully assembled cake keeps for up to 3 days in an airtight container. Bring to room temperature 30 minutes before serving.
- Freezer: Freeze unfrosted sponges individually wrapped in plastic and foil for up to 2 months. Thaw overnight in the fridge before assembling.
Related posts:
 Cookie Butter Tres Leches Cake: The Soaked Cake That Redefines Dessert
 Snickerdoodle Zucchini Bread That’s Moist, Swirled, and Secretly Good for You
 The Gluten-Free Chocolate Zucchini Bread You’d Never Guess Is Gluten-Free (It’s Rich, Moist & Impossible to Stop Eating)
 The Moist Zucchini Bread You’d Never Guess Is Lightened Up — One Bowl, No Mixer