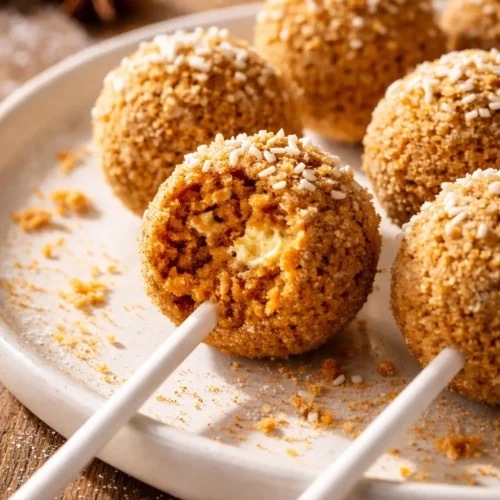
Pumpkin Pie Cake Pops That Don't Fall Apart — Made with a Box Mix Hack
These pumpkin cake pops skip the eggs and oil, using just pumpkin purée and cream cheese frosting to bind a spice cake mix. The trick is chilling the cake balls twice — once before inserting the sticks, and once after — so they hold their shape perfectly when dipped.
Equipment
- 9x13-inch baking pan
- Parchment Paper
- Large tray or baking sheet
- Lollipop sticks
- Foam block or tall jar
- Deep narrow mug for dipping
Ingredients
For the Cake Pops
- 1 box spice cake mix (15.25 oz)
- 1 cup pumpkin purée not pumpkin pie filling
- ½ cup cream cheese frosting store-bought or homemade
For Dipping and Assembly
- 12 oz white chocolate chips or candy melts
- 1 teaspoon coconut oil optional, to thin chocolate
- 24 lollipop sticks 6-inch sticks
Optional Garnishes
- fall sprinkles
- crushed graham crackers or cookie crumbs
Instructions
- Bake the cake: Preheat your oven to 350°F. In a large bowl, combine the spice cake mix with 1 cup of pumpkin purée. Mix until fully combined — the batter will be thick. Spread it into a parchment-lined 9x13 pan and bake for 18-22 minutes, until the edges pull away from the pan and the center springs back when lightly touched. Cool completely.
- Crumble & mix: Once the cake is cool, crumble it into fine crumbs using your hands or a food processor. Stir in ½ cup of cream cheese frosting until the mixture forms a soft dough that holds together when squeezed.
- Shape & chill: Roll the dough into 1-inch balls and place them on a parchment-lined tray. Chill for exactly 30 minutes — this firms them up so they can handle the sticks.
- Insert sticks: Melt 2 tablespoons of white chocolate (or candy melts). Dip the tip of each lollipop stick into the melted chocolate, then insert it about halfway into a chilled cake ball. Chill for another 15 minutes to set the chocolate grip.
- Dip & decorate: Melt the remaining white chocolate with 1 tsp coconut oil (if using) in a deep, narrow mug. Dip each pop straight down and pull it straight up, letting the excess drip off. Gently tap the stick on the rim of the mug to release any air bubbles. Add sprinkles before the coating sets.
- Set & serve: Stand the finished pops upright in a foam block or tall jar. If you don't have one, lay them on a parchment-lined tray. Let them set completely, about 20 minutes at room temperature.
Notes
You can absolutely prep these in stages. I'll often bake the cake and crumble it on a Sunday, then roll and dip the pops the next day. The undipped cake balls freeze beautifully, which means you're always ready for a last-minute party invite.
- Fridge: Store finished pops in an airtight container in the fridge for up to 5 days. Place them in a single layer, or use parchment between layers.
- Freezer: Yes! Freeze the undipped cake balls in a single layer on a tray, then transfer to a zip-top bag for up to 3 months. Dip them straight from the freezer — just add 1 minute to the final chill.
- Reheat: Cake pops are best served cold or at room temperature. Let them sit out for 5 minutes if they're straight from the fridge.
- Don't overmix the frosting: Add the ½ cup of frosting and stir just until it's combined. If you keep mixing, the dough will become greasy and the pops won't hold their shape.
- Chill between every step: It sounds like a hassle, but 30 minutes in the fridge between rolling, sticking, and dipping makes the difference between a pop that stays on the stick and one that slides off.
- Use a deep, narrow container for dipping: A tall glass or a specialized dipping cup lets you submerge the pop fully without drowning your fingers in chocolate. Even if you mess this part up a little, it'll still taste good — I've done it.
- Tap gently to remove excess: Before you add sprinkles, tap the stick lightly against the rim of the cup. This pops any air bubbles and gives you a smooth, professional finish.