
- Serves: 12–16 bars (as a dessert or snack)
- Hands-On Time: 10 minutes | Total Time: 1 hour 10 minutes
- Difficulty: Easy enough for a beginner, impressive enough for a holiday tray
- Cost per serving: Roughly $0.85 per bar
- Nutrition Estimate: 290 Calories, 7g Protein, 32g Carbs, 17g Fat, 9g Saturated Fat, 3g Fiber, 120mg Sodium per serving
- Dietary Notes: Naturally Gluten-Free (verify Chex label), No-Bake
These homemade Kit Kat bars use a crunchy Rice Chex center held together with a peanut butter–maple–coconut oil binder, all coated in a smooth chocolate layer. The trick is pressing the mixture firmly into an 8×8 dish and refrigerating for at least an hour before cutting. Expect a perfectly snappy, melt-in-your-mouth candy bar that rivals the original.
I grew up in a house where Kit Kats were the pinnacle of lunchbox loot. That first crisp snap, the way the chocolate gave way to that light, wafery center—it was the best part of my afternoon. Now, as a mom with a serious sweet tooth and a deep love for shortcuts that actually work, this homemade version was born out of a pantry raid gone right. I had a box of Rice Chex cereal that was about to go stale, a jar of peanut butter with one scoop left, and a serious craving for something crunchy and chocolatey. The result was so good, my husband asked me to “never buy the real ones again.” Honestly? I think he’s right.
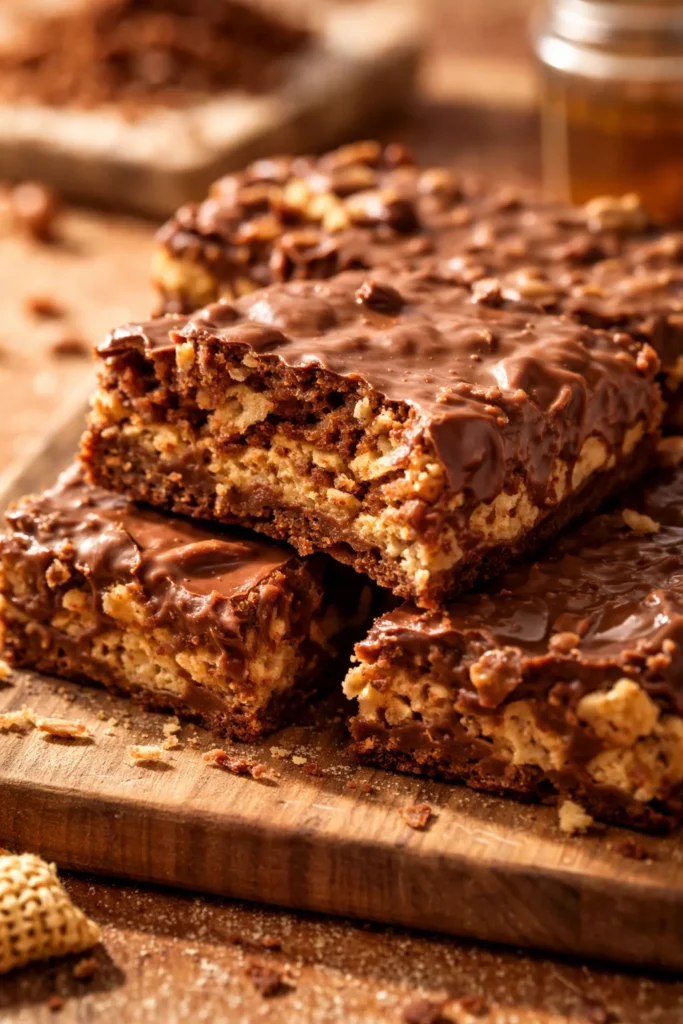
Photo above: An overhead shot of a perfectly cut Homemade Kit Kat bar resting on a piece of parchment paper. The bar is snapped in half, revealing the textured, layered interior. A few loose crumbs and chocolate chips frame the shot. Bright, natural lighting from a kitchen window highlights the glossy chocolate coating.
Why Rice Chex Makes the Perfect Crunchy Center
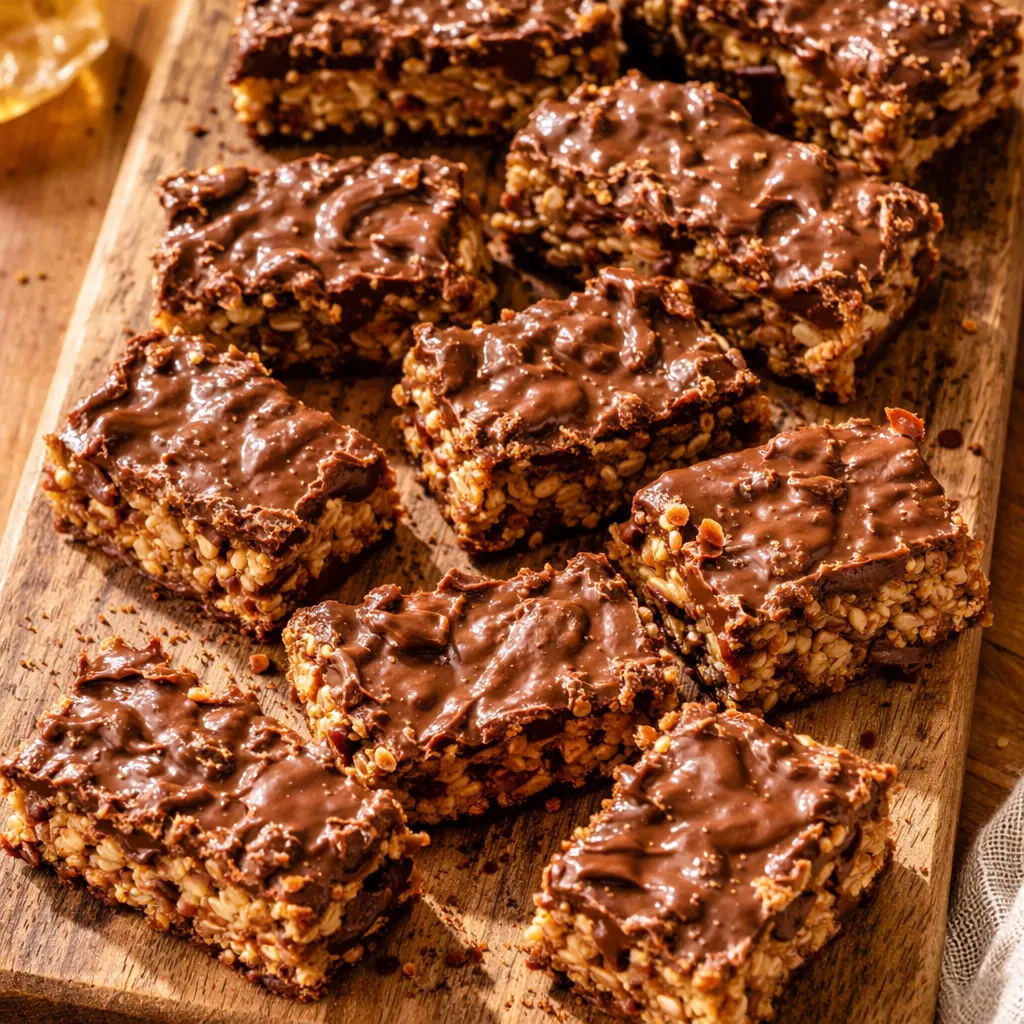
Real Kit Kats have that iconic, airy crunch. Replicating that at home with actual wafers is a pain. Rice Chex cereal is the ultimate cheat code. Its shape and structure create those defined “layers” we all love. When you pour the warm peanut butter–chocolate mixture over it and press it down, it doesn’t turn into a soggy mess. Instead, it clings to every nook and cranny, creating a bar that’s sturdy but still light and crispy. For authoritative nutritional info on ingredients like peanut butter, you can check USDA nutritional data, but rest assured, this treat is about as wholesome as a candy bar gets, using real pantry staples.
The Roles of Coconut Oil and Maple Syrup
These two ingredients do the heavy lifting that corn syrup and stabilizers do in commercial candies. The coconut oil helps the chocolate chip coating stay glossy and ensures it sets up firmly with a clean snap. The maple syrup provides just enough stickiness to bind the Chex together without making it hard or brittle. Trust the process on these two—they’re the secret to that authentic candy-bar texture.
Ingredients Worth Talking About
- 3 cups Rice Chex Cereal: The backbone of our bar. It gives that distinct crunchy, layered texture. Don’t crush it—keep the pieces whole for the best “wafer” effect.
- 1½ cups chocolate chips: This forms the bulk of the coating and the binder. Use semi-sweet or dark chocolate chips. Milk chocolate makes it overly sweet.
- 1 cup Peanut Butter: Provides richness, protein, and helps bind the cereal together. Natural peanut butter works, but stir it well first. If you use the no-stir kind, the bars will be slightly firmer.
- ½ cup maple syrup: Our liquid sweetener and binder. It adds a subtle warmth that complements the chocolate and peanut butter beautifully.
- ¼ cup coconut oil: The magic ingredient for a glossy, snappy chocolate coating. It helps the chocolate chips melt smoothly and firm up perfectly in the fridge.
What to Pull Out Before You Start
- 8 x 8-inch deep dish or baking tray—a standard 8×8 metal or glass pan works great. Deep dish ensures even layers.
- Parchment paper—non-negotiable for easy removal from the pan.
- Large mixing bowl—for combining the Chex and the chocolate mixture.
- Microwave-safe bowl or a small saucepan—for melting the wet ingredients.
- Whisk—to ensure the chocolate mixture is completely smooth and incorporated.
- Sharp knife—for slicing clean bars.
How I Tested This Recipe (and Why It Works)
When I first made these bars, I was in a hurry. I tossed everything together, gave the mixture a gentle press, and popped it in the fridge for 30 minutes. The result? A delicious but crumbly mess. That was the failure: no structure at all. The fix was surprisingly simple. For my second batch, I pressed the mixture firmly using the bottom of a measuring cup, really leaning into it, then chilled it for a full hour. This time, the bars held together with a clean, sharp snap. The third batch I chilled overnight, and that was the winner: the layers stayed so intact that you could pick up a bar without any crumbling. The takeaway? Firm pressure and patience are everything.
Here’s How I Do It (It’s So Simple)
This might be the easiest candy recipe you’ll make all year. No candy thermometer, no tempering chocolate—just a bowl and a fridge. The smell of melted chocolate and peanut butter filling your kitchen is the best part.
- Line It: Line an 8×8-inch dish with parchment paper, leaving a bit of overhang on the sides. This makes lifting the block out effortless.
- Prep the Base: Add the 3 cups of Rice Chex cereal to a large mixing bowl. Set it aside.
- Melt Together: In a microwave-safe bowl, combine the chocolate chips, peanut butter, maple syrup, and coconut oil. Heat in 30-second bursts at 50% power, stirring after each, until fully melted and smooth. (Or melt it slowly on the stovetop over low heat, stirring constantly.) The moment it all comes together, you’ll smell that rich, nutty sweetness.
- Combine: Pour the warm, melted mixture over the Rice Chex. Gently fold until every piece of cereal is completely coated. You’ll hear the gentle crackle as the chocolate wraps around each square. Be thorough but gentle to avoid crushing the Chex.
- Press Firmly: Scrape the mixture into the prepared pan. This is the most important step: press it down firmly and evenly with a spatula or the bottom of a measuring cup. Really compact it. The sound of the mix compressing is deeply satisfying. This ensures the bars hold together.
- Chill: Refrigerate the pan for at least 1 hour, or until fully firm. Do not rush this—it needs time to set properly.
- Cut and Serve: Once firm, lift the block out using the parchment paper. Place it on a cutting board and use a sharp knife to slice it into rectangles or squares, just like the real thing. The first snap of the knife through the chocolate is pure candy-making magic.
Make-Ahead Candy Bars (Yes, Please)
I love having a batch of these in the fridge for when a sugar craving hits. They keep wonderfully, making them perfect for holiday prepping or just a weekly treat.
- Fridge: Store cut bars in an airtight container, separated by wax paper, in the fridge for up to 2 weeks. They actually get better after a day—the flavors meld and the texture becomes even more fudge-like.
- Freezer: Yes! They freeze beautifully for up to 3 months. Freeze them in a single layer on a baking sheet, then transfer to a freezer bag. Eat them straight from the freezer—they’re like a frozen crunch bar, cold and snappy.
- Reheat: Not needed. Take them out of the fridge for 2 minutes before eating for the best texture.
Things I’ve Learned (So You Don’t Have To)
- Don’t Skimp on the Press: I cannot stress this enough. If you don’t press the mixture into the pan firmly enough, the bars will crumble into a delicious, but messy, bowl of Chex mix. Use a piece of parchment over your hands to press it rock solid. The failure taught me that.
- Use a Hot Knife for Clean Cuts: For those perfect, smooth edges like the store-bought bars, run your knife under hot water, dry it off, and slice. The heat glides right through the chocolate without cracking.
- Chill the Pan, Not Just the Mixture: If your kitchen is warm, pop the pan itself into the fridge for 5 minutes before adding the mixture. This helps the bottom set faster, giving you an even cleaner cut later.
Make It Yours
- Chocolate Lover’s Version: Use dark chocolate chips and add ¼ cup of unsweetened cocoa powder to the wet mixture for an ultra-rich, dark chocolate Kit Kat.
- Crunchy Peanut Butter: Swap smooth peanut butter for crunchy. The extra peanut bits add a wonderful texture in the center.
- Kid-Friendly: Use milk chocolate chips and add a handful of mini marshmallows to the mix right after pouring the chocolate over the Chex. Gooey and delicious.
- Holiday Twist: Drizzle melted white chocolate over the top and sprinkle with crushed candy canes or seasonal sprinkles before the chocolate sets.
Troubleshooting: Why Did My Homemade Kit Kat Bars Fall Apart?
Q: Why did my bars fall apart when I cut them?
A: I’ve been there. This almost always happens because the mixture wasn’t pressed firmly enough into the pan, or it wasn’t chilled long enough. That was my first failure. The fix is simple: press down with serious force and refrigerate for at least a full hour. If you’re slicing and it’s cracking, let it sit out for 2 minutes to soften slightly.
Q: Can I use almond butter or sun butter instead of peanut butter?
A: Absolutely. Almond butter works 1:1. Sun butter works too, but keep in mind it tends to turn baked goods a greenish-blue color due to a natural chemical reaction—it’s perfectly safe and tastes fine, but it looks a little funny!
Q: Why is my chocolate coating dull and streaky?
A: This happens if the chocolate mixture was overheated or if it wasn’t whisked smooth enough. To avoid this, melt the chocolate in 30-second increments and whisk vigorously at the end until it’s glossy. The coconut oil helps restore the shine.
Q: Can I make this vegan?
A: Yes, easily. Use dairy-free chocolate chips and ensure your peanut butter is made from just peanuts and salt. The coconut oil and maple syrup are already vegan-friendly.
How Do You Store Homemade Kit Kat Bars?
Q: How long do these bars last, and how should I store them?
A: They last up to 2 weeks in an airtight container in the refrigerator. In warmer weather, they will soften at room temperature, so the fridge is your best bet.
Q: Can I freeze the entire pan of uncut bars?
A: Yes. After chilling the block in the pan, lift it out, wrap it tightly in plastic wrap and then foil, and freeze for up to 3 months. Let it thaw for 10 minutes at room temperature before slicing.
Q: What’s the best way to serve these?
A: Straight from the fridge! Part of the joy of a Kit Kat is the cold, snappy texture. Let them sit for 1–2 minutes if the chocolate is too hard, but don’t let them get warm.
Q: What do you serve with these?
A: They’re perfect on a holiday cookie platter alongside some classic chocolate chip cookies. For a dessert board, pair them with fresh strawberries and a tall glass of cold milk. Or, crumble them over vanilla ice cream for an insane sundae!
These crunchy little bars have honestly changed my snacking game. They hit that exact sweet spot between a store-bought candy bar and a homemade treat, and they take almost no work to pull off. If you try these homemade Kit Kat bars, I’d love to hear how they turned out for you!
Drop a comment below and let me know if your family fights over the crispy end pieces like mine does.
📌 This no-bake homemade Kit Kat bar recipe is crunchy, chocolatey, and uses simple pantry ingredients—save it for your next candy-making afternoon.
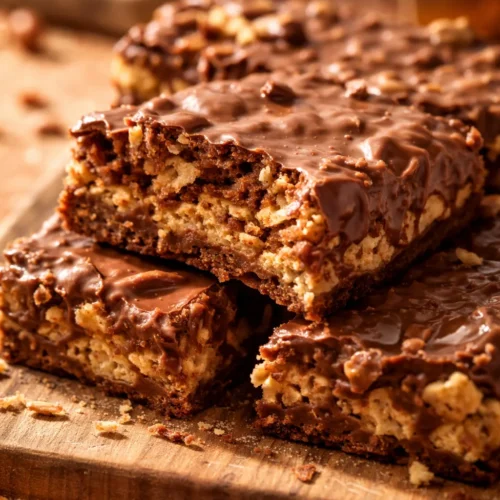
Homemade Kit Kat Bars: The No-Bake Version That Actually Tastes Like the Real Thing
Equipment
- 8×8-inch baking dish
- Parchment Paper
- Large Mixing Bowl
- Microwave-safe bowl
- Whisk
- Sharp knife
Ingredients
- 3 cups Rice Chex Cereal
- 1.5 cups chocolate chips
- 1 cup Peanut Butter
- 0.5 cup maple syrup
- 0.25 cup coconut oil
Instructions
- Line It: Line an 8×8-inch dish with parchment paper, leaving a bit of overhang on the sides. This makes lifting the block out effortless.
- Prep the Base: Add the 3 cups of Rice Chex cereal to a large mixing bowl. Set it aside.
- Melt Together: In a microwave-safe bowl, combine the chocolate chips, peanut butter, maple syrup, and coconut oil. Heat in 30-second bursts at 50% power, stirring after each, until fully melted and smooth. (Or melt it slowly on the stovetop over low heat, stirring constantly.) The moment it all comes together, you’ll smell that rich, nutty sweetness.
- Combine: Pour the warm, melted mixture over the Rice Chex. Gently fold until every piece of cereal is completely coated. You’ll hear the gentle crackle as the chocolate wraps around each square. Be thorough but gentle to avoid crushing the Chex.
- Press Firmly: Scrape the mixture into the prepared pan. This is the most important step: press it down firmly and evenly with a spatula or the bottom of a measuring cup. Really compact it. The sound of the mix compressing is deeply satisfying. This ensures the bars hold together.
- Chill: Refrigerate the pan for at least 1 hour, or until fully firm. Do not rush this—it needs time to set properly.
- Cut and Serve: Once firm, lift the block out using the parchment paper. Place it on a cutting board and use a sharp knife to slice it into rectangles or squares, just like the real thing. The first snap of the knife through the chocolate is pure candy-making magic.
Notes
- Don’t Skimp on the Press: I cannot stress this enough. If you don’t press the mixture into the pan firmly enough, the bars will crumble into a delicious, but messy, bowl of Chex mix. Use a piece of parchment over your hands to press it rock solid. The failure taught me that.
- Use a Hot Knife for Clean Cuts: For those perfect, smooth edges like the store-bought bars, run your knife under hot water, dry it off, and slice. The heat glides right through the chocolate without cracking.
- Chill the Pan, Not Just the Mixture: If your kitchen is warm, pop the pan itself into the fridge for 5 minutes before adding the mixture. This helps the bottom set faster, giving you an even cleaner cut later.
- Chocolate Lover’s Version: Use dark chocolate chips and add ¼ cup of unsweetened cocoa powder to the wet mixture for an ultra-rich, dark chocolate Kit Kat.
- Crunchy Peanut Butter: Swap smooth peanut butter for crunchy. The extra peanut bits add a wonderful texture in the center.
- Kid-Friendly: Use milk chocolate chips and add a handful of mini marshmallows to the mix right after pouring the chocolate over the Chex. Gooey and delicious.
- Holiday Twist: Drizzle melted white chocolate over the top and sprinkle with crushed candy canes or seasonal sprinkles before the chocolate sets.
Related posts:
 My Homemade Bounty Bars: The 4-Ingredient Version That Actually Tastes Like the Real Thing
 Chewy Chocolate Chip Cookie Bars That Are Actually Chewy (Not Cakey) — 20 Minutes to Prep
 Blueberry Lemon Bars That Taste Like Spring in an 8×8 Pan
 White Chocolate Pumpkin Snickerdoodles: The Soft, Bakery-Style Version That Actually Works