
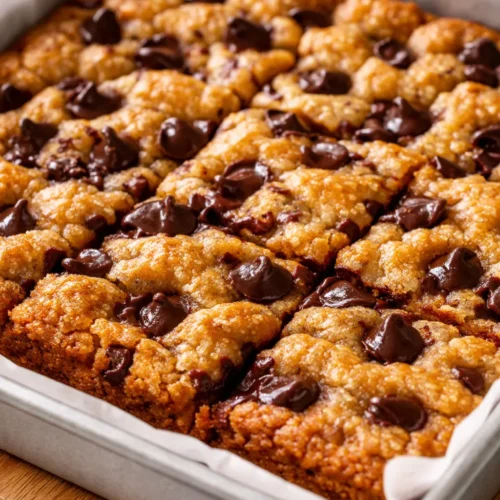
That first bite — where the edges are perfectly chewy, the center is soft but not raw, and the chocolate is melted into puddles rather than stubborn chips — is the exact reason I stopped making regular cookies and started pressing everything into a pan. No scooping. No chilling for hours. Just 20 minutes of prep and the payoff of the best cookie bar you’ll have all year.
The short version: Chewy edges, soft centers, and pools of melted chocolate — all from one pan with no scooping and no stand mixer required.
I’ve tested this about a dozen times, tweaking the butter-to-sugar ratio until it hit exactly the texture I wanted. This batch is the one. The one I bring to school bake sales, the one I make on Sunday afternoons when I want the house to smell like something good, and the one Simone asks for by name when she’s had a long week at school.
- Serves: 16 bars
- Hands-On Time: 20 min | Total Time: 55 min
- Difficulty: Easy — even for a Tuesday afternoon
- Cost per serving: ~$0.75
- Calories: ~280 per bar
- Dietary Notes: Nut-free option. Adaptable for dairy-free.
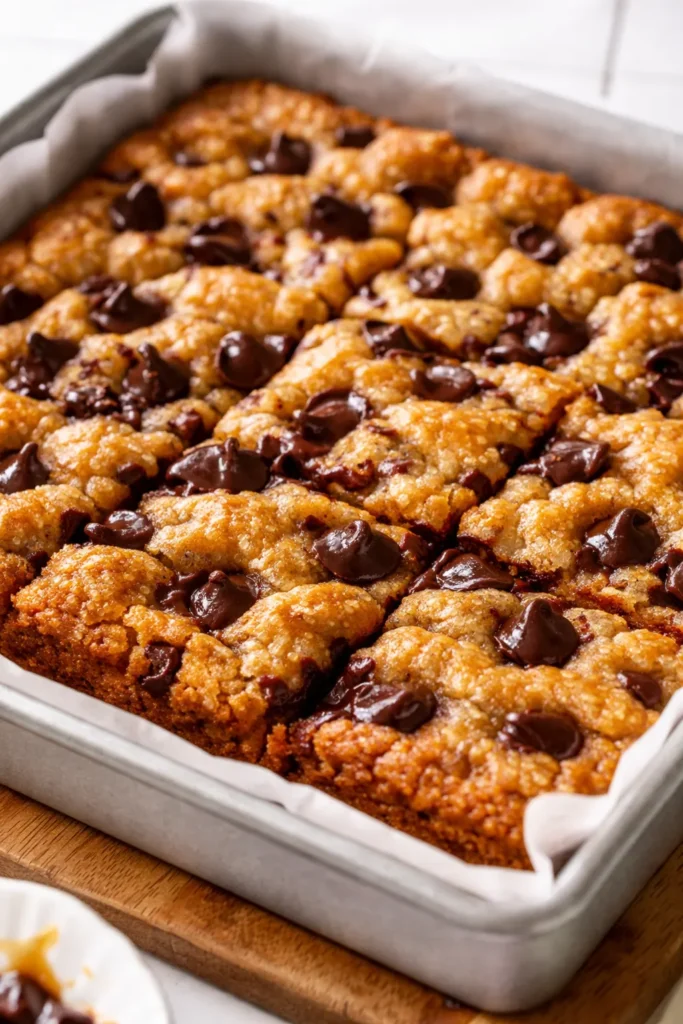
(Photo above: An overhead shot of a golden brown cookie bar being lifted from a metal baking pan, showing the perfectly chewy edge, a soft center studded with dark chocolate puddles, and a slight sheen on the top, natural daylight filtering in from the left side of the frame.)
The Thing That Makes These Chewy (Not Cakey or Crispy)

Browning the butter is the first secret. It removes some of the water content from the butter, concentrating the fat and the flavor. Less water means less steam, and less steam means no puffy, cakey texture. It also adds a nutty depth that makes the chocolate taste darker and richer than it has any right to be.
The second secret is an extra egg yolk. The yolk is pure fat and an emulsifier, which gives you a tender, dense crumb that bends instead of breaks. The white adds too much moisture and structure, making the bars puff up in the oven. One yolk is the magic number here — it makes the difference between a bar that crumbles and a bar that stays soft and chewy for days.
What this produces: A bar that bends slightly in your hand, has a crisp golden edge, and a center that stays soft long after it cools. My kitchen smelled like a bakery within 15 minutes, and Simone asked for one before it was fully cool. I made her wait the extra 10 minutes, which felt like an act of extreme parenting.
What Goes In — Plus My Honest Notes
- 2 sticks (1 cup) unsalted butter: The foundation. Browning it is non-negotiable here — it deepens the flavor and changes the texture completely. Don’t walk away from the pan while it browns. It goes from amber to burnt fast, and there’s no going back. Trust the color, not the clock.
- 1 cup packed light brown sugar: More molasses content than dark, which gives moisture and that signature chew. Dark works too but the flavor is stronger and more caramel-forward. My kids have never once complained about the dark version — they just ask why it tastes ‘extra caramel.’
- 1/4 cup granulated sugar: For the edges — that slight crispness that contrasts with the chewy center. It’s the yin and yang of a perfect bar.
- 1 large egg + 1 large egg yolk: The extra yolk is the texture trick I told you about. Save the white for scrambled eggs in the morning or toss it — no guilt.
- 2 teaspoons vanilla extract: Real, not imitation. Celestine would say ‘if it’s not real, it’s not worth opening the bottle,’ and she was right about everything.
- 2 cups all-purpose flour: Spoon and level it — do not scoop from the bag or you’ll pack in an extra quarter cup and end up with dry bars that nobody wants.
- 1 teaspoon baking soda: Just enough rise to keep them from being hockey pucks. Not more.
- 1 teaspoon salt: Balances the sweet and deepens the chocolate flavor. It’s not optional — it’s structural.
- 2 cups semisweet chocolate chips or chopped chocolate: Chopped chocolate melts into bigger puddles. I use a mix of chips and a chopped bar because I like structure AND pools of melted chocolate in every bite.
- Flaky sea salt for finishing: Optional on paper, non-negotiable in practice. That crunch of salt against the sweet bar is the last detail that makes everyone ask for the recipe.
Tools for This Recipe
- 8×8 or 9×9-inch metal baking pan (glass pans cook slower — if you use glass, add 5 minutes to the bake time)
- Parchment paper — for the sling that lets you lift the whole block of bars out cleanly
- Medium saucepan — for browning the butter
- Mixing bowls and a whisk
- Rubber spatula — for folding without overmixing
That’s it. If you have a stand mixer, you can use it, but a bowl and a whisk work just as well and require less cleanup.
Let’s Make It (Step by Step)
Preheat your oven to 350°F and line your 8×8 pan with parchment paper, leaving an overhang on two opposite sides. That overhang is your handle later — don’t skip it.
- Brown the butter: Melt the butter in a medium saucepan over medium heat. Stir it frequently with a rubber spatula. It will foam up, then the foam will subside, and you’ll see brown specks form at the bottom of the pan. The second it smells nutty and turns amber — about 5 to 7 minutes — pull it off the heat immediately. Pour it into a large mixing bowl to stop the cooking. (📸 Photo tip: You should be able to see the brown milk solids settled at the bottom of the bowl — that’s pure flavor, don’t strain them out.)
- Mix the sugars: Add the brown sugar and granulated sugar to the warm browned butter. Whisk until it looks like wet sand and is completely combined. Let it sit for 2 minutes — this melts the sugar into the fat and starts building that chewy texture from the very first step.
- Add eggs and vanilla: Whisk in the egg, the extra egg yolk, and the vanilla extract. Whisk hard for about 30 seconds until the mixture is smooth, glossy, and lightens slightly in color. This is where the structure starts to come together.
- Fold the dry ingredients: Add the flour, baking soda, and salt all at once. Fold with a rubber spatula until just combined — a few streaks of flour left are fine. Overmixing makes them tough, and nobody wants a tough cookie bar. (📸 Photo tip: The dough should be thick, shiny, and hold together when pressed between your fingers.)
- Fold in the chocolate: Add the chocolate chips and/or chopped chocolate. Fold gently until evenly distributed. Reserve a handful of chocolate to press on top right before baking — it gives the bars that bakery look with chocolate peeking through the surface.
- Press into pan: Scrape the dough into the prepared pan. Press it into an even layer using the spatula or your hands. The dough is thick, so use a little muscle. Press the reserved chocolate pieces onto the top.
- Bake: Bake for 25 to 30 minutes. The edges should be golden brown and the center should look set but still soft — it will jiggle just slightly when you shake the pan. A toothpick inserted in the center should come out with moist crumbs, not wet batter. I start checking at 22 minutes because every oven runs differently, and an underbaked bar is fixable but an overbaked one is not.
- Cool completely: Let the bars cool in the pan on a wire rack for at least 30 minutes. I know it’s hard to wait, but cutting them hot makes them crumble everywhere and the texture doesn’t set properly. Use the parchment sling to lift the whole block out onto a cutting board, then cut into 16 squares with a sharp knife.
How I Make These Ahead (Because We’re All Busy)
I make the dough on Sunday and bake them on Tuesday when the craving hits. The dough rests longer in the fridge, which actually concentrates the flavor even more — the vanilla and brown sugar get deeper over time. If I’m really planning ahead, I press the dough into the pan and freeze it unbaked so I can bake a pan on a whim.
- Fridge (baked): Store in an airtight container at room temperature for up to 4 days. Layer parchment between the bars if you’re stacking them so they don’t stick together.
- Freezer (baked): Cool completely, wrap each bar individually in plastic wrap, then store in a freezer bag. Thaw at room temperature for 15 minutes, or microwave for 20 seconds for that just-baked texture.
- Freezer (dough): Press the dough into the parchment-lined pan, wrap the whole pan well in plastic wrap and foil, and freeze for up to 3 months. Bake from frozen — add 5 to 7 minutes to the bake time and check a few minutes early.
Things I Wish I’d Known the First Time
- Don’t skip the parchment sling. I once had bars stuck in a pan for two full days. The parchment sling — two pieces of paper perpendicular to each other with enough overhang to lift — is the single best thing you can do for your future self. Do it.
- Let them cool ALL the way. I know the smell is torture. But cutting into warm bars releases steam and makes them dry out faster than they should. Plus they crumble under the knife. Patience pays off here, I promise.
- Use good chocolate. The flavor of these bars is simple — butter, sugar, chocolate, vanilla. If you use waxy chips, you get a waxy bar. A good semisweet bar around 60% cacao, chopped into chunks, makes a difference you can taste immediately. Your grandmother was right about using good ingredients.
- Barely bake them. Underbaked is always better than overbaked. A slightly soft center sets up perfectly as it cools. Overbaked gives you a dry bar that Simone will politely decline, and that is the worst review a recipe can get in this house.
Make It Yours — Easy Swaps
- Dairy-Free: Use vegan butter — I like Miyoko’s for browning — and dairy-free chocolate chips. The texture stays remarkably close to the original. Marcus didn’t notice the swap, which is the highest compliment.
- Gluten-Free: Use a 1:1 gluten-free flour blend that contains xanthan gum, like Cup4Cup. The bars will be slightly more tender, so let them cool fully in the pan before cutting to avoid crumbles.
- Add-ins: Swap 1/2 cup of the chocolate for toasted walnuts, pecans, or dried cherries. The salty-sweet-crunchy combination is dangerous and I recommend doubling the batch if you go this route.
- Extra Gooey: Use 1 1/2 cups chocolate chips and press 1/2 cup caramel bits into the top before baking. It’s almost too sweet, but on a bad day it is exactly what you need.
Questions I Get About These Cookie Bars
Q: Why did my bars turn out cakey instead of chewy?
A: You probably used too much flour or skipped the brown butter. Spoon and level your flour — scooping from the bag packs it down and adds too much structure. And don’t skip browning the butter. It removes the excess water that creates steam and puff. You’ve got this next time.
Q: Can I use all brown sugar?
A: You can, but the bars will be softer and almost fudgy rather than chewy with crisp edges. I like the combination of brown and white because the white sugar gives those edges a slight crunch that contrasts with the soft center. If you’re out of white sugar, go ahead and use all brown — it’ll still be good, just different.
Q: How long do these last and how do I store them?
A: In an airtight container at room temperature, they stay soft for 4 days. If you stack them, place parchment between the layers so they don’t weld themselves together. I always freeze half the batch because a frozen cookie bar is a 30-second emergency dessert that tastes like you planned ahead when you absolutely did not.
Q: What do you serve with these?
A: A cold glass of milk is the classic pairing, and my kids agree. For adults, a scoop of vanilla bean ice cream on top of a warm bar is the move — the cold cream against the chewy chocolate bar is a combination that never gets old. I also love them with a strong cup of black coffee in the afternoon when the sugar crash hits.
More Recipes My Family Makes on Repeat
If these bars disappear as fast as they do in my house, here are a few other recipes you’ll want to save for the next time a craving hits:
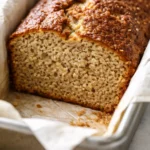
- The Only Banana Bread Recipe You’ll Ever Need — It’s moist, it’s easy, and it uses up those spotty bananas sitting on your counter right now.
- My Go-To Brown Butter Blondies — The brown butter does the same magic here, and they come together just as fast. Warning: they disappear even faster.
- Celestine’s Famous Sweet Potato Pie — The one everyone asks for at Thanksgiving. I finally wrote it down so I could stop texting it to people.
These bars are my emergency dessert, my school bake sale hero, and the thing I make when I want the house to smell like I’ve been baking all afternoon — even though it only took 20 minutes of actual work. They save me every time.
If you make them, drop a comment below and tell me how they turned out. I read every single one, and I love hearing about your baking wins. Tag me on Pinterest so I can see your pan of perfectly chewy bars.
📌 These chewy chocolate chip cookie bars bake up in one pan with no scooping and no stand mixer — save this easy dessert recipe for your next bake sale, weekend baking project, or afternoon craving.
Chewy Chocolate Chip Cookie Bars (Not Cakey)
Equipment
- 8×8 or 9×9-inch metal baking pan
- Parchment Paper
- Medium saucepan
- Mixing Bowls
- Whisk
- Rubber spatula
Ingredients
For the Cookie Bars
- 1 cup unsalted butter (2 sticks)
- 1 cup packed light brown sugar
- 1/4 cup granulated sugar
- 1 large egg
- 1 large egg yolk
- 2 teaspoons vanilla extract (real)
- 2 cups all-purpose flour (spooned and leveled)
- 1 teaspoon baking soda
- 1 teaspoon salt
- 2 cups semisweet chocolate chips or chopped chocolate
For Finishing (optional but recommended)
- Flaky sea salt
Instructions
- Preheat and prep pan: Preheat oven to 350°F. Line an 8×8-inch (or 9×9) metal baking pan with parchment paper, leaving overhang on two opposite sides.
- Brown the butter: In a medium saucepan over medium heat, melt the butter, stirring frequently with a rubber spatula. It will foam, then subside, and brown specks will appear. As soon as it smells nutty and turns amber (about 5-7 minutes), remove from heat immediately and pour into a large mixing bowl. Do not strain out the milk solids.
- Mix sugars: Add brown sugar and granulated sugar to the warm browned butter. Whisk until combined and looks like wet sand. Let sit 2 minutes to melt the sugar into the fat.
- Add egg, yolk, and vanilla: Whisk in the egg, egg yolk, and vanilla extract. Whisk vigorously for about 30 seconds until smooth, glossy, and slightly lighter in color.
- Fold dry ingredients: Add flour, baking soda, and salt all at once. Fold with a rubber spatula until just combined (a few streaks of flour are fine). Do not overmix.
- Add chocolate: Fold in chocolate chips or chopped chocolate until evenly distributed. Reserve a handful to press on top before baking.
- Press into pan: Scrape dough into prepared pan and press into an even layer. Press reserved chocolate pieces onto the top.
- Bake: Bake for 25–30 minutes. Edges should be golden brown; center should look set but still soft (it will jiggle slightly). A toothpick inserted in the center should come out with moist crumbs, not wet batter. Start checking at 22 minutes.
- Cool completely: Cool bars in the pan on a wire rack for at least 30 minutes. Use the parchment sling to lift out the whole block onto a cutting board. Cut into 16 squares with a sharp knife. Sprinkle with flaky sea salt before serving.
Notes
Related posts:
 Low Calorie Banana Bread That Doesn’t Taste Like a Compromise — Finally
 Coconut Flour Banana Bread Muffins That Stay Moist for Days (Not Crumbly)
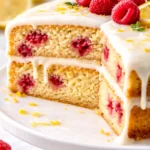 This Raspberry Lemon Cake With White Chocolate Is the Only Layer Cake You Need for Spring Celebrations
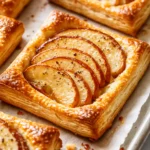 Puff Pastry Apple Tarts That Look Like a Bakery Made Them — with Only 15 Minutes of Effort