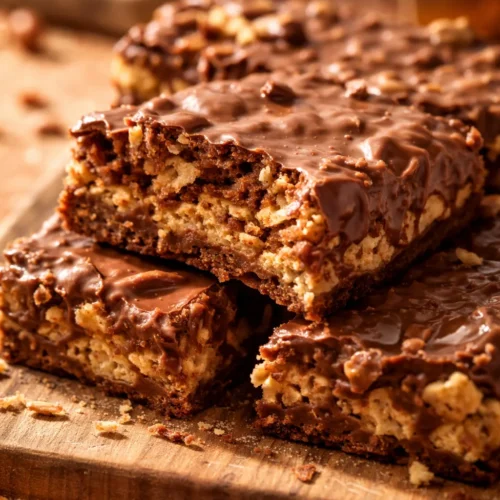
Homemade Kit Kat Bars: The No-Bake Version That Actually Tastes Like the Real Thing
These homemade Kit Kat bars use a crunchy Rice Chex center held together with a peanut butter–maple–coconut oil binder, all coated in a smooth chocolate layer. The trick is pressing the mixture firmly into an 8×8 dish and refrigerating for at least an hour before cutting. Expect a perfectly snappy, melt-in-your-mouth candy bar that rivals the original.
Equipment
- 8x8-inch baking dish
- Parchment Paper
- Large Mixing Bowl
- Microwave-safe bowl
- Whisk
- Sharp knife
Ingredients
- 3 cups Rice Chex Cereal
- 1.5 cups chocolate chips
- 1 cup Peanut Butter
- 0.5 cup maple syrup
- 0.25 cup coconut oil
Instructions
- Line It: Line an 8x8-inch dish with parchment paper, leaving a bit of overhang on the sides. This makes lifting the block out effortless.
- Prep the Base: Add the 3 cups of Rice Chex cereal to a large mixing bowl. Set it aside.
- Melt Together: In a microwave-safe bowl, combine the chocolate chips, peanut butter, maple syrup, and coconut oil. Heat in 30-second bursts at 50% power, stirring after each, until fully melted and smooth. (Or melt it slowly on the stovetop over low heat, stirring constantly.) The moment it all comes together, you'll smell that rich, nutty sweetness.
- Combine: Pour the warm, melted mixture over the Rice Chex. Gently fold until every piece of cereal is completely coated. You'll hear the gentle crackle as the chocolate wraps around each square. Be thorough but gentle to avoid crushing the Chex.
- Press Firmly: Scrape the mixture into the prepared pan. This is the most important step: press it down firmly and evenly with a spatula or the bottom of a measuring cup. Really compact it. The sound of the mix compressing is deeply satisfying. This ensures the bars hold together.
- Chill: Refrigerate the pan for at least 1 hour, or until fully firm. Do not rush this—it needs time to set properly.
- Cut and Serve: Once firm, lift the block out using the parchment paper. Place it on a cutting board and use a sharp knife to slice it into rectangles or squares, just like the real thing. The first snap of the knife through the chocolate is pure candy-making magic.
Notes
Things I've Learned (So You Don't Have To)
- Don't Skimp on the Press: I cannot stress this enough. If you don't press the mixture into the pan firmly enough, the bars will crumble into a delicious, but messy, bowl of Chex mix. Use a piece of parchment over your hands to press it rock solid. The failure taught me that.
- Use a Hot Knife for Clean Cuts: For those perfect, smooth edges like the store-bought bars, run your knife under hot water, dry it off, and slice. The heat glides right through the chocolate without cracking.
- Chill the Pan, Not Just the Mixture: If your kitchen is warm, pop the pan itself into the fridge for 5 minutes before adding the mixture. This helps the bottom set faster, giving you an even cleaner cut later.
- Chocolate Lover's Version: Use dark chocolate chips and add ¼ cup of unsweetened cocoa powder to the wet mixture for an ultra-rich, dark chocolate Kit Kat.
- Crunchy Peanut Butter: Swap smooth peanut butter for crunchy. The extra peanut bits add a wonderful texture in the center.
- Kid-Friendly: Use milk chocolate chips and add a handful of mini marshmallows to the mix right after pouring the chocolate over the Chex. Gooey and delicious.
- Holiday Twist: Drizzle melted white chocolate over the top and sprinkle with crushed candy canes or seasonal sprinkles before the chocolate sets.