
Every high protein yogurt bowl I tried before this one tasted like a math problem dressed up as breakfast. You know the one — chalky, artificially sweetened, and sad enough that you’re hungry again by 9am. This is not that. This is banana pudding for breakfast, and it actually tastes like the thing it’s named after.
The short version: 5 minutes, 35g of protein, and my eight-year-old asked for it three mornings in a row without me mentioning the protein once.
I’ve made about thirty versions of this. Most of them were fine. This one is the one I actually look forward to eating.
- Serves: 1 (easily scaled up for the whole crew)
- Hands-On Time: 5 min | Total Time: 5 min
- Difficulty: So easy you’ll memorize it after the first time
- Cost per serving: ~$2.50
- Calories: ~420 per serving
- Dietary Notes: High protein. Naturally nut-free. Can be gluten-free with certified GF wafers.
(Photo above: An overhead shot of the layered yogurt in a clear glass jar — creamy vanilla yogurt layered with sliced bananas and crushed toasted Nilla wafers, with a final crumble on top. Morning light from the kitchen window hits the side and makes the layers visible.)
The Trick That Keeps It Tasting Like Pudding, Not Like Chalk
The problem with most high-protein yogurt bowls is the protein powder. No matter how expensive it is, if you dump it straight into the yogurt and stir, you get gritty bits and that artificial aftertaste that no amount of fruit can fully cover up. I use a clean vanilla protein powder and bloom it in a tiny splash of milk before mixing it in. That one step eliminates the chalkiness completely and makes it taste like actual pudding mix.
The second thing is how I handle the banana. I mash half of it directly into the yogurt base so the flavor runs all the way through every bite, and I slice the other half on top so you get that fresh, bright banana pop. It keeps each spoonful interesting — creamy, crunchy, sweet, and tangy all at once.
Banana pudding is a staple in my world — it shows up at every family gathering, every church potluck, every summer cookout back home. It’s a labor of love that takes hours. This is not that banana pudding. This is what I make on a Tuesday morning when I need to get out the door. It honors the flavors — the vanilla, the banana, the wafer — without pretending to be the three-hour version. They are both good. They are just different.
Everything You Need (And a Few Notes From Me)
- 1 cup full-fat Greek yogurt: I know non-fat feels virtuous but it breaks and turns watery when you mix it. Full fat stays thick and creamy, which means your breakfast actually feels like a treat. I use Fage 5% because it’s so thick it practically holds its shape.
- 1 scoop clean vanilla protein powder: Quality matters more here than anywhere else. A good whey or a quality plant blend that doesn’t rely on a laundry list of artificial sweeteners. I learned this the hard way after my first batch tasted like a vanilla-scented candle.
- 2 tbsp milk (any kind you have): This is for blooming the protein powder. It sounds fussy but it takes thirty seconds and completely changes the texture.
- 1 large ripe banana: Not green, not black. You want the one with brown spots — that’s where the natural sweetness is highest. Mash half, slice half.
- 8-10 Nilla wafers (or GF alternative): I crush them and toast them in a dry pan for two minutes. It takes them from good to absolutely essential.
- Pinch of fine sea salt: Celestine put salt in her banana pudding. I used to think it was an accident until I tasted it without. A tiny pinch makes the banana taste more like itself and the vanilla taste deeper. You won’t taste the salt itself — you’ll just wonder why it’s so much better.
Tools for the Job (It’s a Short List)
- A bowl and a fork for mashing and mixing
- A small skillet for toasting the crushed wafers
- A glass jar or bowl for layering — wide-mouth jars work perfectly and make it look pretty
That’s genuinely it. No blender, no food processor, no special equipment required.
Let’s Make It — 5 Minutes, I Promise
Read through once before you start. It’s short, but the order matters for the texture.
Toast the wafers first: Crush the Nilla wafers into coarse crumbs (some small, some bigger for crunch). Throw them in a dry skillet over medium heat for about 2 minutes, stirring often. They’ll turn deeply fragrant and toasty. Set them aside while you do the rest.
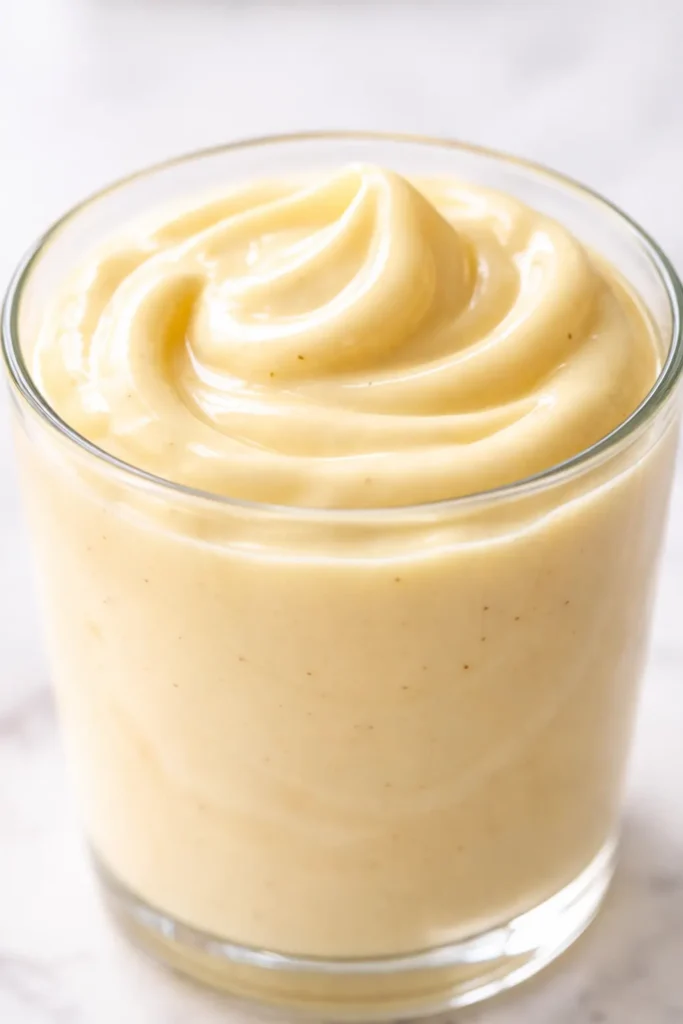
- Bloom the protein powder: In a small bowl, whisk the protein powder with the milk until it forms a smooth, thick paste. There should be zero dry pockets or lumps. (📸 Photo tip: The paste should look like a thick frosting — smooth, shiny, and completely uniform.)
- Build the base: Add the Greek yogurt and the protein paste together in a bowl. Stir until it’s completely homogenous and the color is even. Add the pinch of salt. Mash half the banana right into the yogurt until it’s streaked through but not completely dissolved — you want little pockets of fresh banana throughout.
- Layer it up: Spoon half the yogurt into your jar or bowl. Lay down a layer of sliced banana. Sprinkle half the toasted wafer crumbs over that. Repeat with the remaining yogurt, more banana slices, and the rest of the crumbs. (📸 Photo tip: For the picture-perfect look, wipe the inside of the glass clean with a paper towel before adding the final layer so the stripes are visible.)
- Finish and eat: Top with the last few crumbs right at the end so they stay crunchy. Eat immediately for the full texture experience. If you’re making this for the week, keep the crumbs separate and add them right before you eat.
How I Make This Work for School Mornings
Simone is in second grade, which means mornings are a controlled chaos of finding shoes and packing bags. I mix the yogurt base (steps 1-2) the night before and store it in a jar in the fridge. In the morning, I just slice the banana, toast the crumbs while she’s brushing her teeth, and layer it together. Ninety seconds, start to finish.
- Fridge: The yogurt base lasts 3 days in an airtight container. Give it a quick stir before using it.
- Freezer: Not recommended. Even Greek yogurt gets icy and weird when thawed. This one is strictly fridge territory.
- Reheat: You don’t! But if your bananas are straight out of the fridge, let them sit on the counter for 5 minutes first. Cold bananas lose a lot of their sweetness and flavor concentration.
Things I Wish I’d Known the First Time
- Don’t skip toasting the wafers. Straight out of the box, Nilla wafers are fine. Toasted, they are a completely different ingredient — deep, buttery, almost nutty. It’s two extra minutes and it changes the whole dish.
- Keep the crumbs separate until serving. If you layer everything together and let it sit in the fridge overnight, the wafers turn to mush. Some people like that soft, cobbler-like texture. I am not one of those people. If you want crunch, add the crumbs right before you eat.
- Adjust your protein powder based on the brand. Some scoops are stronger than others. Start with 3/4 of a scoop and taste it. You can always add more, but you can’t take it out without starting over.
- Even if you mess up the ratios, it’s still going to taste good. I’ve made this with too much protein powder (dry and dense) and too little (thin and sweet). It was still better than anything I could buy at a coffee shop. Don’t stress over perfection here.
Swaps That Actually Work
- Gluten-Free: Use certified gluten-free vanilla wafers or even crushed gluten-free graham crackers. The rest of the recipe is naturally GF.
- Dairy-Free: Use a thick coconut milk or oat milk yogurt (unsweetened, plain) and a dairy-free protein powder. The texture will be slightly less thick, but it still scratches the itch.
- Kid-Friendly / Extra Indulgent: Drizzle a teaspoon of warm peanut butter or almond butter between the layers. It adds healthy fat and my daughter says it tastes like a sundae. That’s the version Marcus steals from the fridge.
- Vegan: Follow the dairy-free notes and use a vegan vanilla wafer. It absolutely works.
- No Protein Powder: If you’re out or just don’t use it, mix the yogurt with 2 tbsp of vanilla pudding mix (sugar-free or regular). It won’t have the same protein content, but it will taste exactly like the dessert version.
Questions I Get About This Recipe All the Time
Q: Why did my yogurt turn out runny?
A: You probably used a non-fat or low-fat Greek yogurt. Those have less fat to stabilize them and they release water the second you stir them. Full fat is thicker and holds its structure. Also, if your banana is very ripe (almost black), it will release more liquid. Use a spotty banana, not a mushy one.
Q: Can I use a plant-based protein powder?
A: Yes, but plant proteins are often more absorbent and can make the base dry. Add the milk 1 teaspoon at a time until the paste is smooth. If it seizes up, add a splash more milk and keep stirring. I’ve tested this with a pea protein blend and it worked great for us.
Q: How long does the yogurt base last in the fridge?
A: The mixed base (yogurt + protein + mashed banana) lasts up to 3 days in an airtight container. I make a double batch on Sunday night and we eat it Monday, Tuesday, and Wednesday. Just give it a good stir and add fresh banana slices and crumbs each morning.
Q: What do you serve with this to make it a full meal for a hungry kid?
A: This is already 35g of protein, so it’s substantial on its own. But growing bodies need volume. Simone eats this alongside a scrambled egg or a handful of almonds. I sometimes have it with a slice of the sweet potato muffins I keep in the freezer.
More Recipes My Family Makes on Repeat
If this one works for your mornings, here are a few others that get the same reaction at our table:
- Celestine’s Savory Oatmeal with a Runny Egg — The savory oatmeal that changed my mind about mornings entirely. Fast, filling, and impossible to mess up.
- No-Bake Peanut Butter Protein Bites — Three ingredients, zero baking, and they disappear from the lunchbox in about two minutes flat.
- Sweet Potato Breakfast Muffins — The ones Simone asks for when she’s tired of yogurt. They freeze beautifully and defrost in the microwave in 20 seconds.
This is the breakfast I make when I need something fast that doesn’t taste like I’m cutting corners. It keeps Simone full through her morning classes and it keeps me from eating a sad protein bar at 10am. That is a genuine win in my book.
If you try it, drop a comment below and tell me how it went. I love hearing which variations your family lands on — especially if a picky eater surprised you.
📌 High protein banana pudding yogurt recipe that actually tastes like the real thing — save this for busy school mornings when you need a fast, filling breakfast that everyone will actually eat.
High Protein Banana Pudding Yogurt That Doesn’t Taste Like a Protein Shake
Equipment
- Mixing Bowl
- Fork
- Small skillet
- Glass Jar or Bowl
Ingredients
Base
- 1 cup full-fat Greek yogurt
- 1 scoop clean vanilla protein powder
- 2 tbsp milk (any kind you have)
- 1 pinch fine sea salt
Toppings
- 1 large ripe banana, mashed half and sliced half
- 8-10 Nilla wafers (or GF alternative), crushed and toasted
Instructions
- Crush the Nilla wafers into coarse crumbs. Toast in a dry skillet over medium heat for about 2 minutes, stirring often, until deeply fragrant. Set aside.
- In a small bowl, whisk the protein powder with the milk until it forms a smooth, thick paste with no dry pockets or lumps.
- Add the Greek yogurt and the protein paste to a bowl. Stir until completely homogenous and the color is even. Add the pinch of salt. Mash half the banana right into the yogurt until streaked through but not completely dissolved.
- Spoon half the yogurt into your jar or bowl. Layer with sliced banana. Sprinkle half the toasted crumbs. Repeat with remaining yogurt, banana slices, and crumbs.
- Top with the last few crumbs right before serving to keep them crunchy. Eat immediately. For meal prep, keep crumbs separate and add just before eating.