
Last summer, when the Atlanta heat was hitting 95 by noon, this shrimp ceviche was the only dinner I could stomach making. No stove. No oven. Just a bowl, some fresh shrimp, and a whole lot of lime juice. Simone was skeptical at first — “Raw shrimp, Mom?” — but after one bite she was hooked. She’s been asking for it every weekend since, and I’m not mad about it. This is what summer eating should be: bright, fresh, and completely effortless.
The short version: Perfectly citrus-cured shrimp, creamy avocado, crunchy cucumber, and just enough jalapeño to keep things interesting. Forty-five minutes from start to table, no cooking required, and my whole family devours it.
I’ve tested this about fifteen times to get the balance just right — enough lime to cure the shrimp without making it tough, and a mix of textures that works every single time. This is the version I keep coming back to.
- Serves: 4 as a main dish, 6–8 as an appetizer
- Hands-On Time: 20 min | Total Time: 45 min (includes 25 min cure time)
- Difficulty: Surprisingly easy — just some knife work and patience for the cure
- Cost per serving: ~$4.50
- Calories: ~280 per serving (as main)
- Dietary Notes: Naturally gluten-free and dairy-free. Low-carb friendly.
(Photo above: A wide white ceramic bowl filled with shrimp ceviche, topped with avocado slices and fresh cilantro. Lime wedges on the side. Tortilla chips in a woven basket. Bright natural light from a kitchen window, early afternoon.)
Why My Version Stays Tender (Not Rubbery) Every Time
The secret to ceviche is treating the shrimp right. You don’t want it to sit too long in the acid, or it’ll go from tender to tough in what feels like seconds. I use a 25-minute cure — just long enough for the lime juice to turn the shrimp opaque and firm it up, but not so long that it loses its soft texture.
The other trick? Drain the shrimp after the cure. I pour off the excess lime juice before adding the other ingredients. This keeps the final dish from getting watery and washed out. I learned that one after my first few attempts came out soupy and dull.
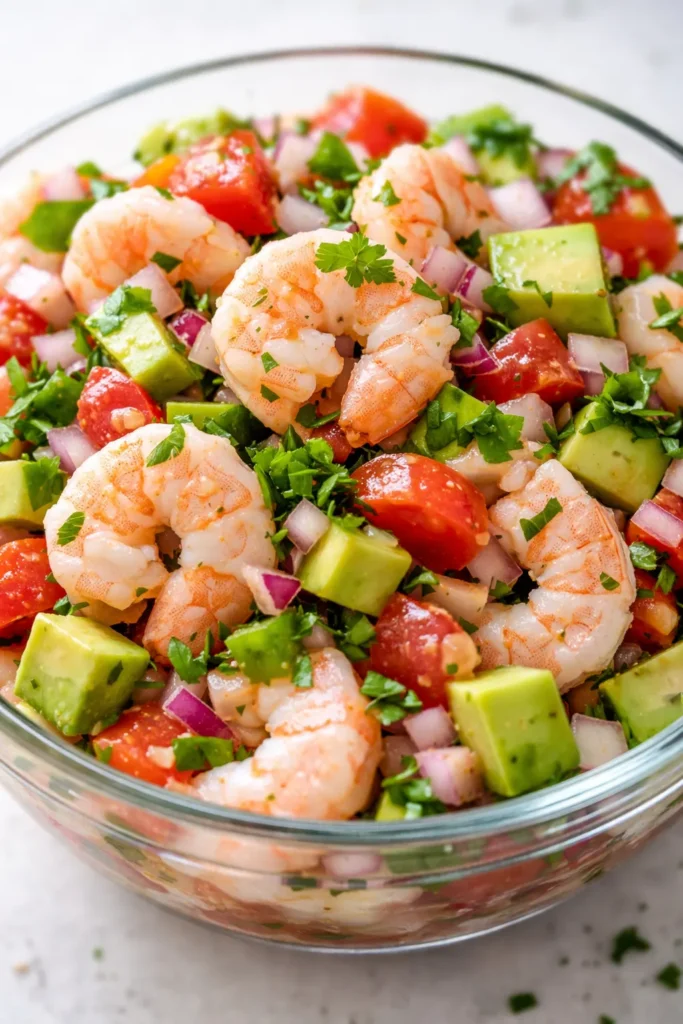
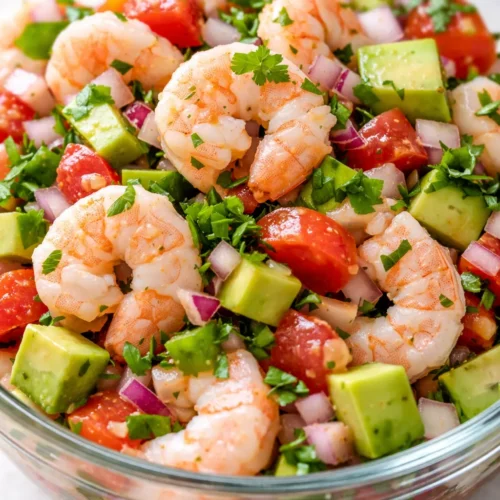
The result is ceviche that’s bright, clean, and perfectly balanced — the shrimp is tender, the vegetables are crunchy, and every bite tastes like summer.
Ingredients Worth Talking About
- 1 lb raw shrimp, peeled and deveined: Tail off, then chopped into ½-inch pieces. Fresh or frozen (thawed) both work. I always pat them very dry before chopping so they soak up the lime juice properly.
- ½ cup fresh-squeezed lime juice (about 5–6 limes): This is non-negotiable. Bottled lime juice has a flat, metallic taste that will ruin the whole dish. I know squeezing limes is a small hassle, but it makes the difference between good ceviche and unforgettable ceviche.
- 1 cup tomato, seeded and diced small: Roma tomatoes work great. Remove the seeds so it doesn’t get watery.
- ½ cup cucumber, seeded and diced small: Adds the crunch that makes this dish so satisfying. My kids don’t even notice they’re eating cucumber.
- 1 large avocado, diced: Fold in gently at the very end. You want chunks, not mush.
- 1 small jalapeño, minced: Remove the seeds for less heat, or leave them in if you like spice. I do a mild version for Simone and add extra jalapeño to mine.
- ½ cup fresh cilantro, chopped: No substitutes here. Cilantro is essential to the flavor profile.
- ¼ cup red onion, finely diced: Soak in cold water for 10 minutes to mellow the bite. This step is easy and makes a big difference — raw onion can be overwhelming.
- Salt and pepper to taste: Don’t skip the salt in the cure step — it helps the shrimp firm up evenly.
What to Pull Out Before You Start
- Large glass or ceramic bowl (don’t use metal — it can react with the acid and leave a weird taste)
- Sharp chef’s knife and cutting board
- Citrus juicer, or just a strong grip
- Fine-mesh strainer
Let’s Make It (Step by Step)
This comes together fast once you’ve got everything chopped. Read through once so you know the timing — the cure step is the most important, and you’ll want to watch the clock.
Prep: Start by soaking the diced red onion in a small bowl of cold water for 10 minutes. This takes the sharp edge off so it doesn’t overpower the ceviche.
- Cure the shrimp: Toss the chopped raw shrimp with the fresh lime juice and ½ teaspoon salt in your glass bowl. Make sure every piece is coated. Cover and refrigerate for exactly 25 minutes. The shrimp will go from pinkish-gray to opaque white and firm up slightly — that’s the acid doing its work. (📸 Photo tip: At 15 minutes, you’ll see the edges turning white. By 25 minutes, the shrimp should be fully opaque.)
- Drain: After 25 minutes, pour the shrimp into a fine-mesh strainer. Shake off the excess lime juice. Don’t skip this — watery ceviche is sad ceviche.
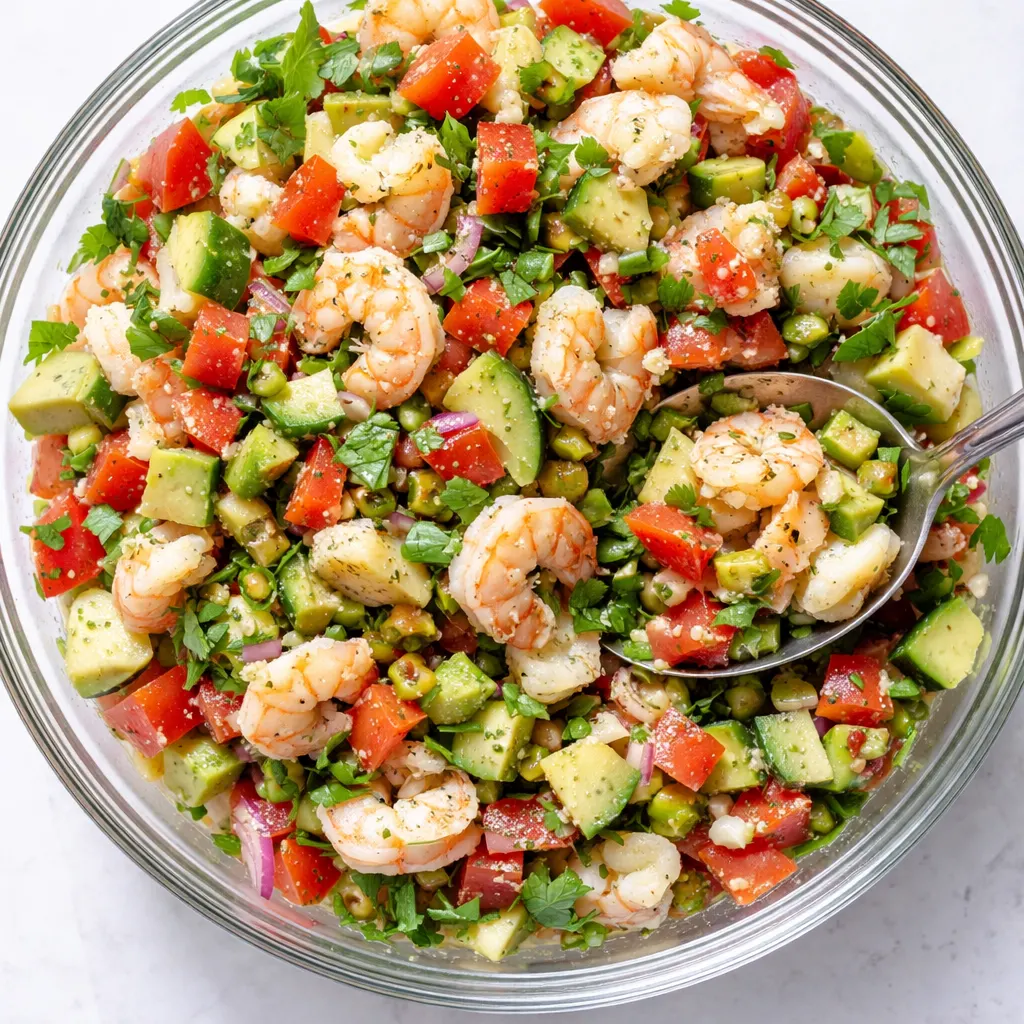
- Mix the veggies: In the same bowl (wiped dry), combine the drained shrimp, tomato, cucumber, drained red onion, jalapeño, and most of the cilantro. Stir gently to combine.
- Season: Taste it. Add more salt if needed, maybe a pinch of black pepper. If it needs more zing, squeeze in one more lime wedge. (📸 Photo tip: This is the moment to adjust — trust your taste buds here.)
- Add avocado: Fold in the diced avocado gently at the very end. You want it in chunks, not mashed. Save a few pieces for topping if you want it to look pretty.
- Serve immediately: Spoon into bowls or serve with tortilla chips, tostadas, or even a fork. It’s also amazing spooned into a halved avocado or on a crispy lettuce cup for a low-carb option.
How I Meal Prep This for the Week
Ceviche is best eaten fresh — the avocado will brown and the texture gets softer after a day. But you can prep everything separately so it comes together in about five minutes. I do this on Sunday mornings when I know I’ll want a no-cook dinner later in the week.
- Fridge: Store the cured and drained shrimp in one container, the chopped veggies (tomato, cucumber, onion, jalapeño) in another, and the avocado whole. Combine everything right before serving.
- Freezer: Not recommended. The texture of the shrimp and veggies will break down completely.
- Reheat: Nope! This is a cold dish. If it’s been refrigerated for a while, let it sit at room temperature for 10 minutes before serving so the flavors open back up.
Things I Wish I’d Known the First Time
- Don’t over-cure the shrimp: 25 minutes is the sweet spot. If you leave it too long, the shrimp gets tough and rubbery. I set a timer on my phone every single time.
- Use fresh lime juice: Bottled juice has a flat, metallic taste. Fresh limes are worth the extra minute of squeezing. If you’re really in a pinch, bottled will technically work, but the dish won’t sing the same way.
- Dry the shrimp after curing: Pour off the excess lime juice before adding the other ingredients. Otherwise, your ceviche will be watery and dull. Learned this one the hard way.
- Add avocado at the very end: Fold it in right before serving. This keeps it from getting mushy and brown. If I’m serving it over time, I’ll put the avocado on the side and let everyone add their own.
Make It Yours: Easy Variations
- Spicy version: Leave the seeds in the jalapeño, or add a minced serrano pepper. A dash of hot sauce at the end works too.
- Kid-friendly version: Leave out the jalapeño entirely and add a little diced mango for sweetness. My kids go absolutely crazy for the mango version. They think it’s a treat, and I’m happy they’re eating protein and vegetables.
- Fish ceviche: Swap the shrimp for 1 lb of fresh snapper or halibut, cut into ½-inch cubes. Cure for 30 minutes instead of 25. The texture is slightly different but just as delicious.
- Add-ins: Diced mango, jicama for extra crunch, or even a splash of Clamato for a more traditional Mexican-style ceviche. I’ve tried them all, and they’re all good in their own way.
Questions I Get About This Recipe All the Time
Q: Why did my shrimp turn out tough?
A: Ugh, I’ve been there. You probably let it sit in the lime juice too long. Twenty-five minutes is the max for shrimp this size. Also, make sure you didn’t start with already-cooked shrimp — that will turn rubbery instantly. Raw shrimp is the way to go here.
Q: Can I use frozen shrimp?
A: Absolutely. Just thaw them completely under cold running water or in the fridge overnight. Pat them very dry before chopping so they soak up the lime juice properly. I use frozen shrimp all the time when fresh isn’t available.
Q: How long does ceviche last in the fridge?
A: It’s at its peak within 2–3 hours of making it. After 24 hours, the texture breaks down and it gets too sour. I don’t recommend making it more than a few hours ahead unless you keep the components separate. And definitely don’t freeze it — the texture will be a mess.
Q: What do you serve with ceviche?
A: Tortilla chips are the classic, and that’s how we eat it most of the time. But we also love it on tostadas with a swipe of crema or mayo, in crunchy lettuce cups for a low-carb option, or spooned over grilled chicken for a full main course. It’s versatile enough for any summer meal.
More Recipes My Family Makes on Repeat
If you liked this bright, fresh ceviche, you’ll definitely want to try these other warm-weather favorites:
- [INTERNAL LINK PLACEHOLDER: Grilled Fish Tacos with Mango Salsa] — The taco version of this vibe, with a smoky, charred twist that my whole family loves.
- [INTERNAL LINK PLACEHOLDER: Cold Brew Marinated Chicken Tacos] — My go-to for taco night when I want something different and unexpected.
- [INTERNAL LINK PLACEHOLDER: Elote (Mexican Street Corn)] — The perfect side dish for any summer meal. Creamy, tangy, and just the right amount of spicy.
This shrimp ceviche is my summer survival dinner. It’s fresh, fast, and feeds the whole family without turning on the stove. Once you get the hang of the lime cure, you’ll be making it every week — just like I do.
Drop a comment below and let me know how it turned out! I love hearing about your kitchen wins. And if you’re on Pinterest, make sure to save this one for your next hot day.
📌 Save this shrimp ceviche recipe for your next summer gathering — it’s the no-cook dinner that always steals the show.
Bright Citrus-Cured Shrimp Ceviche
Equipment
- Large glass or ceramic bowl
- Sharp chef’s knife
- Cutting Board
- Citrus juicer
- Fine-mesh strainer
Ingredients
For the shrimp and cure
- 1 lb raw shrimp, peeled and deveined, tails off, chopped into 1/2-inch pieces
- 1/2 cup fresh squeezed lime juice (about 5-6 limes)
- 1/2 teaspoon salt
For the vegetables
- 1 cup tomato, seeded and diced small
- 1/2 cup cucumber, seeded and diced small
- 1/4 cup red onion, finely diced and soaked in cold water for 10 minutes
- 1 small jalapeño, minced (seeds removed for less heat)
- 1/2 cup fresh cilantro, chopped
- 1 large avocado, diced
- to taste salt and black pepper
Instructions
- Soak the diced red onion in a small bowl of cold water for 10 minutes to mellow the bite. Drain and set aside.
- In a large glass or ceramic bowl, toss the chopped shrimp with the fresh lime juice and 1/2 teaspoon salt. Make sure every piece is coated. Cover and refrigerate for exactly 25 minutes. The shrimp will turn opaque and firm up slightly.
- After 25 minutes, pour the shrimp into a fine-mesh strainer and shake off the excess lime juice. Do not skip this step – watery ceviche is sad ceviche.
- In the same bowl (wiped dry), combine the drained shrimp, tomato, cucumber, drained red onion, jalapeño, and most of the cilantro. Stir gently to combine.
- Taste and adjust seasoning with more salt or black pepper. If it needs more zing, squeeze in one more lime wedge.
- Fold in the diced avocado gently at the very end. Save a few pieces for topping if you want it to look pretty.
- Serve immediately with tortilla chips, tostadas, or spooned into lettuce cups for a low-carb option. It’s also amazing spooned into halved avocados.