
The smell of this braise on a Saturday afternoon is the closest thing to time travel I’ve found — beef that’s fall-apart tender in a gravy so dark and rich you’ll be sopping it up with flour tortillas before you even sit down. I’ve been making this version for about three years now, which means I’ve made it somewhere north of forty times, and I can tell you exactly which shortcuts are fine and which ones will leave you disappointed.
The short version: Browning the beef well, taking the time with the gravy, and letting it simmer until it’s the kind of tender that doesn’t need a knife.
My eight-year-old Simone has been eating this since she was five, and she’s the reason I started serving it with extra tortillas on the side — she uses them to scoop up the last of the gravy, and she’s not wrong to do it. Marcus, my husband, says it’s his favorite thing I make. He says that about a lot of things, but I can tell from how quiet he gets while eating which ones he really means.
- Serves: 6, as a main with tortillas and sides
- Hands-On Time: 25 min | Total Time: 2 hours
- Difficulty: Easy — the kind of cooking that mostly happens while you do other things
- Cost per serving: About $3.50 (using chuck, which is still reasonably priced around here)
- Calories: ~450 per serving (tortillas not included)
- Dietary Notes: Naturally gluten-free if you skip the flour dredge and use a cornstarch slurry instead, or serve with corn tortillas
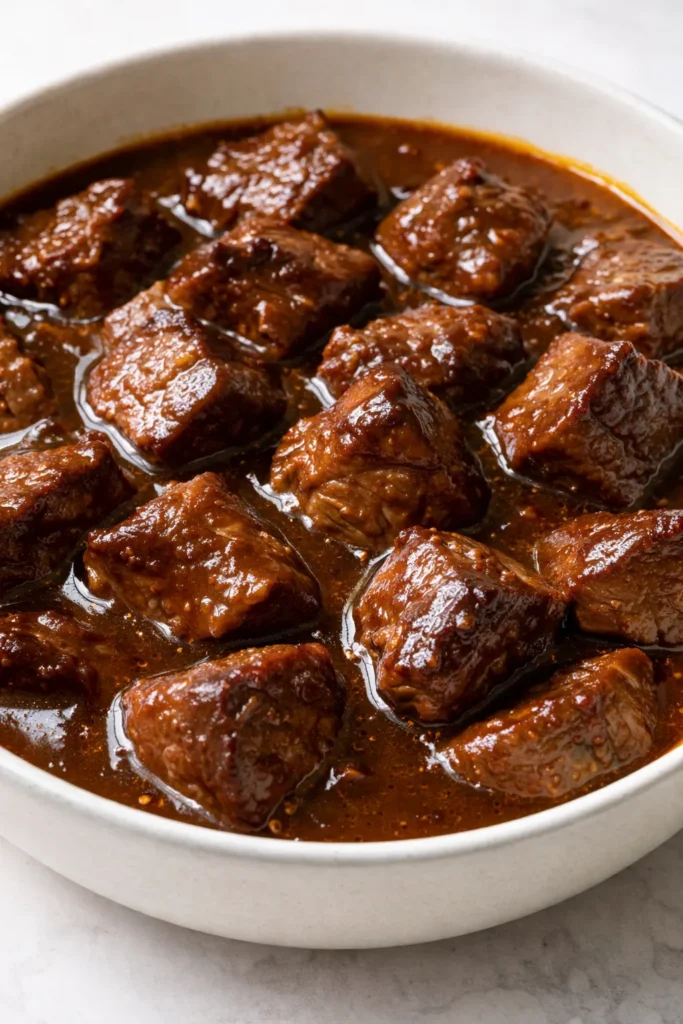
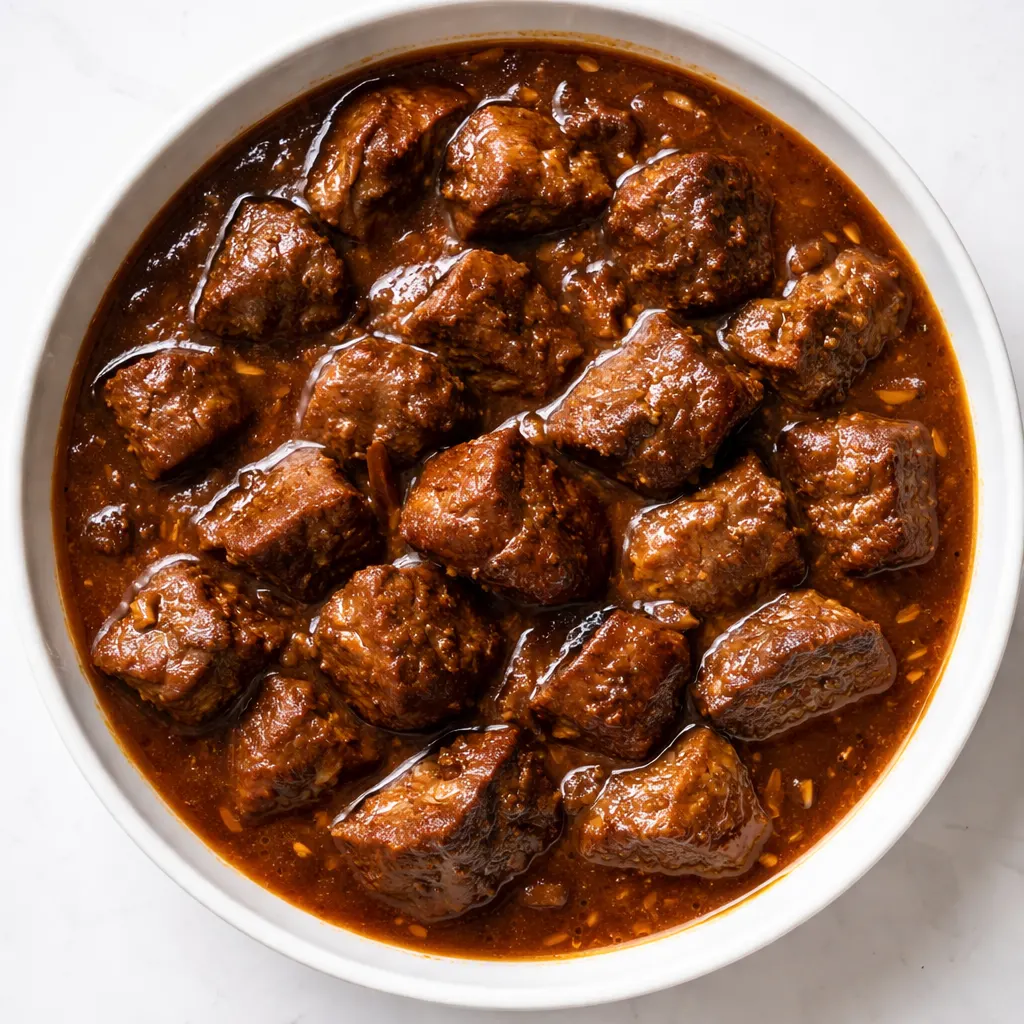
(Photo above: Wide shot of the finished dish in a deep white bowl, beef cubes glistening in a dark gravy, a stack of warm flour tortillas on the side, steam still rising, natural afternoon light from the kitchen window hitting the table right. A small ramekin of pickled jalapeños and a lime wedge are off to the right.)
The Thing That Makes This Gravy Different (It’s the Browning)
Most carne guisada recipes rush through the browning step or skip it entirely, and the result is a gravy that tastes like beef-flavored broth instead of the deep, almost nutty thing this is supposed to be. The flour you dredge the beef in doesn’t just thicken the gravy later — it creates a crust that browns into flavor compounds you cannot get any other way. I learned this the hard way after making a batch where I crowded the pan and the meat steamed instead of browned, and I ended up with gray beef and a gravy that was fine but forgettable. Fine and forgettable is not what we’re doing here.
You brown the beef in batches — yes, it takes an extra ten minutes — and you get that deep mahogany fond on the bottom of the pot that dissolves into the gravy and makes it taste like it simmered all day. Then you bloom the spices in the rendered fat before adding any liquid. That step alone changes everything.
Ingredients Worth Talking About
- 2½ lbs beef chuck, cut into 1-inch cubes: Chuck is the right cut for this — enough fat to stay tender through the simmer, and the flavor is beef-forward without being gamey. I buy a whole chuck roast and cube it myself because the pre-cubed stuff is never the same size and it cooks unevenly. This is the ingredient my butcher knows me for — I buy it every other week now.
- ¼ cup all-purpose flour: For dredging. This is what gives the gravy body and helps the browning happen on the surface of the meat. Simone once asked why I “powder the meat” and I told her it was the secret. She told me I was being dramatic. She wasn’t wrong.
- 2 tablespoons vegetable oil or bacon fat: I use bacon fat when I have it — the smoky note underneath the gravy is subtle but it’s there. If you use oil, use something neutral that can handle high heat without burning.
- 1 large yellow onion, diced: Cooked until translucent but not brown — the onion should melt into the gravy by the end, not stay chunky. I dice mine smaller than I think I need to, because my family doesn’t love big onion pieces, but that’s a personal preference.
- 4 cloves garlic, minced: I add it after the onion is soft, give it thirty seconds, then move on. Garlic burns fast and bitterness ruins a gravy like this.
- 1 jalapeño, seeded and minced (optional for the mild version): My daughter declares the seeds “too spicy” so I take them out for the family batch. I add the seeds back into my own bowl with a whole extra jalapeño when I’m cooking for adults. This is the ingredient that lets me please everyone without making two separate pots.
- 2 tablespoons tomato paste: Cooked in the pot for a full two minutes until it darkens and smells almost sweet — this deepens the color and rounds out the acidity. I learned this from Celestine, who did it with every tomato dish she ever made. She called it “burnishing the flavor.” I call it worth the extra step.
- 1 can (14.5 oz) diced tomatoes, undrained: The liquid helps deglaze the pot and the tomatoes break down into the gravy. I use fire-roasted when I can find them. If you only have whole tomatoes, crush them by hand before adding — it’s the same thing.
- 2 cups beef stock, preferably low-sodium: You need enough liquid to cover the beef by about half an inch. The stock reduces during the simmer, so don’t worry if it looks like too much at the start — it concentrates beautifully. I use the carton stock from the store on busy weeks and homemade when I’ve saved up bones. Both work. The homemade is better, but the carton version is still good. Don’t stress about this one.
- 2 teaspoons ground cumin, 1 teaspoon dried oregano, 1 teaspoon smoked paprika, 1½ teaspoons kosher salt (or to taste), and black pepper: The cumin is the backbone here — it needs to be fairly fresh (within six months of opening) or it tastes like dust. The smoked paprika adds that campfire note that makes the whole dish smell like it cooked over coals. I toast whole cumin seeds in a dry skillet and grind them myself because I’m particular about it. You don’t have to, but if you do, you’ll taste the difference immediately.
- 2 bay leaves: For the background note that you don’t notice until it’s missing. Take them out before serving — nobody wants to bite into a bay leaf.
- 8-12 flour tortillas (store-bought or homemade), warmed: This is non-negotiable for me — the tortillas are what make it a meal. I buy the uncooked ones that you fry yourself when I have time, or the good fresh ones from the Mexican grocery down the street. Simone has opinions about tortillas. She says the store-bought ones that come in bags are “fine but not great.” She’s eight, she’s right.
- Optional garnishes: Fresh cilantro, jalapeño slices, diced onion, sour cream, lime wedges. I set these out in small bowls and let everyone build their own plate.
Tools You’ll Actually Need
- A large heavy-bottomed pot or Dutch oven — I use a 6-quart enameled cast iron one, but a stainless steel pot with a thick bottom works fine too.
- A sharp chef’s knife for cubing the beef and dicing the veggies.
- A wooden spoon or spatula for scraping up the fond — use something that won’t scratch enamel.
- Tongs for flipping the beef during browning without stabbing it.
- A slotted spoon for removing the beef to the plate, or just tongs again.
- A cast iron skillet or comal for warming the tortillas — you can use a dry skillet if you don’t have a comal.
Let’s Make It (Step by Step)
This goes in stages — browning, building the gravy, and then the long simmer where the kitchen starts smelling so good you’ll want to stand over the pot. Read through once before you start, so you know what’s coming.
Start the beef and get your mise en place ready: Pat the beef cubes dry with paper towels — wet meat won’t brown. Season them with a generous pinch of salt and pepper, then toss them with the flour until each piece is lightly coated. Set aside. Dice the onion, mince the garlic, seed and mince the jalapeño if you’re using it. Measure out your spices and have them ready.
- Brown the beef in batches: Heat your pot over medium-high heat and add 1 tablespoon of your fat. When it shimmers (not smoking), add a single layer of beef cubes — don’t crowd the pan or they’ll steam. Let them sit undisturbed for about 3 minutes until the bottom is deep brown, then flip. Brown on all sides, about 6-8 minutes total per batch. Transfer to a plate with tongs. (📸 Photo tip: The beef should have a deep mahogany crust on each side. If it looks pale, let it go another minute. The fond on the bottom of the pot is what you’re aiming for — it’s not burnt, it’s flavor waiting to happen.)
- Sauté the aromatics: Reduce heat to medium. Add the remaining tablespoon of fat if needed. Add the diced onion and cook, stirring occasionally, for about 5 minutes until it becomes translucent and soft. Add the garlic and jalapeño (if using) and cook for 30 seconds more, until fragrant.
- Cook the tomato paste: Add the tomato paste to the center of the pot and stir it into the vegetables. Cook for 2 full minutes — you’ll see it darken from bright red to a deeper brick red. The smell changes too, from raw to almost sweet. (📸 Photo tip: The paste should look rusty and start sticking to the bottom in a thin layer. That’s the sign it’s done. If it smells more acidic than savory, give it another minute.)
- Bloom the spices: Add the cumin, oregano, smoked paprika, and a few grinds of black pepper to the pot. Stir for 30 seconds until they smell deeply fragrant — like they’re waking up. This is the step that makes the whole kitchen smell like something good is happening.
- Deglaze and build the gravy base: Pour in the diced tomatoes with their juices and the beef stock. Use your wooden spoon to scrape up all the browned bits from the bottom of the pot — that fond is where the deep flavor lives. Stir until everything is combined and the liquid is bubbling.
- Return the beef and simmer: Add the browned beef back to the pot, along with any juices that accumulated on the plate. Add the bay leaves. Bring to a gentle simmer — you want small bubbles, not a rolling boil. Reduce the heat to low, cover, and let it cook for 1½ hours. After 1½ hours, uncover and let it simmer for another 20-30 minutes to thicken the gravy to your liking. I set a timer and forget about it for the first hour — it mostly takes care of itself. The stirring I do around the 90-minute mark always makes me feel like I’m actually accomplishing something.
- Check for doneness and adjust seasoning: The beef should be fork-tender — it should break apart with just a little pressure from a fork, not need sawing. Taste the gravy and adjust salt. It usually needs a pinch more at the end, maybe a squeeze of lime if it tastes flat. Remove the bay leaves.
- Warm the tortillas: While the gravy thickens, warm your tortillas. I do them one at a time in a dry cast iron skillet over medium-high heat for about 30 seconds per side, until they puff up slightly and get little brown spots. Stack them in a clean kitchen towel to keep warm.
- Serve immediately: Spoon the carne guisada into shallow bowls. Offer tortillas and garnishes on the side. The way you eat it is up to you — some people make tacos, some people just dip the tortillas in the gravy. I do both.
How I Prep These for the Week
I make a double batch on Sundays and we eat it through Wednesday. The gravy gets even better on day two or three, when the flavors have had time to stop competing and just settle into each other. Here’s how I handle the leftovers so they don’t get sad:
- Fridge: Store in an airtight container for up to 4 days. The beef stays tender and the gravy thickens a bit more in the fridge — which is good, because it loosens up again when you reheat it.
- Freezer: Yes. Cool completely before freezing in quart-sized freezer bags (lay them flat so they stack). It keeps for up to 3 months. Thaw overnight in the fridge before reheating.
- Reheat: The best way is in a pot over medium-low heat with a splash of water or stock to loosen it, stirring occasionally until hot throughout. Microwave works in a pinch but the texture isn’t the same — the gravy can separate if you nuke it too fast.
Things I Wish I’d Known the First Time
- Don’t skip the browning. I made this the wrong way once — skipped the browning because I was in a hurry, just dumped everything in the pot and simmered it. The result was gray, flat, and forgettable. You don’t have to be precious about it, but you do have to do it. Even if your browning is a little uneven, it’s still better than no browning at all.
- The first taste will need more salt than you think. This is a big pot of beef and liquid. I always undersalt at the beginning and correct at the end. The tomatoes also add acidity that needs salt to balance it. Taste it before you serve, not before you add the stock.
- If the gravy is too thin at the end, don’t panic. Simmer it uncovered for another 10-15 minutes. It will reduce and thicken naturally. If it’s still thin, mix a teaspoon of cornstarch with a tablespoon of cold water and stir it in. But honestly, I’ve only needed to do that once — the flour from the dredge usually handles the thickness just fine.
- The tortillas matter more than you think. I know I keep saying this, but I’ve served this with sad store-bought tortillas that fell apart, and the whole meal felt like a compromise. The good tortillas — fresh, warm, with those browned spots — make the dish feel complete. Even if you use store-bought, warm them in a dry skillet. Please.
- This freezes beautifully, so make extra. I always make a double batch now, even if we don’t need it. The frozen portions have saved me on nights when I had zero energy to cook. Even if you mess this up a little, it’s still going to be good — I’ve made it with too much cumin and it was still better than takeout.
Swaps That Actually Work
- Gluten-Free: Skip the flour dredge and use a cornstarch slurry (2 tablespoons cornstarch mixed with 3 tablespoons cold water) stirred in at the end after the beef is tender. The gravy will be slightly glossier but no less rich. Serve with corn tortillas instead of flour. I’ve made this for friends who need gluten-free and nobody noticed the difference — the beef carries the show anyway.
- Dairy-Free: This recipe is naturally dairy-free already, so you’re good there.
- Spicy Adult Version: Keep the jalapeño seeds in, add a second jalapeño, and throw in a chipotle pepper with a spoonful of adobo sauce for smokey heat. This is the version I make for myself after Simone goes to bed.
- Kid-Friendly Mild Version: Omit the jalapeño entirely and use only sweet paprika instead of smoked. The cumin and oregano still give it plenty of flavor without any heat. Simone eats this version happily. She calls it “the cozy one.”
- No Beef Stock: You can use chicken stock in a pinch — it won’t be as beefy but it still works. I’ve done this when I was out of beef stock and it was fine. Not great, but fine. The best substitute is actually water and a teaspoon of beef bouillon base (like Better Than Bouillon), which is usually in my fridge.
- Slow Cooker Version: After browning the beef and sautéing the aromatics, transfer everything to a slow cooker and cook on LOW for 6-7 hours or HIGH for 3-4 hours. The gravy won’t thicken as much because there’s less evaporation, so stir in a cornstarch slurry at the end.
Questions I Get About This All the Time
Q: Why did my gravy turn out watery?
A: This usually happens for one of two reasons: either you didn’t brown the beef long enough (the flour needs to toast into the fat to help thicken later), or you added too much stock. Try simmering it uncovered for 15-20 minutes at the end to let the extra liquid cook off. If it’s still thin after that, the cornstarch slurry trick works wonders. I’ve been there — it’s fixable.
Q: Can I use a different cut of beef?
A: Yes, but choose wisely. Chuck is my first choice, but bottom round or brisket also work — they have enough connective tissue to stay tender after a long simmer. Stay away from lean cuts like sirloin or tenderloin — they dry out and get tough. If you use a leaner cut, reduce the simmer time to about 1 hour and check for tenderness early.
Q: How long does this last in the fridge? Can I freeze it?
A: It keeps for up to 4 days in the fridge. In the freezer, it’s good for 3 months. I freeze it in flat bags so it thaws quickly. Reheat it in a pot over medium-low with a splash of water — the gravy will come back beautifully. The only thing that doesn’t freeze well is the tortillas, so warm fresh ones when you serve the leftovers.
Q: What do you serve with this besides tortillas?
A: I keep it simple: a side of Mexican rice or cilantro-lime rice to catch the gravy, and a quick cabbage slaw with lime and salt for crunch. My kids love it with black beans on the side, and I always put out extra pickled jalapeños for the adults. On weekends we sometimes do a side of fried plantains, which is not traditional but it’s good and nobody has ever complained about plantains.
More Recipes My Family Makes on Repeat
If you liked this one, here are a few others that get the same reaction at our table — the kind where everyone gets quiet and just eats:
- Red Beans and Rice with Slow-Simmered Ham Hocks — The Monday red beans Celestine swore by, with smoky ham hocks and a finish of vinegar that wakes everything up.
- Smoky Chicken Tinga Tacos with Avocado Crema — A faster braise that still has that deep flavor, with a creamy avocado crema that my kids put on everything now.
- Easy Beef and Bean Chili That Gets Better Overnight — The chili I make when I need something that cooks in one pot and makes the whole weekend better.
This is the dish I make when I want the house to smell like something has been cooking all day — even if I started it after lunch. The kind of meal that asks for time and gives back something bigger than the sum of its ingredients. Make it on a weekend, eat it for dinner, and if you’re smart about it, save the leftovers for a Tuesday that needs them.
If you try it, drop a comment below and tell me how it went — I love hearing when someone’s family sits down to something they made from here and it works. And save this one for your next slow-cook Sunday or busy Tuesday when you need something that feels like more than just dinner.
📌 Carne guisada recipe with the gravy that takes 2 hours — save this for your next weekend braise when you want beef so tender it falls apart in the best way.

Carne Guisada with Flour Tortillas: The Braise That Takes 2 Hours (Worth Every Minute)
Equipment
- Large heavy-bottomed pot or Dutch oven
- Sharp chef’s knife
- Wooden spoon or spatula
- Tongs
- Slotted spoon
- Cast iron skillet or comal
Ingredients
- 2½ lbs beef chuck, cut into 1-inch cubes
- ¼ cup all-purpose flour
- 2 tablespoons vegetable oil or bacon fat
- 1 large yellow onion, diced
- 4 cloves garlic, minced
- 1 jalapeño, seeded and minced (optional)
- 2 tablespoons tomato paste
- 1 can (14.5 oz) diced tomatoes, undrained
- 2 cups beef stock, preferably low-sodium
- 2 teaspoons ground cumin
- 1 teaspoon dried oregano
- 1 teaspoon smoked paprika
- 1½ teaspoons kosher salt (or to taste)
- to taste black pepper
- 2 bay leaves
- 8-12 flour tortillas, warmed
- Optional garnishes: fresh cilantro, jalapeño slices, diced onion, sour cream, lime wedges
Instructions
- Pat the beef cubes dry with paper towels — wet meat won’t brown. Season them with a generous pinch of salt and pepper, then toss them with the flour until each piece is lightly coated. Set aside. Dice the onion, mince the garlic, seed and mince the jalapeño if you’re using it. Measure out your spices and have them ready.
- Brown the beef in batches: Heat your pot over medium-high heat and add 1 tablespoon of your fat. When it shimmers (not smoking), add a single layer of beef cubes — don’t crowd the pan or they’ll steam. Let them sit undisturbed for about 3 minutes until the bottom is deep brown, then flip. Brown on all sides, about 6-8 minutes total per batch. Transfer to a plate with tongs. The beef should have a deep mahogany crust on each side. If it looks pale, let it go another minute. The fond on the bottom of the pot is what you’re aiming for — it’s not burnt, it’s flavor waiting to happen.
- Sauté the aromatics: Reduce heat to medium. Add the remaining tablespoon of fat if needed. Add the diced onion and cook, stirring occasionally, for about 5 minutes until it becomes translucent and soft. Add the garlic and jalapeño (if using) and cook for 30 seconds more, until fragrant.
- Cook the tomato paste: Add the tomato paste to the center of the pot and stir it into the vegetables. Cook for 2 full minutes — you’ll see it darken from bright red to a deeper brick red. The smell changes too, from raw to almost sweet. The paste should look rusty and start sticking to the bottom in a thin layer. That’s the sign it’s done. If it smells more acidic than savory, give it another minute.
- Bloom the spices: Add the cumin, oregano, smoked paprika, and a few grinds of black pepper to the pot. Stir for 30 seconds until they feel deeply fragrant — like they’re waking up. This is the step that makes the whole kitchen smell like something good is happening.
- Deglaze and build the gravy base: Pour in the diced tomatoes with their juices and the beef stock. Use your wooden spoon to scrape up all the browned bits from the bottom of the pot — that fond is where the deep flavor lives. Stir until everything is combined and the liquid is bubbling.
- Return the beef and simmer: Add the browned beef back to the pot, along with any juices that accumulated on the plate. Add the bay leaves. Bring to a gentle simmer — you want small bubbles, not a rolling boil. Reduce the heat to low, cover, and let it cook for 1½ hours. After 1½ hours, uncover and let it simmer for another 20-30 minutes to thicken the gravy to your liking. I set a timer and forget about it for the first hour — it mostly takes care of itself. The stirring I do around the 90-minute mark always makes me feel like I’m actually accomplishing something.
- Check for doneness and adjust seasoning: The beef should be fork-tender — it should break apart with just a little pressure from a fork, not need sawing. Taste the gravy and adjust salt. It usually needs a pinch more at the end, maybe a squeeze of lime if it tastes flat. Remove the bay leaves.
- Warm the tortillas: While the gravy thickens, warm your tortillas. I do them one at a time in a dry cast iron skillet over medium-high heat for about 30 seconds per side, until they puff up slightly and get little brown spots. Stack them in a clean kitchen towel to keep warm.
- Serve immediately: Spoon the carne guisada into shallow bowls. Offer tortillas and garnishes on the side. The way you eat it is up to you — some people make tacos, some people just dip the tortillas in the gravy. I do both.
Notes
Related posts:
 Protein French Toast: The Anabolic Version That Actually Tastes Like the Real Thing
 Deep, Rich Slow Cooker Beef Ramen with Broth That Tastes Like You Simmered It All Day
 Deep, Smoky Beef Goulash That Tastes Like It Simmered All Day — in 90 Minutes
 High Protein Banana Pudding Yogurt That Doesn’t Taste Like a Protein Shake — Finally