
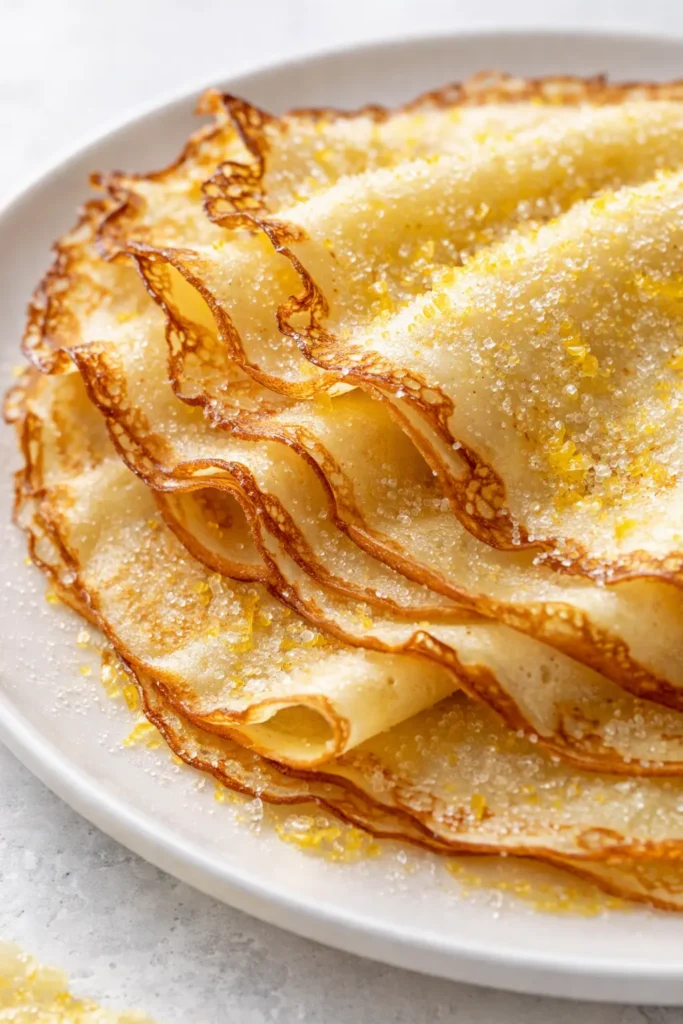
Simone called these “yellow pancakes” the first time I made them. She was four, and she ate three before I could ask whether she liked them. When she was old enough to put words to it, she said they tasted like “a sunny day that you can eat.” She’s eight now, and these lemon sugar crepes are still the Saturday breakfast she requests most — which is the highest review I know how to get from anyone, especially a child with firm opinions about her food.
The short version: Thin, tender crepes folded around buttery lemon sugar and a squeeze of fresh lemon juice, with the edges gone golden and slightly crisp from the pan — 30 minutes of hands-on work, plus a rest you don’t have to do anything for.
I’ve made this batter so many times I can do it from memory, half asleep, with the coffee still brewing. That’s the version of a recipe I trust most: the one that works even when you’re not paying full attention.
- Serves: 4 (makes 8–10 crepes)
- Hands-On Time: 30 minutes | Total Time: 1 hour (includes 30-minute batter rest)
- Difficulty: Easy — once you forgive the first crepe
- Cost per serving: ~$1.00
- Calories: ~290 per serving (2 crepes with lemon sugar)
- Dietary Notes: Vegetarian; easy to make dairy-free
(Photo above: a short stack of golden crepes folded into triangles on a cream ceramic plate, one dusted lightly with powdered sugar and a halved lemon leaning against the stack, soft morning light from the left across our kitchen table.)
Why These Come Out Tender (And Why the First One Is Always the Test)
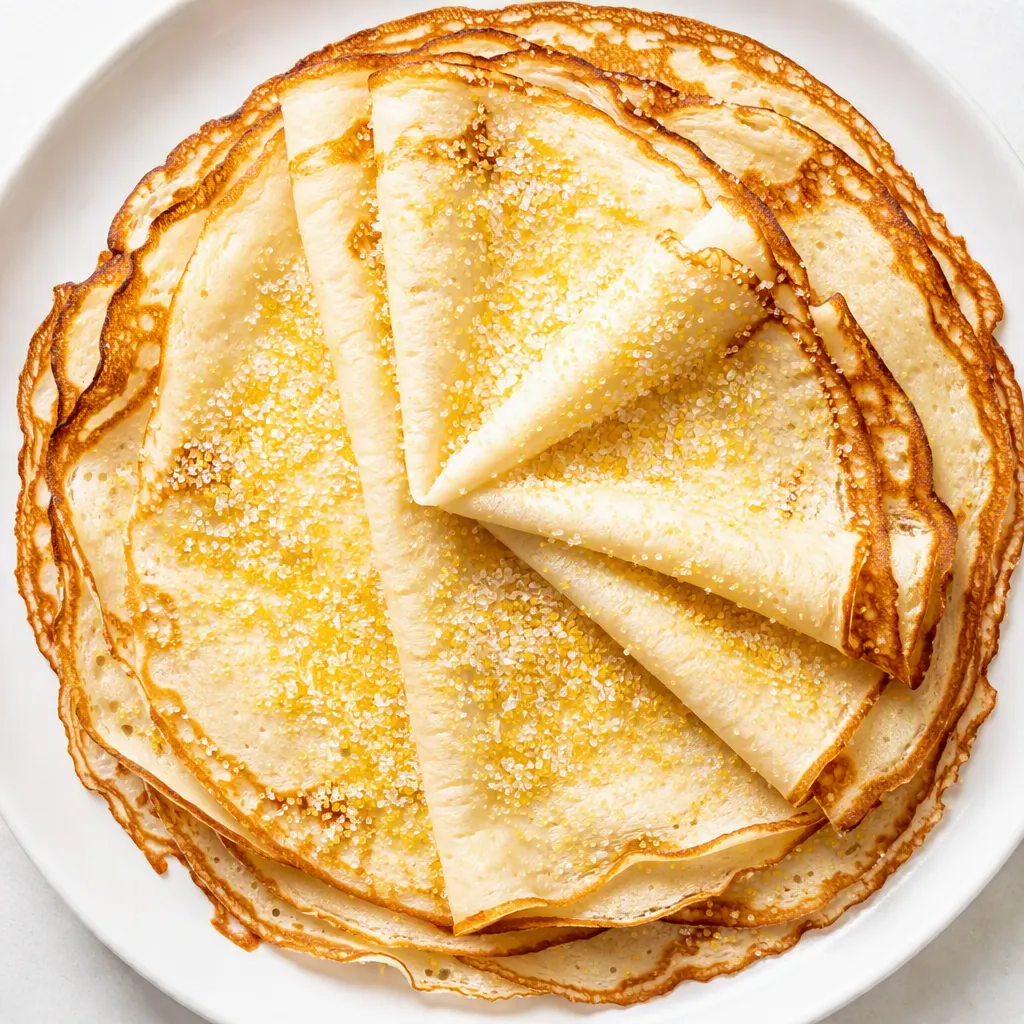
The most important step in this recipe is the one where you do absolutely nothing. The batter rests for at least 30 minutes before it touches the pan, and that rest gives the flour time to soak up the liquid and relax. It’s the difference between a tender crepe and something that tastes like a yoga mat. I learned this the hard way, standing over a stack of crepes with the texture of a yoga mat. They were technically edible. They were also a warning.
I didn’t grow up with crepes. I grew up with pain perdu and buttermilk pancakes and whatever Celestine had in the big skillet on Sunday mornings. But crepes are one of those foods that shows up in a kitchen and becomes part of the rotation anyway. The rules that make them good are the same rules that make anything good: build the flavor in layers, don’t rush the base, finish with something bright. I knew how to do that before I ever touched a crepe pan.
The lemon sugar is where the layering happens. You rub the lemon zest into the sugar with your fingers until it smells like lemon candy. That’s not a garnish step — it’s where the flavor lives. The oils in the zest carry all the lemon perfume, and rubbing them into the sugar releases it. Plain sugar on top tastes sweet. This tastes like a lemon in its best possible mood.
And about the first crepe: it is never pretty. The pan hasn’t settled, the batter hasn’t figured out how to behave, and the result looks like a geography project. That’s not failure. That’s calibration. Eat it standing at the stove with a little butter. You’ve earned it.
What Goes In (Plus My Honest Notes)
Half of this list is probably already in your kitchen. The things worth being particular about are the lemons and the resting time.
- 1 cup all-purpose flour: Nothing fancy. Bleached or unbleached, both work fine here.
- 2 large eggs: The structure. If your eggs are on the small side, add a splash of milk to make up the difference.
- 1 cup whole milk: Whole milk makes a richer batter. If you only have 2 percent, use it and add a little extra butter to the pan. Nobody will know.
- 1/2 cup cold water: The water is what keeps the crepes thin and light. I know it feels like a strange addition, but it’s this — not more milk — that gives the batter the looseness it needs to spread properly.
- 2 tablespoons unsalted butter, melted, plus more for the pan: The melted butter goes into the batter and helps the crepes brown evenly. I use salted butter for the pan because it’s what I have out, and it works fine.
- 1 tablespoon granulated sugar: Just a whisper of sweetness in the batter itself. The real sweetness comes from the lemon sugar.
- 1/2 teaspoon vanilla extract: Optional. I add it when I think about it. It rounds out the flavor without anyone being able to name it.
- 1/4 teaspoon salt: Keeps the whole thing from tasting flat.
- 1/3 cup granulated sugar (for the lemon sugar): The base of the filling. You’ll rub it with the lemon zest until it turns pale yellow and smells like a lemon tree.
- Zest of 1 large lemon: Use a fine grater and go gently — you want the yellow part, not the white pith, which is bitter. I have accidentally hit the pith. It is not a mistake you make twice.
- 1/4 cup fresh lemon juice (about 1–2 lemons): Fresh only. Bottled lemon juice will make the whole thing taste like a cleaning product. I am not exaggerating.
- 3–4 tablespoons unsalted butter, melted (for brushing): This is what carries the lemon sugar and melts it into the warm crepe. Don’t skimp — this fat is doing real work.
Simone’s review of the lemon sugar, age four: “It smells like candy, but it’s for breakfast!” That is the review that matters.
The Setup (It’s Minimal, I Promise)
- An 8- or 10-inch nonstick skillet: A crepe pan is nice if you have one, but don’t buy one for this. A regular nonstick skillet does the job beautifully.
- A whisk or a blender: The blender makes a perfectly smooth batter in about 20 seconds. The whisk is what I use when I don’t want to wash the blender. Both work.
- A flexible spatula: For getting under the edge and flipping. A thin one works best.
- A pastry brush: For brushing the melted butter onto the finished crepes. The back of a spoon works in a pinch, but the brush is easier.
- A medium bowl: For the batter. A measuring cup with a spout is a nice extra — it makes pouring into the pan much cleaner.
Let’s Make Them (Step by Step)
Read through once before you start. It’s not complicated, but the rest step changes the rhythm from your usual pancake situation, and I’d rather you know that now than be caught waiting halfway through.
- Make the lemon sugar first: In a small bowl, combine the 1/3 cup sugar and the lemon zest. Rub them together with your fingers for about 30 seconds, until the sugar turns pale yellow and smells strongly of lemon. Set it aside. The longer it sits, the deeper the flavor — making this the night before is a genuinely good move.
- Make the batter: In a medium bowl, whisk the flour, the 1 tablespoon sugar, and the salt together. Add the eggs, milk, cold water, melted butter, and vanilla. Whisk until smooth. If you’re using a blender, put everything in and blend for 20 seconds. (📸 Photo tip: The batter should look like thin pancake batter — it coats the back of a spoon lightly but runs off quickly. If it looks thick, add a splash more milk.)
- Rest the batter: Cover the bowl and let it sit for 30 minutes at room temperature. This is the step everyone tries to skip. Don’t. It’s the difference between tender and tough, and it costs you nothing but patience.
- Heat the pan: Set your skillet over medium heat. Add a small pat of butter and swirl to coat the bottom. When the butter foams but doesn’t brown, the pan is ready. (📸 Photo tip: Look for a thin, even sheen of butter across the whole pan — that’s your cue. And please don’t use cooking spray here; it makes crepes stick in a way that’s genuinely strange.)
- Pour and swirl: Pour about 1/4 cup of batter into the center of the pan and immediately tilt and swirl the pan so the batter covers the bottom in a thin, even layer. (📸 Photo tip: You should be able to just barely see the pan through the batter — thin enough to cook through quickly, thick enough to hold together.)
- Cook the first side: Cook for 45 to 60 seconds, until the edges turn golden and lift slightly away from the pan. The top will look mostly set but still slightly soft in the center — that’s normal for the first side.
- Flip and finish: Slide the spatula under the edge and flip. Cook for another 15 to 20 seconds, until you see light golden spots across the surface. Slide it onto a plate. Repeat with the remaining batter, adding a small pat of butter between crepes as needed. Stack the finished crepes on the plate and cover loosely with a towel to keep them warm. (📸 Photo tip: When the second side is done, the back should be golden-spotted rather than pale. That’s how you know your heat is in the right place.)
- Assemble: Brush one side of a warm crepe with melted butter. Sprinkle 1 to 2 teaspoons of lemon sugar over it, then squeeze a little fresh lemon juice over the top — about a teaspoon per crepe. Fold the crepe in half, then in half again, into a triangle.
- Optional crackly finish: If you want the sugar to turn into a thin caramel shell, return the folded crepes to the pan for 20 to 30 seconds per side, just until the sugar melts and crisps. This is the version Simone demands. The sugar becomes a thin, crackly layer that shatters when you bite it. That texture surprised me the first time I did it — and it’s still my favorite way to eat these!
Make-Ahead Notes (Because Mornings Are Chaotic)
Crepe batter is one of the friendliest make-ahead things in my kitchen. I mix it up Friday night, let it rest in the fridge overnight, and by Saturday morning all I have to do is heat the pan and cook. The batter actually gets a little more tender the longer it sits, so there’s no downside.
- Fridge: The batter keeps in a sealed container for up to 2 days. It will separate a little as it sits — just stir it before you pour. Cooked crepes stack between sheets of parchment in an airtight container for up to 2 days.
- Freezer: Yes — cooked crepes freeze beautifully. Stack them with a piece of parchment between each one, wrap the stack in plastic wrap and foil, and freeze for up to 2 months. Thaw in the fridge overnight before using.
- Reheat: The microwave works in a pinch, but it softens the whole crepe. For the crisp edges, warm them in a dry skillet over medium heat for about 30 seconds per side, then brush with butter and add the lemon sugar.
Things I Learned After Making These Too Many Times to Count
- The pan temperature is a dial, not a switch: The heat drifts between crepes, and the batter will let you know. If it sizzles aggressively and browns too fast, turn the heat down a notch. If the crepe comes out pale and soft, turn it up. You’re managing a small fire, not setting a thermostat. It settles out after the first couple — just keep adjusting.
- Fresh lemon juice is not negotiable: Bottled lemon juice in this recipe will make the whole thing taste like a cleaning product. I know that’s a strong statement. It’s also accurate. Buy the actual lemon. Marcus thinks I use too much lemon — he is wrong, but I love him.
- Make the lemon sugar ahead if you can: The longer the zest sits in the sugar, the deeper the flavor goes. Even an hour helps. If you make it the night before, you’ll taste the difference the next morning. It takes ninety seconds and feels like doing nothing, but it’s absolutely doing something.
- Don’t skip the rest: I tested this once, side by side, because I wanted to know if the 30 minutes actually mattered. It does. The rested batter produces crepes that are noticeably softer. I know waiting feels counterintuitive, but the wait is doing the work.
- Even if your crepes aren’t pretty, they’re still good: A folded crepe hides a lot of imperfections. Nobody at your table is grading uniformity — they’re eating lemony, buttery, sweet folded things that you made. That’s a good morning, even when the stack looks a little raggedy.
Swaps That Actually Work
- Dairy-free: Use oat milk instead of whole milk and a good plant-based butter in both the batter and the filling. Full-fat oat milk behaves closest to dairy milk here — I’ve tested it, and it’s genuinely good, not just “fine for a dairy-free version.” My sister-in-law can’t do dairy, and this is the version I make when she visits. She likes it even better, which I try not to take personally.
- Gluten-free: A good 1:1 gluten-free flour blend works in this recipe. The crepes come out slightly more delicate, so handle them gently on the flip and let the batter rest a little longer — 45 minutes instead of 30.
- Kid version: Use a little extra sugar and a lighter hand with the lemon juice the first time you serve it. The full lemon came around for my kids eventually, but the slightly sweeter version is what got them there. Start sweet, then let the lemon catch up.
- Meyer lemon version: If you can find Meyer lemons in the winter, use them. They’re sweeter and less sharp, and the crepes turn almost floral. This is the version I make when I’m feeling fancy for no reason.
- Dessert version: Add a spoonful of crème fraîche or a small scoop of vanilla ice cream on top. It’s very extra. I only do it when we’re having people over.
The Questions I Always Get About This Recipe
Q: Why did my crepes turn out rubbery and tough?
A: Ugh, I’ve been there. The usual culprit is a batter that didn’t rest long enough, or a pan that was too hot and cooked the outside before the middle could set. Give the batter the full 30-minute rest, keep the pan at medium heat, and trust the swirl. The next batch will be better — you’ve got this.
Q: Can I make this dairy-free?
A: Yes. Oat milk and a good plant-based butter work beautifully in both the batter and the filling. I’ve tested this one, and it’s genuinely good. Full-fat oat milk is your best bet for the batter. This is the version I make whenever my sister-in-law comes to visit.
Q: How long do these keep? Can I freeze the crepes?
A: Cooked crepes keep in the fridge for about 2 days stacked between sheets of parchment, and they freeze well for up to 2 months. The batter keeps in the fridge for up to 2 days too, and it actually gets more tender as it rests. Reheat cooked crepes in a dry skillet so the edges stay crisp — the microwave works, but it makes them soft all over, so I’d call it a pinch-only situation.
Q: What should I serve with lemon sugar crepes?
A: These are a whole breakfast on their own, honestly. But if you’re making a full table, a bowl of fresh berries and a few slices of bacon are my favorite pairing — the salty against the lemony is genuinely good. We do coffee and orange juice and call it a day. And if you have any lemon sugar left over, it’s incredible on yogurt or stirred into tea.
More Recipes My Family Makes on Repeat
If this one lands at your table the way it does at mine, here are a few others that get the same reaction:
- Celestine’s Fluffy Buttermilk Pancakes — The ones I grew up on, made in the big skillet, worth every minute of standing time.
- Pain Perdu with Brown Sugar Syrup — My version of the French toast we ate growing up: custardy in the middle, crisp at the edges.
- Lemon Olive Oil Cake — Bright, tender, and dangerously easy — the cake that makes people think you tried harder than you did.
These are the crepes I make on the mornings when I want the house to smell like butter and lemon, and nobody to be in a hurry. They aren’t complicated. They need the batter to rest and the first crepe to be forgiven. That’s most of cooking, actually.
If you make them, come back and tell me how they went — I read every comment, and I love hearing which version your family landed on.
📌 Lemon sugar crepes recipe that turns Saturday breakfast into something special — save it for your next slow morning with the family.
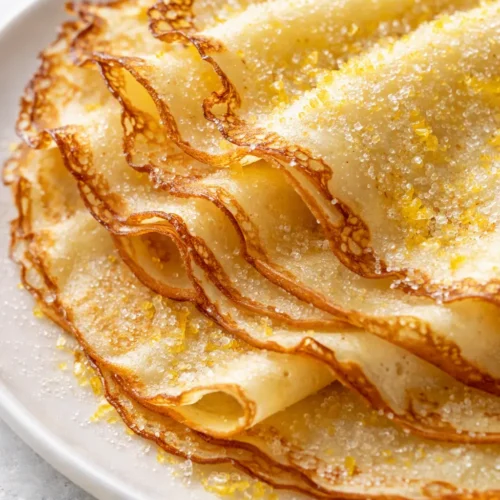
Lemon Sugar Crepes for Saturday Mornings
Equipment
- 8- or 10-inch nonstick skillet
- Whisk or blender
- Flexible spatula
- Pastry brush
- Medium Bowl
- Measuring cup with spout (optional)
Ingredients
For the Lemon Sugar
- 1/3 cup granulated sugar
- Zest of 1 large lemon
For the Crepe Batter
- 1 cup all-purpose flour
- 2 large eggs
- 1 cup whole milk
- 1/2 cup cold water
- 2 tablespoons unsalted butter, melted, plus more for the pan
- 1 tablespoon granulated sugar
- 1/2 teaspoon vanilla extract
- 1/4 teaspoon salt
For Assembling
- 1/4 cup fresh lemon juice, from 1 to 2 lemons
- 3-4 tablespoons unsalted butter, melted, for brushing
- Lemon sugar from above
Instructions
- Make the lemon sugar first: In a small bowl, combine the 1/3 cup sugar and the lemon zest. Rub them together with your fingers for about 30 seconds, until the sugar turns pale yellow and smells strongly of lemon. Set it aside. The longer it sits, the deeper the flavor; making this the night before is a genuinely good move.
- Make the batter: In a medium bowl, whisk the flour, the 1 tablespoon sugar, and the salt together. Add the eggs, milk, cold water, melted butter, and vanilla. Whisk until smooth. If using a blender, put everything in and blend for 20 seconds. The batter should look like thin pancake batter; if it looks thick, add a splash more milk.
- Rest the batter: Cover the bowl and let it sit for 30 minutes at room temperature. Do not skip this step. It is the difference between tender and tough, and it costs you nothing but patience.
- Heat the pan: Set your skillet over medium heat. Add a small pat of butter and swirl to coat the bottom. When the butter foams but doesn’t brown, the pan is ready. Don’t use cooking spray here; it makes crepes stick in a way that’s genuinely strange.
- Pour and swirl: Pour about 1/4 cup of batter into the center of the pan and immediately tilt and swirl the pan so the batter covers the bottom in a thin, even layer. You should be able to just barely see the pan through the batter.
- Cook the first side: Cook for 45 to 60 seconds, until the edges turn golden and lift slightly away from the pan. The top will look mostly set but still slightly soft in the center.
- Flip and finish: Slide the spatula under the edge and flip. Cook for another 15 to 20 seconds, until you see light golden spots across the surface. Slide it onto a plate. Repeat with the remaining batter, adding a small pat of butter between crepes as needed. Stack the finished crepes on the plate and cover loosely with a towel to keep them warm.
- Assemble: Brush one side of a warm crepe with melted butter. Sprinkle 1 to 2 teaspoons of lemon sugar over it, then squeeze a little fresh lemon juice over the top, about a teaspoon per crepe. Fold the crepe in half, then in half again, into a triangle.
- Optional crackly finish: If you want the sugar to turn into a thin caramel shell, return the folded crepes to the pan for 20 to 30 seconds per side, just until the sugar melts and crisps. This is the version Simone demands. The sugar becomes a thin, crackly layer that shatters when you bite it.
Notes
Related posts:
 Low Calorie Banana Bread That Doesn’t Taste Like a Compromise — Finally
 Soft, Pillowy White Chocolate Pumpkin Snickerdoodles with a Cinnamon-Sugar Crunch
 White Chocolate Pumpkin Snickerdoodles: The Soft, Bakery-Style Version That Actually Works
 Strawberry Cream Cheese Stuffed Pancake Rolls That Stay Crispy — in 30 Minutes Flat