
I tried a dozen versions of Lemon Chicken Romano before I figured out why the breading kept sliding off. It drove me crazy. You’d get this beautiful golden crust in the pan, then you add the sauce and suddenly the chicken is naked and the breading is floating in a sad puddle. That first perfect bite — when I finally got the crust to stay put — I texted a photo to my sister before I even finished eating. This is the method that finally worked.
The short version: Thin, tender chicken cutlets in a crispy panko-Romano crust, finished with a quick lemon-butter sauce that won’t turn the breading to mush. Ready in about 30 minutes.
I’ve been making this for about five years now. It’s the first thing Simone learned to bread with me, and Marcus requests it at least once a month. It’s not the food I grew up eating — Celestine never made chicken like this. She was a dark-roux, three-pot woman. But she knew how to get a crust on a piece of fish, and that’s where I learned the patience for a good breading. This recipe is mine, but the discipline is hers.
- Serves: 4 as a main
- Hands-On Time: 25 min | Total Time: 30 min
- Difficulty: Easy (with one pro tip that makes all the difference)
- Cost per serving: ~$3.50
- Calories: ~450 per serving
- Dietary Notes: Adaptable for gluten-free (see variations below)
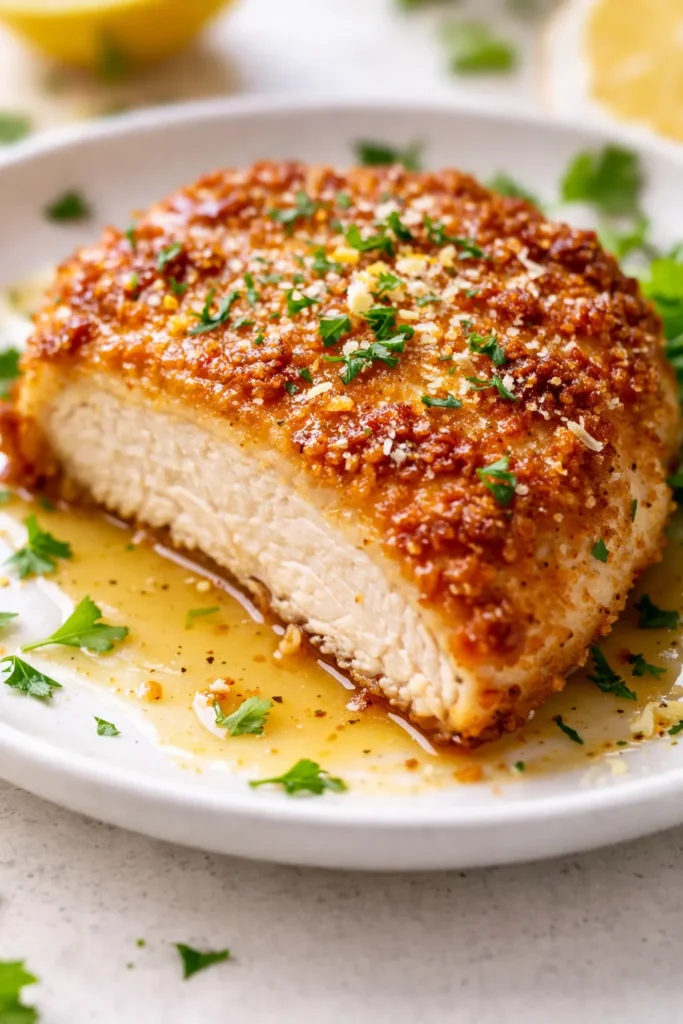
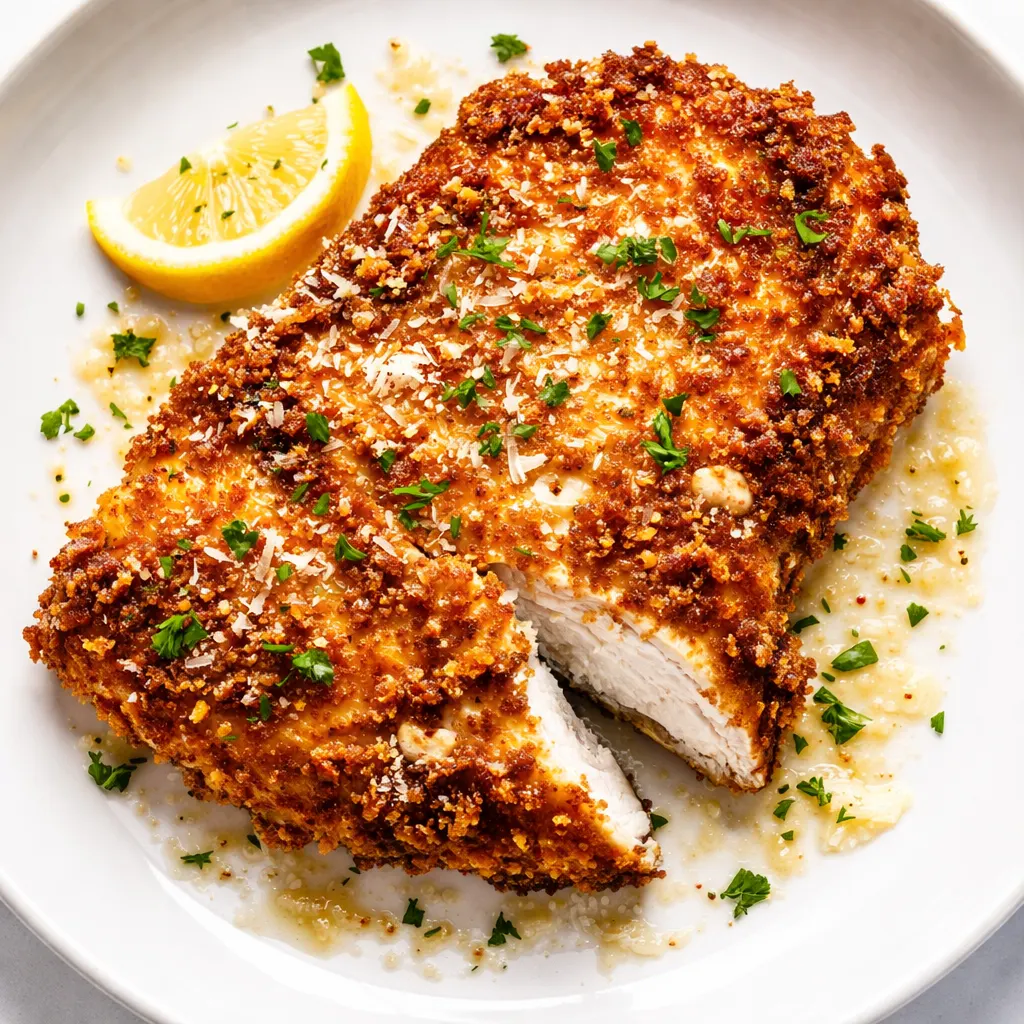
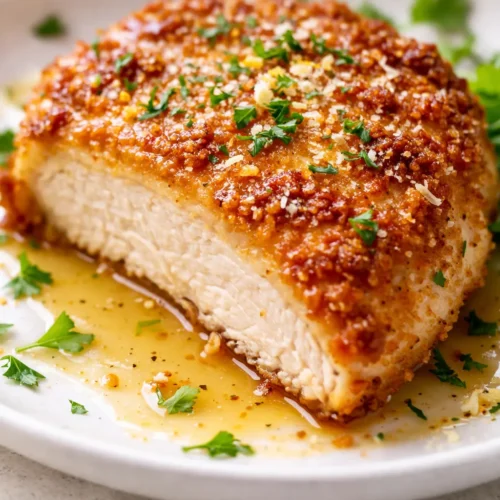
(Photo above: Golden-brown chicken cutlets arranged on a white platter. A slice of lemon and fresh parsley scattered around the edges. A small pitcher of the lemon-butter sauce sits beside it, ready to be spooned over the top.)
The Thing That Keeps the Breading From Sliding Off
The biggest complaint people have with chicken Romano is that the breading separates from the chicken. The culprit is moisture. Chicken releases steam as it cooks, and if the breading isn’t properly sealed or the pan isn’t hot enough, that steam creates a slippery layer between the meat and the coating. I fix it with one extra step that takes almost no effort: letting the breaded chicken rest for 5 minutes before it hits the pan. That short rest allows the flour to fully absorb the moisture from the egg wash, creating a tight bond that stays put even under a pan sauce. It’s the same patience Celestine used with her fried fish — let the coating set, then cook it with confidence. The result is a cutlet that stays shatteringly crisp on the outside and tender on the inside, every single time.
What Goes In — Plus My Honest Notes
- Chicken breast (2 large, sliced in half lengthwise and pounded to ¼-inch): Thin, even cutlets cook quickly and evenly. No dry edges, no undercooked centers. If you buy pre-sliced cutlets, you still need to pound them to even thickness. Trust me, it matters.
- Romano cheese (¾ cup, finely grated): Romano is sharper and saltier than Parmesan. It brings a savory depth that stands up to the lemon. Please grate it from a wedge. The pre-shredded stuff has anti-caking agents that make the breading less crispy. I promise you can taste the difference.
- Panko breadcrumbs (1 cup): These stay crispier than regular breadcrumbs because they’re coarser and absorb less grease. They’re the reason the crust has that beautiful crunch even after the sauce goes on.
- Lemon (1 large, zested and juiced): Fresh zest goes into the breading. Fresh juice goes into the pan sauce. Bottled lemon juice gives you a flat, harsh acidity that tastes like a cleaning product. Do not use it here.
- Butter (3 tbsp): Two for the pan sauce, one for the cooking fat. Butter adds richness and helps the sauce emulsify into something silky and luxurious without being heavy.
- Chicken stock (½ cup): The liquid base for the pan sauce. Use a good one. Swanson’s low-sodium is my go-to, or homemade if I have it in the freezer.
The Tools You’ll Need
- A 10-inch cast iron or heavy-bottomed skillet (cast iron holds heat best for a crisp sear)
- A meat mallet or rolling pin (for pounding the chicken to even thickness)
- 3 shallow bowls for the breading station
- Tongs (for turning the chicken without knocking off the breading)
- A microplane or fine grater (for zesting the lemon and grating the Romano)
- A wire rack set inside a baking sheet (for resting the breaded cutlets and holding the cooked ones)
That wire rack is key. It lets air circulate around the cutlets so they don’t get soggy on the bottom. One of the best investments I’ve made for crispy cooking.
30 Minutes, Start to Finish
Read through once before you start. The active time is short, but you’ll need to move quickly once the oil is hot.
- Prep the chicken: Place the sliced chicken breasts between two sheets of parchment paper. Pound them to an even ¼-inch thickness. Pat them VERY dry with paper towels. Season generously on both sides with salt and pepper.
- Set up the breading station: Bowl 1: ½ cup all-purpose flour mixed with 1 tsp salt and ½ tsp black pepper. Bowl 2: 2 large eggs plus 1 tbsp water, beaten until uniform. Bowl 3: 1 cup panko breadcrumbs, ¾ cup finely grated Romano, and the zest of 1 lemon. Use your fingers to mix it all together so the zest is evenly distributed.
- Bread the chicken: Coat a cutlet in the flour, shake off the excess. Dip it into the egg wash, let the excess drip off. Press it firmly into the panko mixture, making sure it’s fully covered on both sides. Place it on the wire rack. Repeat with the remaining cutlets. Let them rest for 5 minutes. This is the step that keeps the breading on the chicken. Don’t skip it. (📸 Photo tip: The breaded cutlets on the wire rack should look dry and uniform — no shiny wet spots.)
- Fry the cutlets: Heat 2 tbsp olive oil and 1 tbsp butter in the skillet over medium-high heat. The fat should shimmer but not smoke. Add the cutlets in a single layer. Do not crowd the pan — work in batches if necessary. Cook for 2-3 minutes per side, until deep golden brown and cooked through. Transfer to a clean wire rack. (📸 Photo tip: The crust should be an even golden brown with no pale spots. If it’s browning too fast, turn the heat down.)
- Make the pan sauce: Pour off the excess fat from the skillet, but leave the browned bits on the bottom. Add ½ cup chicken stock, the juice of 1 lemon, and 2 tbsp butter. Stir, scraping up the browned bits. Let it simmer for 1 minute until slightly thickened and emulsified. Taste it. Add a pinch of salt if it needs it, or a small pinch of red pepper flakes if you want some heat.
- Serve immediately: Spoon the sauce over the cutlets right before they hit the table. Garnish with fresh parsley and lemon slices. The sauce goes on at the table, not on the stove — if the cutlets sit in the sauce, the breading will soften.
How I Make These for the Week
I make a double batch on Sundays so we have them for the week. They hold up better than you’d expect. Here’s how I store them:
- Fridge (uncooked, breaded): Layer the breaded cutlets between sheets of parchment paper in an airtight container. They keep for up to 24 hours. Let them rest for 5 minutes before cooking.
- Freezer (uncooked, breaded): Freeze them in a single layer on a baking sheet, then transfer to a freezer bag. Cook directly from frozen. Add about 2 more minutes per side. This is a lifesaver on busy nights.
- Reheat (cooked): The microwave will make the breading soft. Reheat them in a 375°F oven on a wire rack for 8-10 minutes. The breading will crisp right back up.
Little Things That Make a Big Difference
- Dry the chicken completely: Wet chicken makes soggy breading. Pat it dry with paper towels before you season it. This is non-negotiable.
- Rest the breaded cutlets: I know I keep saying it, but that 5-minute rest on the wire rack is what transforms a good cutlet into a great one. Try it once and you’ll never skip it again.
- Season at every stage: The flour gets salt. The chicken gets salt. The sauce gets a final adjustment. Each layer builds on the next.
- Don’t crowd the pan: If the cutlets are touching, they’ll steam instead of fry. Steam makes the breading soggy. Cook in batches and keep the finished ones warm on the wire rack in a low oven.
Make It Yours: Easy Swaps
- Gluten-Free: Use a cup-for-cup gluten-free all-purpose flour blend in the flour step and gluten-free panko in the breading step. It works perfectly — I’ve tested it for my cousin who has celiac.
- Chicken Parmesan style: Swap the lemon sauce for a cup of quick marinara and a sprinkle of mozzarella. Broil for 2 minutes until the cheese bubbles.
- Extra lemony: Add the zest of a second lemon to the pan sauce and finish with a squeeze of fresh lemon juice just before serving. This is my preferred version when I want something really bright.
- Kid-friendly note: Simone likes hers with just a squeeze of lemon and a side of spaghetti with butter. No sauce on the cutlet. Kids are particular about textures, and I’ve learned not to push it.
Questions I Get Every Time I Post This
Q: Why did my breading fall off?
A: It’s almost always moisture or temperature. Either the chicken wasn’t patted dry enough before flouring, or the pan wasn’t hot enough when the cutlets went in. Pat the chicken dry, let the breading rest for 5 minutes, and make sure the oil is shimmering before you add the cutlets. You’ll get a perfect crust every time.
Q: Can I use chicken thighs instead of breasts?
A: Yes! Pound them to the same ¼-inch thickness. They’ll take about 30 seconds longer per side. Dark meat stays juicier, which is a plus if you’re prone to overcooking. I do it all the time.
Q: How long does this last in the fridge?
A: Cooked cutlets keep in an airtight container in the fridge for up to 4 days. Keep the sauce separate so the breading doesn’t soften. Reheat in the oven at 375°F for 8-10 minutes on a wire rack.
Q: What do you serve with this?
A: I usually do a simple arugula salad with lemon vinaigrette and roasted potatoes or angel hair pasta with garlic and oil. Marcus likes it with white beans and greens. Simone eats it with buttered spaghetti — she’s a purist.
More Recipes My Family Makes on Repeat
If this one’s a hit at your table, here are a few others that get the same reaction at ours:
- [INTERNAL LINK PLACEHOLDER: Crispy Buttermilk Chicken Thighs] — Juicy on the inside, shatteringly crisp on the outside. No deep fryer required.
- [INTERNAL LINK PLACEHOLDER: One-Pot Lemon Orzo with Shrimp] — Bright, herbaceous, and ready in about 20 minutes. Perfect for the nights you don’t want a pile of dishes.
- [INTERNAL LINK PLACEHOLDER: Celestine’s Sunday Red Beans] — The recipe that started it all. Long braise, dark roux, and the best pot liquor you’ll ever taste.
I make this on weeknights when I want something that feels a little special but doesn’t take all evening. It’s bright, it’s crispy, and it gets eaten fast — three things I look for in any dinner. If you try it, drop a comment below and let me know how it turned out. I genuinely love hearing about the recipes that land on your table.
📌 Crispy Lemon Chicken Romano recipe that stays golden and crunchy under a lemony butter sauce — save it for your next weeknight dinner that feels like a Sunday supper.
Crispy Lemon Chicken Romano
Equipment
- 10-inch cast iron skillet or heavy-bottomed skillet
- Meat mallet or rolling pin
- 3 shallow bowls for breading station
- Tongs
- Microplane or fine grater
- Wire rack set inside a baking sheet
Ingredients
For the Chicken
- 2 large boneless skinless chicken breasts, halved lengthwise and pounded to 1/4-inch thickness
- 1/2 cup all-purpose flour
- 1 tsp salt, plus more for seasoning
- 1/2 tsp black pepper
- 2 large eggs
- 1 tbsp water
- 1 cup panko breadcrumbs
- 3/4 cup finely grated Romano cheese (from a wedge)
- 1 large lemon, zested
For Cooking and Sauce
- 2 tbsp olive oil
- 1 tbsp butter
- 1/2 cup low-sodium chicken stock
- 1 large lemon, juiced
- 2 tbsp butter (for sauce)
- Fresh parsley and lemon slices for garnish
Instructions
- Prep the chicken: Place the sliced chicken breasts between two sheets of parchment paper. Pound them to an even 1/4-inch thickness. Pat them VERY dry with paper towels. Season generously on both sides with salt and pepper.
- Set up the breading station: In bowl 1, combine flour, 1 tsp salt, and 1/2 tsp black pepper. In bowl 2, beat eggs with water until uniform. In bowl 3, mix panko, Romano, and lemon zest with your fingers until evenly combined.
- Bread the chicken: Coat a cutlet in flour, shake off excess. Dip into egg wash, let excess drip off. Press firmly into panko mixture until fully covered on both sides. Place on a wire rack. Repeat with remaining cutlets. Let them rest for 5 minutes. This is the step that keeps the breading on.
- Fry the cutlets: Heat olive oil and 1 tablespoon butter in a 10-inch skillet over medium-high heat until shimmering. Add cutlets in a single layer (work in batches if needed). Cook 2-3 minutes per side until deep golden brown and cooked through. Transfer to a clean wire rack.
- Make the pan sauce: Pour off excess fat from the skillet, leaving the browned bits. Add chicken stock, lemon juice, and 2 tablespoons butter. Stir, scraping up browned bits. Simmer 1 minute until slightly thickened. Taste and adjust salt; add red pepper flakes if desired.
- Serve immediately: Spoon sauce over cutlets right before serving. Garnish with parsley and lemon slices. Do not let cutlets sit in sauce or breading will soften.