
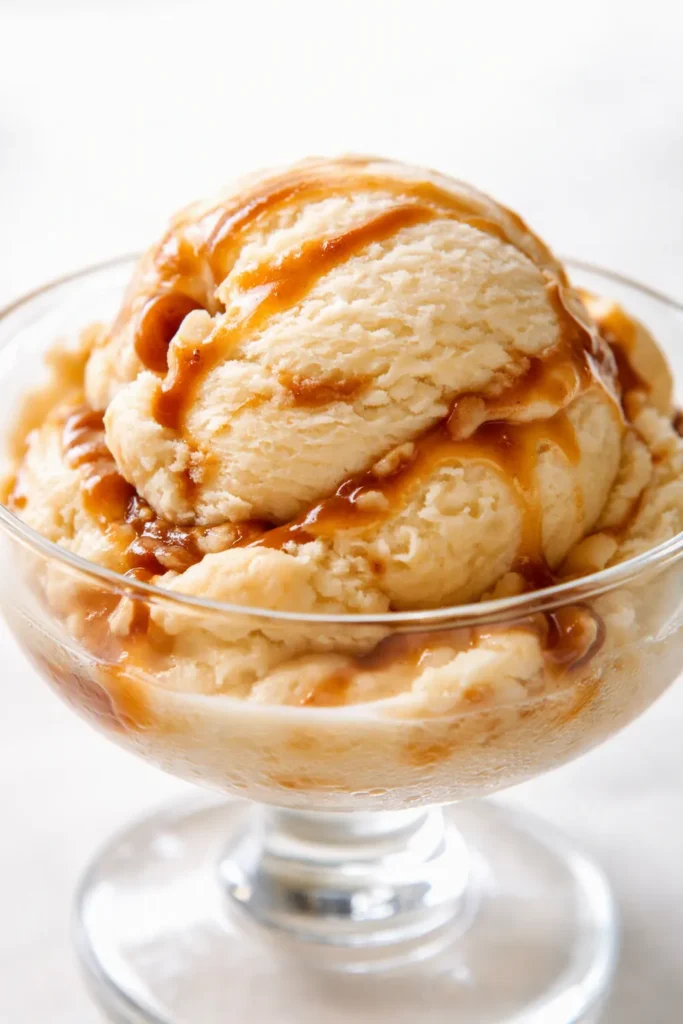
That first spoonful of Bailey’s Irish Cream Ice Cream — the warm whiskey tingle at the back of your throat, the custard so silky it barely counts as chewing — is the reason I stopped buying ice cream. It took me a while to get here. Every batch I made before this one came out of the freezer like a brick that held a grudge, and I assumed that was just how homemade ice cream worked. It’s not. The difference is a real custard base and a last-minute pour of Bailey’s that does more for the texture than any amount of extra cream ever could.
The short version: Real custard, real cream, and the Bailey’s added at the very end — that’s the whole trick.
I’ve made this eleven times since Christmas, including twice for Marcus’s poker group. Those guys asked me to write it down for them. That never happens. It’s about 25 minutes of hands-on work and roughly 7 hours total, most of it the freezer doing the actual labor. This one’s for the grown-ups, and it knows it.
- Serves: 8 as dessert
- Hands-On Time: 25 min | Total Time: About 7 hours (mostly chilling and freezing)
- Difficulty: Easy custard technique — but patience is an ingredient
- Cost per serving: About $1 without the Bailey’s bottle (which you should buy anyway)
- Calories: ~350 per serving
- Dietary Notes: Naturally gluten-free and vegetarian; has alcohol — adults only
(Photo above: an overhead shot of two scoops of Bailey’s Irish Cream Ice Cream in a cobalt blue bowl, a short glass of bourbon off to the side, warm evening light coming from the left, the first scoop already melting just at the edge.)
Why This One Stays Scoopable (and Never Fights Back)
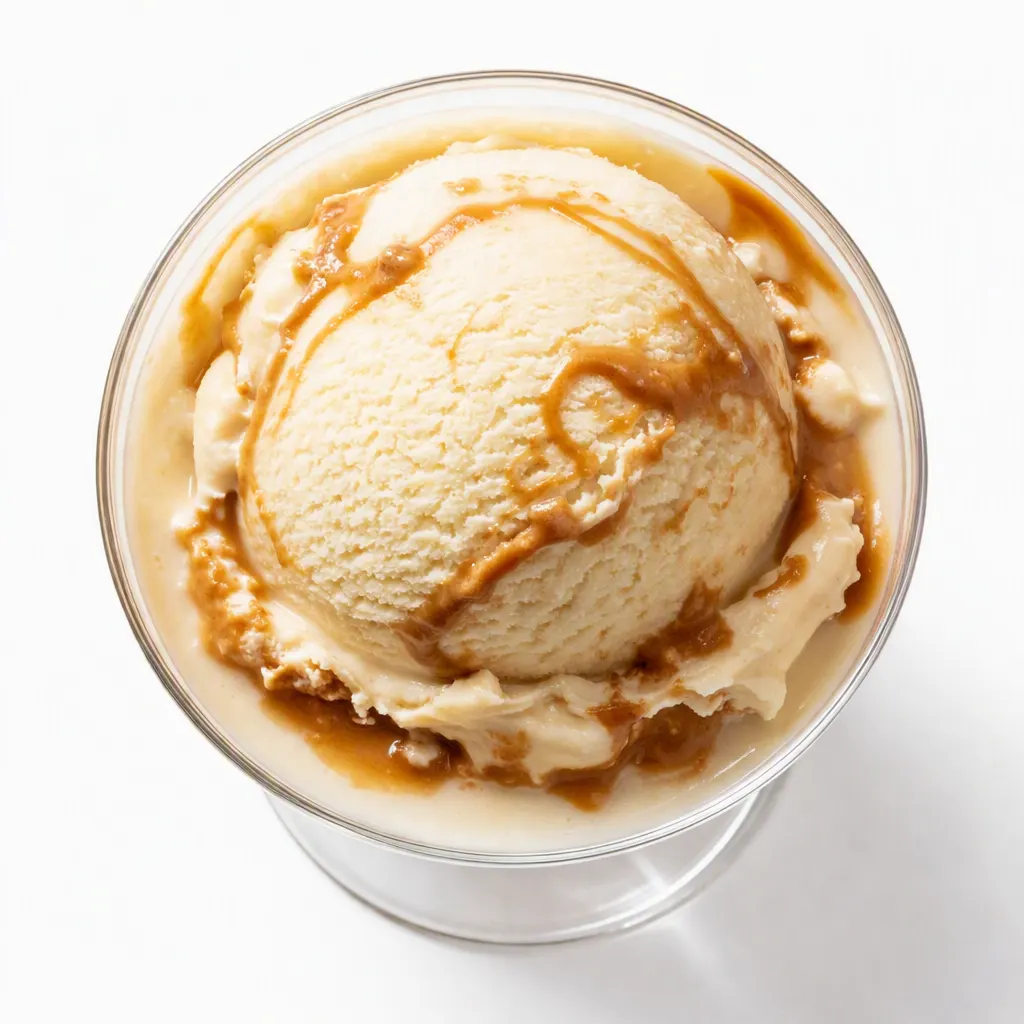
First, the egg yolks. A real custard has structure that plain cream doesn’t — the yolks thicken the base, and that thickened base is what keeps the finished ice cream smooth instead of icy. It’s also why melted ice cream from this recipe re-freezes soft instead of turning into a solid block. The structure holds. I didn’t understand this until I made a batch without the yolks and watched it turn into a haunted ice cube.
Second, and this is the part people don’t expect, the alcohol is doing texture work. Bailey’s isn’t just flavor. The alcohol in it lowers the freezing point of the mixture, which is why a scoop comes out clean and soft even after a few days in the freezer. I learned this the hard way after one batch made with too much liquor never froze at all and another with none froze like a cinder block. The right amount is the difference between a dessert and a construction project.
Third, there’s the balance. One third of a cup, measured, not decorative. Too little and the ice cream is bland and stiff. Too much and the freezer never gets a say in the matter. This is exactly the amount — I’ve made the mistake both directions so you don’t have to.
And there’s the salt, which goes in the base, not just on top. Celestine made boiled custard every Christmas Eve, and she described the moment the custard thickened as “an argument you have to win.” She was right. This is that same custard, grown up and a little irresponsible.
Everything You Need (Plus My Honest Notes from the Kitchen)
Most of this is stuff you already have. The Bailey’s is the one purchase, and it’s a fun one. The small bottle is a lie — you’ll use the rest of it over the course of the week, and I’m not going to pretend otherwise.
- 2 cups heavy cream: Cold from the fridge, and regular pasteurized rather than ultra-pasteurized if you can find it — it just makes a smoother custard. That’s the kind of detail I used to skip until I tasted the difference.
- 1 cup whole milk: Not skim, not 2%. The fat is part of the texture, and if you’re already making homemade ice cream, this is not the place to be disciplined.
- 3/4 cup granulated sugar, divided: Half goes into the cream, half goes into the yolks. Splitting it is not fussiness — each half does a different job.
- 5 large egg yolks: Save the whites. They become Sunday morning scrambled eggs, or a whiskey sour with Marcus, or both. The yolks are what give the ice cream its body.
- 1/2 teaspoon fine sea salt: You won’t taste it as salt. You’ll taste it as everything else tasting more like itself. Celestine salted her custard “like she meant it,” which is the only instruction I’ve ever needed.
- 1 teaspoon vanilla extract: Not the fancy stuff. Just real vanilla, not imitation. This is the one place to be boring in the most reliable way possible.
- 1/3 cup Bailey’s Irish Cream: The bottle says Baileys, without the apostrophe. I don’t know why that bothers me, but it does. My phone autocorrects every time. The point is, buy the real thing — the knockoffs are too sweet and too thin in a way that shows up in the finished ice cream.
- Flaky sea salt for the finish: Optional, but I’ve never once skipped it. A pinch on top right before you serve is the difference between a good scoop and a memorable one.
Simone had a taste of the custard before the Bailey’s went in — she wanted to see what all the fuss was about. She declared it “fine” and asked where the chocolate chips were. She wasn’t wrong to want them. She was just wrong to think they were necessary.
What to Pull Out Before You Start
The equipment list is short, but the one big item needs a full day of warning, so read this before you buy anything.
- An ice cream maker, with the bowl frozen for a full 24 hours ahead of time — put a reminder on your phone; future you will be grateful
- A medium saucepan, 3-quart size is ideal
- A whisk and a silicone spatula
- A fine-mesh strainer
- A medium mixing bowl for the yolks
- A 2-quart container with a lid, or a loaf pan and plastic wrap
- An instant-read thermometer — optional but genuinely helpful; you’re looking for 170°F
Here’s How I Do It — Slowly and On Purpose
Read through once before you start, especially if this is your first custard. The hands-on parts move fast; the waiting parts are the actual work. Don’t let the number of steps scare you — most of them are thirty seconds each.
- Freeze the bowl (yesterday): The ice cream maker’s bowl needs a full 24 hours in the freezer. Not 20. I say this because I have, on more than one occasion, gotten every ingredient measured, cream poured, yolks separated, and then remembered the bowl was sitting in the pantry. It’s a specific kind of frustration. This is a “tomorrow night” dessert recipe, in the best way.
- Start the custard base: In the saucepan, warm the cream, milk, 1/2 cup of the sugar, and the salt over medium heat. Stir occasionally until the sugar dissolves and steam curls off the surface — small bubbles around the edges, but no big bubbles in the middle. You’re not boiling this; you’re just waking it up. While that warms, whisk the yolks with the remaining 1/4 cup of sugar in the bowl until they’re pale and thick, the ribbon stage, where the whisk leaves a trail for a second before it disappears.
- Temper, and don’t rush it: Pour about half a cup of the warm cream into the yolk mixture in a slow, thin stream, whisking the whole time. Keep moving. Then pour everything back into the saucepan. This is the step people skip or rush and then blame the recipe when the ice cream is grainy. The eggs are not going to scramble if you pour slowly and keep whisking — that’s the entire secret, and it’s embarrassingly simple.
- Cook until it visibly thickens: Over medium-low heat, stir constantly with the silicone spatula, scraping the bottom and the corners. You’re looking for the mixture to coat the back of the spatula — dip it in, drag a finger across, and the line should hold for a second. If you’re using the thermometer, 170°F. The second it hits that, take it off the heat. (📸 Photo tip: the custard should look like pale yellow cream and coat the spatula like a thin frosting — it should not look watery, and it should not look curdled. You’re somewhere in the middle, and the finger-drag test tells you when you’ve arrived.)
- Strain it, then chill it properly: Pour the custard through the fine-mesh strainer into a clean bowl — this catches any tiny bits of cooked egg that would otherwise make the texture grainy. Stir in the vanilla. Let it cool on the counter for about 30 minutes, then cover and refrigerate for at least 4 hours. Overnight is better; I always do overnight. The colder the base, the smoother the churn, and if you’re tired tonight, the custard will happily wait for you until tomorrow. It keeps for 3 days in the fridge, so you can absolutely do this step today and churn on Friday.
- Churn it: Pour the cold base into your ice cream maker and churn according to your machine’s instructions — usually 20 to 25 minutes — until it’s thick like soft serve and has roughly doubled in volume. (📸 Photo tip: when it’s done, it should hold its shape on the paddle and look like soft-serve vanilla with a warm glow to it — pale caramel, not bright white.)
- Add the Bailey’s in the last minute: With the machine still running, pour in the 1/3 cup of Bailey’s during the final minute of churning, then let it go another 30 seconds to blend. This is the whole trick. Adding it at the start means the alcohol interferes with the churn the entire time and the ice cream never sets properly. Adding it at the end means you keep the whiskey flavor alive and fold the alcohol into a structure that’s already built. The first time I did this, the texture changed so much I thought I’d made a different dessert!
- Pack it tight: Scrape the soft ice cream into your container, press a piece of parchment paper directly onto the surface — that keeps ice crystals from forming — snap the lid on, and freeze for at least 2 hours to firm up before you scoop.
- Serve it right: Pull the container out, let it sit on the counter for 5 to 10 minutes, then scoop. Finish with a pinch of flaky sea salt on top. I know it sounds like a strange move, but the salt is the final layer of the whole argument, and it lands.
Make-Ahead Notes (Because a Dessert Like This Obeys Your Schedule)
This is probably the most make-ahead dessert I make that isn’t cookies. The custard base is where the time lands — once it’s chilling, you’re done. I make a double batch of the base on Sunday, churn one batch for us and keep the second base in the fridge for Wednesday, when I inevitably need something to get me through the week.
- Fridge: The custard base holds for up to 3 days in a sealed container before churning. It only gets richer. Make it Tuesday, churn it Friday, no problem.
- Freezer: The finished ice cream keeps for up to 2 weeks in a sealed container with parchment pressed onto the surface. After that the Bailey’s flavor fades and it starts picking up freezer taste. It won’t go bad; it just stops being at its best.
- Reheat: You don’t reheat ice cream — you do the opposite. Let it sit on the counter for 10 minutes before scooping. That’s the whole serving ritual, and it matters more than any other step after churning.
The Mistakes I Made So You Don’t Have To
- Freeze the bowl longer than you think: 24 hours minimum. I once did 20 and the ice cream came out thin and sad, like it had given up halfway through the churn. The bowl needs to be deeply, thoroughly, definitely frozen. Put it in the back of the freezer, not near the door.
- Don’t rush the temper: Slow stream, constant whisking, 45 seconds of patience. That’s what saves you from a grainy texture that no amount of churning will fix. If you see a little lump form, whisk faster and pull the pan off the heat for a second — it’s fixable in the moment if you catch it early.
- Salt before you chill, not just at the end: The flaky salt on top is a finish, but the fine sea salt in the base is the foundation. Both are good. The base is essential. I’ve made it without and the ice cream tastes flat, like a song with no bass line.
- If you skip the ice cream maker: Pour the cold custard into a metal loaf pan and put it in the freezer, then stir it every 30 minutes for 3 or 4 hours with a fork, breaking up the ice crystals each time. The texture will be a little coarser than churned, but it’s still genuinely good. I’ve done it when my machine was wedged somewhere unreachable, and nobody at the table complained.
- If it still freezes too hard: Leave it out for 10 or 15 minutes. Every freezer runs different, every container holds heat differently. Even if you mess this part up a little, it’ll still taste like the best thing in the freezer. I’ve done it — it’s not a failure, it’s just a slower start.
Swaps That Actually Work
- Coffee House Version: Stir 1 tablespoon of instant espresso powder into the warm cream before you temper the yolks. Bailey’s already whispers coffee and chocolate notes; this makes it say them out loud. It’s the version I make when I want it to feel like a café dessert.
- Chocolate Chunk Version (Simone’s Version, Eventually): Fold in chopped dark chocolate during the last two minutes of churning. Simone said it needed chocolate chips. She was right about the chocolate. She’s usually right!
- Dairy-Free: Swap the heavy cream and whole milk for full-fat coconut milk and a cup of thick oat cream. It’s icier and slightly less luxurious, but the Bailey’s does a lot of the structural work, and the coconut fat carries the flavor well. My sister-in-law can’t do dairy, and she ate a full bowl without saying a word, which for her is a five-star review.
- Non-Alcoholic: Use a good Irish cream coffee creamer in place of the Bailey’s. The flavor is close, and you can serve it to anybody without having to check IDs. It will freeze harder because there’s no alcohol doing the texture work, so give it 10 to 15 minutes on the counter before scooping.
The Questions I Get About This Recipe All the Time
Q: Why did my ice cream freeze into a brick?
A: Ugh, I’ve been there. It’s almost always one of three things: no ice cream maker, not enough alcohol, or a base that never got properly cold before churning. Fix it next time by chilling the base overnight, using the full 1/3 cup of Bailey’s, and making sure the machine bowl had a solid 24 hours in the freezer. And give it 10 minutes on the counter before you scoop. You’ve got this — the next batch will be the one.
Q: Can I use a non-alcoholic Irish cream?
A: Yes, you can — use a good Irish cream coffee creamer. The flavor will be close, but the texture changes because the alcohol was doing structural work. It’ll freeze firmer, so plan for 10 to 15 minutes on the counter before serving. I’ve tested it and it works; it’s just a slightly different version of the same family.
Q: How long does this last, and can I freeze it?
A: Up to 2 weeks in a sealed container with parchment pressed onto the surface. It lives in the freezer, so that’s not the issue. The real note is that the flavor peaks in the first week. After that the Bailey’s starts to fade, so eat it while it’s showing off.
Q: What do you serve with this?
A: Three things. A tiny pour of hot espresso over the top — it melts into this boozy affogato situation that I would personally fight someone for. Warm brownies, obviously. And caramel sauce if you’re feeling extra. Marcus drizzles chocolate syrup over his, which I have stopped commenting on. He’s happy. That’s what matters.
More Recipes My Family Makes on Repeat
If this one lands at your table, a few others get the same reaction at ours:
- [INTERNAL LINK PLACEHOLDER: Salted Caramel Sauce That Doesn’t Crystallize — Finally] — Drizzle it over this ice cream and you’ll understand everything.
- [INTERNAL LINK PLACEHOLDER: My Grandmother’s Christmas Boiled Custard] — The original this recipe grew up from, Celestine’s version, no alcohol unless you add it yourself.
- [INTERNAL LINK PLACEHOLDER: Brown Butter Brownies with Flaky Salt] — Warm, fudgy, and ready to be buried under a scoop of something cold.
I make this on nights when the kids are in bed and the house is finally quiet — the kind of dessert you’re allowed to be a little selfish about. It’s a grown-up decision, made slowly and on purpose, the way all the best things in the kitchen are.
If you make it, tell me in the comments — I love hearing when a recipe lands at someone else’s table. And tag me on Pinterest or Instagram so I can see your scoops.
📌 Bailey’s Irish Cream Ice Cream recipe with a silky custard base that stays scoopable — save it for your next date night at home.
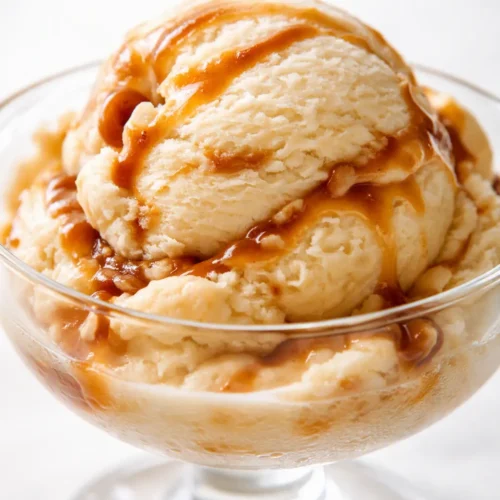
Bailey’s Irish Cream Ice Cream That Doesn’t Freeze Rock-Solid
Equipment
- Ice Cream Maker
- Medium saucepan
- Whisk
- Silicone spatula
- Fine-mesh strainer
- Medium Mixing Bowl
- 2-Quart Freezer Container
- Instant-read thermometer
Ingredients
For the Custard Base
- 2 cups heavy cream, cold
- 1 cup whole milk
- 3/4 cup granulated sugar, divided
- 5 large egg yolks
- 1/2 teaspoon fine sea salt
- 1 teaspoon vanilla extract
At the End
- 1/3 cup Bailey’s Irish Cream, measured
For Serving
- flaky sea salt, for finishing
Instructions
- Freeze the ice cream maker bowl for a full 24 hours before you start.
- Warm the cream, milk, 1/2 cup of the sugar, and salt in a saucepan over medium heat until steam rises and small bubbles form at the edges. While it warms, whisk the egg yolks with the remaining 1/4 cup sugar until pale and thick.
- Temper the yolks by pouring about 1/2 cup of the warm cream into the yolk mixture in a slow, thin stream, whisking constantly. Pour everything back into the saucepan.
- Cook over medium-low heat, stirring constantly with a silicone spatula, until the custard coats the spatula and a finger dragged across it leaves a line that holds, about 170°F on an instant-read thermometer.
- Strain the custard through a fine-mesh strainer into a clean bowl. Stir in the vanilla. Cool 30 minutes on the counter, then cover and refrigerate at least 4 hours or overnight.
- Churn the cold base in your ice cream maker according to the machine instructions, usually 20 to 25 minutes, until thick like soft serve and doubled in volume.
- During the final minute of churning, pour in the 1/3 cup Bailey’s and let it blend for 30 seconds. This keeps the alcohol from interfering with the churn and preserves the whiskey flavor.
- Pack the ice cream into a 2-quart container, press parchment paper directly onto the surface, cover, and freeze at least 2 hours to firm up.
- Let the ice cream sit on the counter 5 to 10 minutes before scooping. Finish each bowl with a pinch of flaky sea salt.
Notes
Related posts:
 Frozen Chocolate Covered Strawberry Bites That Taste Like Pure Summer (3 Ingredients, No Oven)
 Summer Berry Trifle for a Crowd: Creamy, Tangy, and Completely No-Bake
 Ninja Creami Salted Caramel Ice Cream That’s Creamy, Dreamy, and Ready in 24 Hours
 Fall Pumpkin Marshmallow Coffee Syrup That Beats the Coffee Shop — in 10 Minutes