
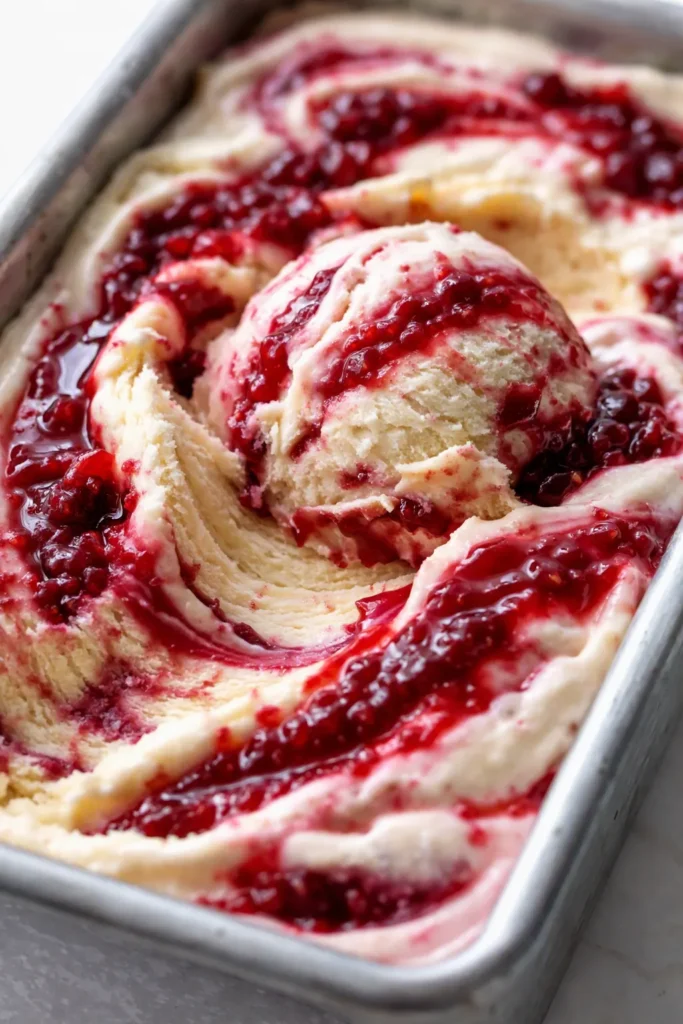
That first bite of homemade raspberry swirl ice cream — the kind where the custard bends like ribbon and the berry ribbon snaps like jam pulled from a jar — is the reason my freezer has been full of custard all summer. Every batch I made before this one came out half-hearted. Icy. Flat. The raspberries turned into little frozen pellets that crunched instead of melting. It took me a while to figure out that the problem wasn’t my machine or my patience. It was three small things I kept skipping, and once I fixed them, this recipe has turned out right every single time.
The short version: Thirty minutes of real work and it comes out scoopable every single time — no chisel required.
I’ve made this batch eleven times in the past year. The first four were me working through the ice-chip problem. Batch five was the one that turned around — ribbons held, scoop came out clean — and I called my sister before the lid was even back on the freezer! The next six were because my daughter Simone kept requesting it for her birthday long after her birthday had passed. Her official review: “It tastes like the raspberry jam but cold. Do it again!” She’s not wrong.
Celestine never owned an ice cream maker, and she’d have said the freezer door was for storage, not for showing off. But the rule she taught me about a roux is the same one that governs this: you don’t rush the thing that needs time, and you don’t walk away from the thing that needs stirring. This dessert is thirty minutes of honest work and about six hours of waiting. The waiting isn’t a flaw. It’s the whole trick.
- Serves: 8 (about 1.5 quarts) as dessert
- Hands-On Time: 30 min | Total Time: ~6 hours (including chill, churn, and freeze)
- Difficulty: Easy once you’ve done it once — the trick is timing, not technique
- Cost per serving: ~$1.20
- Calories: ~330 per serving
- Dietary Notes: Naturally gluten-free and vegetarian; dairy-free swap in variations
(Photo above: Overhead shot of the churned ice cream in a chilled loaf pan, the raspberry ribbon threading through in thick burgundy swirls, a scatter of whole raspberries on top, soft late-afternoon light across the kitchen counter.)
The Three Small Things That Keep It Scoopable (Not a Frozen Brick)
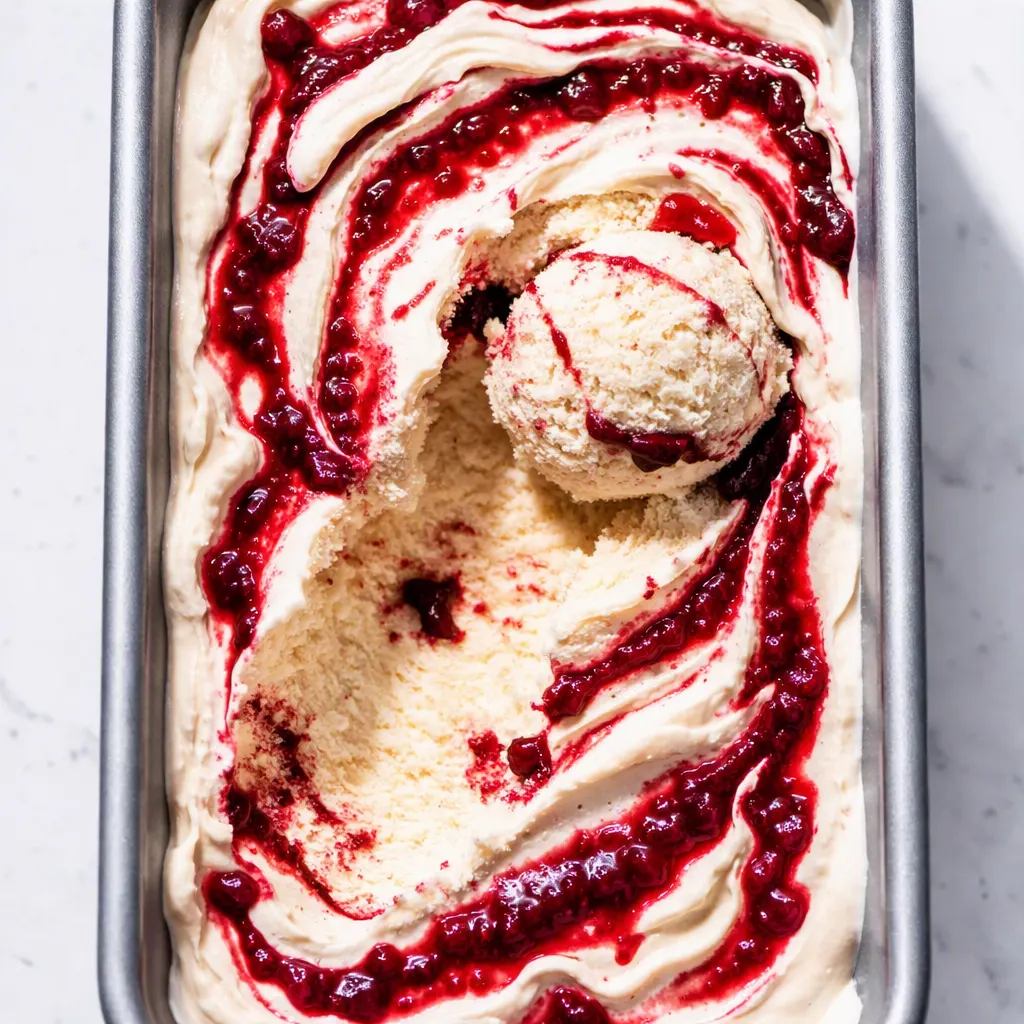
The first thing I learned the hard way: raspberries are mostly water. Stir raw berries into a custard and freeze it, and that water turns into ice crystals that crunch instead of melt. The fix is to cook the berries down into a compote first. You’re not losing flavor — you’re losing the water that was watering it down. What’s left is a ribbon that stays soft in the freezer while the custard around it stays smooth.
The second thing is a spoonful of light corn syrup in the custard. It’s not about sweetness — you won’t taste it. It keeps the base from freezing into a hard brick, so you can scoop straight from the freezer instead of planning around a thaw. I know it looks like an ingredient you’d skip. I was the skeptic.
The third thing is cold. I make the custard the night before and let it sit in the fridge overnight. The colder the base when it hits the churn, the faster it freezes, and the faster it freezes, the smoother it comes out. Room-temperature custard makes the machine work twice as hard, and the texture shows it.
None of these three things matters much on its own. All three together are the difference between a pint that needs a chisel and one that scoops like you brought it home from the shop.
Everything You Need — Plus the Notes I’d Text a Friend
- 2 cups heavy cream and 1 cup whole milk: The cream-to-milk ratio is what makes the base rich without being heavy. Half-and-half doesn’t have enough fat and the texture gives it away. This is the one place I don’t swap.
- 4 large egg yolks: The yolks turn this from frozen milk into custard. Save the whites for breakfast — I scramble them with cheese the next morning.
- 3/4 cup granulated sugar, divided: Half a cup goes into the custard, a quarter cup goes into the berries. Different jobs, different amounts. Don’t pour it all into the cream and expect the berries to get the message.
- 1/8 teaspoon fine sea salt, divided: Most goes in the custard, a pinch in the berries. Sugar needs salt the way greens need acid — it wakes everything up.
- 1 tablespoon light corn syrup: The thing that keeps the base scoopable. You’ll want to skip it. Don’t. Simone calls this “the sticky spoon spoon” because she gets to lick the measuring spoon afterward.
- 1 teaspoon vanilla extract: Real vanilla, not the clear kind. In a custard this simple, you can taste the difference.
- 1 1/2 cups fresh or frozen raspberries: Fresh in July, frozen the rest of the year, and both work because you cook them down anyway. Simone eats the fresh ones before they reach the pan — I’ve started buying two boxes and hiding the second.
- 1 teaspoon fresh lemon juice: Berries need acid. It brightens the compote the way lemon brightens a pot of beans — you might not name it, but you’d know if it weren’t there.
The Equipment (Minimal, I Promise)
- An ice cream maker with a canister that has lived in your freezer for a full 24 hours. Not six. Not overnight if you’re being generous with a clock. Twenty-four.
- A medium heavy-bottomed saucepan for the custard.
- A fine-mesh strainer and a large mixing bowl. Strain the custard even if it looks smooth — you’ll catch a stray bit of cooked yolk and you’ll thank yourself.
- A loaf pan or wide, shallow freezer container. Wide means it freezes faster, and faster freezing means smoother texture.
- A butter knife for the swirl. A spoon works, but a knife gives you ribbons instead of a tie-dye.
Let’s Make It — Step by Step, No Shortcuts Where It Counts
Read the whole thing once before you start. It’s not complicated, but it moves through phases, and each phase has a doneness cue that matters.
- Cook the berries: Put the raspberries, the 1/4 cup sugar, the lemon juice, and a tiny pinch of salt in a small saucepan. Smash about half the berries with the back of a fork right in the pan, then set it over medium heat. Simmer for 8 to 10 minutes, stirring, until it thickens into something that looks like loose jam — drag a spatula through it and the trail should hold for a second. Pour it into a small bowl and cool completely. (📸 Photo tip: The compote should be thick and glossy, the color of a dark garnet, with the spatula’s trail holding its line cleanly before it slowly settles.)
- Warm the cream base: In a medium saucepan, combine the heavy cream, whole milk, the 1/2 cup sugar, the corn syrup, and the remaining salt. Warm it over medium heat, stirring now and then, until the sugar dissolves and the mixture is steaming hot but not boiling.
- Temper the yolks: Whisk the four yolks in a separate bowl until they loosen up. Grab a ladleful of the hot cream and whisk it into the yolks, slowly, so the heat gets introduced without scrambling anything. Do that twice. Then pour the whole yolk mixture back into the saucepan, whisking the whole time. This is the step people rush, and it’s the one that prevents scrambled eggs in your custard.
- Cook the custard: Keep stirring over medium-low heat until the custard thickens enough to coat the back of a spoon — about 170°F on a thermometer, or the spoon test: run your finger across the back and if the custard holds the stripe, it’s done. Don’t let it boil. (📸 Photo tip: That clean stripe on the back of the spoon is the moment — the custard should look like thick cream, not like milk.)
- Strain and chill: Pour the custard through the strainer into the bowl. Stir in the vanilla. Let it cool on the counter for 15 minutes, then cover and refrigerate for at least 2 hours — overnight is better, and overnight is what I do. The colder the base, the smoother the churn.
- Churn: Pour the fully chilled custard into the frozen canister and churn according to your machine, about 25 to 30 minutes, until it looks like thick soft-serve. Transfer it to the chilled loaf pan and smooth the top.
- Swirl: Dollop the cold raspberry compote across the top in five or six spoonfuls. Take the butter knife and draw it through the ice cream in three or four big strokes — up and over, like you’re folding, not stirring. Stop as soon as the ribbons are visible. Over-swirling gives you pink ice cream, and pink ice cream is fine, but it’s not raspberry swirl.
- Freeze: Press a piece of parchment paper directly against the surface to keep freezer air out, then cover tightly. Freeze for 2 to 3 hours until scoopable. If it freezes longer than that, let it sit on the counter for 10 minutes before scooping — an actual count of 10, not “I think that’s about 10.”
Make-Ahead Notes (Because Ice Cream Is About Timing)
This is the sweet thing I make ahead on purpose. The custard base can sit in the fridge for a full two days before you churn it — the flavor relaxes and deepens, like most things worth eating. I make the compote on Sunday and the base on Sunday night, churn it Monday evening when the kitchen is quiet, and by Tuesday afternoon we’re scooping.
- Fridge: Custard base up to 2 days in a sealed container; compote up to 5 days in a jar. Both need to be thoroughly chilled before churning anyway.
- Freezer: Finished ice cream is best within the first week. It keeps for 2 weeks, but the texture starts to firm up after day three — parchment pressed on the surface helps more than you’d think.
- Reheat: Not a thing for the base, but the scoop method matters: run the scoop under hot water, shake it off, and let the pint sit out 10 minutes first. The microwave makes a melted mess with a frozen middle.
Things I Learned After Too Many Icy Batches
- Give the canister a full 24 hours: I have tried this with a six-hour freeze on the canister and a full 24. The results are not in the same family. If the machine can’t chill the custard fast enough, it just spins and sloshes into a frozen brick that never really set. Freeze the bowl the day before. Write it on the calendar.
- Don’t skip the corn syrup: I know it looks like the ingredient you’d leave out because the label has a lot of syllables. A single tablespoon is the difference between a pint that scoops and one that requires an ice pick. Trust me on this one — I was the skeptic.
- Swirl gently: My first batch turned out raspberry-flavored ice cream because I stirred the compote straight in, hoping for marbling and getting a muddle. Three or four strokes with the knife, no more. If the ribbons look thin, that’s correct.
- Let it sit out before serving: Even a perfect batch straight from a long freezer stint will be too firm. Ten minutes on the counter, a warm scoop, and you’re getting the texture the recipe intends. And even if you skip it, it’s still ice cream — I’ve done it.
- Strain the custard no matter what: You’ll catch a stray cooked bit of egg you’d never see in the pan but would absolutely regret in the pint. It takes ten seconds.
Swaps That Actually Work
- Frozen raspberries: My default outside of July. Use them straight from the freezer — they’re already soft, so they cook into compote even faster. The compote step cooks out the water regardless, so the ribbons stay true.
- Dairy-free version: Full-fat coconut milk in place of the heavy cream and a good oat milk in place of the whole milk. It’s a different texture — denser, more coconut flavor — but genuinely good. My nephew can’t do dairy, so this is the version I make when he’s over.
- Other berries: Blackberries and blueberries work with the same method and the same sugar. Strawberries are sweeter and more watery, so cook the compote a few minutes longer.
- Honey instead of corn syrup: Same amount, and it works. It adds a mild floral note that’s lovely in the base, though it competes a little with the berries. Your call.
- The adult version: A tablespoon of bourbon stirred into the compote after it comes off the heat. It keeps the ribbon a touch softer in the freezer and adds a warmth you can’t quite name. I make this one after Simone’s in bed.
The Questions I Get Every Single Summer
Q: Why did my ice cream come out icy and crunchy?
A: Ugh, I’ve been there. It’s almost always one of two things: raw berries stirred into the base without cooking them down, or a skipped tablespoon of corn syrup. Both leave extra water in the mix, and water freezes into crystals. Cook the compote until it’s thick, keep the corn syrup, chill the base overnight, and the next batch will be smooth. You’ve got this.
Q: Can I use frozen raspberries instead of fresh?
A: Yes — frozen raspberries are actually my default outside of summer. They’re picked at their peak and they’re already soft, so they melt down into compote faster. Don’t bother thawing them first; just put them straight into the pan. I’ve tested this plenty and it always works.
Q: How long does this keep in the freezer?
A: It’s at its best within the first week, it stays safe and tasty for two, and after that the texture starts to harden. The fix is easy: set it on the counter for 10 minutes before you scoop and run the scoop under hot water. We’ve never had a batch survive long enough to see week three.
Q: What do you serve with this?
A: Three things we do: over a warm brownie so the edges melt just a little, scooped onto a slice of pound cake, or in a waffle cone with fresh raspberries dropped on top. Simone’s version is a bowl with extra raspberries so it’s “double berry.” She’s not wrong — the contrast between the cold custard and the bright fresh berries is the best part.
More Recipes My Family Makes on Repeat
If this one lands in your summer rotation, here are a few others that get the same reaction at our table:
- [INTERNAL LINK PLACEHOLDER: Vanilla Bean Custard Ice Cream] — The clean, simple base this recipe started from, before the berries get involved.
- [INTERNAL LINK PLACEHOLDER: Brown Butter Peach Galette] — Peak summer in a pie pan, with a crust that shatters and a filling that tastes like July.
- [INTERNAL LINK PLACEHOLDER: Old-Fashioned Southern Pound Cake] — The slice this ice cream was made to sit on, dense enough to hold its own against a scoop.
Whether this is for a birthday, a hot afternoon, or just the week the market raspberries finally look good enough, it’s worth the patience. Thirty minutes of real work and about six hours of waiting — and the waiting is mostly the freezer doing the job it does best.
If you make it, drop a comment below and tell me how the swirl went. I love hearing about the good batches and the ones that taught you something.
📌 Save this homemade raspberry swirl ice cream recipe for your next summer party — the one dessert that stays scoopable even after an hour of sitting out.
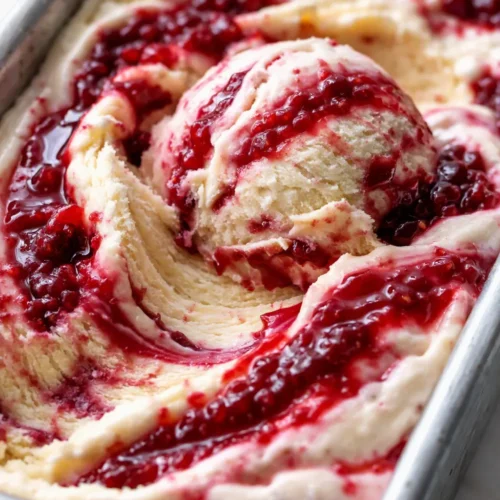
Homemade Raspberry Swirl Ice Cream That Doesn’t Turn Icy — Finally
Equipment
- Ice Cream Maker
- Medium Heavy-Bottomed Saucepan
- Small saucepan
- Fine-mesh strainer
- Large Mixing Bowl
- Loaf Pan
- Butter Knife
Ingredients
Custard Base
- 2 cups heavy cream
- 1 cup whole milk
- 4 large egg yolks
- 1/2 cup granulated sugar
- 1/8 teaspoon fine sea salt
- 1 tablespoon light corn syrup
- 1 teaspoon vanilla extract
Raspberry Compote
- 1 1/2 cups fresh or frozen raspberries
- 1/4 cup granulated sugar
- 1 teaspoon fresh lemon juice
- 1 pinch fine sea salt
Instructions
- Cook the berries: put the raspberries, the 1/4 cup sugar, the lemon juice, and a tiny pinch of salt in a small saucepan. Smash about half the berries with the back of a fork, then set it over medium heat. Simmer for 8 to 10 minutes, stirring, until it thickens into loose jam. Pour into a small bowl and cool completely.
- Warm the cream base: combine the heavy cream, whole milk, the 1/2 cup sugar, corn syrup, and the remaining salt in a medium saucepan. Warm over medium heat, stirring now and then, until the sugar dissolves and the mixture is steaming but not boiling.
- Temper the yolks: whisk the four yolks in a separate bowl until they loosen. Ladle some hot cream into the yolks, whisking slowly, then repeat. Pour the yolk mixture back into the saucepan, whisking the whole time. This is the step that prevents scrambled eggs.
- Cook the custard: keep stirring over medium-low heat until the custard thickens enough to coat the back of a spoon — about 170°F on a thermometer, or the spoon test: run your finger across the back and if the custard holds the stripe, it is done. Do not let it boil.
- Strain and chill: pour the custard through the strainer into a bowl. Stir in the vanilla. Let it cool for 15 minutes, then cover and refrigerate for at least 2 hours — overnight is better. The colder the base, the smoother the churn.
- Churn: pour the fully chilled custard into the frozen canister and churn according to your machine, about 25 to 30 minutes, until it looks like thick soft-serve. Transfer to a chilled loaf pan and smooth the top.
- Swirl: dollop the cold raspberry compote across the top in five or six spoonfuls. Take a butter knife and draw it through the ice cream in three or four big strokes, up and over, like folding. Stop as soon as the ribbons are visible. Over-swirling gives you pink ice cream.
- Freeze: press parchment paper directly against the surface, then cover tightly. Freeze for 2 to 3 hours until scoopable. If it freezes longer, let it sit on the counter for 10 minutes before scooping.
Notes
Related posts:
 Frozen Chocolate Covered Strawberry Bites That Taste Like Pure Summer (3 Ingredients, No Oven)
 Apple Pie Rice Krispie Treats for Last-Minute Fall Desserts: 5 Minutes, No Oven, All the Flavor
 Cherry Rice Krispie Treats That Taste Like a Chocolate-Covered Cherry — in 20 Minutes Flat
 Brownie Batter Protein Ice Cream (Ninja Creami Recipe). Language: English (US)