
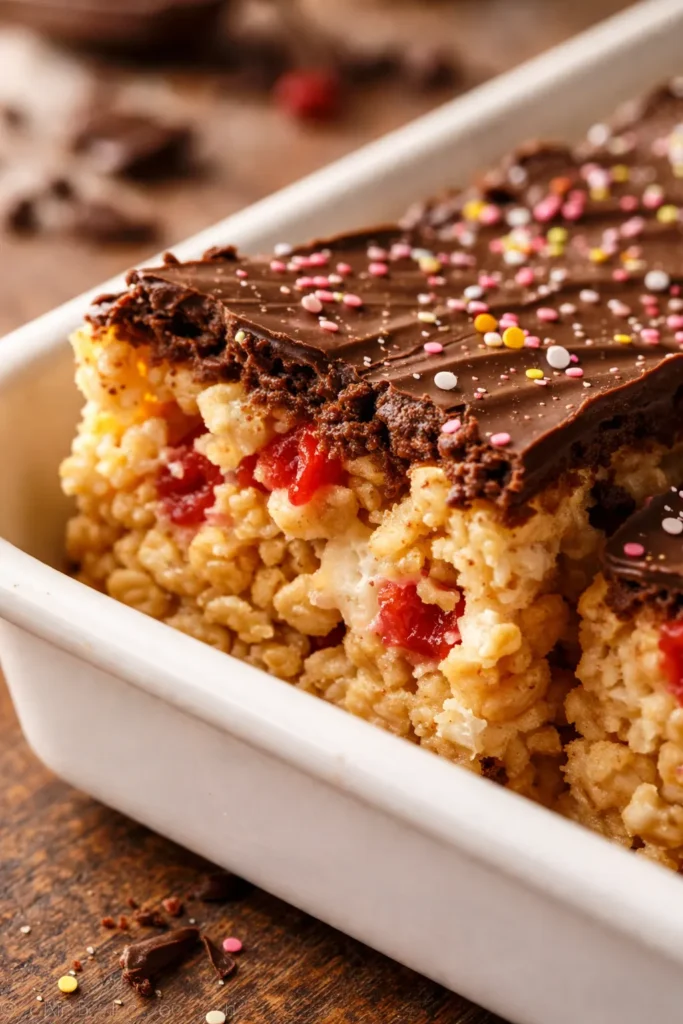
That first bite — where the crispy marshmallow crunch meets a smooth layer of dark chocolate and a burst of cherry sweetness — is the kind of moment that makes you glad you didn’t settle for the boxed stuff. I’ve been making rice krispie treats since I was old enough to stand on a step stool and reach the stove, but this cherry version? It’s the one my friends text me about every February, and honestly, I make it year-round now. Something about that cherry-chocolate combo just hits different — like a dessert that feels both nostalgic and a little fancy at the same time.
Look, I’ll be real with you: my first few batches of cherry rice krispie treats were a hot mess. The gelatin clumped into weird little pockets of bright red powder that didn’t mix in, and the chocolate topping slid right off like a bad ice rink. I nearly gave up. But batch four — that was the one. I learned to add the gelatin after the marshmallows are fully melted (not before), and I let the chocolate set properly before cutting. Now these come out perfect every time: that signature marshmallow chew, a pop of cherry that’s sweet but not cloying, and a dark chocolate lid that cracks just a little when you bite through. My neighbor’s kid called them “the pink ones that taste like a fancy candy bar,” and honestly, I’ll take that compliment any day.
Through my testing, I found that the key variables are the temperature when you add the gelatin, the speed of melting the marshmallows, and the resting time for the chocolate. Dozens of batches later, I’ve dialed in the timing and technique to get consistent results. This recipe has been tested in my own kitchen (as well as by a few brave neighbors) and it works every single time — as long as you follow a few critical steps I’ll walk you through below.
- Serves: 12 to 16 as a dessert or snack
- Hands-On Time: 20 min | Total Time: 1 hr 20 min
- Difficulty: Easy — even if you’ve never made a cereal bar before
- Cost per serving: About $0.85
- Nutrition Estimate: 210 Calories, 3g Protein, 32g Carbs, 9g Fat, 5g Saturated Fat, 0g Fiber, 135mg Sodium per serving
- Dietary Notes: Contains dairy and gluten; adaptable for gluten-free with certified GF cereal
(Photo: overhead shot of a 13×9 pan of treats, cut into squares with a glossy dark chocolate layer on top, a few pink crumbs scattered on a white ceramic plate, natural light from the left showing the chocolate sheen and the pink cereal base.)
Why Cherry Gelatin Makes These Actually Taste Like a Real Cherry (Not Candy)
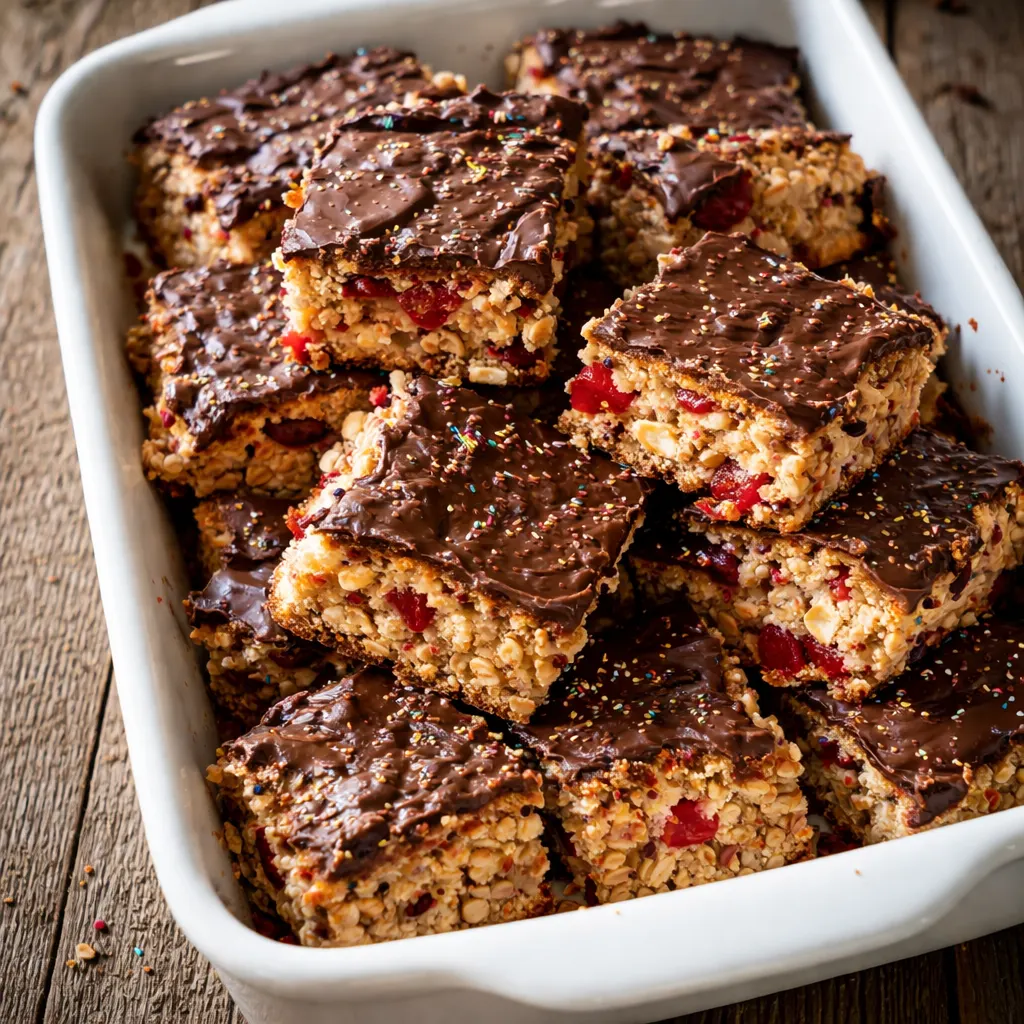
Regular rice krispie treats are great — don’t get me wrong — but they’re basically just sweet. The cherry gelatin powder does two things here that plain marshmallows can’t. First, it adds a tangy fruit note that cuts through all that sugar, making each bite feel brighter and less one-note. Second, it tints the whole batch that pretty pink color that makes people think you fussed way more than you did. The gelatin dissolves completely into the warm marshmallow mixture if you add it at the right moment — no powder pockets, no streaks. According to USDA nutritional data, gelatin contributes a small amount of protein per serving, which is a fun bonus in what’s otherwise pure treat territory.
The dark chocolate topping isn’t just decoration — it’s the counterbalance. Dark chocolate’s bitterness plays against the sweet-tart cherry base in a way that makes each component taste more like itself. One square of this has roughly 4 grams of saturated fat from the butter and chocolate combined, so it’s definitely a sometimes-food, but that’s what makes it feel special. The chocolate also gives the bars a clean, snappy top layer that contrasts with the soft, chewy cereal beneath. If you skip the chocolate, you’re basically making pink rice krispie treats — good, but not the cherry-chocolate experience we’re here for.
Everything You Need (And a Few Notes From Me)
- 6 Tablespoons unsalted butter: Butter gives these bars their rich flavor and helps the marshmallows melt smoothly. Salted butter works too — just cut the pinch of salt if you’re using it. I use unsalted so I can control the salt level myself.
- 16 ounce package mini marshmallows: Mini marshmallows melt faster and more evenly than the big ones. The standard 16-ounce bag is exactly what you need — no measuring, no guessing. If all you have are jumbo marshmallows, they’ll work, but keep the heat low and stir patiently.
- 1 ½ Tablespoons cherry gelatin powder (JELL-O, not sugar free): This is where the cherry flavor and pink color come from. Use the full-sugar version — sugar-free gelatin has a different texture and doesn’t dissolve as smoothly into the marshmallow mixture. One small box of JELL-O holds about 3 tablespoons, so you’ll use half a box for these bars.
- 6 cups Rice Krispies cereal: The classic crispy rice cereal that gives these bars their signature crunch. Generic store brands work too, but check that they’re fresh — stale cereal makes for sad, soft bars. Measure by lightly spooning the cereal into the cup — don’t pack it down or you’ll end up with a denser treat.
- 10 ounce Ghirardelli dark chocolate melting wafers (melted): These wafers melt smoothly and set with a nice shine. You can use chocolate chips instead, but add a teaspoon of coconut oil to help them melt into a pourable consistency. I’ve tried a few brands, and Ghirardelli gives the glossiest finish with the least fuss.
- Sprinkles (optional): A little sprinkle on top while the chocolate is still wet adds a festive touch. I do pink and white hearts when I’m making these for Valentine’s Day, or just leave them plain for everyday snacking.
What to Pull Out Before You Start
- Large saucepan: You need a pot big enough to stir the marshmallows and cereal together without spillage. A 4- or 5-quart pot works great.
- 13×9 baking dish: This gives you standard-thickness bars that are easy to cut and share. If you want thick, bakery-style treats, use a 9-inch square pan instead.
- Covered container for storage: An airtight container keeps these bars fresh for several days. A glass or plastic food storage container with a tight lid works perfectly.
- Spatula or wooden spoon: For stirring the marshmallow mixture and folding in the cereal.
- Butter or cooking spray: To grease the pan and your hands or spatula for pressing the mixture in without sticking.
Let’s Make It (Step by Step)
This recipe moves fast once you start, so I like to have everything measured and ready before I turn on the stove. Here’s my exact process.
- Grease your 13×9 baking dish with butter or cooking spray. Set it aside so it’s ready when you need it.
- Melt the 6 tablespoons unsalted butter and the entire 16-ounce bag of mini marshmallows together in a large saucepan over low heat. Stir constantly with a spatula or wooden spoon until the marshmallows are completely melted and the mixture is smooth and glossy. Low heat is key here — high heat can scorch the marshmallows and make the mixture grainy.
- Add the 1½ tablespoons of cherry gelatin powder to the warm marshmallow mixture. Stir it in thoroughly until the powder is fully dissolved and the color is even throughout. You should see a uniform pink with no white streaks. If the gelatin isn’t dissolving fully, the mixture might not be hot enough — give it another minute on low heat while stirring.
- Fold in the 6 cups of Rice Krispies cereal. Use a gentle folding motion — don’t stir too aggressively or you’ll crush the cereal into tiny pieces. You want the marshmallow mixture to coat each piece evenly without breaking them down.
- Press the mixture into your greased 13×9 baking dish. Use a buttered spatula or buttered hands to press it down evenly. If you want THICKER treats, use a 9-inch square pan instead — the same amount of mixture will fill it deeper. I lightly butter my hands and press gently — firm enough to hold together, but not so hard that the bars become dense.
- Frost the treats with the melted dark chocolate. Pour the 10 ounces of melted Ghirardelli dark chocolate wafers over the top and spread it evenly with a spatula. If you’re using sprinkles, add them now while the chocolate is still wet.
- Allow the treats to set at room temperature for about one hour. The chocolate should firm up completely — it’ll go from glossy to matte and feel firm to the touch. If your kitchen is warm, you can pop the pan in the fridge for 20-30 minutes instead.
- Cut into squares and enjoy. I like to trim the edges first for clean-looking bars, but that’s totally optional. Store any leftovers in a covered container at room temperature.
How I Meal Prep These for the Week
I make a full 13×9 pan on Sunday afternoon and we snack on them through the week — if they last that long. The bars stay fresh at room temperature for about four days, but honestly, mine are usually gone by day three. I cut them into squares and store them in a covered container with wax paper between the layers to keep the chocolate from sticking to itself. One square is usually enough for an afternoon treat, but I won’t judge you if you grab two.
- Fridge: Store in a covered container at room temperature. Skip the fridge — it can make the chocolate bloom (turn white and cloudy) and the cereal lose its crunch.
- Freezer: Yes, you can freeze these. Wrap each square individually in plastic wrap, then place them in a freezer bag. They’ll keep for up to two months. Thaw at room temperature for about 30 minutes before eating.
- Reheat: You don’t need to reheat these — they’re best at room temperature. If you want a slightly warm treat, microwave a single square for 8-10 seconds, but no longer, or the chocolate will melt and get messy.
Things I Wish I’d Known the First Time
- Add the gelatin at the right moment: Stir the gelatin powder in after the marshmallows are fully melted and smooth, not before. If you add it too early, the gelatin can clump and leave little hard bits in the finished bars. If you add it when the mixture is still hot enough to dissolve it completely, you get a perfectly even pink color. Trust me on this one — I learned the hard way.
- Butter your hands or spatula for pressing: The marshmallow mixture is sticky — like, really sticky. Lightly butter your hands or the spatula before pressing it into the pan, and it won’t cling to everything. A light spray of cooking spray works too. Even if you mess this part up a little, it’ll still taste good — I’ve done it.
- Let the chocolate set fully before cutting: I know it’s tempting to cut into these right away, but the chocolate needs a solid hour to set. If you cut too soon, the chocolate layer will smear and make a mess. You’ll know it’s ready when the chocolate is firm to the touch and no longer shiny. If you’re impatient, 30 minutes in the fridge speeds things up nicely.
- Don’t over-mix the cereal: Fold the Rice Krispies in gently with a spatula, using broad, gentle strokes. Over-mixing crushes the cereal into tiny pieces and makes the bars dense and heavy instead of light and airy. You want each piece of cereal to be coated in marshmallow but still recognizable as a little puff.
Swaps That Actually Work
- Gluten-Free: Use certified gluten-free crispy rice cereal. Rice Krispies brand contains malt flavoring from barley, which has gluten, so look for a GF-labeled brand like Nature’s Path or One Degree. Everything else in the recipe is already gluten-free.
- Dairy-Free: Swap the unsalted butter for a plant-based butter stick (not spread — it needs to be firm). Use dairy-free dark chocolate wafers or chocolate chips. The texture will be slightly different, but still delicious.
- White Chocolate Version: Replace the dark chocolate melting wafers with white chocolate for a sweeter, creamier topping. This pairs beautifully with the cherry flavor and makes the bars look even pinker against the white chocolate.
- Strawberry or Raspberry Twist: Use strawberry or raspberry gelatin instead of cherry for a different fruit flavor. The method stays exactly the same — just swap the flavor of the JELL-O. I love raspberry with dark chocolate too.
- Party-Size Batch: Double all the ingredients and press the mixture into a half-sheet pan. You’ll get about 30-36 squares — perfect for bake sales, birthday parties, or holiday gift plates.
Troubleshooting Common Problems
Why Did My Cherry Rice Krispie Treats Turn Out Hard Instead of Chewy?
Q: Why did my treats turn out hard and crunchy instead of soft and chewy?
A: The most common culprit is cooking the marshmallow mixture too long or over too high heat. When marshmallows are heated past the melting point, the sugar can crystallize and make the bars tough as they cool. Keep the heat on low and stir just until the marshmallows are melted and smooth — don’t let it simmer or bubble. If your bars are already hard, they’re still edible! Try microwaving a square for about 10 seconds to soften it up.
Q: Can I use sugar-free gelatin instead of regular?
A: I don’t recommend it. Sugar-free gelatin uses different sweeteners and thickeners that don’t dissolve as smoothly into the marshmallow mixture. You’ll likely end up with a grittier texture and a less vibrant color. If you’re watching your sugar intake, you’re better off making regular treats and enjoying a smaller portion — the texture difference is noticeable.
Q: How do I know when the chocolate topping is fully set?
A: The chocolate should change from glossy to matte and feel firm to a light touch. If you press it gently with a clean fingertip, no chocolate should come off on your skin. At room temperature, this takes about an hour. If your kitchen is warm (above 75°F), the chocolate may take longer — you can refrigerate the pan for 20-30 minutes to speed it up without harming the texture.
Q: Can I make these vegan?
A: Yes, with some swaps. Use vegan mini marshmallows (Dandies brand works well), plant-based butter, and vegan dark chocolate. The texture will be slightly different — vegan marshmallows don’t stretch the same way — but the flavor and look are still fantastic. I’ve made a vegan batch for a friend’s birthday and they disappeared just as fast as the regular ones.
How Do You Store These Treats?
Q: How long do cherry rice krispie treats last, and how should I store them?
A: They’ll stay fresh at room temperature for about 4 days in a covered container. Place them in a single layer or with wax paper between layers to keep the chocolate from sticking. Don’t refrigerate them — the cold can make the chocolate bloom (turn white and chalky-looking) and the cereal soften. They’re still safe to eat after refrigeration, but the texture won’t be as nice.
Q: Can I make these ahead of time and freeze them?
A: Absolutely. Wrap each square individually in plastic wrap, then place them in a freezer-safe bag or container. Freeze for up to 2 months. To thaw, let them sit at room temperature for about 30 minutes — unwrap them after they’ve thawed to avoid condensation on the chocolate. I often make a double batch and freeze half for later.
Q: What’s the best way to keep them fresh for a party?
A: Make them the day before your party and store them in an airtight container at room temperature. Don’t cut them until the chocolate is fully set (about an hour after frosting), then cut and store. If you’re stacking them in a container, use wax paper between layers. They’ll look and taste freshly made the next day.
Q: What do you serve with these treats?
A: These are fantastic on their own, but here are three of my favorite pairings: a cold glass of milk for classic dunking, a scoop of vanilla ice cream for an extra-indulgent dessert, or a cup of hot coffee — the bitterness of the coffee is perfect against the sweet cherry and chocolate. I also love bringing them to potlucks alongside something savory, like a cheese board, so guests can go back and forth between salty and sweet.
These cherry rice krispie treats have become my go-to for everything from Valentine’s Day classroom parties to lazy Sunday baking sessions. They’re the kind of recipe that feels special without requiring any real skill — if you can stir, you can make these. The cherry gelatin gives them that pop of color and flavor that makes everyone ask, “Wait, what’s in these?” and the dark chocolate on top makes them feel like a grown-up treat, even though they’re made from the same cereal we ate as kids.
If you try this recipe, I’d love to hear how it turns out — tag me on Pinterest so I can see your pretty pink squares!
Cherry rice krispie treats with dark chocolate frosting that taste like a chocolate-covered cherry and take just 20 minutes of hands-on time — save this recipe for your next Valentine’s Day celebration or spring party.
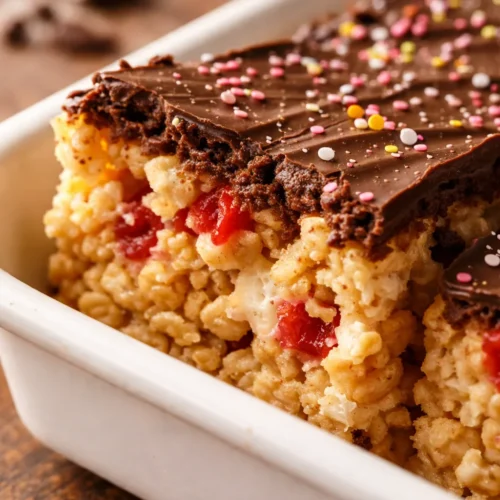
Cherry Rice Krispie Treats That Taste Like a Chocolate-Covered Cherry — in 20 Minutes Flat
Equipment
- Large saucepan
- 13×9 baking dish
- Covered container
- Spatula or wooden spoon
- Butter or cooking spray
Ingredients
- 6 Tbsp unsalted butter
- 16 oz mini marshmallows 1 package
- 1 ½ Tbsp cherry gelatin powder (JELL-O, not sugar free)
- 6 cups Rice Krispies cereal
- 10 oz Ghirardelli dark chocolate melting wafers melted
- Sprinkles optional
Instructions
- Grease your 13×9 baking dish with butter or cooking spray. Set it aside so it’s ready when you need it.
- Melt the 6 tablespoons unsalted butter and the entire 16-ounce bag of mini marshmallows together in a large saucepan over low heat. Stir constantly with a spatula or wooden spoon until the marshmallows are completely melted and the mixture is smooth and glossy. Low heat is key here — high heat can scorch the marshmallows and make the mixture grainy.
- Add the 1½ tablespoons of cherry gelatin powder to the warm marshmallow mixture. Stir it in thoroughly until the powder is fully dissolved and the color is even throughout. You should see a uniform pink with no white streaks. If the gelatin isn’t dissolving fully, the mixture might not be hot enough — give it another minute on low heat while stirring.
- Fold in the 6 cups of Rice Krispies cereal. Use a gentle folding motion — don’t stir too aggressively or you’ll crush the cereal into tiny pieces. You want the marshmallow mixture to coat each piece evenly without breaking them down.
- Press the mixture into your greased 13×9 baking dish. Use a buttered spatula or buttered hands to press it down evenly. If you want THICKER treats, use a 9-inch square pan instead — the same amount of mixture will fill it deeper. I lightly butter my hands and press gently — firm enough to hold together, but not so hard that the bars become dense.
- Frost the treats with the melted dark chocolate. Pour the 10 ounces of melted Ghirardelli dark chocolate wafers over the top and spread it evenly with a spatula. If you’re using sprinkles, add them now while the chocolate is still wet.
- Allow the treats to set at room temperature for about one hour. The chocolate should firm up completely — it’ll go from glossy to matte and feel firm to the touch. If your kitchen is warm, you can pop the pan in the fridge for 20-30 minutes instead.
- Cut into squares and enjoy. I like to trim the edges first for clean-looking bars, but that’s totally optional. Store any leftovers in a covered container at room temperature.
Related posts:
 Frozen Chocolate Covered Strawberry Bites That Taste Like Pure Summer (3 Ingredients, No Oven)
 Apple Pie Rice Krispie Treats for Last-Minute Fall Desserts: 5 Minutes, No Oven, All the Flavor
 The Homemade Pumpkin Spice Latte That Costs a Fraction of the Drive-Through (And Tastes Better)
 Almond Flour Granola That’s Perfectly Clustered (Not Soggy) — Finally