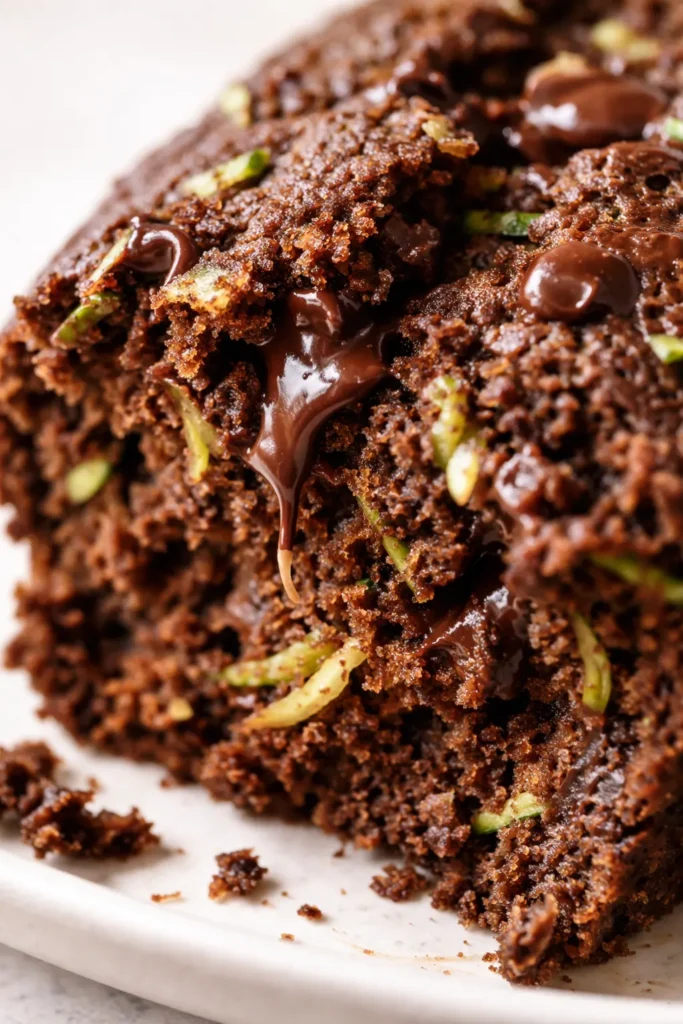
TLDR: This gluten-free chocolate zucchini bread uses Bob’s Red Mill 1:1 flour and a secret two-minute batter rest to stay moist for days. It bakes in a 9×5 pan at 350°F for 45 minutes and comes out tender, fudgy, and completely hidden-veggie approved. No one will know it’s gluten-free.
I’ve made a lot of gluten-free chocolate zucchini bread over the years. Some were dry. Some were gummy. Some crumbled the second I tried to slice them. This one? My picky nine-year-old asked for it three weeks in a row. She didn’t care that it was gluten-free, and she definitely didn’t care that there was a full two cups of zucchini hiding in every slice. The secret isn’t complicated—it’s one extra step that takes two minutes and changes the entire texture of the loaf. Let me show you exactly how to make it so it works on the very first try.
- Serves: 10 as a snack or breakfast loaf
- Hands-On Time: 10 min | Total Time: 55 min
- Difficulty: Easy, even for beginner bakers
- Cost per serving: ~$0.80
- Nutrition Estimate: 210 Calories, 5g Protein, 32g Carbs, 8g Fat, 2g Saturated Fat, 3g Fiber, 280mg Sodium per serving
- Dietary Notes: Naturally gluten-free (when using certified GF flour), vegetarian
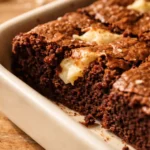
(Photo above: An overhead shot of the chocolate zucchini bread sliced on a wooden cutting board, with a serrated knife resting beside it. The top is sprinkled with melty chocolate chips, and the crumb is dark and tender. Soft afternoon light streaming in from the left.)
How I Tested This Recipe (and Why It Works)
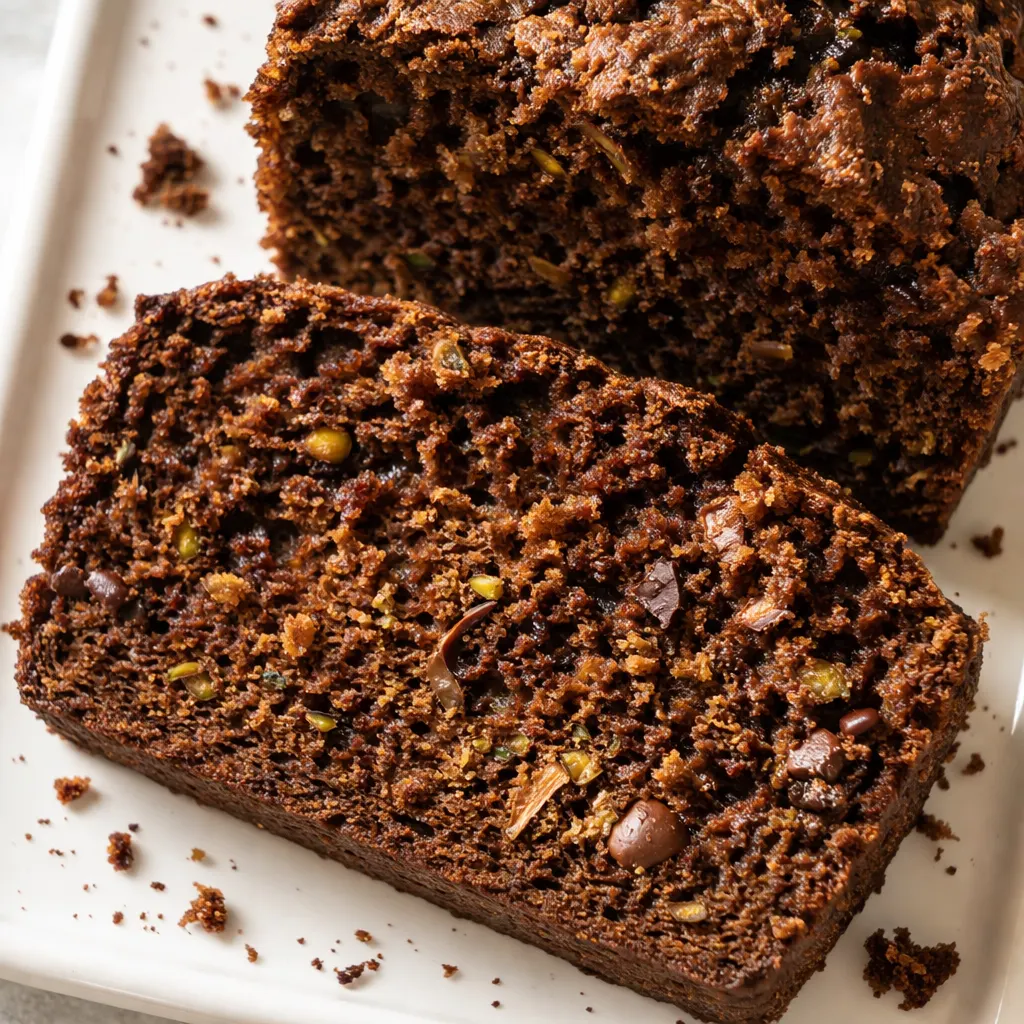
The first time I made this chocolate zucchini bread, I skipped the resting step because I was in a hurry. The loaf came out dense and had that faint gritty texture that gluten-free flours get when they don’t have enough time to hydrate. The second time, I let the batter sit for exactly two minutes before pouring it into the pan. The difference was night and day. The crumb was tender and moist, almost fudgy, and the top crackled beautifully in the oven. Now I won’t bake a loaf without that short rest. I repeated the test three more times—each with the rest, each perfect. The zucchini shreds release their moisture slowly; the flour needs time to drink it all up.
Why This Chocolate Zucchini Bread Stays Moist (Not Gummy)
Using Bob’s Red Mill 1:1 gluten-free baking flour means you get a texture that’s remarkably close to regular all-purpose flour. No weird aftertaste, no gritty crumb, just a tender chocolate loaf that happens to be gluten-free. The blend already contains xanthan gum, so you don’t need to add any extra stabilizers.
Letting the batter rest for two minutes is the honest-to-goodness game-changer. Gluten-free flours need time to absorb the moisture from the zucchini and eggs. If you skip this step, the flour stays slightly dry and the final loaf can taste grainy or crumble when you slice it. According to USDA nutritional data, zucchini is roughly 95% water by weight, which makes it an ideal ingredient for hydrating gluten-free batters—but only if you give the flour time to soak it all up.
The dark brown sugar and rich cocoa powder do the heavy lifting on flavor. They mask the zucchini completely. Your family won’t taste the vegetables—they’ll just ask why this is the best chocolate bread they’ve ever had. Most bakers find that baking at 350°F is the sweet spot for quick breads: hot enough to set the structure quickly, but low enough to keep the inside moist.
Everything You Need (and a Few Notes From Me)
- 1 cup Bob’s Red Mill 1:1 gluten-free baking flour (4 ¾ ounces; 138 grams): This is my go-to gf flour blend. It already contains xanthan gum, so you don’t need to add any. Don’t substitute almond or coconut flour here—they’ll change the texture completely and won’t give you the same rise.
- ¾ cup dark brown sugar (5 ½ ounces; 155 grams): Dark brown sugar adds moisture and a deeper molasses flavor than light brown sugar. If you only have light brown, it’ll still work—your loaf just won’t be quite as tender or rich.
- ⅓ cup unsweetened cocoa powder (1 ounce; 28 grams): Use a good-quality cocoa powder like Ghirardelli or Hershey’s Special Dark. Dutch-processed cocoa works beautifully here too and gives an even darker color.
- 1 teaspoon baking soda: This is the only leavener. Make sure it’s fresh—if it doesn’t bubble when mixed with an acid like vinegar, it won’t help your bread rise properly.
- ¼ teaspoon salt: Balances the sweetness and deepens the chocolate flavor.
- 2 cups grated zucchini (9 ounces; 255 grams): Squeeze the zucchini lightly with your hands if it’s extremely watery, but don’t squeeze it dry. The moisture is what keeps this loaf tender for days.
- 2 large eggs: Make sure they’re at room temperature. Cold eggs can seize the batter and make it harder to mix.
- ⅓ cup vegetable oil (2 ⅓ ounces; 65 grams): Oil gives a softer crumb than butter. Avocado oil or melted coconut oil work well too.
- 1 tablespoon chocolate chips (⅓ ounce; 10 grams), optional: I like semi-sweet or dark chocolate chips sprinkled on top. They melt into little pools of chocolate—don’t skip them if you can help it.
What to Pull Out Before You Start
- 9×5-inch loaf pan
- Nonstick cooking spray
- Mixing bowl and whisk
- Wire rack for cooling
- Metal spatula (for loosening the loaf)
- Serrated knife (for clean slices)
- Cake tester or toothpick
- Parchment paper and freezer bag (for storing or freezing)
Let’s Make It (Step by Step)
Ready? Here’s the exact process I use every time I make this loaf.
Preheat and Prep: Preheat your oven to 350°F. Spray your 9×5-inch loaf pan with nonstick cooking spray, or line it with a parchment sling for the easiest removal ever. The smell of warm cocoa will soon fill your kitchen—it’s the best kind of anticipation.
- Whisk dry ingredients: In a large mixing bowl, whisk together the gluten-free flour, dark brown sugar, cocoa powder, baking soda, and salt. Break up any clumps of brown sugar with your fingers—if they make it into the batter, you’ll get sticky pockets of sweetness that don’t bake out. The cocoa powder releases a deep, earthy aroma as you whisk.
- Add wet ingredients: Add the grated zucchini, eggs, and vegetable oil. Stir with a spatula until a thick batter forms. The batter will look almost too thick at this point—that’s exactly right. It folds over itself like a dark, glossy ribbon. Keep stirring until everything is combined.
- Rest the batter (this is the secret): Let the batter rest for exactly two minutes. Set a timer. I know it feels like nothing is happening, but this is the step that makes gluten-free baking work. The flour is absorbing the moisture. You’ll see the batter relax slightly and become more cohesive.
- Give it one last stir: Stir the batter one more time to make sure no dry flour is hiding at the bottom of the bowl. Spread the batter evenly into the prepared pan and smooth the top. Sprinkle the chocolate chips evenly over the surface—they’ll melt into glossy pools in the oven.
- Bake until done: Bake for about 45 minutes, or until a cake tester inserted into the center of the loaf comes out with only a few moist crumbs clinging to it. If the top is browning too fast before the center is set—which can happen if your oven runs hot—tent the pan loosely with foil. The kitchen will smell like a bakery by now.
- Cool completely in the pan: Place the pan on a wire rack and let the bread cool completely. This is the hardest part of the recipe, I know. Run a metal spatula gently around the edges to loosen the loaf, then turn it out onto the rack. Don’t try to slice it while it’s warm—it needs to be completely cool or it will crumble apart. Patience pays off here.
- Slice and serve: Use a serrated knife to slice the bread with a gentle sawing motion. Serve at room temperature or lightly toasted with a pat of butter—the butter melts into the warm crumb and it’s perfection.
How I Meal Prep This for the Week
I almost always bake this on Sunday afternoon. It makes breakfast and snack time so much easier during the busy week. Sometimes I’ll double the batch and freeze one loaf whole, just in case.
- Fridge: Wrap the loaf tightly in plastic wrap or store it in an airtight container at room temperature for up to 4 days. Don’t refrigerate it—the cold air dries out gluten-free baked goods much faster than regular ones.
- Freezer: Yes, absolutely. Slice the loaf and place a small piece of parchment paper between each slice. Put the slices into a freezer bag, remove as much air as possible, and freeze for up to 3 months.
- Reheat: Toast frozen slices directly in a toaster or toaster oven at medium heat. It takes about 3 to 4 minutes and the outside gets slightly crisp while the inside stays soft.
Things I Wish I’d Known the First Time
- Don’t overmix the batter: Once the flour is incorporated, stop stirring. Overmixing can make any quick bread tough, but it’s especially risky with gluten-free flours because they don’t have the same elasticity as wheat flour.
- Grate the zucchini on the small side: Use the small holes of a box grater. If you use the large holes, you’ll end up with long shreds of zucchini that don’t blend evenly into the batter and can leave wet streaks in the baked loaf.
- Let it cool completely before slicing: I know it’s hard to wait, but a warm gluten-free loaf is fragile. If you slice it too soon, it will crumble and fall apart. Give it at least an hour on the wire rack. Even if you mess this part up a little, it’ll still taste good—I’ve done it too.
- Measure your flour correctly: Spoon it into the measuring cup and level it off with the back of a knife. Scooping directly into the bag can pack the flour and give you as much as 25% too much, which leads to a dry, dense loaf.
Swaps That Actually Work
- Dairy-Free: Use dairy-free chocolate chips. The rest of the recipe is naturally dairy-free, so this is an easy swap.
- Nut-Free: This recipe is already nut-free as written. Just make sure your chocolate chips are processed in a nut-free facility if that’s a concern for your household.
- Add-ins: Fold in ½ cup of chopped walnuts or pecans along with the wet ingredients for a little crunch and a nutty flavor.
- Spiced version: Add 1 teaspoon of cinnamon and ¼ teaspoon of nutmeg to the dry ingredients. It gives the loaf a Mexican chocolate vibe that’s absolutely delicious.
Troubleshooting Your Chocolate Zucchini Bread
Q: Why did my gluten-free chocolate zucchini bread sink in the middle?
A: This usually happens when the oven isn’t hot enough when the loaf goes in, or if the baking soda is no longer active. Make sure your oven is fully preheated to 350°F before you put the pan in. You can also test your baking soda by dropping a small amount into a bowl of vinegar—if it bubbles vigorously, it’s still good.
Q: Can I use almond flour instead of Bob’s Red Mill 1:1?
A: I really don’t recommend it. Almond flour doesn’t have the same starch structure as a gluten-free all-purpose blend, so the loaf will be dense, wet, and won’t rise properly. Stick with an all-purpose gf flour blend for the best results.
Q: How do I know when the bread is truly done?
A: Use a cake tester or a toothpick inserted into the very center of the loaf. If it comes out with only a few moist crumbs (not wet batter), it’s done. The top should also spring back lightly when you press on it with your finger.
Q: Can I make this vegan?
A: Yes! Replace the two eggs with two flax eggs (2 tablespoons ground flaxseed mixed with 6 tablespoons water, let it sit for 5 minutes to thicken). The texture will be slightly denser and a bit more tender, but it will still be very good.
Can You Freeze This Chocolate Zucchini Bread?
Q: How long does gluten-free chocolate zucchini bread last, and how should I store it?
A: Wrapped tightly in plastic wrap at room temperature, it lasts up to 4 days. I don’t recommend refrigerating it—the cold air will dry it out much faster than keeping it on the counter.
Q: Can I make this ahead of time or freeze it?
A: Absolutely. Bake the loaf, let it cool completely, then slice it. Place a small piece of parchment paper between each slice so they don’t stick together, put them in a freezer bag, and freeze for up to 3 months. It’s the perfect make-ahead breakfast or after-school snack.
Q: What’s the best way to reheat gluten-free chocolate zucchini bread?
A: For a single slice, pop it in the toaster or air fryer at 350°F for about 3 to 4 minutes. To reheat the whole loaf, wrap it in foil and warm it in a 300°F oven for 10 to 15 minutes.
Q: What do you serve with gluten-free chocolate zucchini bread?
A: I love it with a generous pat of salted butter on top while it’s still warm from the toaster. For breakfast, it’s great alongside scrambled eggs and fresh fruit. For dessert, a glass of cold milk or a hot cup of coffee is the perfect pairing.
This chocolate zucchini bread has honestly saved me on busy mornings more times than I can count. I hope it becomes that recipe for you too.
If you try it, drop a comment below—I love hearing how it goes for you and your family!
📌 This moist gluten-free chocolate zucchini bread recipe is the only one you’ll ever need—save it for zucchini season or your next weekend baking day.
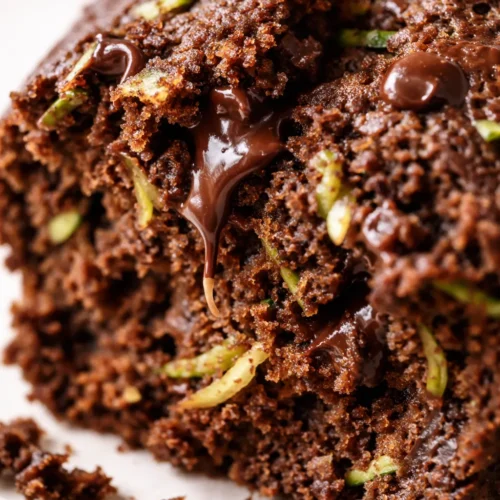
Gluten-Free Chocolate Zucchini Bread: The 45-Minute Loaf That Actually Stays Moist
Equipment
- 9×5-inch Loaf Pan
- Mixing bowl and whisk
- Wire rack
- Metal spatula
- Serrated Knife
- Cake tester or toothpick
- Parchment Paper
Ingredients
Ingredients
- 1 cup Bob’s Red Mill 1:1 gluten-free baking flour This is my go-to gf flour blend. It already contains xanthan gum, so you don’t need to add any. Don’t substitute almond or coconut flour here—they’ll change the texture completely and won’t give you the same rise.
- 3/4 cup dark brown sugar Dark brown sugar adds moisture and a deeper molasses flavor. If you only have light brown, it’ll still work—your loaf just won’t be quite as tender or rich.
- 1/3 cup unsweetened cocoa powder Use a good-quality cocoa powder like Ghirardelli or Hershey’s Special Dark. Dutch-processed cocoa works beautifully here too and gives an even darker color.
- 1 teaspoon baking soda This is the only leavener. Make sure it’s fresh—if it doesn’t bubble when mixed with an acid like vinegar, it won’t help your bread rise properly.
- 1/4 teaspoon salt Balances the sweetness and deepens the chocolate flavor.
- 2 cups grated zucchini Squeeze the zucchini lightly with your hands if it’s extremely watery, but don’t squeeze it dry. The moisture is what keeps this loaf tender for days.
- 2 large eggs Make sure they’re at room temperature. Cold eggs can seize the batter and make it harder to mix.
- 1/3 cup vegetable oil Oil gives a softer crumb than butter. Avocado oil or melted coconut oil work well too.
- 1 tablespoon chocolate chips (optional) I like semi-sweet or dark chocolate chips sprinkled on top. They melt into little pools of chocolate—don’t skip them if you can help it.
Instructions
- Preheat and Prep: Preheat your oven to 350°F. Spray your 9×5-inch loaf pan with nonstick cooking spray, or line it with a parchment sling for the easiest removal ever. The smell of warm cocoa will soon fill your kitchen—it’s the best kind of anticipation.
- Whisk dry ingredients: In a large mixing bowl, whisk together the gluten-free flour, dark brown sugar, cocoa powder, baking soda, and salt. Break up any clumps of brown sugar with your fingers—if they make it into the batter, you’ll get sticky pockets of sweetness that don’t bake out. The cocoa powder releases a deep, earthy aroma as you whisk.
- Add wet ingredients: Add the grated zucchini, eggs, and vegetable oil. Stir with a spatula until a thick batter forms. The batter will look almost too thick at this point—that’s exactly right. It folds over itself like a dark, glossy ribbon. Keep stirring until everything is combined.
- Rest the batter (this is the secret): Let the batter rest for exactly two minutes. Set a timer. I know it feels like nothing is happening, but this is the step that makes gluten-free baking work. The flour is absorbing the moisture. You’ll see the batter relax slightly and become more cohesive.
- Give it one last stir: Stir the batter one more time to make sure no dry flour is hiding at the bottom of the bowl. Spread the batter evenly into the prepared pan and smooth the top. Sprinkle the chocolate chips evenly over the surface—they’ll melt into glossy pools in the oven.
- Bake until done: Bake for about 45 minutes, or until a cake tester inserted into the center of the loaf comes out with only a few moist crumbs clinging to it. If the top is browning too fast before the center is set—which can happen if your oven runs hot—tent the pan loosely with foil. The kitchen will smell like a bakery by now.
- Cool completely in the pan: Place the pan on a wire rack and let the bread cool completely. This is the hardest part of the recipe, I know. Run a metal spatula gently around the edges to loosen the loaf, then turn it out onto the rack. Don’t try to slice it while it’s warm—it needs to be completely cool or it will crumble apart. Patience pays off here.
- Slice and serve: Use a serrated knife to slice the bread with a gentle sawing motion. Serve at room temperature or lightly toasted with a pat of butter—the butter melts into the warm crumb and it’s perfection.
Notes
- Don’t overmix the batter: Once the flour is incorporated, stop stirring. Overmixing can make any quick bread tough, but it’s especially risky with gluten-free flours because they don’t have the same elasticity as wheat flour.
- Grate the zucchini on the small side: Use the small holes of a box grater. If you use the large holes, you’ll end up with long shreds of zucchini that don’t blend evenly into the batter and can leave wet streaks in the baked loaf.
- Let it cool completely before slicing: I know it’s hard to wait, but a warm gluten-free loaf is fragile. If you slice it too soon, it will crumble and fall apart. Give it at least an hour on the wire rack. Even if you mess this part up a little, it’ll still taste good—I’ve done it too.
- Measure your flour correctly: Spoon it into the measuring cup and level it off with the back of a knife. Scooping directly into the bag can pack the flour and give you as much as 25% too much, which leads to a dry, dense loaf.
A: This usually happens when the oven isn’t hot enough when the loaf goes in, or if the baking soda is no longer active. Make sure your oven is fully preheated to 350°F before you put the pan in. You can also test your baking soda by dropping a small amount into a bowl of vinegar—if it bubbles vigorously, it’s still good. Q: Can I use almond flour instead of Bob’s Red Mill 1:1?
A: I really don’t recommend it. Almond flour doesn’t have the same starch structure as a gluten-free all-purpose blend, so the loaf will be dense, wet, and won’t rise properly. Stick with an all-purpose gf flour blend for the best results. Q: How do I know when the bread is truly done?
A: Use a cake tester or a toothpick inserted into the very center of the loaf. If it comes out with only a few moist crumbs (not wet batter), it’s done. The top should also spring back lightly when you press on it with your finger. Q: Can I make this vegan?
A: Yes! Replace the two eggs with two flax eggs (2 tablespoons ground flaxseed mixed with 6 tablespoons water, let it sit for 5 minutes to thicken). The texture will be slightly denser and a bit more tender, but it will still be very good. Can You Freeze This Chocolate Zucchini Bread? Q: How long does gluten-free chocolate zucchini bread last, and how should I store it?
A: Wrapped tightly in plastic wrap at room temperature, it lasts up to 4 days. I don’t recommend refrigerating it—the cold air will dry it out much faster than keeping it on the counter. Q: Can I make this ahead of time or freeze it?
A: Absolutely. Bake the loaf, let it cool completely, then slice it. Place a small piece of parchment paper between each slice so they don’t stick together, put them in a freezer bag, and freeze for up to 3 months. It’s the perfect make-ahead breakfast or after-school snack. Q: What’s the best way to reheat gluten-free chocolate zucchini bread?
A: For a single slice, pop it in the toaster or air fryer at 350°F for about 3 to 4 minutes. To reheat the whole loaf, wrap it in foil and warm it in a 300°F oven for 10 to 15 minutes. Q: What do you serve with gluten-free chocolate zucchini bread?
A: I love it with a generous pat of salted butter on top while it’s still warm from the toaster. For breakfast, it’s great alongside scrambled eggs and fresh fruit. For dessert, a glass of cold milk or a hot cup of coffee is the perfect pairing.