
I’ll be honest: when my daughter Simone first asked for pizza quesadillas, I braced for a soggy mess. Pizza sauce and crispy tortillas don’t naturally get along. But she’s eight and she’s persistent, so I figured it out. The secret is treating the tortilla like a crust — which means keeping the moisture in the sauce away from the crunch until the very last minute. This version is golden, shatteringly crisp, and tastes exactly like pepperoni pizza night — without turning on the big oven!
The short version: These take 20 minutes start to finish and my kid has never once left a single triangle behind.
I spent a whole month testing these every Friday night. This batch is the one Marcus started requesting for lunch, too.
- Serves: 4 as a main
- Hands-On Time: 15 min | Total Time: 20 min
- Difficulty: Easy enough for a school night
- Cost per serving: ~$2.50
- Calories: ~480 per serving (4 wedges)
- Dietary Notes: Adaptable for gluten-free or dairy-free
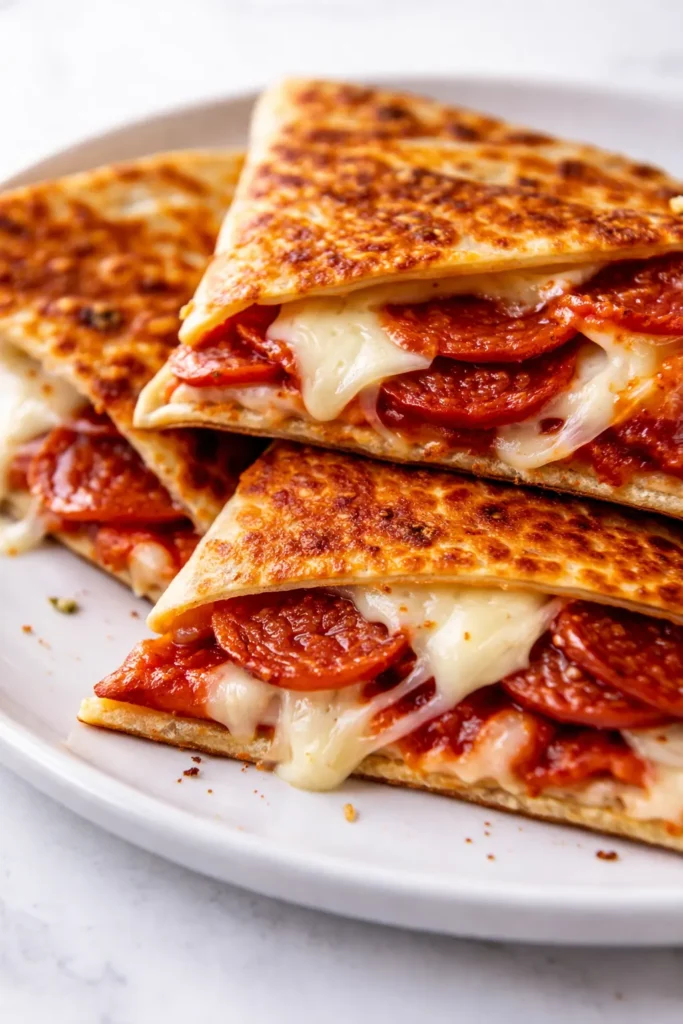
(Photo above: Overhead shot of four pizza quesadilla wedges on a cast iron comal, edges browned and bubbly, a single slice lifted to show the molten mozzarella pull and pepperoni peeking out. A small bowl of marinara sits at the top corner. Warm golden-hour light coming from the left.)
The Trick That Keeps Them Crispy (It’s Not What You Think)

The enemy of a good quesadilla is moisture. Pizza sauce has a lot of it, and if it touches the tortilla directly before the heat does, you’re fighting a losing battle. The trick is a moisture barrier: a thin layer of cheese against the tortilla, then the sauce, then the rest of the cheese. The cheese melts and creates a seal — a simple barrier that keeps the moisture out. It’s a reordering of layers that changes everything.
The second trick is to cook it in just enough fat — not a deep fry, but not a dry pan either. A light brush of olive oil or a pat of butter gives you that golden, shatteringly crisp exterior that holds up to the filling.
I learned this the hard way after way too many limp quesadillas. Simone told me the first version was “just okay,” which is her polite way of saying it needed work. This version got a “this is really good, Mama.” That’s the full review.
Ingredients Worth Talking About
- 8 large flour tortillas (or corn for GF): The vessel. Don’t get the burrito-size ones — standard taco/fajita size (8-inch) is perfect. I use flour for the classic pizza chew, but corn works if that’s your thing. My family prefers flour and they are the bosses of this particular operation.
- 2 cups shredded whole-milk mozzarella: The glue and the seal. Pre-shredded is fine in a pinch, but block mozzarella melts creamier because it doesn’t have the anti-caking starch. Simone can tell the difference. I tested her. She’s right.
- 1/2 cup pizza sauce (store-bought or homemade): Don’t go heavy here. This is a quesadilla, not a deep-dish. You need just enough for flavor. I use Rao’s when I’m buying. If I’m making it, it’s crushed San Marzanos with a little garlic and oregano — fifteen minutes on the stove.
- 4 oz pepperoni slices: The flavor anchor. Turkey pepperoni works if you need it. My kids eat the regular stuff and smile.
- 2 tbsp butter or olive oil: For the pan. Butter gives the best browning. Olive oil is a close second. Use what you have.
What You’ll Pull Out of the Drawer
- A 12-inch nonstick skillet or well-seasoned cast iron pan
- A spatula — metal if cast iron, silicone if nonstick
- A pastry brush (or just a paper towel with oil) for the pan
- A pizza cutter for slicing (or a sharp knife)
Let’s Make Them (It’s Faster Than Delivery)
This goes fast, so read through once before you start. The assembly line matters here.
Prep the filling: Shred your cheese if you’re doing it from a block. Lay out your tortillas, pepperoni, and sauce. Have everything within arm’s reach.
- Layer the moisture barrier: Lay a tortilla flat. Sprinkle a thin layer of mozzarella over the entire surface — this is the seal that keeps the sauce from soaking in. (📸 Photo tip: You want a light, even blanket of cheese — no bare spots.)
- Add the sauce and fillings: Spoon 1–2 tablespoons of sauce onto the cheese layer and spread it thin. Add a few pepperoni slices, then top with another layer of mozzarella. Place a second tortilla on top.
- Heat the pan: Set your pan over medium heat. Add a thin layer of butter or oil. Swirl to coat. (📸 Photo tip: The fat should shimmer but not smoke.)
- Cook the first side: Carefully transfer the assembled quesadilla to the hot pan. Cook for 2–3 minutes, until the bottom is deep golden brown and crispy. Press lightly with the spatula once or twice.
- Flip and finish: Flip carefully. Cook the second side for another 2–3 minutes, until golden and the cheese is fully melted through. If the pan looks dry, add a tiny bit more butter before flipping. If you’re really tired, you can skip the second layer of cheese on top — it’ll still be good, just less gooey.
- Rest, slice, serve: Transfer to a cutting board. Let it rest for 1 minute (this helps the cheese set so it doesn’t all slide out when you cut). Slice into wedges with a pizza cutter. Serve warm with extra sauce for dipping.
How I Batch These for the Week
I make a double batch on Sundays and we eat them for lunch all week. The key is to cook them all the way, let them cool completely on a wire rack, then store them correctly.
- Fridge: Stack cooked quesadillas with parchment paper between them in an airtight container. They keep for 4 days. Reheat in a dry skillet for the crispiest result.
- Freezer: Yes! Freeze them flat on a baking sheet, then transfer to a freezer bag. Reheat straight from frozen in a skillet or air fryer at 350°F for 5–6 minutes.
- Reheat: The microwave works in a pinch but it will soften the crunch. A skillet or air fryer brings the crisp back in 2 minutes.
Things I Wish I’d Known the First Time
- Don’t over-sauce it: Two tablespoons per quesadilla is plenty. Any more and you’ll end up with a soggy mess, no matter how good your cheese seal is. Trust me on this one. I’ve cleaned up the aftermath.
- Medium heat is your friend: High heat will burn the outside before the cheese melts. Low heat will dry it out. Medium is the sweet spot — you want the tortilla to sizzle gently when it hits the pan.
- Let it rest before cutting: I know you’re hungry. I am too. But cutting into it immediately makes the cheese spill out and the structure collapses. One minute on the cutting board changes everything.
- Press down gently: A light press with the spatula ensures even contact with the pan. Don’t squish it flat — just a gentle weight to make sure every part of the tortilla is toasting.
Make It Yours: Easy Swaps
- Veggie version: Sautéed mushrooms, bell peppers, and onions go between the cheese layers. My husband Marcus adds jalapeños to his. I do not judge his heat tolerance.
- Meat lovers: Add crumbled cooked Italian sausage or chopped ham alongside the pepperoni. Just don’t overload it — you still need room for the cheese to do its job.
- Dairy-free: Use your favorite dairy-free mozzarella shreds. The moisture barrier trick still works — just make sure the shreds are well-distributed.
- Gluten-free: Corn tortillas work beautifully here. Use two per quesadilla instead of one, and cook them a minute longer on each side to get them fully crispy.
- Kid-friendly mild version: Use mild mozzarella and skip the pepperoni, or use chopped cooked chicken. Simone likes hers with just cheese and a little sauce. She calls them ‘pizza dippers’ and eats them with extra sauce on the side.
Questions I Get About These All the Time
Q: Why did my quesadilla turn out soggy?
A: Ugh, I’ve been there. Nine times out of ten, it’s because the sauce touched the tortilla directly before the cheese had a chance to melt and form a seal. Make sure your first layer of cheese completely covers the tortilla. The other culprit is too much sauce — dial it back to 2 tablespoons per quesadilla and you’ll be golden.
Q: Can I make these in an air fryer?
A: Yes, and they come out incredibly crispy. Assemble the quesadilla, brush the outside with a little oil, and cook at 350°F for 5–6 minutes, flipping halfway through. I haven’t tested this myself but readers have reported great results — just make sure the air fryer is preheated.
Q: How long do these last? Can I freeze them?
A: Cooked quesadillas keep in the fridge for 4 days in an airtight container with parchment between them. For freezing, freeze flat on a baking sheet, then transfer to a freezer bag. Reheat in a dry skillet or air fryer straight from frozen. I always make a double batch for exactly this purpose.
Q: What do you serve with these?
A: We do a simple green salad with a lemon vinaigrette on the side to cut through all the rich cheesy goodness. Sometimes I’ll roast a can of chickpeas with salt and paprika for a crunchy side. Simone likes hers with a pile of carrot sticks and ranch for dipping.
More Recipes My Family Makes on Repeat
If you liked these, here are a few others that get the same reaction at our table:
- [INTERNAL LINK PLACEHOLDER: Weeknight Black Bean Tacos] — They take exactly as long as these quesadillas and use mostly pantry ingredients.
- [INTERNAL LINK PLACEHOLDER: Sheet Pan Chicken Fajitas] — No assembly required. Just dump, roast, and serve.
- [INTERNAL LINK PLACEHOLDER: Easy Red Beans and Rice] — Celestine’s recipe. It’s a full meal that tastes like a long Sunday.
This is the recipe I make on Fridays when I want to give my kids the joy of pizza night without the delivery wait or the oven heating up the whole house. It’s fast, it’s crunchy, and it disappears before I’ve even sat down.
If you try these, drop a comment below — I love hearing how they turned out for you. Did your kids fight over the last piece? Mine definitely did.
📌 These crispy pizza quesadillas are the solve for your next busy weeknight dinner — save this recipe for the next time you need a 20-minute meal the whole family will love.

Pizza Quesadillas That Don’t Get Soggy
Equipment
- 12-inch Nonstick Skillet or Cast Iron Pan
- Spatula
- Pastry brush (or paper towel)
- Pizza cutter or sharp knife
Ingredients
For the Quesadillas
- 8 large flour tortillas (8-inch), or corn for gluten-free
- 2 cups shredded whole-milk mozzarella
- 1/2 cup pizza sauce
- 4 oz pepperoni slices
- 2 tbsp butter or olive oil
For Serving
- extra pizza sauce for dipping
Instructions
- Layer the moisture barrier: Lay a tortilla flat. Sprinkle a thin layer of mozzarella over the entire surface — this is the seal that keeps the sauce from soaking in.
- Add the sauce and fillings: Spoon 1–2 tablespoons of sauce onto the cheese layer and spread it thin. Add a few pepperoni slices, then top with another layer of mozzarella. Place a second tortilla on top.
- Heat the pan: Set your pan over medium heat. Add a thin layer of butter or oil. Swirl to coat. The fat should shimmer but not smoke.
- Cook the first side: Carefully transfer the assembled quesadilla to the hot pan. Cook for 2–3 minutes, until the bottom is deep golden brown and crispy. Press lightly with the spatula once or twice.
- Flip and finish: Flip carefully. Cook the second side for another 2–3 minutes, until golden and the cheese is fully melted through. If the pan looks dry, add a tiny bit more butter before flipping.
- Rest, slice, serve: Transfer to a cutting board. Let it rest for 1 minute. Slice into wedges with a pizza cutter. Serve warm with extra sauce for dipping.