
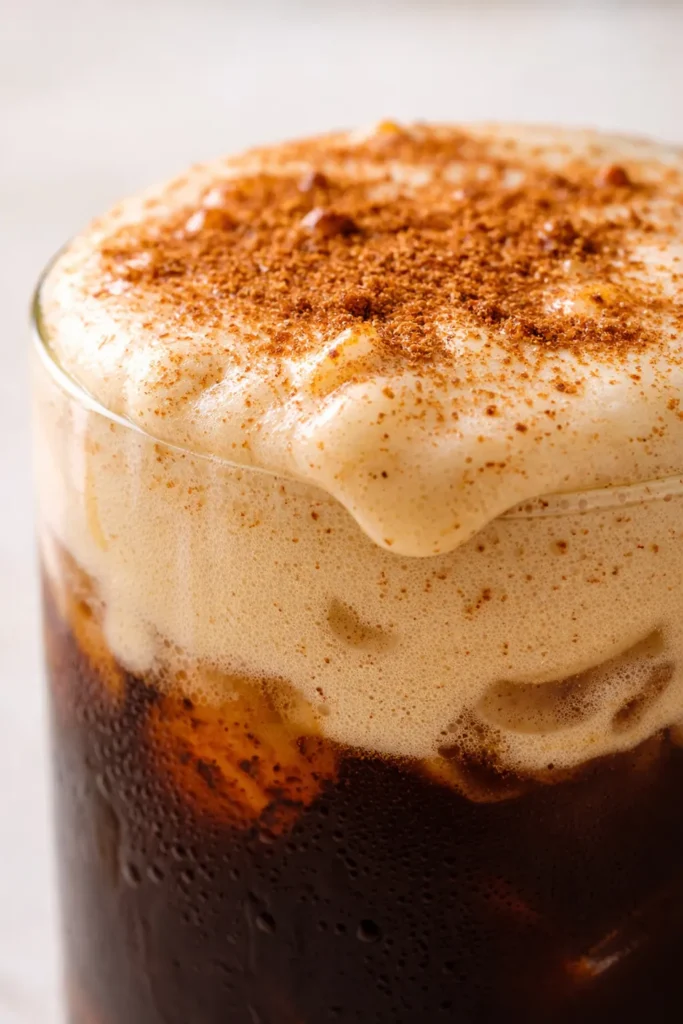
The first time I poured that thick, spiced foam over iced coffee and watched it slowly cascade down through the cold brew, I knew I’d cracked the code. That creamy, pumpkin-spiced layer that stays suspended, not sinking into a sad puddle — this is the vegan pumpkin cream cold foam I’ve been chasing for three autumns. I’ve made this exact batch probably a dozen times this month alone, and every time I take that first sip, I still get a little thrill. It’s rich without being heavy, sweet without being cloying, and the cinnamon on top gives it that bakery-case look that makes you feel like you’re treating yourself, even on a random Tuesday morning.
The first couple times I tried making vegan cold foam, I just used almond milk and pumpkin puree — it turned into a watery mess that sank right to the bottom within seconds. Total failure. Then I switched to using a thick dairy-free heavy cream (the kind that comes in a carton, not the aerosol can) and added sweetened condensed coconut milk. That was the game changer. The fat content is high enough to whip into actual foam, and the condensed milk gives it body and sweetness. The final result is a luscious, spoonable foam that holds its shape for a good ten minutes — long enough to snap a photo and enjoy every sip.
- Serves: 2 as a drink
- Hands-On Time: 5 min | Total Time: 5 min
- Difficulty: Easy — even on a sleepy weekday morning
- Cost per serving: ~$2.50
- Nutrition Estimate (per serving): 180 Calories, 1g Protein, 22g Carbs, 10g Fat, 8g Saturated Fat, 1g Fiber, 80mg Sodium
- Dietary Notes: Naturally vegan, gluten-free, can be nut-free depending on your cream choice
Why Vegan Pumpkin Cream Cold Foam Needs Full-Fat Cream
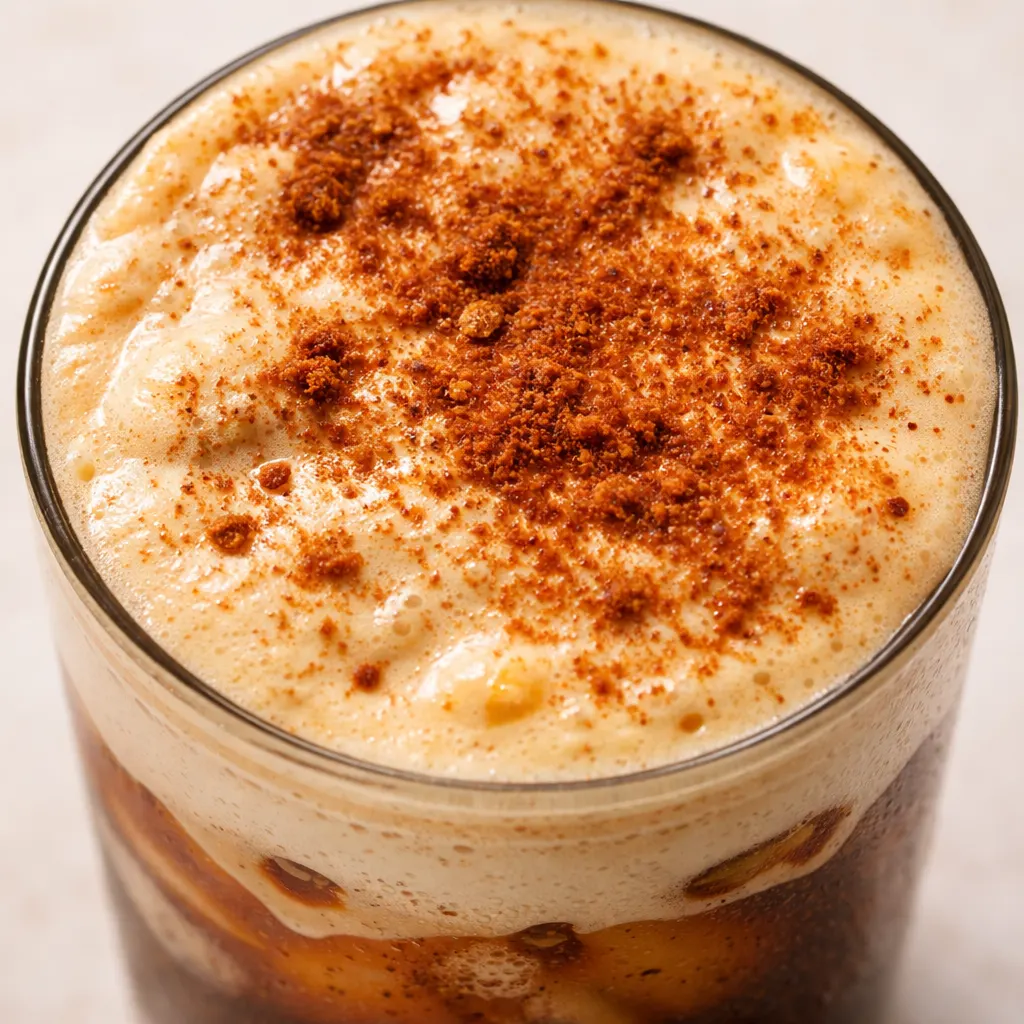
The key to a cold foam that actually stays afloat is fat. Most brands of dairy-free heavy cream contain around 25% fat, which is the threshold needed to trap air and create a stable foam (the USDA nutritional data confirms this standard). When you blend that with sweetened condensed coconut milk, you get a base that whips up thick and luscious without any weird additives. If you try to make this with just pumpkin puree and a splash of almond milk, you’ll get a thin, sad liquid that sinks immediately. The condensed milk also adds the perfect sweetness — you don’t need any extra sugar.
Another thing I learned: you don’t need to chill the cream first. Straight from the fridge is fine, but even at room temperature it whips up well because of the fat content. The pumpkin puree adds body and that unmistakable fall flavor, while the pumpkin pie spice and cinnamon make it taste like a latte from a cozy café.
The result is a foam that’s thick enough to spoon onto your coffee, and it stays put for at least 10 minutes — long enough to enjoy the whole drink without it mixing in completely.
Everything You Need (And a Few Notes From Me)
- 1 cup dairy-free heavy cream: This is the backbone of the foam. Look for one that’s labelled “heavy cream” or “whipping cream” — not a coffee creamer. I like the brand from Califia Farms or Country Crock plant-based. Avoid coconut cream from a can for this; it’s too fatty and can separate.
- ½ cup sweetened condensed coconut milk: This is the sweetener and thickener. Don’t skip it — regular condensed milk alternatives don’t work the same. If you can’t find it, see my swap below.
- ½ cup pumpkin puree: Use canned pumpkin, not pumpkin pie filling. One can will give you enough for two batches, so freeze the rest in tablespoon portions.
- 2 teaspoons vanilla extract: Adds warmth and depth. Real vanilla, not imitation, if you have it.
- 2 teaspoons pumpkin pie spice: The blend that makes it taste like autumn. You can mix your own with cinnamon, nutmeg, ginger, and cloves.
- 1 tsp cinnamon: I add extra cinnamon on top of the pumpkin pie spice — it makes the foam extra fragrant. Use Ceylon cinnamon if you can; it’s milder and sweeter.
- 6-8 ounces cold brew coffee: Strong and smooth. I use store-bought cold brew, but you can also use strong chilled coffee.
- handful of ice cubes: Keeps the drink cold so the foam doesn’t melt too fast. Large cubes work best — they melt slower.
- cinnamon, for garnish: A final dusting just before serving makes it look pretty and adds a pop of flavor.
What to Pull Out Before You Start
- Blender: A standard countertop blender works perfectly. If you don’t have one, a hand mixer with a mixing bowl will do the same job — just whisk until thick.
- Glass: Use a 12–16 oz glass to have room for foam. A clear glass shows off those beautiful layers.
- Spoon: For spooning the foam on top. A long-handled spoon helps if your glass is tall.
Testing Vegan Pumpkin Cream Cold Foam: What Worked and What Didn’t
After three autumns of trial and error, I finally dialed in the perfect method. Here’s what I learned from making this every day for two weeks straight.
- Don’t over-blend the foam: The first time I blended for over a minute, the foam turned into a thick paste that was hard to spoon. Blend just until it’s thick and creamy — about 30-40 seconds on high is perfect. You’re not making whipped cream; you want it spoonable, not stiff.
- Use a wide glass if you have one: A narrower glass makes it harder to spoon the foam on top without it sliding down the sides. A wider glass gives you room to layer it properly. If all you have is a skinny tumbler, try pouring the foam down the back of a spoon — it helps it stay afloat.
- Let the cold brew sit for a minute after pouring: Freshly poured cold brew can be fizzy, which causes the foam to sink. Let it settle for 30 seconds before adding the foam. Trust me on this one — it makes a big difference.
- Add a pinch of salt to the foam base: This is optional, but a tiny pinch of flaky salt (like Maldon) after blending really makes the pumpkin spice pop. It’s one of those small tweaks that elevates it from “good” to “I need this every morning.” Even if you forget the salt, it’ll still taste delicious — I’ve done it plenty of times.
Let’s Make That Pumpkin Cream Cold Foam (Step by Step)
Grab your blender — this is about to become your favorite 5-minute coffee treat.
- Blend the foam base: Add the dairy-free heavy cream, sweetened condensed coconut milk, pumpkin puree, vanilla, pumpkin pie spice, and cinnamon to your blender. Blend on high for 30-45 seconds until the mixture is creamy, thick, and smooth. It should look like a very thick milkshake — if it’s still runny, blend another 15 seconds. You can also use a hand mixer in a large bowl; just beat for 2-3 minutes until thick and soft peaks form.
- Prep your glass: Fill a tall glass with a generous handful of ice cubes. Pour 6-8 ounces of cold brew coffee over the ice, leaving about an inch of space at the top for the foam.
- Add the foam: Spoon about 4-6 tablespoons of the pumpkin cream foam onto the top of the cold brew. Don’t stir — the foam will naturally start to settle and ripple down into the coffee over time, which creates that gorgeous marbled effect.
- Garnish and serve: Dust the top with a sprinkle of cinnamon. Serve immediately with a straw or a spoon to scoop up the foam.
How I Prep This for Fall Mornings
If you’re like me and want pumpkin cold foam every day without the cleanup, you can make a big batch of the foam base and store it. I make double the recipe on Sunday and keep it in the fridge — then all I need to do in the morning is pour my cold brew and spoon on the foam.
- Fridge: Store leftover foam in an airtight jar for up to 2 days. It will thicken a bit as it sits, so give it a quick stir or shake before using. I usually whisk it lightly with a fork to restore the texture.
- Freezer: I don’t recommend freezing — the texture gets grainy when thawed because of the dairy-free cream. Make only what you’ll use within 48 hours.
- Reheat: Not applicable for a cold drink, but if you want a hot version, warm the foam gently on the stove and pour over hot coffee. It won’t be as foamy, but the flavor is still wonderful.
Swaps That Actually Taste Good
- Dairy-free / Vegan: This recipe is already vegan, but if you’re avoiding coconut, use a nut-based heavy cream and swap the condensed coconut milk for ⅓ cup maple syrup + 2 tbsp extra heavy cream. It won’t be as thick, but it’ll still foam nicely.
- Nut-free version: Use a soy- or oat-based heavy cream (So Delicious makes one) and the original condensed coconut milk. Check labels — some oat creams are thinner, so you might need to blend a little longer.
- Extra spicy: Add ¼ teaspoon ground ginger and a pinch of nutmeg to the foam. It gives it a real pumpkin pie kick.
- Less sweet: Cut the sweetened condensed milk to ⅓ cup and add 1-2 tablespoons of maple syrup. The foam will be slightly thinner, but it’s still delicious.
- Iced latte version: Instead of cold brew, use 1-2 shots of espresso over ice and top with the foam. The espresso has more bite, which balances the sweet foam perfectly.
Troubleshooting Your Vegan Pumpkin Cream Cold Foam
Q: Why did my pumpkin cream cold foam sink to the bottom?
A: The most common reason is that your cream wasn’t fatty enough. If you used a light coconut milk or a thin vegan cream, there isn’t enough fat to trap air and float. Use a dairy-free heavy cream with at least 20% fat content. Also, make sure you didn’t over-blend — blending too long can break the emulsion and make the foam watery. I’ve been there, and it’s frustrating, but switching to a thick cream fixes it every time.
Q: Can I use regular whipped cream or cow’s milk?
A: No — this is a vegan recipe, so using regular dairy would defeat the purpose. But if you’re not vegan, you can absolutely use heavy cream and sweetened condensed milk. The technique is the same, and it’ll be even richer. For a non-vegan version, skip the coconut milk and use ¼ cup granulated sugar or maple syrup.
Q: How do I know when the foam is thick enough?
A: The foam should have the consistency of a thick milkshake or thin sour cream. When you lift the blender lid, it should slowly drop off the lid in a ribbon, not pour like a liquid. If it’s still runny, blend another 10 seconds. If it’s too thick (like a paste), add 1 tablespoon of cold water or oat milk and blend again.
Q: Can I make this sugar-free?
A: Yes, but you’ll need to adjust. Replace the sweetened condensed coconut milk with ⅓ cup of a sugar-free condensed milk alternative (like the coconut-based one from Thrive Market) or use ¼ cup of a monk fruit maple syrup blend. The texture will be slightly thinner, and the sweetness won’t be as rich, but it still foams well. Just don’t use stevia drops — they can make the cream curdle.
How Do You Store Vegan Pumpkin Cream Cold Foam?
Q: How long does this cold foam last, and how should I store it?
A: You can store the foam base in an airtight container in the fridge for up to 2 days. After that, it starts to separate and thin out. I’ve kept it for 3 days once, and while the flavor was still fine, the foam wasn’t as thick. Store it in a jar with a tight lid, and give it a good shake or whisk before using.
Q: Can I make this ahead of time or freeze it?
A: You can make the base up to 2 days ahead and keep it in the fridge. I don’t recommend freezing — the texture changes dramatically when thawed, becoming grainy and separating. If you want to prep for the week, make a double batch and use it within 48 hours.
Q: What’s the best way to reheat this?
A: Reheating isn’t needed for a cold drink. But if you want a hot version, gently warm the foam in a small saucepan over low heat, stirring constantly, and pour over hot coffee. It won’t be foamy anymore, but the flavor is still wonderful — like a pumpkin latte.
Q: What do you serve with this drink?
A: This cold foam is a treat on its own, but it pairs beautifully with a simple pumpkin muffin or a slice of banana bread. I also love sipping it alongside a savory breakfast — a tofu scramble or a bagel with vegan cream cheese. The sweet-spiced foam balances out salty or savory flavors perfectly.
This little 5-minute drink has become my non-negotiable from September through December. It’s the kind of thing that makes even a Monday morning feel like a cozy weekend treat. If you try it, drop a comment below — I love hearing how it goes for you! Tag me on Pinterest so I can see yours!
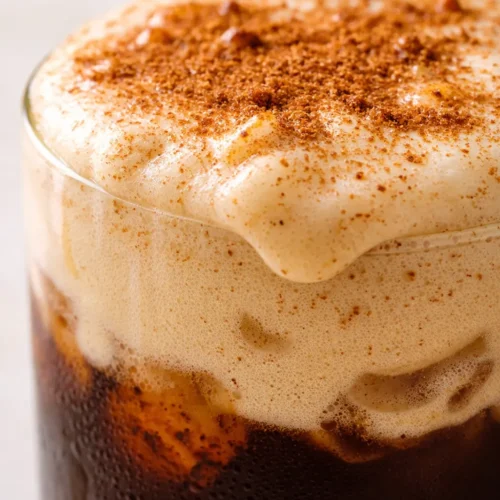
Vegan Pumpkin Cream Cold Foam Iced Espresso That’s Creamier Than Starbucks — in 5 Minutes
Equipment
- Blender
- Glass
- Spoon
Ingredients
For the Pumpkin Cream Cold Foam
- 1 cup dairy-free heavy cream Use a dairy-free heavy cream, not coffee creamer. Califia Farms or Country Crock recommended.
- 1/2 cup sweetened condensed coconut milk Don’t skip; regular condensed milk alternatives don’t work the same. If unavailable, see swap below.
- 1/2 cup pumpkin puree Use canned pumpkin, not pumpkin pie filling. Freeze leftover portions.
- 2 teaspoons vanilla extract Real vanilla recommended.
- 2 teaspoons pumpkin pie spice Can be made from cinnamon, nutmeg, ginger, cloves.
- 1 teaspoon cinnamon Ceylon cinnamon recommended if available.
- 6-8 ounces cold brew coffee Strong and smooth. Store-bought or strong chilled coffee.
- 1 handful ice cubes Large cubes melt slower.
- cinnamon for garnish
Instructions
- Blend the foam base: Add the dairy-free heavy cream, sweetened condensed coconut milk, pumpkin puree, vanilla, pumpkin pie spice, and cinnamon to your blender. Blend on high for 30-45 seconds until the mixture is creamy, thick, and smooth. It should look like a very thick milkshake — if it’s still runny, blend another 15 seconds. You can also use a hand mixer in a large bowl; just beat for 2-3 minutes until thick and soft peaks form.
- Prep your glass: Fill a tall glass with a generous handful of ice cubes. Pour 6-8 ounces of cold brew coffee over the ice, leaving about an inch of space at the top for the foam.
- Add the foam: Spoon about 4-6 tablespoons of the pumpkin cream foam onto the top of the cold brew. Don’t stir — the foam will naturally start to settle and ripple down into the coffee over time, which creates that gorgeous marbled effect.
- Garnish and serve: Dust the top with a sprinkle of cinnamon. Serve immediately with a straw or a spoon to scoop up the foam.
Notes
Related posts:
 Strawberry Cream Tea Party Sandwiches for Baby Showers & Spring Gatherings (Tastes Like a Cloud)
 Almond Flour Granola That’s Perfectly Clustered (Not Soggy) — Finally
 Low Calorie Banana Bread That Doesn’t Taste Like a Compromise — Finally
 Apple Pie Rice Krispie Treats for Last-Minute Fall Desserts: 5 Minutes, No Oven, All the Flavor