
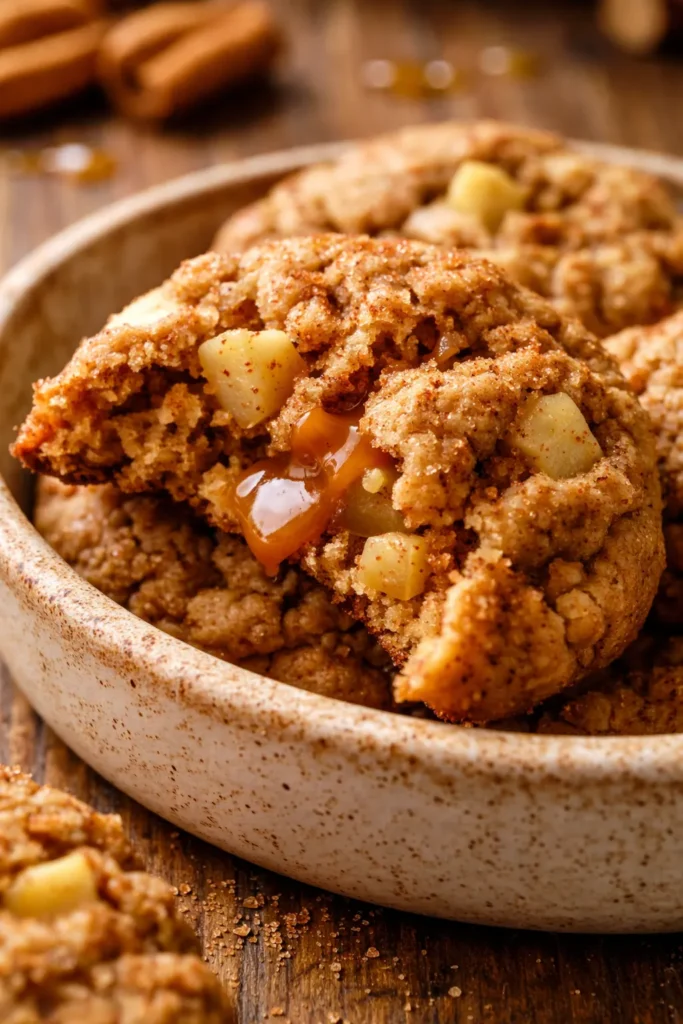
TLDR: These caramel apple cookies combine tender bits of cooked apple with a soft, buttery dough, then get finished with a salted caramel drizzle. The key is cooking the apples just until softened but not mushy, and chilling the dough if it gets too sticky. Expect a chewy, apple-studded cookie with a rich caramel finish—perfect for fall baking.
I still remember the first fall afternoon I pulled a tray of these out of the oven. The whole kitchen smelled like apples and brown sugar, and when I drizzled that salted caramel on top, my husband walked in and said, “Okay, these are going to be a problem.” He was right. I’ve made them every September since, and they’re the cookie that gets requested for every gathering from now through Thanksgiving.
The first batch I made, I cooked the apples too long—they turned into applesauce in the dough, and the cookies came out gummy. The second time, I pulled the apples off the heat the second they started to soften, and the texture was exactly what I wanted: little pockets of apple that stay tender but hold their shape. That’s the trick—don’t rush it, but don’t overdo it. The result is a cookie that’s soft in the center, slightly crisp at the edges, and studded with apple in every bite.
- Serves: 12-15 cookies as dessert
- Hands-On Time: 25 min | Total Time: 45 min (including cooling)
- Difficulty: Easy, even for a beginner baker
- Cost per serving: About $0.75 per cookie
- Nutrition Estimate: 220 Calories, 3g Protein, 32g Carbs, 10g Fat, 6g Saturated Fat, 1g Fiber, 150mg Sodium per cookie
- Dietary Notes: Not vegan or gluten-free, but can be adapted (see Variations)
(Photo above: Overhead shot of four cookies on a rustic wooden board, a fork poised to break one open, revealing soft dough and visible apple chunks, with salted caramel pooling on top and a few flakes of sea salt. Warm, golden afternoon light from the side.)
My Testing Process (And What I Learned)
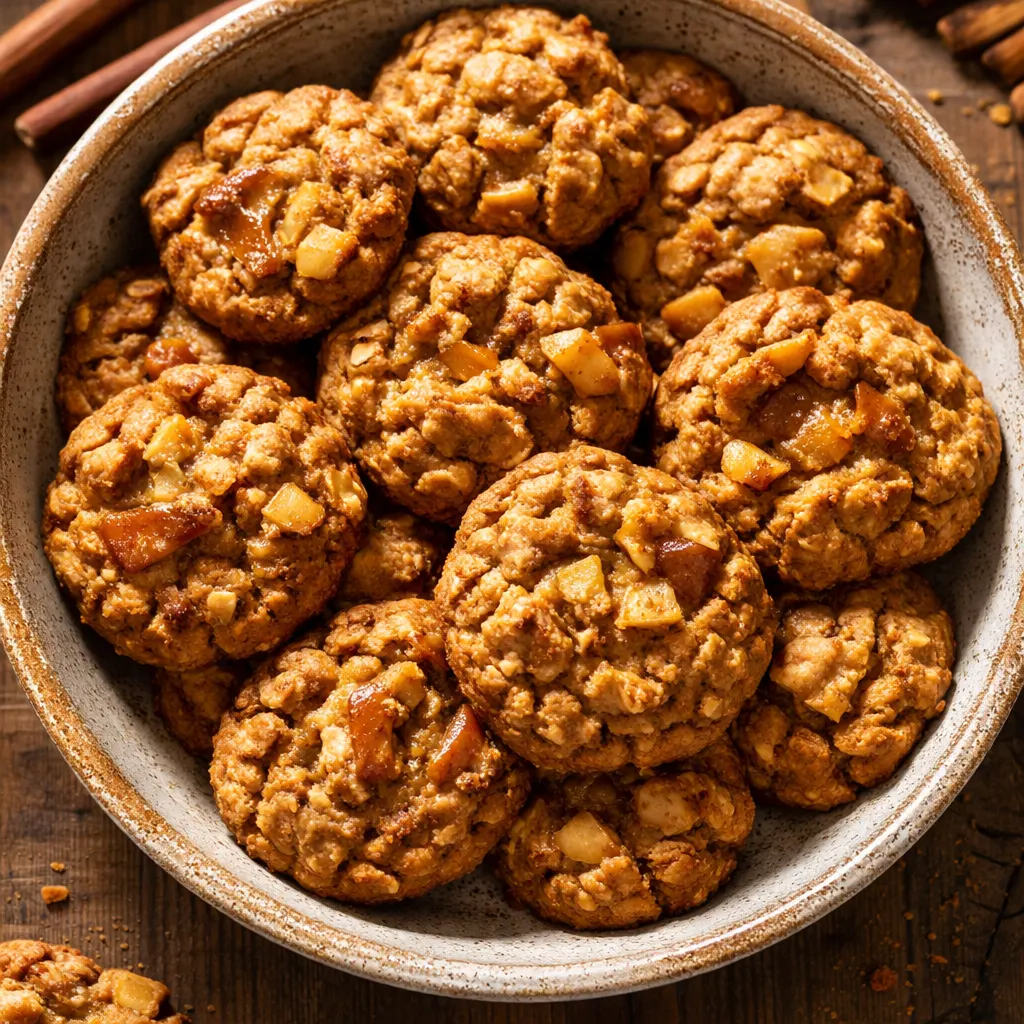
I went through four rounds of testing to nail this recipe—and I took detailed notes each time so you don’t have to repeat my mistakes.
Batch 1 (The Applesauce Disaster): I cooked the diced apples for a full 10 minutes over medium-high heat, stirring constantly. By the time I added them to the dough, they’d broken down completely. The cookies spread like pancakes and had a gummy, wet texture. The flavor was good, but the texture was a hard pass.
Batch 2 (Better, But Too Wet): I reduced the cook time to 5 minutes, but I skipped the cooling step. The warm apples melted the butter in the dough, making it greasy and impossible to scoop cleanly. The cookies spread again, though less than the first batch.
Batch 3 (The Goldilocks Batch): I cooked the apples for 5 minutes over medium heat until they were just softened—still holding their shape—then transferred them to a clean bowl and let them cool completely for 20 minutes. I also poured off any liquid that accumulated. The dough came together beautifully, and the cookies baked up thick, tender, and studded with visible apple chunks.
Batch 4 (The Chilling Test): I wanted to see if chilling the dough helped even more. After mixing, I refrigerated the dough for 30 minutes before scooping. The cookies were slightly thicker and had less spread around the edges. I now recommend this step as a “bonus” if your dough feels sticky—it’s not mandatory, but it improves the shape.
The takeaway: cook the apples for exactly 5 minutes over medium heat, cool them completely, and pour off any liquid before folding them in. That’s the pattern that consistently gives you the best texture.
Why These Cookies Actually Stay Soft (Not Dry or Gummy)
The secret is the double brown sugar—both in the apples and the dough. Dark brown sugar adds molasses, which keeps the cookies tender and gives that deep caramel flavor. Cooking the apples first with sugar and cinnamon concentrates their flavor and removes excess moisture, so they don’t make the dough soggy. Most bakers find that 350°F is the sweet spot: it bakes the cookies through without browning the edges too fast, giving you that perfect chewy center. The caramel drizzle adds a finishing touch that makes these feel special without any extra work.
If you skip the apple-cooking step, the raw apple will release water into the dough as it bakes, leading to flat, gummy cookies. Trust me on this one—that extra 5 minutes on the stove makes all the difference. According to the USDA nutritional data, firm apples like Granny Smith provide a good source of fiber and vitamin C, which is a nice bonus in a cookie.
What Goes In (Plus My Honest Notes)
- 2 cups (200g) diced peeled firm tart apples: Granny Smith or Honeycrisp work best—they hold their shape and balance the sweet dough. Don’t use soft apples like McIntosh; they’ll break down too fast.
- 2 tbsp (30g) packed dark brown sugar: For the apple mixture. Dark brown has more molasses, which deepens the apple flavor.
- ¼ tsp ground cinnamon: Just enough to warm things up without overpowering the apple.
- ½ cup (113g) unsalted butter, softened: Room temperature is key—cold butter won’t cream properly and the cookies will spread too much. If your butter is too soft, the dough will be greasy; let it sit out for about 30 minutes.
- ½ cup (110g) packed dark brown sugar: For the dough. Again, dark brown for moisture and flavor.
- ¼ cup (50g) granulated sugar: Adds a bit of crunch and helps with spreading.
- 1 tsp (5ml) pure vanilla extract: Pure vanilla is worth it here—imitation adds a chemical note that doesn’t play well with caramel.
- 1 large egg, at room temperature: Cold eggs seize the butter and make the dough stiff and hard to mix. Quick trick: place the egg in a bowl of warm water for 5 minutes.
- 1 ⅓ cups (190g) all-purpose flour: Spoon and level—don’t scoop directly from the bag or you’ll pack in too much flour and get dry cookies.
- ½ tsp baking soda: Helps the cookies rise just a little. Make sure it’s fresh (replace every 6 months).
- ½ tsp salt: Balances the sweetness and enhances the caramel.
- Salted caramel sauce, for drizzling: Use a good quality store-bought or homemade. It’s the star on top.
What to Pull Out Before You Start
- Small frying pan (nonstick or stainless)
- Clean bowl (for cooling apples)
- Large bowl (for dough)
- Electric hand mixer or stand mixer with paddle attachment
- Medium bowl (for dry ingredients)
- Whisk
- 2 large baking sheets
- Parchment paper
- Medium spring-loaded ice cream scoop or two large spoons
- Wire rack for cooling
Let’s Make Them (Step by Step)
I like to get the apple mixture done first so it has time to cool completely while I prep the rest. Trust the order here—it matters.
Prep the apples: Dice your apples into small, uniform cubes (about ¼ inch). You want them bite-size but not too tiny or they’ll vanish into the dough.
- Cook the apples: In a small frying pan over medium heat, combine the diced apples, 2 tbsp dark brown sugar, and cinnamon. Cook, stirring frequently, for about 5 minutes until the apples soften slightly but still hold their shape—they should be tender but not mushy. If you see liquid pooling at the bottom, you’ve gone too long. Transfer to a clean bowl and let cool completely while you make the dough.
- Cream butter and sugars: In a large bowl, combine the softened butter, remaining ½ cup dark brown sugar, granulated sugar, and vanilla. Beat with an electric mixer on medium speed for 1-2 minutes until the mixture is pale and fluffy. Don’t overbeat at this stage or the cookies may spread. Add the egg and beat until just combined.
- Mix dry ingredients: In a medium bowl, whisk together the flour, baking soda, and salt. I like to whisk for at least 10 seconds to evenly distribute the soda and salt.
- Combine: Add the dry ingredients to the butter mixture and fold gently with a spatula until mostly incorporated—a few streaks of flour are okay at this point.
- Add the apples in two stages: Fold in half the cooled apples first, then add the remaining apples and fold just until evenly distributed. Important: Do not add any liquid that came out of the apples while they were cooling—pour it off before mixing. If the dough feels very soft or sticky, cover and refrigerate for 20 minutes.
- Preheat and prepare sheets: Preheat your oven to 350°F. Line two large baking sheets with parchment paper.
- Scoop the dough: Use a medium spring-loaded ice cream scoop (about 2 tablespoons) or two large spoons to scoop mounds of dough onto the prepared sheets, spacing them 2 inches apart. You should get 12-15 cookies total.
- Bake: Bake one sheet at a time for 12-16 minutes. The cookies are done when the edges are browned and the bottoms are golden, and the tops are lightly golden but still soft in the center. For larger cookies (15 per batch), go closer to 16 minutes; for smaller ones (12-13), start checking at 12 minutes. Let cool on the baking sheet for exactly 2 minutes—this helps them set without breaking.
- Transfer and finish: Move the cookies to a wire rack to cool completely. Once cool, drizzle with salted caramel sauce. I love to do a zigzag pattern for looks, but you can also just drizzle straight from a spoon. Serve at room temperature.
How I Meal Prep These for the Week
If you’re like me and want to simplify your baking session, you can make the dough ahead and bake off cookies fresh whenever the craving hits. I often double the batch and freeze half.
- Fridge: Scooped dough balls can be refrigerated in an airtight container for up to 3 days. Bake straight from the fridge, adding 1-2 minutes to the bake time.
- Freezer: Yes! Scoop the dough onto a parchment-lined baking sheet, freeze until solid (about 1 hour), then transfer to a freezer bag. You can bake frozen dough directly—just add 2-3 minutes to the time.
- Reheat: The best way to enjoy these is warm and freshly baked. If you have day-old cookies, pop them in a 300°F oven for 3-4 minutes to revive the softness. Microwaving works too (10 seconds on high) but can make them slightly chewy.
Things I Wish I’d Known the First Time
- Don’t rush the apple cooling: I’ve been tempted to mix warm apples into the dough, but it melts the butter and turns the dough into a sticky mess. Let those apples sit at room temperature for at least 20 minutes—go prep your other ingredients while you wait.
- Chill if it feels wet: If you live in a humid climate or your apples were extra juicy, the dough may be sticky. Don’t panic—just pop it in the fridge for 20-30 minutes. It makes scooping much easier and prevents the cookies from spreading into thin discs.
- Use a cookie scoop for even sizes: I know it seems fussy, but uniform cookies bake evenly. If one cookie is twice as big as its neighbor, the small one will be overdone before the big one is set. A medium scoop (about 2 tablespoons) is my go-to.
- Don’t skip the parchment paper: These cookies have enough sugar to stick to plain baking sheets. Parchment paper ensures easy release and easy cleanup. If all you have is a silicone mat, that’s fine too—just watch the bake time since mats can slightly change browning.
Swaps That Actually Work
- Gluten-Free: Use a 1:1 gluten-free baking flour blend (like King Arthur Measure for Measure). The dough may be slightly softer, so chill it for 30 minutes before scooping.
- Dairy-Free: Swap the butter for a high-quality vegan butter (I like Miyoko’s). Use a dairy-free salted caramel sauce—store-bought or homemade.
- Spiced-Up Version: Add ¼ tsp nutmeg and ⅛ tsp cloves to the apple mixture for a more autumnal flavor. It pairs beautifully with the caramel.
- Richer Caramel Kick: Swap the granulated sugar in the dough for an equal amount of dark brown sugar. It’ll make the cookies softer and even more caramel-flavored.
- Kid-Friendly: Skip the caramel drizzle and instead roll the dough balls in cinnamon sugar before baking. The kids won’t know what they’re missing—and you save a step.
Troubleshooting
Why Did My Cookies Spread Flat Instead of Staying Thick?
The most common culprit is butter that was too soft or warm when you creamed it. Room temperature butter should be about 65°F—if it’s any warmer, the cookies will spread before they set. Also, if you skipped the optional chilling step, the dough was too warm. Next time, refrigerate the dough for 20 minutes before baking. Another possibility: your baking soda is old. Test it by dropping a little into vinegar—if it doesn’t fizz vigorously, replace it.
Can I Use a Different Type of Apple?
Yes, but avoid very soft apples like Red Delicious or Macintosh—they’ll turn to mush. Good alternatives are Gala, Fuji, or Braeburn. If you use sweeter apples, you can reduce the brown sugar in the apple mixture by 1 tablespoon.
How Do I Know When These Cookies Are Perfectly Baked?
Look for browned edges and a lightly golden top—but the center should still be soft and puffy. If you gently press the top with your finger, it should spring back slightly but not feel raw. Underbaked cookies will collapse; overbaked ones will be dry. In my oven, 14 minutes hits the sweet spot for a 2-tablespoon scoop.
Can I Make These Cookies Vegan?
Absolutely. Use plant-based butter (the stick kind, not spread), replace the egg with a flax egg (1 tbsp ground flax + 3 tbsp water, let sit 5 minutes), and chill the dough well. For the caramel, use a certified vegan salted caramel sauce. The texture will be slightly less tender, but still very good.
How Long Do These Cookies Last, and How Should I Store Them?
In an airtight container at room temperature, they’ll stay soft for 3 days. If you’ve already drizzled caramel on them, store in a single layer with wax paper between layers to prevent sticking. The cookies are at their best on day 1 and 2, but day 3 they’re still delicious—especially if you warm them slightly.
Can I Freeze Baked Cookies?
Yes, but freeze them before the caramel drizzle. Place cooled cookies in a single layer on a baking sheet, freeze until firm, then transfer to a freezer bag. They’ll keep for 2 months. Thaw at room temperature, then drizzle with fresh caramel just before serving.
What’s the Best Way to Reheat These?
If the cookies are undrizzled, pop them in a 300°F oven for 5-7 minutes to bring back that fresh-from-the-oven texture. If they already have caramel, microwaving for 10-15 seconds works better, because the oven can make the caramel brittle.
What Should I Serve With These Cookies?
A tall glass of cold milk is the classic pairing, and I never say no to that. For a dessert spread, they go beautifully with a scoop of vanilla bean ice cream or a warm apple cider. If you’re feeling fancy, crumble them over a bowl of cinnamon-scented applesauce.
This recipe has become my go-to fall bake, and I hope it becomes yours too. The moment you pull a tray out of the oven and drizzle that caramel on top, you’ll understand why they’re so special—it’s like capturing autumn in a single bite.
If you try them, drop a comment below and let me know how they turned out. I love hearing about your kitchen successes!
📌 Soft and chewy caramel apple cookies with real apple chunks—save this for your next cozy fall baking session.
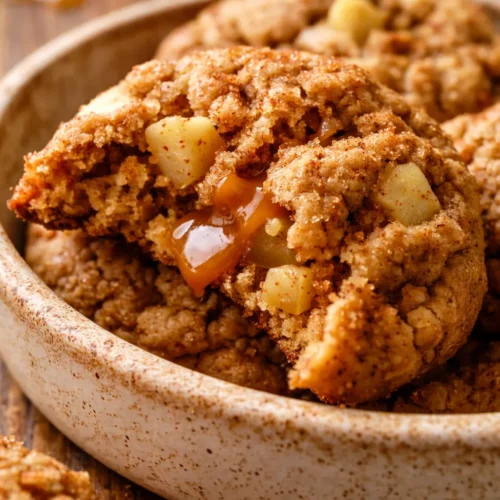
Caramel Apple Cookies for Cozy Autumn Afternoons: Soft, Chewy, and Drizzled with Salted Caramel
Equipment
- Small frying pan
- Clean bowl
- Large Bowl
- Electric hand mixer or stand mixer with paddle attachment
- Medium Bowl
- Whisk
- 2 large baking sheets
- Parchment Paper
- Medium spring-loaded ice cream scoop or two large spoons
- Wire rack for cooling
Ingredients
Ingredients
- 2 cups firm tart apples diced peeled (Granny Smith or Honeycrisp)
- 2 tbsp dark brown sugar for apple mixture
- 0.25 tsp ground cinnamon
- 0.5 cup unsalted butter softened
- 0.5 cup dark brown sugar for dough
- 0.25 cup granulated sugar
- 1 tsp pure vanilla extract pure vanilla recommended
- 1 large egg room temperature
- 1.333 cups all-purpose flour
- 0.5 tsp baking soda
- 0.5 tsp salt
- salted caramel sauce for drizzling
Instructions
- Prep the apples: Dice your apples into small, uniform cubes (about ¼ inch). You want them bite-size but not too tiny or they’ll vanish into the dough.
- Cook the apples: In a small frying pan over medium heat, combine the diced apples, 2 tbsp dark brown sugar, and cinnamon. Cook, stirring frequently, for about 5 minutes until the apples soften slightly but still hold their shape—they should be tender but not mushy. If you see liquid pooling at the bottom, you’ve gone too long. Transfer to a clean bowl and let cool completely while you make the dough.
- Cream butter and sugars: In a large bowl, combine the softened butter, remaining ½ cup dark brown sugar, granulated sugar, and vanilla. Beat with an electric mixer on medium speed for 1-2 minutes until the mixture is pale and fluffy. Don’t overbeat at this stage or the cookies may spread. Add the egg and beat until just combined.
- Mix dry ingredients: In a medium bowl, whisk together the flour, baking soda, and salt. I like to whisk for at least 10 seconds to evenly distribute the soda and salt.
- Combine: Add the dry ingredients to the butter mixture and fold gently with a spatula until mostly incorporated—a few streaks of flour are okay at this point.
- Add the apples in two stages: Fold in half the cooled apples first, then add the remaining apples and fold just until evenly distributed. Important: Do not add any liquid that came out of the apples while they were cooling—pour it off before mixing. If the dough feels very soft or sticky, cover and refrigerate for 20 minutes.
- Preheat and prepare sheets: Preheat your oven to 350°F. Line two large baking sheets with parchment paper.
- Scoop the dough: Use a medium spring-loaded ice cream scoop (about 2 tablespoons) or two large spoons to scoop mounds of dough onto the prepared sheets, spacing them 2 inches apart. You should get 12-15 cookies total.
- Bake: Bake one sheet at a time for 12-16 minutes. The cookies are done when the edges are browned and the bottoms are golden, and the tops are lightly golden but still soft in the center. For larger cookies (15 per batch), go closer to 16 minutes; for smaller ones (12-13), start checking at 12 minutes. Let cool on the baking sheet for exactly 2 minutes—this helps them set without breaking.
- Transfer and finish: Move the cookies to a wire rack to cool completely. Once cool, drizzle with salted caramel sauce. I love to do a zigzag pattern for looks, but you can also just drizzle straight from a spoon. Serve at room temperature.
Notes
Related posts:
 Pansy Sugar Cookies That Taste Like a Pastel Dream: Colorful, Buttery, and Surprisingly Easy to Make
 Pumpkin Coffee Cake Cookies That Taste Like Fall in Every Bite — Ready in 45 Minutes
 Blueberry Lemon Bars That Taste Like Spring in an 8×8 Pan
 Healthy Protein Cookie Dough That Actually Tastes Like the Real Thing (Ready in 5 Minutes)