
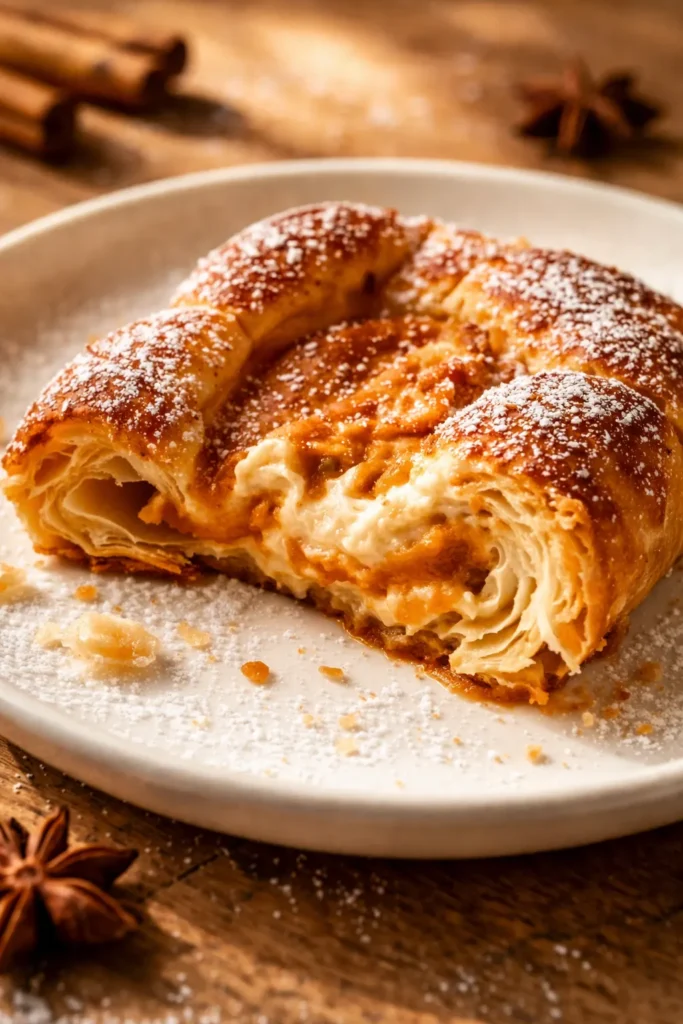
TLDR: This pumpkin cream cheese danish uses store-bought puff pastry for a stunning, bakery-worthy breakfast in under an hour. The trick is thoroughly chilling the filled pastries before baking to guarantee the flakiest layers and a fully set center. Expect golden, puffed edges and a creamy, spiced filling.
That first bite — where the shatteringly crisp, buttery layers give way to a cloud of sweetened cream cheese and warmly spiced pumpkin — is exactly why this is the first pastry I make when the air turns crisp. I’ve tested this with homemade dough, with crescent roll shortcuts, and more filling ratios than I care to count. This specific version, using frozen puff pastry and a precise two-filling method, is the one that gets requests for “the pumpkin danish thing” every single Thanksgiving and lazy Saturday from October through December.
My Testing Process: Getting the Perfect Danish

The first few times I made these, I fought with soggy bottoms and filling that leaked all over the pan. The pastry would puff unevenly, and the center would look pale and underdone. I finally realized two things: I wasn’t docking the pastry properly, and I was rushing the chill time. Adding a solid 30-minute rest in the fridge before baking changed everything. The butter solidified, the puff went sky-high, and the cream cheese layer created a perfect moisture barrier between the wet pumpkin and the delicate pastry. Now every batch comes out even, golden, and reliably flaky.
I tested over a dozen iterations, varying the thickness of the cream cheese layer, the temperature of the oven, and the duration of the chill. What emerged was a method that balances speed with reliability — because no one wants to wrestle with pastry dough when you could be enjoying a hot cup of coffee and the scent of cinnamon filling your kitchen.
- Serves: 8 as a breakfast pastry or dessert
- Hands-On Time: 25 min | Total Time: 55 min
- Difficulty: Straightforward — precision helps, but no special skills needed
- Cost per serving: ~$2.50
- Nutrition Estimate: 380 Calories, 7g Protein, 35g Carbs, 24g Fat, 12g Saturated Fat, 2g Fiber, 320mg Sodium per serving
- Dietary Notes: Vegetarian. Easily adaptable for gluten-free (use GF puff pastry).
(Photo above: Overhead shot of four golden-brown pumpkin cream cheese danishes arranged on a rustic wooden board. One is sliced in half, revealing the distinct swirl of cream cheese and pumpkin filling. A small dish of the powdered sugar icing sits nearby, with a light dusting of cinnamon on top. Natural daylight, warm tones.)
The Two-Filling Method That Prevents Soggy Pastry
Putting the cream cheese layer down first creates a waterproof seal against the puff pastry. The fat in the cream cheese prevents the wet pumpkin puree from saturating the dough, keeping every layer distinct and shatteringly crisp. Without this barrier, the water in the pumpkin turns the pastry into a tough, gluey mess.
Chilling the assembled pastries isn’t a suggestion — it’s the rule. 30 minutes in the fridge solidifies the butter in the puff pastry, ensuring tall, dramatic puff instead of a flat, greasy cookie. Most home bakers find that skipping this step is the number one reason their danishes don’t achieve that dramatic lift.
Baking at 375°F is the sweet spot for puff pastry — hot enough to generate instant steam for lift, but not so hot that the sugar in the filling burns before the center cooks through. This temperature creates the perfect environment for the layers to separate and brown evenly in about 20 minutes.
What Goes In (Plus My Honest Notes on Each)
- 2 sheets puff pastry (thawed): The shortcut that makes this recipe accessible any day of the week. I prefer the all-butter variety for flavor, but standard will work beautifully. Thaw it overnight in the fridge — never at room temperature, or you’ll end up with sticky, unworkable dough.
- 1/2 cup pumpkin puree: Not pie filling. Make sure it’s 100% pure pumpkin. Libby’s is standard and has the lowest moisture content, which is ideal here. Pumpkin is packed with Vitamin A (one serving provides over 100% of the daily recommended intake according to USDA nutritional data), but beyond the health kick, it provides essential moisture and color.
- 8 oz cream cheese (softened): Full-fat, block-style. Neufchâtel (1/3 less fat) works, but reduced-fat or spreadable tub versions have too much water and will break the filling, making the danish soggy.
- 1 teaspoon pumpkin pie spice: You can DIY with 1/2 tsp cinnamon + 1/4 tsp ginger + 1/8 tsp cloves + 1/8 tsp nutmeg if you don’t have the blend. Fresh spices make a noticeable difference here.
- 1 egg + 2 Tablespoons water (egg wash): This is non-negotiable for golden, glossy, bakery-style color. Skip it and you’ll have pale, matte pastry that looks unappetizing no matter how good it tastes.
- 2/3 cup powdered sugar, 1 teaspoon vanilla, 4 Tablespoons milk (icing): The drizzle that takes this from “homemade pastry” to “did you get this from a bakery?”.
- 1/4 cup sugar, 4 Tablespoons sugar: The granulated sugar provides sweetness and structure to the fillings. Don’t reduce it — it’s balanced perfectly for the tartness of the cream cheese and the earthiness of the pumpkin.
The Setup (It’s Minimal, I Promise)
- Baking sheet (rimmed, 13×18-inch)
- Parchment paper or a silicone baking mat
- Mixing bowls (one small, one medium)
- Hand mixer or stand mixer (for beating the cream cheese)
- Knife or pizza cutter (for scoring the pastry)
- Pastry brush (for the egg wash)
- Whisk (for the icing)
- Cooling rack
If you don’t have a pastry brush, a paper towel dipped in egg wash works in a pinch — just dab gently so you don’t deflate the pastry edges.
Let’s Make Pumpkin Danish (Start to Finish)
Start this one by prepping your fillings and your pastry so the assembly line goes smoothly. Clear your counter, grab a cup of coffee, and let’s get to it.
Prep the Oven and Pastry:
Preheat your oven to 375°F. Line a baking sheet with parchment. Unfold your thawed puff pastry sheets onto a lightly floured surface and cut each sheet into 4 equal rectangles (8 total). Score a 1/2-inch border around each rectangle, being careful not to cut all the way through. Prick the inner pastry with a fork. This is called docking — it prevents the center from puffing up into a balloon while the border rises tall and golden.
- Mix the Cream Cheese Filling: In a medium bowl, beat the softened 8 oz cream cheese, 4 tablespoons sugar, and 1 teaspoon vanilla until completely smooth and fluffy, about 2 minutes. Scrape the bowl well. You want zero lumps here — they’ll melt unevenly in the oven and leave holes in your filling.
- Mix the Pumpkin Filling: In a separate bowl, whisk together the 1/2 cup pumpkin puree, 1/4 cup sugar, 1 teaspoon vanilla, 1 teaspoon pumpkin pie spice, and 1 egg until fully combined and glossy. The mixture should look like thick, smooth pudding.
- Assemble the Danishes: Spoon about 1 heaping tablespoon of the cream cheese filling into the center of each pastry, spreading it gently within the scored border. Top with about 1 tablespoon of the pumpkin filling, spreading it over the cream cheese layer. Don’t overfill — it will spread as it bakes.
- Chill and Egg Wash: Place the assembled danishes on the baking sheet in the fridge for 30 minutes. This is the most important step for flaky layers. After chilling, brush the borders (not the filling) generously with the egg wash (1 egg + 2 tbsp water whisked together). Be precise — egg wash on the filling makes the surface look streaky and unappetizing.
- Bake: Bake for 18–22 minutes, rotating halfway through. The pastry should be deeply golden and puffed, and the filling should be set with a slight jiggle in the very center. The cream cheese should look matte, not shiny. Transfer the pan to a cooling rack.
- Ice and Serve: While the danishes cool, whisk together the 2/3 cup powdered sugar, 1 teaspoon vanilla, and 4 tablespoons milk. Add the milk a little at a time until you get a thick but drizzling consistency. Drizzle over the warm danishes. Serve warm or at room temperature.
How I Prep These Ahead for a Stress-Free Morning
If I’m serving these for a holiday brunch or a weekend gathering, I never want to be futzing with pastry while guests are sipping coffee. The good news is this recipe bends beautifully to a little advanced preparation without losing any of its impact.
- Fridge: Baked danishes (without icing) keep well in an airtight container in the fridge for up to 3 days. Reheat in a 300°F oven for 5-7 minutes before icing and serving.
- Freezer: Yes! Freeze the unbaked assembled danishes on a sheet pan until solid, then transfer to a freezer bag. Bake directly from frozen, adding 5-7 minutes to the bake time. Ice after baking.
- Reheat: A toaster oven or standard oven is vastly superior to a microwave here. Microwave reheating makes the puff pastry soggy and tough, which is a real tragedy after you did all that work.
Troubleshooting These Pumpkin Danishes
Q: Why did my danish leak filling and become soggy on the bottom?
A: This usually happens when the filling is too thin or the pastry wasn’t docked properly. Make sure you’re using 100% pumpkin puree, not pumpkin pie filling. Also, ensure your cream cheese is softened but not greasy — if it’s too warm, it breaks down during baking. Docking the center thoroughly allows steam to escape, keeping the bottom dry and crisp.
Q: Can I use pumpkin pie filling instead of pumpkin puree?
A: I wouldn’t recommend it. Pumpkin pie filling has added sugar, spices, and thickeners (corn syrup), which makes it overly sweet and dense for this application. It can also make the filling too heavy, preventing the pastry from puffing properly. Stick with pure pumpkin puree.
Q: My pastry didn’t puff up at all. What happened?
A: The number one culprit is warm pastry. Puff pastry needs to be COLD when it hits the hot oven. If the butter softens before baking, it absorbs into the flour instead of creating steam. Pop your assembled danishes in the freezer for 15 minutes next time if your kitchen is warm.
Q: Can I make this with crescent roll dough?
A: You can, but it will be a completely different pastry. Crescent roll dough contains less butter and more sugar, so it won’t puff as high or be as crispy. Reduce the bake time to 10-14 minutes if you do, and expect a more bread-like, tender result.
Things I Wish I’d Known the First Time
- Thaw Pastry in the Fridge, Not on the Counter: Overnight in the refrigerator is the only way to guarantee the butter stays solid. Room-temp thawing leads to sticky, hard-to-handle pastry that won’t puff properly and often tears during cutting.
- Don’t Skip the Chill: I know it adds 30 minutes. Do it anyway. It prevents the butter from melting immediately in the oven, which is what creates those tall, shattery layers. Even 15 minutes helps, but 30 is the gold standard. I’ve tested this side-by-side, and the difference is dramatic.
- Go Easy on the Egg Wash: You want a thin, even coat on the borders only. If it drips down the sides and pools on the pan, it can glue the pastry to the pan and inhibit lift. Less is definitely more here.
- Let Them Cool a Little Before Icing: Warm pastry will melt the icing into a thin, invisible glaze. A 10-minute rest on the cooling rack gives you thick, white, photogenic drizzle that sets up beautifully. Even if you mess this part up, it’ll still taste incredible — I’ve done it plenty of times.
Make It Yours: Easy Twists on the Classic
- Gluten-Free: Swap in your favorite GF puff pastry. The choreography is exactly the same. Just make sure your GF pastry is fully thawed — it tends to crack more easily when cold.
- Dairy-Free: Use a high-quality vegan puff pastry (like Pepperidge Farm, which is accidentally dairy-free) and a vegan cream cheese block. The texture will be slightly softer, so freeze the filled danishes for 15 minutes before baking to compensate.
- Spiced Maple Glaze: Swap the vanilla in the icing for 1/2 teaspoon maple extract, and use maple cream or maple syrup instead of milk for a deeper fall flavor that pairs amazingly with the pumpkin.
- Add a Crunch: Sprinkle the egg-washed borders with coarse sanding sugar or turbinado sugar before baking for a delightful extra crunch. It adds a beautiful sparkle that catches the light.
- Kid-Friendly Version: Cut the pastry into smaller squares (16 instead of 8) for mini danishes. They’re perfect for lunchboxes and bake in about 14-16 minutes.
How to Store and Reheat Pumpkin Cream Cheese Danish
Q: How long does this danish last, and how should I store it?
A: Stored in an airtight container in the refrigerator, properly baked danishes (without the glaze) will last for up to 5 days. I recommend glazing them fresh just before serving for the prettiest presentation. The unglazed pastries also reheat much better.
Q: Can I freeze these danishes?
A: Absolutely. You can freeze the assembled, unbaked danishes on a sheet pan, then transfer them to a freezer bag for up to 3 months. Bake directly from frozen, adding 5-8 minutes to the normal bake time. You can also freeze baked danishes flat in a freezer bag for up to 2 months.
Q: What’s the best way to reheat these danishes?
A: The oven is king here. Reheat on a parchment-lined baking sheet at 300°F for 5-8 minutes. It revives the crispiness of the pastry perfectly. The microwave will make the pastry chewy and tough — I only use it if I’m in a desperate hurry and eating it myself.
Q: What do you serve with this danish?
A: A simple cup of black coffee or a hot apple cider is the perfect pairing. For a full brunch spread, serve it alongside a fresh fruit salad with mint or some crispy bacon for a sweet and salty balance. I also love it with a dollop of extra vanilla yogurt on the side.
This recipe has genuinely become my secret weapon for fall hosting. It looks ridiculously impressive, but the secret is entirely in the technique of keeping things cold and not overfilling. I’ve made it so many times I can practically do it in my sleep, and it works every single time.
If you make this pumpkin danish, I’d love to hear about it — drop a comment or tag me in your photos so I can see those flaky layers!
📌 This easy fall pastry recipe uses frozen puff pastry for a bakery-worthy breakfast — save it for your next autumn brunch or Thanksgiving morning.
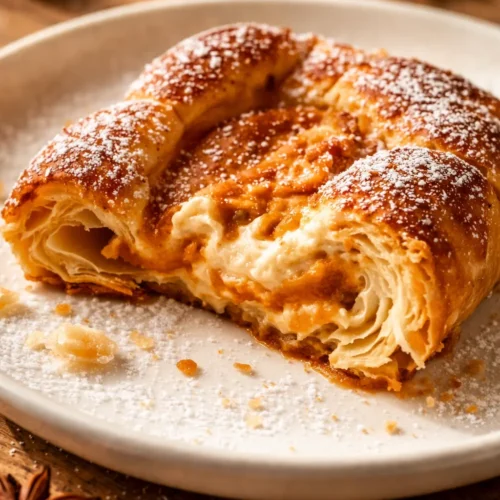
Pumpkin Cream Cheese Danish
Equipment
- Baking sheet (rimmed, 13×18-inch)
- Parchment paper or silicone baking mat
- Mixing Bowls
- Hand mixer or stand mixer
- Knife or pizza cutter
- Pastry brush
- Whisk
- Cooling rack
Ingredients
For the Pastry
- 2 sheets puff pastry, thawed
For the Cream Cheese Filling
- 8 oz cream cheese, softened full-fat, block-style
- 4 tablespoons granulated sugar
- 1 teaspoon vanilla extract
For the Pumpkin Filling
- 1/2 cup pumpkin puree not pie filling
- 1/4 cup granulated sugar
- 1 teaspoon vanilla extract
- 1 teaspoon pumpkin pie spice or homemade blend
- 1 large egg
For the Egg Wash
- 1 large egg
- 2 tablespoons water
For the Icing
- 2/3 cup powdered sugar
- 1 teaspoon vanilla extract
- 4 tablespoons milk
Instructions
- Preheat your oven to 375°F. Line a baking sheet with parchment. Unfold your thawed puff pastry sheets onto a lightly floured surface and cut each sheet into 4 equal rectangles (8 total). Score a 1/2-inch border around each rectangle, being careful not to cut all the way through. Prick the inner pastry with a fork. This is called docking — it prevents the center from puffing up into a balloon while the border rises tall and golden.
- Mix the Cream Cheese Filling: In a medium bowl, beat the softened 8 oz cream cheese, 4 tablespoons sugar, and 1 teaspoon vanilla until completely smooth and fluffy, about 2 minutes. Scrape the bowl well. You want zero lumps here — they’ll melt unevenly in the oven and leave holes in your filling.
- Mix the Pumpkin Filling: In a separate bowl, whisk together the 1/2 cup pumpkin puree, 1/4 cup sugar, 1 teaspoon vanilla, 1 teaspoon pumpkin pie spice, and 1 egg until fully combined and glossy. The mixture should look like thick, smooth pudding.
- Assemble the Danishes: Spoon about 1 heaping tablespoon of the cream cheese filling into the center of each pastry, spreading it gently within the scored border. Top with about 1 tablespoon of the pumpkin filling, spreading it over the cream cheese layer. Don’t overfill — it will spread as it bakes.
- Chill and Egg Wash: Place the assembled danishes on the baking sheet in the fridge for 30 minutes. This is the most important step for flaky layers. After chilling, brush the borders (not the filling) generously with the egg wash (1 egg + 2 tbsp water whisked together). Be precise — egg wash on the filling makes the surface look streaky and unappetizing.
- Bake: Bake for 18–22 minutes, rotating halfway through. The pastry should be deeply golden and puffed, and the filling should be set with a slight jiggle in the very center. The cream cheese should look matte, not shiny. Transfer the pan to a cooling rack.
- Ice and Serve: While the danishes cool, whisk together the 2/3 cup powdered sugar, 1 teaspoon vanilla, and 4 tablespoons milk. Add the milk a little at a time until you get a thick but drizzling consistency. Drizzle over the warm danishes. Serve warm or at room temperature.
Notes
- Thaw Pastry in the Fridge, Not on the Counter: Overnight in the refrigerator is the only way to guarantee the butter stays solid.
- Don’t Skip the Chill: It prevents the butter from melting immediately in the oven, which creates tall, shattery layers.
- Go Easy on the Egg Wash: A thin, even coat on the borders only.
- Let Them Cool a Little Before Icing: Warm pastry will melt the icing into a thin, invisible glaze.
Related posts:
 Low Calorie Banana Bread That Doesn’t Taste Like a Compromise — Finally
 My Go-To Moist Gluten Free Chocolate Banana Bread (It’s the Only GF Loaf I Make)
 Puff Pastry Apple Tarts That Look Like a Bakery Made Them — with Only 15 Minutes of Effort
 White Chocolate Pumpkin Snickerdoodles: The Soft, Bakery-Style Version That Actually Works