
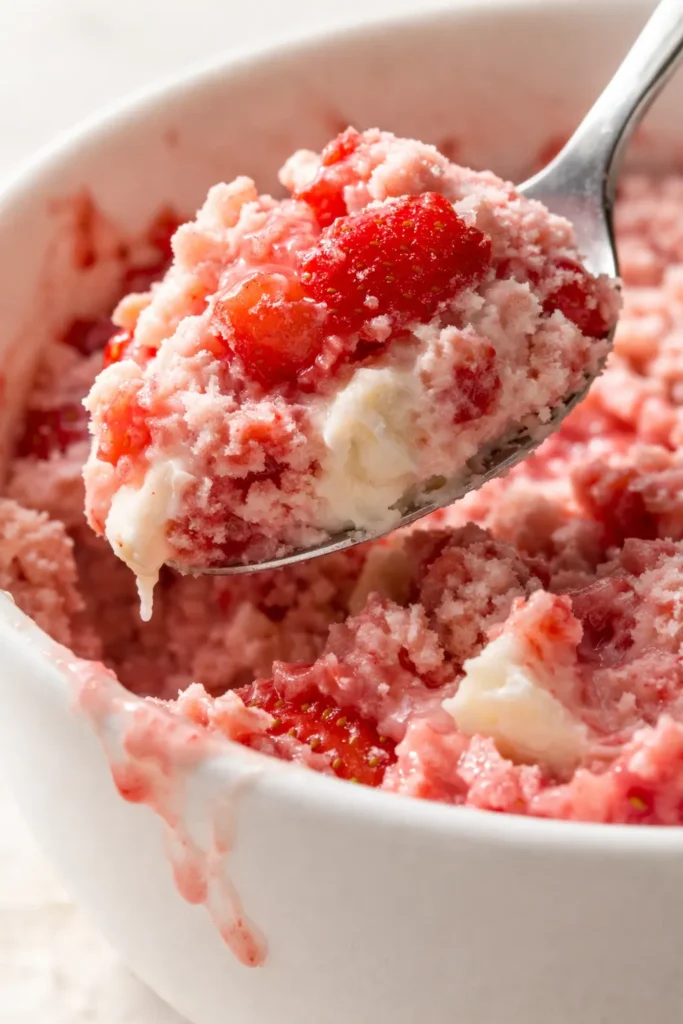
TL;DR: This Ninja Creami strawberry ice cream uses a simple base of whole milk, heavy cream, sugar, and a key ingredient—cream cheese—for the silkiest texture. Freeze the pint for 24 hours, process on Lite Ice Cream, then enjoy a scoop that tastes like fresh strawberries in cream. No fancy gear or complicated steps required, just a creamy, satisfying dessert that beats anything from the store.
I’ve tested a lot of Ninja Creami recipes, and strawberry is the one my family fights over. Not the chocolate, not the vanilla, the strawberry. The first time I made it, I used just milk and strawberries—and it came out tasting like a crushed-up ice cube. I knew there had to be a way to get that rich, scoopable texture without a ton of extra work. This version? It’s the one I keep coming back to. Six ingredients, one pint, and it’s genuinely better than anything I’ve pulled out of a tub from the grocery store.
The first batch I tried was pure fruit puree and milk—you know the one. It came out metallic and icy. Batch two I added a little cream, which helped, but it was still dense on the bottom and crumbly on top. Finally, I landed on a trick my grandmother used for her no-churn ice cream: a spoonful of cream cheese. It emulsifies the fat and water, giving you that smooth, velvety texture from the very first scoop. The vanilla bean paste was the cherry on top—it rounds out the strawberry flavor beautifully, adding a floral warmth that makes the berries taste more like themselves.
- Serves: 1 pint (about 2 generous servings)
- Hands-On Time: 10 min | Total Time: 24 hours 10 min (includes freeze time)
- Difficulty: Easy—if you can measure and press a button, you can make this
- Cost per serving: ~$1.50 per pint
- Nutrition Estimate: 410 Calories, 6g Protein, 45g Carbs, 24g Fat, 15g Saturated Fat, 2g Fiber, 105mg Sodium per serving (half pint)
- Dietary Notes: Naturally gluten-free. Can be adapted for lower sugar with a monk fruit blend.
(Photo above: A creamy, pale pink scoop of strawberry ice cream resting on a chilled Ninja Creami pint lid, with fresh halved strawberries scattered around the base. The texture is smooth and dense, with tiny specks of vanilla bean visible. Soft, natural window light from the side. No artifice—just pure, homemade ice cream ready to be devoured.)
Why a Spoonful of Cream Cheese Makes All the Difference
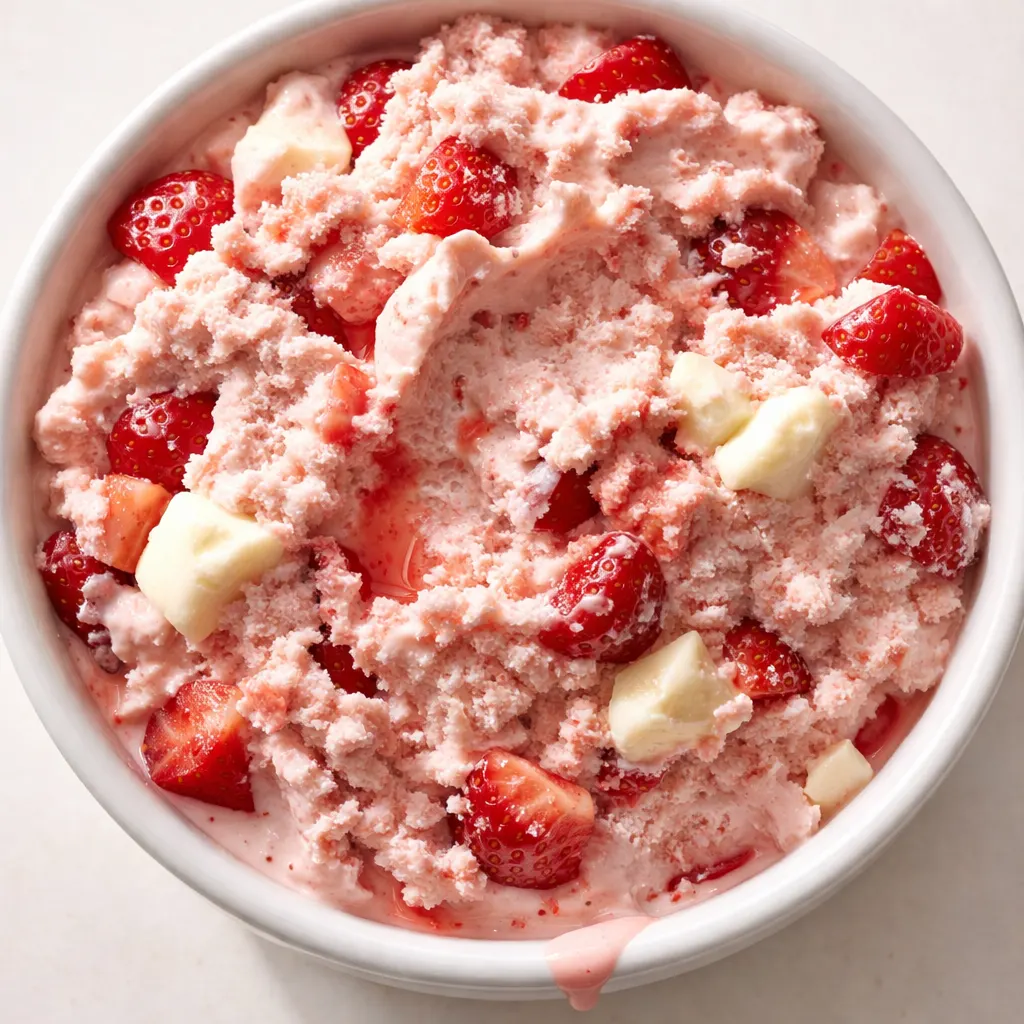
The number one complaint I hear about Ninja Creami recipes is that they’re too icy. Straight milk and fruit is full of water, and water freezes into hard ice crystals. Cream cheese contains stabilizers and fat that bind that water, giving you a much smoother bite. It doesn’t make the ice cream taste tangy or cheesecake-like—it just makes the texture right. According to USDA nutritional data, cream cheese is roughly 35% fat and 53% water, which is exactly the ratio you need to prevent icy crystallization in a quick-freeze environment.
Vanilla bean paste works beautifully here because it adds a floral warmth that makes the strawberries taste more like themselves. You don’t get a loud vanilla flavor—just a softer, more rounded berry note. It’s my favorite trick for making fruit-based ice creams taste “complete.”
Most home cooks find that freezing the pint for a full 24 hours produces a much more consistent texture than the minimum 12 hours. The colder the base, the better the machine can process it into that dense, scoopable crème.
Ingredients Worth Talking About (Plus a Few Honest Notes)
- 6 Fluid Ounces Whole Milk: The base of our ice cream. Whole milk gives you enough fat to keep things creamy without making the base too heavy. Don’t swap in skim here—you’ll lose too much body.
- 4 Fluid Ounces Heavy Whipping Cream or Half and Half: Heavy cream is my preference for the richest possible texture, but half and half works in a pinch if that’s what you have. The higher the fat, the softer the final scoop.
- 1 Teaspoon Vanilla Bean Paste: This isn’t about making vanilla ice cream—it’s about making the strawberry flavor taste fuller and more complex. The tiny specks look beautiful, too. If you only have extract, use 1 ½ teaspoons.
- 3 Tablespoons Sugar: Just enough to sweeten the berries and milk without overwhelming the fruit. You can reduce this to 2 tablespoons if your strawberries are very sweet and ripe.
- 1 Tablespoon Cream Cheese (Room Temperature): This is the texture hack you didn’t know you needed. Make sure it’s really soft before you whisk it in, or you’ll feel tiny lumps when you blend. Let it sit on the counter while you wash your strawberries.
- 6 Medium Strawberries: Wash, hull, and dice them small. You don’t need to cook them down—fresh strawberries give the brightest flavor. Frozen strawberries can be used, but thaw and drain them well first to avoid extra water.
What to Pull Out Before You Start
- Ninja Creami Machine: This recipe is designed specifically for the Creami spin-and-process mechanism. It should work on the NC300, NC301, or any of the standard models.
- Ninja Creami Pint Container: The exact container that comes with your machine. Make sure it’s clean and completely dry.
- A Small Blender or Immersion Blender: You need to fully emulsify the cream cheese into the milk mixture. A whisk works if you’re patient, but a blender makes it foolproof.
- A Sharp Knife and Cutting Board: For dicing your strawberries into small, even pieces.
One note: Let your pint container sit at room temperature for a minute while you blend—a cold container can cause the base to seize up slightly when you pour it in.
How to Make Ninja Creami Strawberry Ice Cream: My Exact Process
This is the method I’ve landed on after maybe ten pints of trial and error. It’s forgiving, but a few small details make the difference between “good” and “I’m eating this straight from the pint at 10 PM.”
Prep the Strawberries: Wash, hull, and dice 6 medium strawberries into pieces no bigger than a pea. Set them aside in a small bowl.
- Soften the cream cheese: If you didn’t let it sit out, microwave it for 5–7 seconds until it’s the texture of buttercream. You don’t want it melted, just very soft.
- Blend the base: In a small blender, combine the whole milk, heavy cream, vanilla bean paste, sugar, and softened cream cheese. Blend on low for about 20 seconds until everything is smooth and the cream cheese has completely disappeared. You’ll smell the vanilla and a hint of dairy sweetness.
- Add the strawberries: Pour the blended base into your Ninja Creami pint container. Gently stir in the diced strawberries with a spoon. They’ll float, and that’s exactly what you want—they’ll distribute evenly during the spin.
- Freeze: Place the pint container on a level surface in your freezer. Freeze for a minimum of 12 hours, but ideally 24 hours. The longer freeze gives you a colder, more consistent block for the machine to process.
- Process: Take the pint out of the freezer and remove the lid. Run it under warm water for about 10 seconds to loosen the sides. Place it in the outer bowl, lock it into the machine, and press the Lite Ice Cream button. Watch it spin—you’ll hear a gentle whirring, and at first it will look like a crumbly snow.
- Re-process (if needed): If the texture looks dry or crumbly after the first spin (which happens often with fruit-based recipes), create a small hole in the center of the ice cream down to the bottom of the pint. Add 1–2 tablespoons of milk or cream and press the Re-Spin button. This transforms it into a smooth, scoopable consistency every time.
- Serve immediately or rest: You can eat it right away if you like a softer, almost milkshake texture. For a classic scoop, place the pint in the fridge for 15–20 minutes to warm up slightly, or let it sit on the counter for 5 minutes. The texture will become dense and velvety, with tiny flecks of vanilla bean and soft strawberry pieces throughout.
How I Batch-Prep These for the Week
I almost never make just one pint at a time. If I’m pulling out the blender and strawberries, I’ll make three or four bases and freeze them all at once. It takes the same amount of effort, and you’ve got ice cream ready whenever the craving hits. Just label the lids with a sharpie so you remember which is which.
- Fridge: The blended base can be stored in the pint container in the fridge for up to 24 hours before freezing. This actually helps the flavors meld.
- Freezer: Once frozen, the pint can be stored for up to 3 months. Keep it flat and don’t let anything sit on top of it.
- Reheat: If it’s been in the freezer for more than a week, let it sit at room temperature for 2–3 minutes before processing—it’s a little gentler on the machine.
Troubleshooting Your Strawberry Ice Cream
Even with the best recipe, things can go sideways. Here’s how to save your pint:
- Ice cream is too icy or crunchy after processing? You likely didn’t use enough cream cheese or fat. Next time, be generous with the cream cheese and use heavy cream. For an existing pint, try re-spinning with an extra tablespoon of milk.
- The machine struggles to spin (pint is too hard)? Let the pint sit at room temperature for 5–7 minutes before processing. Also, run the sides under warm water for 15 seconds. If the block is uneven, shave off any high spots with a butter knife.
- Base separated or cream cheese lumps remain? Make sure the cream cheese is truly room temperature and blend thoroughly. If you see lumps after freezing, the texture will be grainy. Re-blend the base before freezing.
- After re-spin, texture is still dry? Add another tablespoon of milk and re-spin. If it becomes soupier than you like, freeze the pint for 30 minutes and re-spin again.
Swaps That Actually Work (When You’re Out of Strawberries)
- Mixed Berry: Swap the strawberries for an equal weight of raspberries, blackberries, and blueberries. You’ll get a deep purple ice cream with a tangy-sweet flavor.
- Peach or Mango: Use 6 ounces of fresh or frozen (thawed) diced peaches or mango. The base stays the same—the cream cheese is essential here because stone fruits are even higher in water content.
- Chocolate Strawberry: Add 1 tablespoon of unsweetened cocoa powder to the blender along with the other ingredients. Reduce the vanilla bean paste to ½ teaspoon. You’ll get a chocolate-covered strawberry vibe.
This strawberry ice cream has become a staple in my kitchen, especially during the summer when berries are at their peak. I love hearing how others tweak the recipe—feel free to drop a comment below with your favorite variation or any questions about making this strawberry ice cream. If you make it, tag me so I can see that beautiful pink scoop—there’s nothing better than a homemade pint shared with friends.
Ninja Creami Strawberry Ice Cream: The 5-Ingredient Version That’s Creamier Than Store-Bought
Equipment
- Ninja Creami machine
- Ninja Creami pint container
- Small Blender or Immersion Blender
- Sharp Knife and Cutting Board
Ingredients
Ingredients
- 6 Fluid Ounces Whole Milk Don’t swap in skim here—you’ll lose too much body.
- 4 Fluid Ounces Heavy Whipping Cream Half and half works in a pinch.
- 1 Teaspoon Vanilla Bean Paste If using extract, use 1 ½ teaspoons.
- 3 Tablespoons Sugar Can reduce to 2 tablespoons if strawberries are very sweet.
- 1 Tablespoon Cream Cheese Room temperature. Let it sit out while washing strawberries.
- 6 medium Strawberries Wash, hull, and dice small. Frozen strawberries can be used but thaw and drain.
Instructions
- Prep the strawberries: Wash, hull, and dice 6 medium strawberries into pieces no bigger than a pea. Set them aside in a small bowl.
- Soften the cream cheese: If you didn’t let it sit out, microwave it for 5–7 seconds until it’s the texture of buttercream. You don’t want it melted, just very soft.
- Blend the base: In a small blender, combine the whole milk, heavy cream, vanilla bean paste, sugar, and softened cream cheese. Blend on low for about 20 seconds until everything is smooth and the cream cheese has completely disappeared. You’ll smell the vanilla and a hint of dairy sweetness.
- Add the strawberries: Pour the blended base into your Ninja Creami pint container. Gently stir in the diced strawberries with a spoon. They’ll float, and that’s exactly what you want—they’ll distribute evenly during the spin.
- Freeze: Place the pint container on a level surface in your freezer. Freeze for a minimum of 12 hours, but ideally 24 hours. The longer freeze gives you a colder, more consistent block for the machine to process.
- Process: Take the pint out of the freezer and remove the lid. Run it under warm water for about 10 seconds to loosen the sides. Place it in the outer bowl, lock it into the machine, and press the Lite Ice Cream button. Watch it spin—you’ll hear a gentle whirring, and at first it will look like a crumbly snow.
- Re-process (if needed): If the texture looks dry or crumbly after the first spin (which happens often with fruit-based recipes), create a small hole in the center of the ice cream down to the bottom of the pint. Add 1–2 tablespoons of milk or cream and press the Re-Spin button. This transforms it into a smooth, scoopable consistency every time.
- Serve immediately or rest: You can eat it right away if you like a softer, almost milkshake texture. For a classic scoop, place the pint in the fridge for 15–20 minutes to warm up slightly, or let it sit on the counter for 5 minutes. The texture will become dense and velvety, with tiny flecks of vanilla bean and soft strawberry pieces throughout.
Notes
- If ice cream is too icy, use more cream cheese or fat next time. For an existing pint, re-spin with an extra tablespoon of milk.
- If machine struggles, let pint sit at room temperature for 5-7 minutes and run sides under warm water.
- If cream cheese lumps, ensure it’s room temperature and blend thoroughly.
- If texture is dry after re-spin, add another tablespoon of milk and re-spin. If too soupy, freeze for 30 minutes and re-spin again.
- Mixed Berry: Swap strawberries for equal weight of raspberries, blackberries, blueberries.
- Peach or Mango: Use 6 oz fresh or thawed frozen diced peaches or mango. Cream cheese is essential.
- Chocolate Strawberry: Add 1 tbsp unsweetened cocoa powder, reduce vanilla to ½ tsp.
Related posts:
 Frozen Chocolate Covered Strawberry Bites That Taste Like Pure Summer (3 Ingredients, No Oven)
 Apple Pie Rice Krispie Treats for Last-Minute Fall Desserts: 5 Minutes, No Oven, All the Flavor
 Cherry Rice Krispie Treats That Taste Like a Chocolate-Covered Cherry — in 20 Minutes Flat
 The Homemade Pumpkin Spice Latte That Costs a Fraction of the Drive-Through (And Tastes Better)