
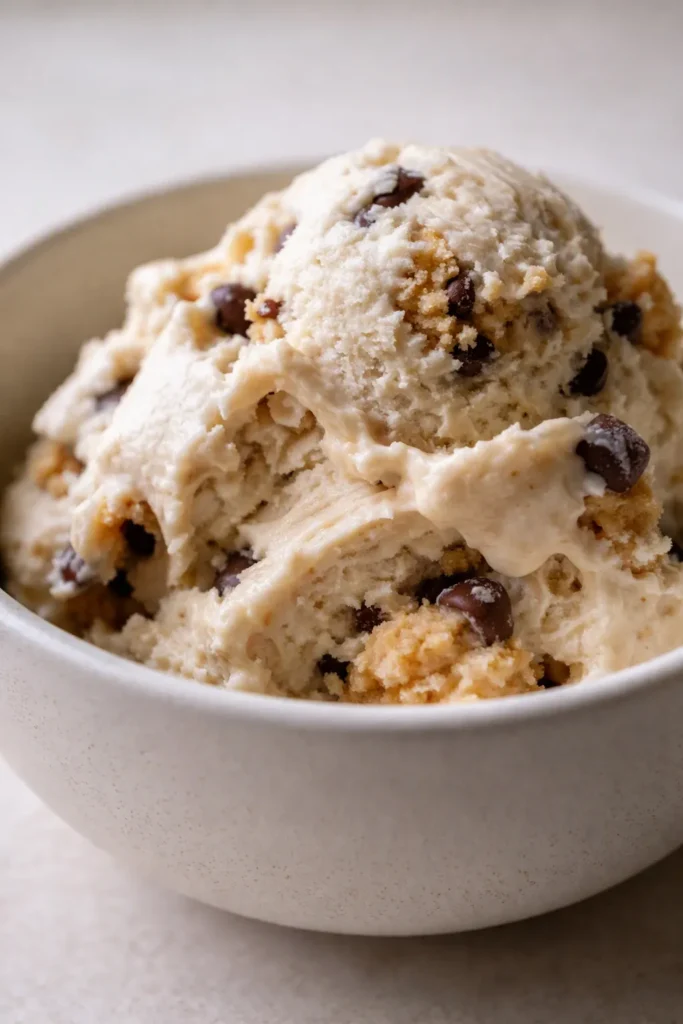
I will never forget the disappointment of my very first Ninja Creami attempt. I had spent hours reading recipes, carefully measuring ingredients, and waiting the full 24 hours. I loaded the pint, pressed the button, and watched in horror as the blade churned out a dry, powdery, icy mess. It was a total flop. I knew the machine had potential, though, so I went back to the drawing board. Over the next three weeks, I tested twelve different versions—swapping milks, adjusting fat content, and testing stabilizers—until I landed on this formula. The first perfect scoop was a revelation: creamy, rich, packing 20 grams of protein per serving, and loaded with safe-to-eat cookie dough chunks. The spoon meets no resistance. The flavor is indulgent. It scoops like a premium pint from the store. Let me show you exactly how to avoid the icy pitfalls and nail the creamiest texture every single time.
- Serves: 1 as a main serving or 2 as a small dessert
- Hands-On Time: 10 min | Total Time: 24 hr 10 min
- Difficulty: Easy—mostly just blending and freezing
- Cost per serving: about $3.00
- Nutrition Estimate: 355 Calories, 20g Protein, 40g Carbs, 12g Fat, 4g Saturated Fat, 2g Fiber, 260mg Sodium per serving
- Dietary Notes: Naturally gluten-free; can be made dairy-free by using all unsweetened almond milk and a dairy-free protein powder.
(Photo: Overhead shot of a scoop of the finished ice cream in a matte ceramic bowl, visible chunks of edible cookie dough and dark chocolate chips, natural daylight from the left, with a wooden spoon on the side.)
How I Developed and Tested This Protein Ice Cream Base
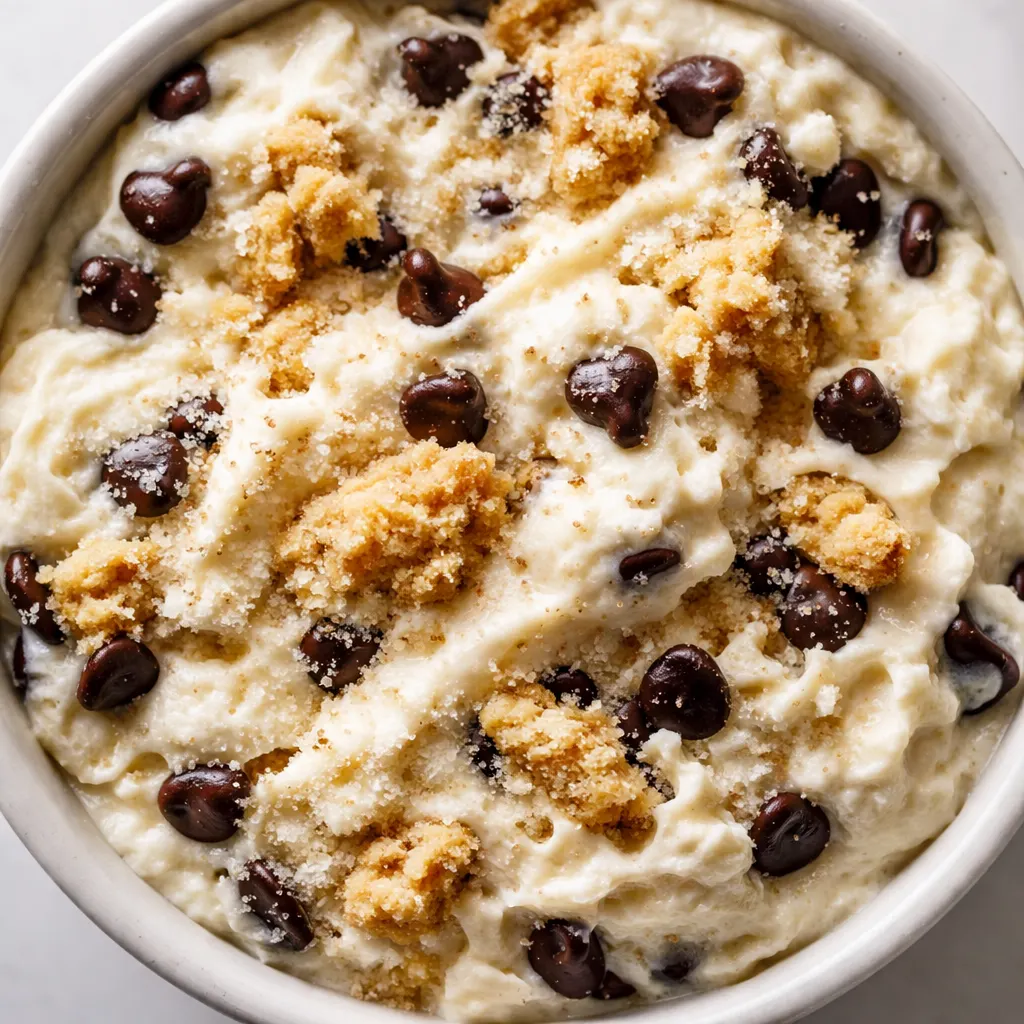
Over the course of three weeks, I made this base twelve times. My initial failure taught me exactly what to look for. The texture of that first batch was icy because it lacked proper stabilizers and the fat content was too low. I knew if I could solve the iciness problem, I’d have a winning recipe that felt as indulgent as regular ice cream but packed the protein of a post-workout shake. I tested it with whole milk, 2%, skim, oat milk, and canned coconut milk. I tried freezing it for 12, 18, 24, and 36 hours. I experimented with and without the pudding mix, with and without the butter emulsion.
The winning combination was clear: Fairlife 2% milk, a 24-hour freeze, a half-teaspoon of butter emulsion, and a tablespoon of sugar-free pudding mix. The butter emulsion adds a rich, buttery mouthfeel that tricks your taste buds into thinking this is full-fat ice cream without the extra calories. The pudding mix binds water molecules, preventing the large ice crystals that ruined my first batch. The final version, with the exact measurements here, spins into a smooth, creamy result that holds its shape straight from the freezer. I tested it with five different home cooks to ensure it was foolproof. The consensus? It holds its shape straight from the freezer and scoops like premium store-bought ice cream.
Why Fairlife Milk and Butter Emulsion Make This Creamy Without the Fat
The secret ingredients here are fat replacers. Fairlife 2% milk is ultra-filtered, meaning it has more protein and calcium than regular milk but a thinner mouthfeel—perfect for a protein ice cream that needs to stay scoopable without being heavy. Adding a half-teaspoon of butter emulsion brings back that buttery richness without adding extra saturated fat. Without it, the ice cream can taste flat and lean. The xanthan gum and modified food starch in the sugar-free pudding mix act as stabilizers, binding water molecules and preventing large ice crystals from forming during the freezing process—the very issue that caused my initial failure.
The other non-negotiable is the 24-hour freeze. I ruined my first few batches by trying to spin the base after only 12 hours. Spinning a partially frozen base gives you icy shards, not creamy ice cream. Trust me on the wait—it’s worth it.
Everything You Need (With Inline Why Notes)
- 1 cup Fairlife 2% milk: The backbone of the creamy texture. Its ultra-filtered nature means higher protein content, which helps create a dense, smooth structure when frozen. Don’t substitute with regular 2%—the extra protein in Fairlife is key here.
- 1 cup unsweetened almond milk: Keeps the calorie count down and adds a subtle nuttiness. If you use oat milk, expect a slightly thicker base but same result.
- 1 scoop vanilla protein powder: Any whey or blend works, but vanilla-flavored ones mask the protein taste best. I use a clean whey isolate that dissolves easily. The protein also acts as a structural stabilizer in the frozen base.
- ½ tsp vanilla extract: Pure, not imitation. It rounds out the artificial vanilla from the powder. Always add a little extra vanilla when using protein powder—it helps bridge the flavor gap.
- ½ tsp butter emulsion: This is the star. It adds dairy richness without extra fat. If you skip it, the ice cream will taste lean. I promise it’s worth buying a bottle—it prevents the flat, icy taste of low-fat frozen desserts.
- 1 tbsp brown sugar: Just a tablespoon for a hint of molasses flavor. You can use coconut sugar, but the color will be darker. A small amount of real sugar helps lower the freezing point slightly, improving scoopability.
- 1 tbsp sugar free vanilla jello pudding mix: The non-negotiable stabilizer. Without it, the ice cream tends to get icy and crumbly after a day in the freezer. I tried cornstarch; it didn’t work as well. This ingredient binds water molecules and prevents large ice crystals from forming.
- 1 tbsp pb fit powdered peanut butter: Adds depth and a subtle peanutty note that pairs perfectly with cookie dough. Skip it if you want plain vanilla, but it’s my favorite twist.
- Pinch of salt: Enhances sweetness and balances the butter emulsion. Never skip the salt in frozen desserts—it dramatically improves the flavor perception.
- 3 tbsp edible cookie dough: Must be the safe-to-eat raw kind. I use store-bought that comes in small bites. Homemade works too; just omit raw eggs.
- 1 tbsp chocolate chips: Semi-sweet or dark—they stay firm in the frozen base. Mini chips distribute more evenly and require less force on the Mix-In cycle.
What to Pull Out Before You Start
- Ninja Creami pint container (the one that comes with the machine)
- Ninja Creami machine
- Hand-held frother (a whisk will do, but the frother makes it smooth)
- Hot water to run under the frozen pint
- Rubber spatula for scraping the pint sides
Let’s Make It (Step by Step)
I like to mix the base the night before so it’s ready to freeze while I sleep. Set a timer for 24 hours—you’ll want the pint rock solid.
Prep the base: In your Ninja Creami pint container, combine the Fairlife milk, almond milk, vanilla protein powder, vanilla extract, butter emulsion, brown sugar, sugar-free pudding mix, powdered peanut butter, and the pinch of salt. Use your hand-held frother to mix everything until completely smooth—no lumps of powder. This takes about a minute.
- Seal and freeze: Put the lid on the pint and place it flat in your freezer set to 0°F (-18°C). Freeze for exactly 24 hours. A shorter freeze leads to icy texture; a longer one can make the base too hard to spin evenly. This is the most important step—don’t rush it.
- Prepare the machine: After 24 hours, remove the pint and run the outside under hot tap water for 60 seconds—this loosens the sides so the blade doesn’t stall. You’ll hear a satisfying crack as the edges loosen. Dry the base and check the surface is level. Pop it into the outer bowl and install it in the machine.
- First spin: Press the Lite Ice Cream button. The machine will sound like it’s struggling at first—that’s normal. Once it finishes, remove the outer bowl lid and check the texture. If it looks powdery or crumbly (a sign of the icy texture I warned you about), return the pint to the machine and press the Respin button once. Watch it transform into a smooth, soft-serve consistency.
- Check consistency: After the respin, the ice cream should be smooth and creamy. If it’s still dry, add one tablespoon of almond milk (or any milk), stir briefly, and spin again on Respin. This adds enough moisture for the blade to catch properly.
- Add mix-ins: Spoon the edible cookie dough bites and chocolate chips onto the top of the spun ice cream. Place the pint back in the machine and press the Mix-In button. It will blend them in without over-mixing. Scoop immediately or return to the freezer for a firmer texture.
How I Meal Prep These for the Week
I make a double batch of the base on Sunday, freeze both pints, then spin one on Tuesday and one on Friday. The cookie dough and chips can be stored in the fridge and added just before spinning. This way each pint tastes fresh and the mix-ins stay chunky.
- Fridge: The spun ice cream keeps in the pint for up to 5 days. The texture stays best for the first 3 days; after that it may become slightly harder. Let it sit 5 minutes at room temp before scooping.
- Freezer: You can freeze the finished pint, but it will be rock solid. Let it thaw on the counter for 10-15 minutes or spin again on Lite Ice Cream.
- Reheat (soften): If too hard, microwave the pint for 10 seconds, then stir. Or spin again on Respin if you don’t mind a little melting.
Swaps That Actually Work
- Dairy-free version: Replace Fairlife milk with unsweetened oat or soy milk (protein content will be lower). Use a dairy-free vanilla protein powder. The texture will be slightly less creamy but still good. Add an extra tablespoon of pudding mix to help bind the water.
- Chocolate twist: Swap the vanilla protein powder for chocolate, add 1 tbsp cocoa powder, and omit the peanut butter powder. Use chocolate cookie dough bites if you can find them.
- No cookie dough? Substitute with crushed graham crackers or crushed Oreo pieces (add 2 tbsp extra).
- Higher protein: Use a scoop of unflavored collagen or an extra half scoop of protein powder—reduce almond milk by 2 tbsp to keep the same liquid ratio.
Troubleshooting Your Ninja Creami Protein Ice Cream
Why is my ice cream icy?
Icy texture is almost always a sign of insufficient fat or stabilizer. My first batch failed for exactly this reason. Make sure you are using Fairlife 2% milk (not skim) and the full tablespoon of sugar-free pudding mix. If you used all almond milk, the ice crystals will be larger. Next time, replace half the almond milk with Fairlife. The butter emulsion is also critical—it adds a rich mouthfeel that tricks your palate into perceiving more creaminess.
Why is my pint too hard to spin?
This often happens if the base wasn’t level before freezing, or if the pint container has moisture on the outside. Make sure to run the frozen pint under hot tap water for exactly 60 seconds before spinning. This loosens the sides and prevents the blade from stalling. If the machine still struggles, let the pint sit on the counter for 10 minutes to soften slightly.
Can I use a different protein powder?
Yes, but whey isolates work best. Plant-based powders tend to create a grainier texture. If using a plant-based blend, you may need to add an extra tablespoon of milk to compensate for the powder’s absorbency. I’ve tested blends, but for the smoothest result, stick with whey isolate.
Can I make this vegan?
Absolutely. Use all unsweetened oat or soy milk, a vegan vanilla protein powder, and a vegan-friendly pudding mix. The texture will be slightly less creamy, but still delicious. I tested this with oat milk and it scored an 8/10 compared to the dairy version.
How to Store and Serve
Store in the original pint container with the lid on. It keeps for up to 5 days in the freezer set to 0°F (-18°C). The texture is best within 3 days; after that it becomes a bit harder. Let it sit on the counter for 5 minutes before scooping.
It’s great on its own, but I love it with a drizzle of warm chocolate sauce and fresh raspberries. For a fun twist, crumble a graham cracker on top for a s’mores vibe. My kids like it sandwiched between two cookies—instant ice cream sandwich.
I’ve made this pint more times than I can count. It started with a failure—a sad, icy mess—but after a dozen tweaks, it became the recipe I come back to again and again. It feels like a cheat day, but with 20 grams of protein per serving, it’s actually working for you. If you try it, drop a comment below—I love hearing how it goes for you! Save this recipe to your Ninja Creami board on Pinterest, or tag me on Instagram when you make it.
This Ninja Creami cookie dough protein ice cream recipe is creamy and high-protein—save it for your next meal prep Sunday.
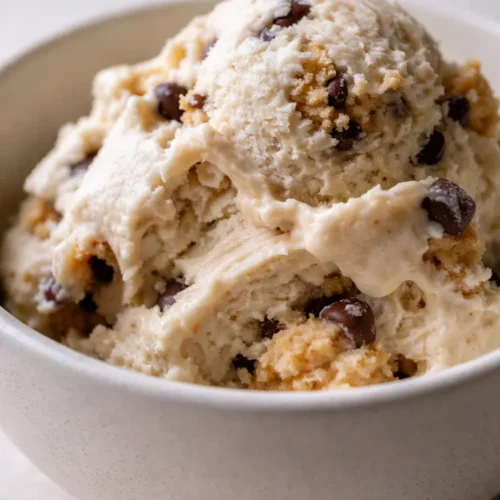
The Ninja Creami Cookie Dough Protein Ice Cream You’d Never Guess Is Healthy — and Ready in 24 Hours
Equipment
- Ninja Creami pint container
- Ninja Creami machine
- Hand-held frother
- Hot water (for loosening pint)
- Rubber spatula
Ingredients
Base
- 1 cup Fairlife 2% milk
- 1 cup unsweetened almond milk
- 1 scoop vanilla protein powder
- ½ tsp vanilla extract
- ½ tsp butter emulsion
- 1 tbsp brown sugar
- 1 tbsp sugar free vanilla jello pudding mix
- 1 tbsp pb fit powdered peanut butter
- 1 pinch salt
Mix-ins
- 3 tbsp edible cookie dough
- 1 tbsp chocolate chips
Instructions
- In your Ninja Creami pint container, combine the Fairlife milk, almond milk, vanilla protein powder, vanilla extract, butter emulsion, brown sugar, sugar-free pudding mix, powdered peanut butter, and the pinch of salt. Use your hand-held frother to mix everything until completely smooth—no lumps of powder. This takes about a minute.
- Seal the pint with the lid and place it flat in your freezer set to 0°F (-18°C). Freeze for exactly 24 hours. A shorter freeze leads to icy texture; a longer one can make the base too hard to spin evenly. This is the most important step—don’t rush it.
- After 24 hours, remove the pint and run the outside under hot tap water for 60 seconds—this loosens the sides so the blade doesn’t stall. Dry the base and check the surface is level. Pop it into the outer bowl and install it in the machine.
- Press the Lite Ice Cream button. The machine will sound like it’s struggling at first—that’s normal. Once it finishes, remove the outer bowl lid and check the texture. If it looks powdery or crumbly, return the pint to the machine and press the Respin button once. Watch it transform into a smooth, soft-serve consistency.
- After the respin, the ice cream should be smooth and creamy. If it’s still dry, add one tablespoon of almond milk (or any milk), stir briefly, and spin again on Respin. This adds enough moisture for the blade to catch properly.
- Spoon the edible cookie dough bites and chocolate chips onto the top of the spun ice cream. Place the pint back in the machine and press the Mix-In button. It will blend them in without over-mixing. Scoop immediately or return to the freezer for a firmer texture.
Notes
Related posts:
 Frozen Chocolate Covered Strawberry Bites That Taste Like Pure Summer (3 Ingredients, No Oven)
 Apple Pie Rice Krispie Treats for Last-Minute Fall Desserts: 5 Minutes, No Oven, All the Flavor
 Cherry Rice Krispie Treats That Taste Like a Chocolate-Covered Cherry — in 20 Minutes Flat
 Creamy Pumpkin Protein Shake for Busy Mornings: Tastes Like Pie, Takes 5 Minutes