
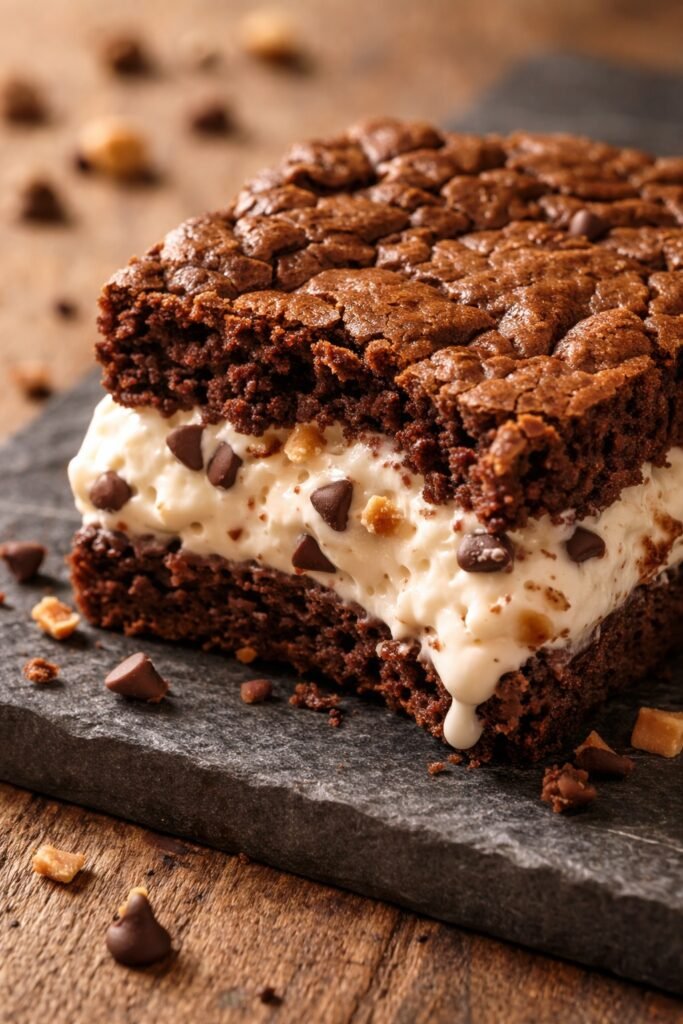
The first time I made brownie ice cream sandwiches, I used a single 9×9 pan and ended up with a brick of cake that dwarfed the ice cream. I learned the hard way: thick brownie layers throw off the balance entirely. Splitting the batter into two thin sheets gives you a perfect brownie-to-ice cream ratio in every bite. That single change turns a heavy dessert into something you can’t stop eating.
The short bake time — just 15 minutes — keeps the brownies intentionally underbaked. This is the secret that keeps them soft and chewy after a full night in the freezer. Over-baked brownies turn into hockey pucks when chilled, and nobody wants that. I learned this the hard way so you don’t have to.
Here’s the trick that surprised me most: pressing a small piece of parchment directly onto the batter before baking prevents the brownies from puffing up. This gives you a flat, even surface that stacks perfectly with the ice cream layer. It also helps the brownies bake more evenly, so you don’t end up with a domed top that slides right off the ice cream.
What This Testing Process Taught Me
I tested this recipe a dozen times before I got it right. The first batches were either too cakey or rock hard after freezing. I realized the problem was over-baking paired with the wrong pan technique.
By reducing the bake time to 15 minutes and using that parchment-paper press on top, the brownies stay flat, fudgy, and flexible enough to bite into straight from the freezer. That one fix changed everything. I also tested different ice cream brands — cheaper ones with more water created crunchy ice crystals. Splurging on a premium brand (or making your own) makes a noticeable difference in texture.
Ingredients Worth Talking About
- 1 cup (226g) unsalted butter, melted: Melted butter gives these brownies their dense, fudgy texture. Don’t substitute margarine here — the water content will make them cakey.
- 2 cups (400g) granulated sugar: The high sugar content helps keep the brownies chewy and creates that signature crackly top. I’ve reduced it before, and the texture really suffers.
- 3 large eggs, at room temperature: Room temperature is non-negotiable here. Cold eggs can seize the melted butter and make the batter stiff.
- 1 Tablespoon pure vanilla extract: Don’t skimp on this — it deepens the chocolate flavor and adds warmth.
- 1 cup (82g) unsweetened cocoa powder: Natural or Dutch-process works great. Dutch-process gives a richer, more Oreo-like brownie.
- 1 cup (125g) all-purpose flour, spooned and leveled: Packing the flour yields dry, crumbly brownies. Spoon it into the cup and level it off with a knife.
- 1 teaspoon salt: Balances the sweetness and enhances the chocolate flavor.
- 3/4 teaspoon baking powder: Adds just enough lift without making the brownies cakey.
- 2 quarts (1/2 gallon) vanilla ice cream, slightly softened: Slightly softened is key. Cheap store-brand ice cream has more moisture and will freeze harder and icier. Spend a little extra here.
What You’ll Need
- Two 9-inch square baking pans — If you only have one, you can bake the layers one after the other. The second pan just speeds things up.
- Parchment paper — For the slings and the top press. Don’t skip it, or lifting the brownies out will be a nightmare.
- Microwave-safe bowl or small saucepan — For melting the butter.
- Whisk and rubber spatula — A wooden spoon works fine too.
- Ice cream scoop or large spoon — For spreading the ice cream evenly.
- Sharp knife — A long chef’s knife works best for cutting clean squares.
A note on pans: I don’t recommend other sizes. A 9-inch square pan gives you the perfect thickness for both the brownie and ice cream layers.
Let’s Make Them (Step by Step)
This is one of those recipes where a little planning goes a long way. Read through the whole thing once before you start — it’ll make the process so much smoother.
Preheat and Prep: Preheat your oven to 350°F (177°C). Line one 9-inch square baking pan with parchment paper, leaving enough overhang on the sides to lift the warm brownies out later. Set it aside.
- Melt and mix: In a microwave-safe bowl or a small saucepan on the stove, melt the butter. Whisk in the sugar until it’s completely combined, then whisk in the eggs and vanilla. The batter will look a little dull and that’s perfectly normal.
- Fold the dry ingredients: Add the cocoa powder, flour, salt, and baking powder. Fold everything together with a rubber spatula or wooden spoon. It will come together, I promise. The batter will be very thick — you should have about 4 cups total.
- Spread and press: Spoon and spread half of the batter (about 2 cups) into the prepared pan. The batter is thick and heavy, so do your best to spread it evenly. I find the back of a spoon works best. Place a small sheet of parchment paper directly on top of the batter, smoothing it down gently.
- Bake: Bake for 15-16 minutes. I find any longer over-cooks the brownies, making the sandwiches difficult to cut and eat. Remove from the oven and cool for 5 minutes in the pan. Carefully, using the parchment overhang, lift the warm and soft square sheet of brownies out of the pan as a whole. Set it aside.
- Repeat: Line the warm pan with another sheet of parchment paper, leaving overhang. Give the remaining batter a stir — it will be very thick. Add a teaspoon of water if necessary to thin it out, but no more. Spoon and spread it in the pan, place parchment on top, and bake for another 15-16 minutes. This time, let the brownies cool for 15 minutes in the pan. During this cooling time, take the ice cream out of the freezer so it has a chance to soften.
- Assemble: Scoop the softened ice cream onto the warm brownie layer in the pan. You’ll use almost all of the half-gallon. Using the back of a spoon or your ice cream scoop, gently spread it into an even, thick layer.
- Top and freeze: Carefully pick up the first square sheet of brownies and place it on top of the ice cream layer. Gently press it down into the ice cream to help it stick. Cover the entire pan with aluminum foil or plastic wrap and freeze for at least 12 hours and up to 1 week. I find 12-18 hours is the perfect amount of time.
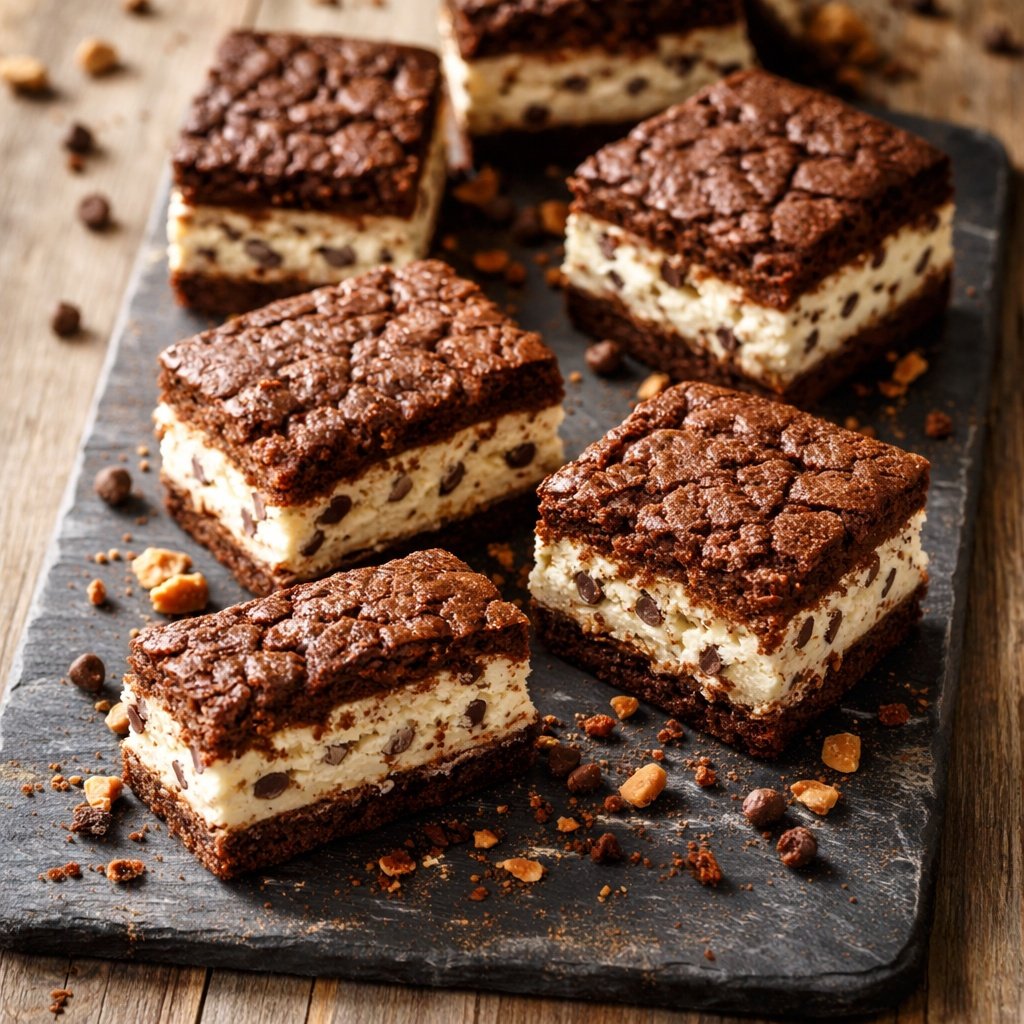
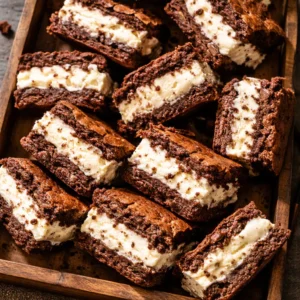
- Slice and serve: Remove the pan from the freezer. Lift the whole block out using the parchment overhang. Using a very sharp knife and some arm muscle, cut into 12 squares. Enjoy immediately.
Make-Ahead Magic (Because Summer Desserts Should Be Easy)
These are the perfect make-ahead dessert for parties or barbecues. I usually make them a full day before I plan to serve them. It takes the stress out of entertaining and gives you one less thing to worry about.
- Fridge: Not recommended. They’ll get too soft and lose their structure.
- Freezer: Wrap each leftover sandwich individually in plastic wrap and store in an airtight container in the freezer for up to 1 month. They get a little harder the longer they sit, so let them sit out for 5-10 minutes before eating if they’re frozen solid.
- Reheat: No reheating needed! Straight from the freezer is the way to go.
Things I Learned the Hard Way So You Don’t Have To
- Don’t Over-bake: Trust me on this one — 15 minutes is enough. The center will look slightly underdone. That’s the goal. Over-baked brownies turn into hockey pucks when frozen.
- Use a Sharp Knife: Run it under hot water and wipe it clean between each cut. The knife glides through the frozen ice cream and brownies, giving you clean, bakery-style edges.
- Soften the Ice Cream Properly: Leave it out on the counter for about 20 minutes. If it’s too hard, you’ll rip the brownie layer when you try to spread it. If it’s too soft, it won’t freeze back properly and will feel icy.
- Don’t Skip the Parchment Press: I know it feels like an extra step, but it’s what keeps the brownies flat. Without it, you get a domed top that makes stacking uneven and messy.
Ways to Switch Them Up
- Chocolate Ice Cream: Swap the vanilla for chocolate, cookies and cream, or even mint chocolate chip. It all works beautifully.
- Gluten-Free: Swap the all-purpose flour for a good 1:1 gluten-free baking blend. Spoon and level it just like you would regular flour. The texture will be slightly more tender but still delicious.
- Add Mix-Ins: Fold 1 cup of chocolate chips, chopped nuts, or crushed pretzels into the brownie batter before baking. It adds a lovely crunch.
- Peanut Butter Swirl: Drop spoonfuls of creamy peanut butter onto the ice cream layer before topping with the second brownie sheet. Swirl it gently with a knife for a marbled effect.
Troubleshooting: Why Did My Brownies Turn Out Dry or Hard?
Q: Why did my brownies come out dry?
A: You likely over-baked them. Oven temperatures vary, so I always check at 14 minutes. The edges should be set and the center should be soft and slightly jiggly. If it looks fully set in the oven, it’s already over-baked.
Q: Can I use salted butter?
A: Yes, you can. Just reduce the added salt in the recipe to 1/2 teaspoon so things don’t get too salty.
Q: Why is my ice cream layer icy?
A: This usually happens if the ice cream melts too much before freezing. Work quickly when spreading it, and make sure your freezer is set to 0°F. Using a higher-quality ice cream with less air and stabilizers also helps prevent ice crystals.
Q: Can I make this recipe lighter or lower in fat?
A: I honestly wouldn’t recommend swapping ingredients for low-fat versions in this recipe. It’s meant to be an indulgence. The butter and sugar are essential for the fudgy texture that makes these sandwiches worth making.
Can You Freeze Brownie Ice Cream Sandwiches? (FAQ)
Q: How long do these last in the freezer?
A: Up to 1 month if wrapped tightly in plastic wrap and stored in an airtight container. They will get a little harder over time, so let them sit out for 5 minutes before eating if they feel too solid.
Q: Can I make this with boxed brownie mix?
A: Yes, you absolutely can. Just prepare the box mix according to the package directions, then bake it in two thin layers following the same 15-minute timing. It works in a pinch.
Q: What’s the best way to cut them?
A: Use a long, sharp chef’s knife. Run it under hot water, wipe it dry, then make one clean cut. Wipe the blade clean between each cut for the neatest edges.
Q: What do you serve with them?
A: A tall glass of cold milk is the classic pairing. Hot fudge sauce on the side is a close second. If I’m feeling fancy, I’ll drizzle a little warm caramel sauce over the top right before serving.
These brownie ice cream sandwiches are my go-to for summer birthdays, potlucks, or just a regular Tuesday when you need something sweet and cold. If you make them, drop a comment below and let me know how they turned out — I love hearing about your kitchen wins.
📌 This brownie ice cream sandwiches recipe stays perfectly fudgy even after freezing — save it for your next summer party or backyard barbecue.
Brownie Ice Cream Sandwiches That Don’t Turn Into a Soggy Mess — Make Them in 30 Minutes
Equipment
- Two 9-inch square baking pans
- Parchment Paper
- Microwave-safe bowl or small saucepan
- Whisk and rubber spatula
- Ice cream scoop or large spoon
- Sharp knife
Ingredients
- 1 cup unsalted butter melted
- 2 cup granulated sugar
- 3 large eggs room temperature
- 1 tablespoon pure vanilla extract
- 1 cup unsweetened cocoa powder
- 1 cup all-purpose flour spooned and leveled
- 1 teaspoon salt
- 3/4 teaspoon baking powder
- 2 quarts vanilla ice cream slightly softened
Instructions
- Preheat and Prep: Preheat your oven to 350°F (177°C). Line one 9-inch square baking pan with parchment paper, leaving enough overhang on the sides to lift the warm brownies out later. Set it aside.
- Melt and mix: In a microwave-safe bowl or a small saucepan on the stove, melt the butter. Whisk in the sugar until it’s completely combined, then whisk in the eggs and vanilla. The batter will look a little dull and that’s perfectly normal.
- Fold the dry ingredients: Add the cocoa powder, flour, salt, and baking powder. Fold everything together with a rubber spatula or wooden spoon. It will come together, I promise. The batter will be very thick — you should have about 4 cups total.
- Spread and press: Spoon and spread half of the batter (about 2 cups) into the prepared pan. The batter is thick and heavy, so do your best to spread it evenly. I find the back of a spoon works best. Place a small sheet of parchment paper directly on top of the batter, smoothing it down gently.
- Bake: Bake for 15-16 minutes. I find any longer over-cooks the brownies, making the sandwiches difficult to cut and eat. Remove from the oven and cool for 5 minutes in the pan. Carefully, using the parchment overhang, lift the warm and soft square sheet of brownies out of the pan as a whole. Set it aside.
- Repeat: Line the warm pan with another sheet of parchment paper, leaving overhang. Give the remaining batter a stir — it will be very thick. Add a teaspoon of water if necessary to thin it out, but no more. Spoon and spread it in the pan, place parchment on top, and bake for another 15-16 minutes. This time, let the brownies cool for 15 minutes in the pan. During this cooling time, take the ice cream out of the freezer so it has a chance to soften.
- Assemble: Scoop the softened ice cream onto the warm brownie layer in the pan. You’ll use almost all of the half-gallon. Using the back of a spoon or your ice cream scoop, gently spread it into an even, thick layer.
- Top and freeze: Carefully pick up the first square sheet of brownies and place it on top of the ice cream layer. Gently press it down into the ice cream to help it stick. Cover the entire pan with aluminum foil or plastic wrap and freeze for at least 12 hours and up to 1 week. I find 12-18 hours is the perfect amount of time.
- Slice and serve: Remove the pan from the freezer. Lift the whole block out using the parchment overhang. Using a very sharp knife and some arm muscle, cut into 12 squares. Enjoy immediately.
Notes
Related posts:
 Low Calorie Banana Bread That Doesn’t Taste Like a Compromise — Finally
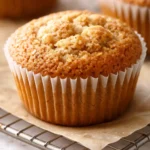 Coconut Flour Banana Bread Muffins That Stay Moist for Days (Not Crumbly)
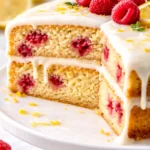 This Raspberry Lemon Cake With White Chocolate Is the Only Layer Cake You Need for Spring Celebrations
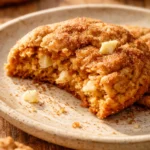 Soft, Pillowy White Chocolate Pumpkin Snickerdoodles with a Cinnamon-Sugar Crunch