
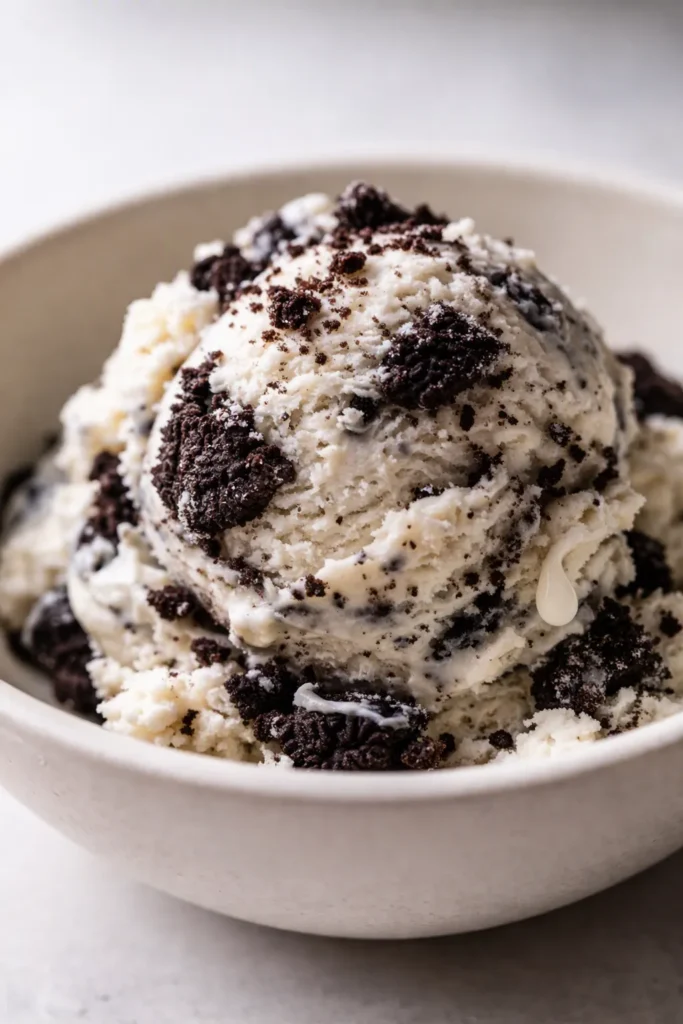
TLDR: This Ninja Creami cookies and cream ice cream uses heavy cream, milk, and a touch of cream cheese to keep the base ultra-smooth before you fold in crushed Oreos. Freeze the pint for at least 18 to 24 hours, run the Ice Cream setting, then pulse in the cookies with the +MixIn setting. Expect a scoopable, diner-style cookies and cream ice cream with zero churning required.
Ninja Creami cookies and cream ice cream has been on heavy rotation in my kitchen since the first time I realized I could get that soft-serve-meets-hand-packed texture without dragging out an ice cream maker. The first scoop is everything — smooth and cold, with soft Oreo pieces scattered through every bite and a shower of extra crumbs on top that melt into the cream as you eat.
I’ve made this exact base at least two dozen times now, and it’s genuinely the easiest thing I make all week. No eggs, no tempering, no machine to babysit — just a blender, a freeze, and two buttons on the Creami.
The first batch I made came out powdery — that weird, crumbly texture that looks like snow and tastes like disappointment. I’d skipped the cream cheese, and I’d only frozen the pint for about ten hours. Batch two was better but still a little icy around the edges. The fix turned out to be embarrassingly simple: add the cream cheese, and give the pint a full 24 hours in the freezer. Now the machine shaves the base into ribbons of sweet, velvety ice cream, and the Oreo bits fold through like they were always meant to be there.
At a Glance
- Serves: 4 (about ½ cup each) as a dessert
- Hands-On Time: 10 min | Total Time: 24 hr 10 min (almost all of it hands-off freeze time)
- Difficulty: Easy — if you can blend and push a button, you’ve got this
- Cost per serving: About $1.10
- Nutrition Estimate: 380 Calories, 6g Protein, 29g Carbs, 24g Fat, 15g Saturated Fat, 1g Fiber, 150mg Sodium per serving
- Dietary Notes: Vegetarian; easily adaptable for dairy-free
(Photo above: overhead shot of the finished cookies and cream ice cream scooped into a chilled ceramic bowl, crushed Oreo pieces scattered generously across the top, soft morning light coming from the left, and a few whole cookies propped against the pint container on the counter behind it.)
Why This Ninja Creami Cookies and Cream Base Comes Out So Smooth
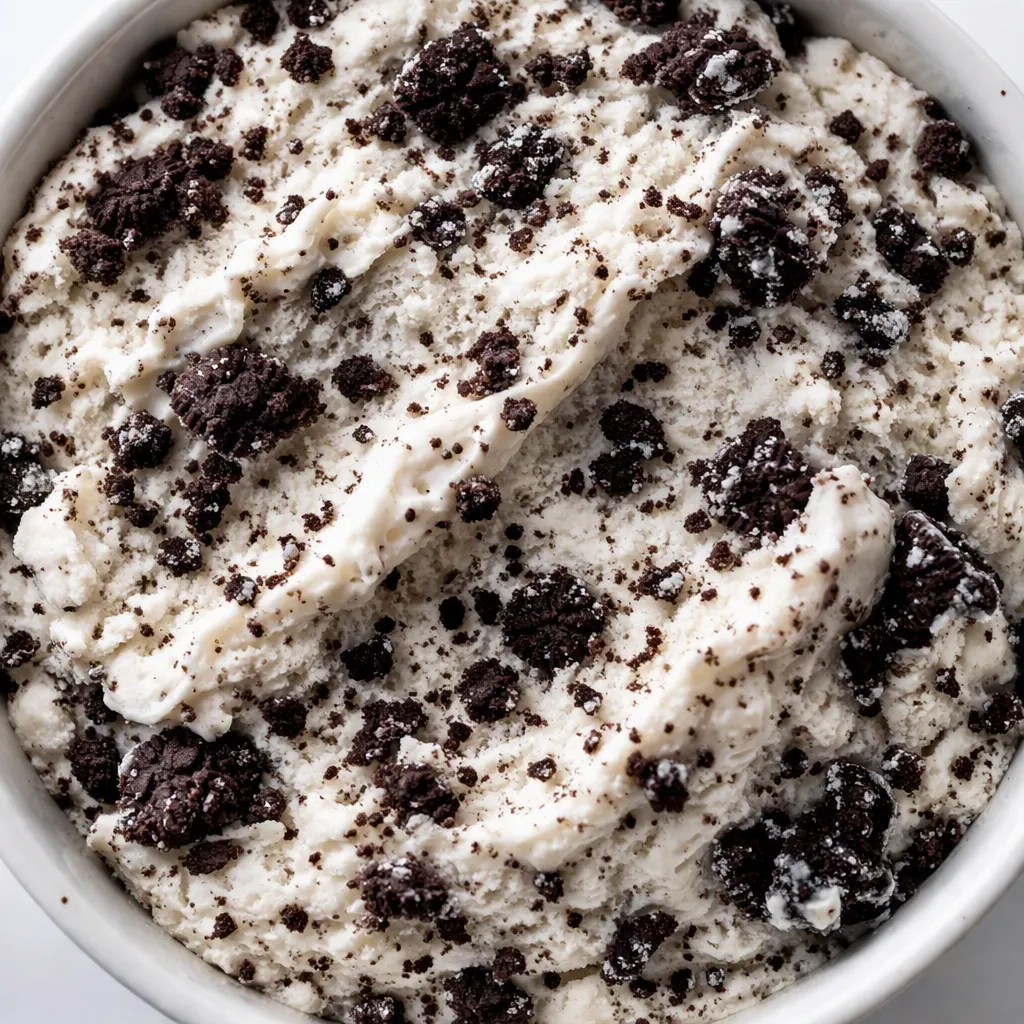
The machine does a lot of the work, but the base is what makes or breaks a batch of Ninja Creami cookies and cream ice cream. That small amount of cream cheese is the quiet hero here — it adds a little tang, sure, but mostly it stabilizes the fat and water so the ice cream doesn’t turn into a block of ice shards. You won’t taste it at all. You’ll just notice that the finished pint scoops the way the good stuff from the grocery store does, not the way a frozen smoothie does. Run a spoon through it and you’ll feel the difference — it gives like soft-serve, not like ice.
Freezing the pint for a full 18 to 24 hours matters more than you’d think. The Creami needs the base frozen solid to the core — right around 0°F (-18°C) — so the blade can shave it into fine ribbons instead of plowing through mushy slush. If you rush it and spin at 10 hours, you’ll get a grainy, icy mess. I know because I’ve done it. Give it the full day and the texture comes out silky every time.
One more thing worth knowing: the full-fat dairy here is doing real work. Heavy cream delivers a big share of its calories as fat, which is exactly why this base freezes soft rather than brick-hard. If you ever want to nerd out on the numbers, USDA nutritional data breaks down exactly how much fat is in each ingredient — it’s a good reminder that the creamy stuff does the heavy lifting.
Everything You Need: Ingredients for Ninja Creami Cookies and Cream
This is a proper grocery list — no mystery ingredients, no surprises. Blender, Creami, done.
- ¾ cup heavy whipping cream: This is the backbone of the rich, scoopable texture. If you swap it for something lighter, the ice cream will come out icier and harder — you’ve been warned.
- 1 cup milk (any type or milk alternative; recipe uses 2% milk): The milk keeps the base from being too heavy and helps everything blend into a pourable consistency. Whole milk makes it even richer; oat milk works in a pinch.
- 2 teaspoons vanilla extract: Two full teaspoons sounds like a lot, but freeze dulls flavor, so you need more than you’d think. This is not the place for vanilla bean paste unless you’re feeling fancy — plain extract does the job beautifully.
- 2 tablespoons cream cheese: This is the texture insurance. It prevents ice crystals from forming and gives the ice cream that dense, premium mouthfeel. Use the block-style cream cheese, not the whipped kind in a tub — the stabilizers are different.
- ½ cup sweetened condensed milk: This adds all the sweetness you need, plus a little extra body. Don’t confuse it with evaporated milk — they’re not interchangeable, and you’ll end up with hockey puck ice cream if you grab the wrong can.
- 3 Oreo cookies, slightly crushed: These go in during the +MixIn step. You want chunks, not dust — chunks give you that classic cookies and cream pocket of chocolate in every bite.
- More crushed Oreo cookies for topping (to taste): This is the part where you get to be generous. A handful of crumbs on top adds texture that contrasts with the smooth base.
Equipment: What to Pull Out Before You Start
- A blender — any blender you own, even a cheap one, will work
- Ninja Creami pint container (the one that came with your machine)
- A freezer with a flat, level spot for the pint
- Ninja Creami machine with the pint holder lid
- Serving bowls — chilled bowls are a nice touch if you think about it ahead of time
How to Make Ninja Creami Cookies and Cream Ice Cream
This moves fast — the whole active part takes about ten minutes, and then the freezer does the rest.
- Blend (about 1 minute): Combine the heavy whipping cream, milk, vanilla extract, cream cheese, and sweetened condensed milk in the blender. Blend until completely smooth, about 30 to 45 seconds. You’re looking for a uniform mixture with no visible cream cheese flecks — it should look like a thick vanilla milkshake and smell like a bakery in the morning.
- Pour (about 1 minute): Pour the mixture into the Ninja Creami pint container. Keep a close eye on the max fill line — if you overfill, the blade won’t spin properly and you’ll have a mess on your hands.
- Freeze (18–24 hours): Place the pint container in the freezer on a flat, level surface and freeze for at least 18 to 24 hours at 0°F (-18°C) or below. The longer you leave it, the better the texture will be. I usually make mine the night before and spin it the next evening.
- Load (about 1 minute): Remove the pint from the freezer and place it into the Ninja Creami machine. Attach the pint holder lid and lock it firmly into place.
- Process (about 90 seconds): Select the Ice Cream setting and let the machine run. You’ll hear the blade shave through the frozen base — it sounds like grinding a snow cone, and that’s exactly the right sound. As it works, the whine drops to a deeper, smoother hum once the base turns creamy. If the pint looks dry or crumbly after the first cycle, press Re-Spin (or run the Ice Cream setting again) to work through it.
- Add cookies (30 seconds): Place the 3 slightly crushed Oreo cookies in the center of the Creami container. Don’t bury them under a mountain of ice cream — the center placement lets the mixing blade distribute them evenly.
- Mix (about 30 seconds): Attach the pint holder lid and lock it back into place. Select the +MixIn setting and let the machine pulse the cookies through the base until they’re scattered through every scoop.
- Scoop and top (about 2 minutes): Scoop the finished ice cream into serving bowls and top with more crushed Oreo cookies to your liking. Eat immediately for soft-serve consistency, or pop the bowl in the freezer for 10 minutes for a firmer, hand-packed-style scoop.
How I Tested This Recipe: From Powdery Failures to Perfect Pints
I don’t put a recipe on this site unless I’ve made it at least half a dozen times, and this one got more testing than most. The first two attempts were the rough ones — one powdery, one icy — and both taught me something specific about how the Creami works.
Batch 1: No cream cheese, 10-hour freeze. The machine churned through the base easily enough, but what came out was dry and crumbly, like a snow cone that had been left out. The lesson: without the cream cheese, there isn’t enough fat to keep the water from recrystallizing into ice shards.
Batch 2: Cream cheese added, 12-hour freeze. Better, but the edges were still grainy and the center was slightly slushy. The lesson: 12 hours isn’t enough. The base needs to be frozen solid all the way through — 0°F (-18°C) is the target — so I pushed it to a full 24 hours.
Batch 3: The sweet spot. Full cream cheese, full 24-hour freeze, and the Ice Cream setting followed by a +MixIn spin with the Oreos. The result is the recipe you see here: dense, velvety, scoopable, with a flavor that lands somewhere between a vanilla malt and a classic cookies and cream pint.
I also tested the dairy-free swap, the half-and-half swap, and the instant espresso version. The dairy-free version is genuinely good — slightly softer body, but the coconut fat reads as richness, not coconut flavor. The half-and-half version is serviceable but noticeably icier; the extra cream cheese helps. And the espresso version? That’s my new dinner-party move.
Make-Ahead Notes (Because We’re All Busy)
This is one of the best make-ahead desserts in my rotation. I’ll blend the base in the morning, freeze the pint all day, and spin it after dinner — it’s ready right when the ice cream craving hits. If I’m really on top of things, I’ll keep a spare pint of base in the freezer so dessert is always one button-press away.
- Fridge: The blended but unfrozen base will keep in an airtight container in the fridge for up to 2 days. Just give it a stir before pouring into the pint and freezing.
- Freezer: Yes — the finished pint IS the frozen version. It will keep in the freezer, unspun, for up to 3 weeks. Once you’ve processed it, you can also refreeze the spun ice cream and re-spin it later with the Ice Cream setting — just know the texture won’t be quite as perfect the second time around.
- Soften: If the pint has been sitting in the freezer for a week or more, let it sit at room temperature for 5 to 10 minutes before processing. The blade has an easier time with a slightly tempered pint.
Pro Tips: Things I Wish I’d Known the First Time
- Freeze the pint on a level shelf. The first time I made this, I wedged the pint on a door shelf, and the base froze at a weird angle. The blade still managed, but one side was noticeably icier. Just find a flat, clear spot in your freezer and let it sit upright for the full 24 hours. Trust me on this one.
- Slightly crush the Oreos — don’t pulverize them. I learned this the hard way when I made cookie dust instead of chunks. You want pieces about the size of a pea or a little bigger. The +MixIn setting does the rest of the work, and bigger pieces survive the mixing blade intact.
- Don’t skip the cream cheese. I know it feels weird to put cream cheese in ice cream, but this is the only thing standing between you and a pint of icy crystals. Even a slightly softer, whipped version will change the result. Use the block, use the full two tablespoons, and don’t question it.
- If the pint comes out crumbly, just run it again. Sometimes the machine finishes and the ice cream looks dry and clumpy — especially if the base was extra cold. That’s normal. Press the Ice Cream setting one more time, or let it sit for 5 minutes and re-spin. Even if you mess this part up a little, it’ll still taste good — I’ve done it.
Swaps That Actually Work
- Dairy-Free: Use full-fat coconut cream in place of the heavy cream, oat milk in place of the milk, and a dairy-free cream cheese alternative. The texture will be slightly softer, but it’s genuinely good — my dairy-free friends have given it the stamp of approval.
- Lighter Version: Swap the heavy cream for half-and-half and cut the sweetened condensed milk down to ⅓ cup. It’ll be less rich and a touch icier, but it still hits the spot if you’re watching portions.
- Different Cookies: The recipe works beautifully with gluten-free Oreo-style cookies, peanut butter sandwich cookies, or even chocolate wafers. If you use a softer cookie, crush them a bit more coarsely so they hold up during the MixIn spin.
- Coffee Shop Version: Add 1 tablespoon of instant espresso powder to the blender along with the wet ingredients. The coffee flavor cuts through the sweetness and makes the chocolate cookie pieces pop even more.
Troubleshooting: Why Is My Ninja Creami Cookies and Cream Ice Cream Crumbly?
Why did my ice cream come out dry and powdery instead of creamy?
That’s the classic Creami texture hiccup, and I’ve been there too. Usually it means the base didn’t have enough fat, or it sat frozen for too long before spinning. Let the pint sit at room temperature for 5 to 10 minutes, then run the Ice Cream setting again. If it’s still dry, press the Re-Spin function if your model has it, or add a tablespoon of milk to the center of the pint and spin once more. The cream cheese in the base is what prevents this in the first place, so don’t skip it.
Can I use half-and-half instead of heavy cream?
Yes, you can, but you’ll notice a difference. Half-and-half has less fat and more water, so the finished ice cream will be harder when frozen and slightly more icy in texture. If you only have half-and-half on hand, compensate by adding an extra tablespoon of cream cheese to keep things as creamy as possible.
How do I know when the pint is frozen enough to spin?
The base needs a full 18 to 24 hours in the freezer at 0°F (-18°C) — no shortcuts. You’ll know it’s ready when the pint is rock solid with no slushy center. Give it a gentle shake, and you should feel absolutely no movement. When in doubt, freeze it overnight and spin it the next day. It really is that simple.
Can I make this with a lighter milk alternative?
Sure — the recipe is flexible enough for oat milk or almond milk, but keep in mind that the lower the fat, the icier the result. Almond milk will produce a noticeably lighter ice cream that freezes quite hard. If you go that route, consider adding an extra tablespoon of cream cheese or a splash of coconut cream to help build back some richness.
Why won’t my blade spin at all?
This usually happens when the pint is overfilled past the max fill line, or when the base froze with a raised dome in the middle. The Creami needs a flat, level surface to engage the blade. If you’ve overfilled, scoop a little out and try again; if the base domed, run a spoon over the top before spinning. And make sure the pint locks into the outer bowl correctly.
Storage: How to Keep Your Ninja Creami Cookies and Cream Ice Cream Scoopable
How long does this ice cream last, and how should I store it?
The unspun pint will keep in the freezer for up to 3 weeks. Once you’ve spun it, the texture is best within the first day or two. Store it with a piece of plastic wrap pressed directly against the surface, then pop the lid back on — that extra layer prevents ice crystals from forming on top.
Can I make this ahead of time or freeze it?
Yes, this is the most make-ahead friendly dessert I know. Blend the base, freeze the pint, and spin it whenever the mood strikes. If you want to batch-prep for a party, make two or three pints and keep them in the freezer — everyone gets to pick their own flavor or add their own mix-ins.
Can I refreeze the ice cream after spinning it?
Yes, but the texture won’t be quite as perfect the second time. Press a piece of plastic wrap directly onto the surface of the pint before freezing, then run the Ice Cream setting again when you’re ready to serve. It’ll come back to a scoopable state, just a touch softer than the first spin.
The Bottom Line: Make This Pint Tonight
If you own a Ninja Creami, this Ninja Creami cookies and cream ice cream is the recipe to start with. It’s forgiving enough for a first spin, impressive enough for company, and endlessly adaptable — once you’ve nailed the base, you can swap in any cookie, extract, or swirl you like. The texture is genuinely indistinguishable from a premium hand-packed pint, which is saying something for a dessert that took ten minutes of active time.
My advice: freeze the base tonight, spin it tomorrow, and keep a few extra Oreos on the counter for the topping. I think you’ll understand why this pint is on permanent rotation in my kitchen.
Ninja Creami Cookies and Cream Ice Cream: The 2-Step Version That Actually Works
Equipment
- Blender
- Ninja Creami pint container
- Freezer
- Ninja Creami machine
- Pint holder lid
- Bowls and spoons
Ingredients
For the Ice Cream Base
- ¾ cup Heavy Whipping Cream Backbone of the creamy texture; don’t swap for half-and-half.
- 1 cup Milk 2% or any milk/milk alternative. Whole milk makes it extra luxurious; oat milk and almond milk both work if dairy-free.
- 2 teaspoons Vanilla Extract Pure vanilla is recommended; artificial works in a pinch.
- 2 tablespoons Cream Cheese The secret stabilizer. Soften slightly before blending so it incorporates fully.
- ½ cup Sweetened Condensed Milk Not the same as evaporated milk.
- 3 Oreo Cookies Slightly crushed; crush by hand, not in a food processor, so you get texture.
For Topping
- More crushed Oreo cookies Sprinkle on right before serving so they stay crunchy.
Instructions
- Blend the base: In your blender, combine the heavy whipping cream, milk, vanilla extract, sweetened condensed milk, and cream cheese. Blend on medium-high until completely smooth — about 30 to 45 seconds. You’re looking for a uniform, slightly thick liquid with no visible cream cheese flecks.
- Fill the pint: Pour the blended mixture into your Ninja Creami pint container, stopping right at the max fill line. If you have extra base, don’t overfill — store the leftover in a small jar and enjoy it as a milkshake-style drink.
- Freeze solid: Place the lid on the pint and freeze at 0°F (-18°C) or below on a flat, level shelf for at least 18–24 hours. The base needs to be frozen all the way through the center — a soft core will make the Creami spin without actually shaving the mixture.
- Process the ice cream: Take the frozen pint out of the freezer, remove the lid, and place it into the Ninja Creami outer bowl. Attach the pint holder lid and lock it into place. Select the Ice Cream setting and let the machine run its cycle. It’s loud and that’s normal.
- Add the Oreos: After the first spin, the ice cream will look like soft serve. Place the 3 slightly crushed Oreo cookies in the center of the container — don’t mix them in yet. Reattach the lid, lock it in place, and select the MixIn setting so the machine folds the cookie pieces evenly through.
- Scoop and top: Scoop the Ninja Creami cookies and cream into bowls and finish with more crushed Oreo cookies on top.
Notes
Related posts:
 Apple Pie Rice Krispie Treats for Last-Minute Fall Desserts: 5 Minutes, No Oven, All the Flavor
 Homemade Pumpkin Marshmallow Sauce That Actually Sets Up — in 15 Minutes
 The Iced Apple Crisp Nondairy Cream Chai Latte (Starbucks Copycat) That’s Better in 5 Minutes
 Brownie Batter Protein Ice Cream (Ninja Creami Recipe). Language: English (US)