
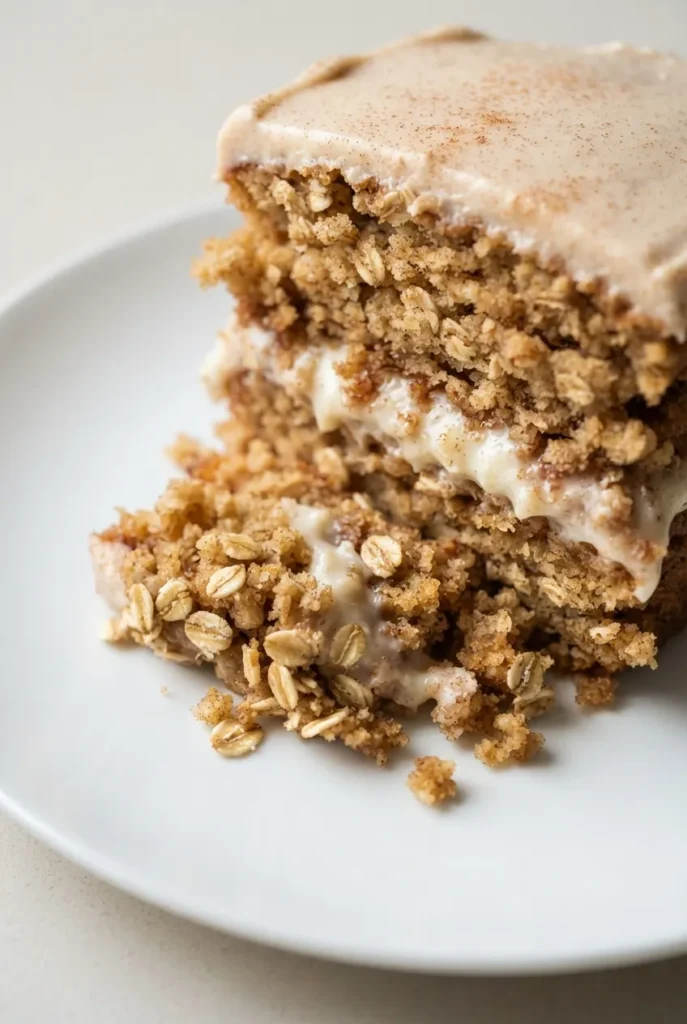
Every boxed mix version of an oatmeal cream pie cake I tried growing up was fine. Just fine. It had the flavor, sure, but the texture was always a little too uniform, a little too soft. It never had that hearty, nubby crumb from the actual cookie that I loved peeling apart as a kid. This version? It tastes like the original cookie grew up and went to finishing school.
I’ve made this oatmeal cream pie cake seven times now for everything from birthday parties to quiet Sunday afternoons, and every single time someone asks for the recipe before they’ve finished their first slice. The layers are tender but sturdy enough to hold a thick blanket of that vanilla cream filling — the same one I could honestly eat by the spoonful. If you grew up loving those packaged cookies, this is your adult upgrade.
The first time I attempted an oatmeal cream pie cake from scratch, it was a total bust. The layers came out dense and dry because I used quick oats straight from the box without grinding them first, and the batter was way too thick. For the second attempt, I pulsed old fashioned oats in the food processor until they were coarsely ground — the texture was instantly lighter, more tender, and had that distinctive oat structure I was missing. The second batch of buttercream was the real keeper, though. Beating the butter for the full three to four minutes until it’s genuinely pale and fluffy makes all the difference between a gritty frosting and a silky one.
- Serves: 12 as dessert
- Hands-On Time: 45 min | Total Time: 1 hour 45 min
- Difficulty: Medium — requires three cake pans and a mixer, but no special piping skills
- Cost per serving: ~$2.50
- Nutrition Estimate: 620 Calories, 6g Protein, 78g Carbs, 33g Fat, 17g Saturated Fat, 1g Fiber, 310mg Sodium per serving
- Dietary Notes: Contains dairy, gluten, and eggs. Not easily made vegan, but the filling can be adapted with plant-based butter
(Photo above: A three-tiered naked cake on a rustic wooden cake stand, spilling over with vanilla buttercream and topped with whole and crumbled oatmeal cream pie cookies. A single slice is cut away to reveal the creamy white filling between the golden, cinnamon-flecked oat cake layers. Soft afternoon light, shallow depth of field.)
Why Old Fashioned Oats Make the Best Cake Texture
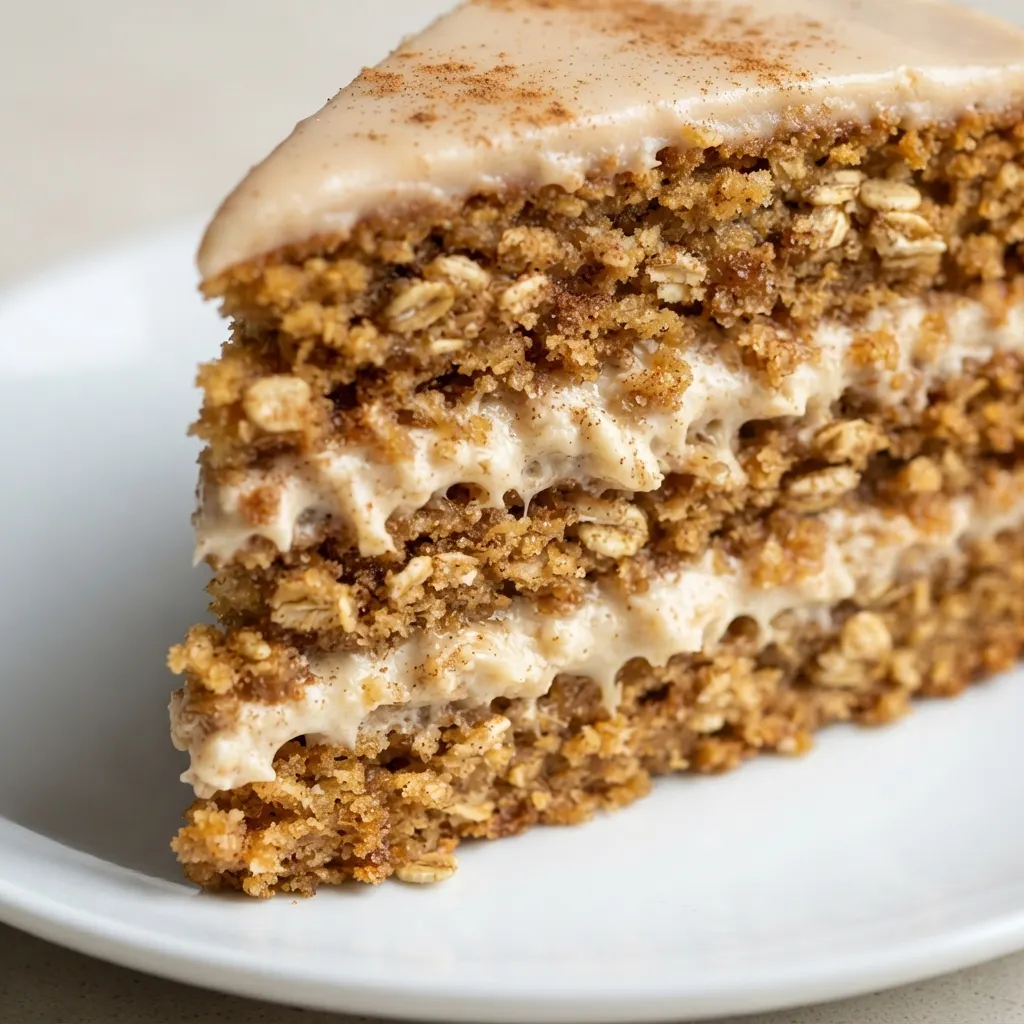
Pulsing the oats in a food processor until they’re coarsely ground gives you that unmistakable oatmeal cream pie texture — tiny, tender bits of oats throughout the crumb — without the chewiness of whole rolled oats or the dustiness of oat flour. It’s the Goldilocks of oat textures. USDA nutritional data confirms that whole grain oats provide a solid source of fiber and unique texture that refined flours simply can’t replicate, making this cake feel both indulgent and genuinely satisfying.
The combination of cinnamon and nutmeg doesn’t just add spice; it amplifies the brown butter-vanilla notes in the filling and frosting. It tricks your brain into thinking the cake is more caramelized than it actually is.
Room-temperature ingredients aren’t just baker’s dogma. Cold eggs seize the butter, which makes the batter stiff and the final cake dense. Warm ingredients emulsify properly, creating a lighter, more tender crumb that stays moist for days. Most bakers find that 350°F is the sweet spot for this style of cake — hot enough to set the structure quickly, but gentle enough to keep the oats tender.
The Ingredient Breakdown (With Real Talk)
- 2 cups old fashioned rolled oats, coarsely ground: Don’t use instant oats here. Old fashioned oats have the structure to hold up in a cake batter. Grinding them yourself in the food processor is non-negotiable for the texture.
- 2 cups all-purpose flour: Regular AP flour gives the cake enough structure to support the heavy fillings without getting gummy.
- 1.5 tsp baking powder + 1 tsp baking soda: Both work together to give lift. The baking soda also helps neutralize the acidity of the buttermilk and brown sugar.
- 2 tsp ground cinnamon + 1/2 tsp ground nutmeg: The classic oatmeal cream pie spice blend. Freshly grated nutmeg makes a noticeable difference here.
- 1/2 tsp salt: Balances the sweetness and enhances the oat flavor.
- 1 cup unsalted butter, softened: For the cake. Make sure it’s at genuine room temperature — pliable but not greasy.
- 1 cup granulated sugar + 1 cup brown sugar, packed: The brown sugar brings moisture and a fudge-like depth. The granulated sugar helps with browning and structure.
- 4 large eggs, room temperature: This is critical. Cold eggs will seize the creamed butter and ruin the texture. Leave them out on the counter for 30 minutes.
- 2 tsp pure vanilla extract: Use the real stuff here — the vanilla is front and center in both the cake and the fillings.
- 1 cup buttermilk, room temperature: Buttermilk makes the cake incredibly tender. If you don’t have it, use 1 cup milk + 1 tablespoon lemon juice or vinegar.
- For the Vanilla Cream Filling: 1 cup unsalted butter + 1 cup vegetable shortening. The shortening keeps the filling stable at room temperature and gives it that signature creamy, non-greasy melt. Don’t skip it.
- 4 cups powdered sugar, sifted (for filling): Sifting prevents lumps. Lumpy filling is a texture disaster.
- 3 tbsp heavy cream (for filling): Loosens the filling to the perfect spreadable consistency.
- 1.5 cups unsalted butter, softened (for buttercream): The base of your outer frosting. Must be softened but cool to the touch.
- 5 cups powdered sugar, sifted (for buttercream): Gives the buttercream structure and sweetness.
- 3 – 4 tbsp heavy cream (for buttercream): Adjust to reach your desired piping or spreading consistency.
- 6 – 8 oatmeal cream pie cookies + Cookie crumbs for garnish: I crush some for the crumb coating between layers and leave others whole for the top decoration.
What to Pull Out Before You Start
- Food processor (for the oats)
- Three 8-inch round cake pans
- Parchment paper
- Wire racks for cooling
- Cake board or serving plate
- Bench scraper (for the naked cake finish)
- Electric mixer (stand mixer or hand mixer)
- Toothpick (for doneness test)
A food processor is the only specialty tool here. If you don’t have one, you can pulse the oats in a blender or buy oat flour.
Here’s How I Do It
This is a 45-minute hands-on process. It looks like a lot of steps, but most of it is just creaming and alternating.
- Preheat and Prep: Set the oven to 350°F. Grease the bottoms and sides of three 8-inch round cake pans, line the bottoms with parchment paper, and dust the sides lightly with flour.
- Grind the Oats: Pulse the rolled oats in a food processor 8-10 times until they look like a mix of coarse flour and small oat pieces. Don’t overdo it — you want texture, not dust.
- Whisk Dry Ingredients: In a large bowl, whisk together the ground oats, all-purpose flour, baking powder, baking soda, cinnamon, nutmeg, and salt. Set aside.
- Cream Butter and Sugars: In the bowl of a stand mixer fitted with the paddle attachment, beat the softened butter, granulated sugar, and brown sugar on medium speed for 4-5 minutes until it’s light, fluffy, and noticeably paler in color. Scrape the bowl down once during this process.
- Add Eggs and Vanilla: Add the room temperature eggs one at a time, beating well after each (about 30 seconds each). Mix in the vanilla extract.
- Alternate Dry and Wet: With the mixer on low, add the dry ingredients in three additions and the buttermilk in two additions, starting and ending with the dry ingredients. Mix until just combined — overmixing at this stage will make the cake tough.
- Divide and Bake: Divide the batter evenly among the three prepared pans. Bake for 28-32 minutes, until a toothpick inserted in the center comes out clean or with a few moist crumbs. Let the cakes cool in their pans on wire racks for 10 minutes, then turn them out onto the racks to cool completely. The smell of cinnamon and toasted oats will fill your kitchen.
Making the Vanilla Cream Filling
This is the heart of the oatmeal cream pie cake — that thick, cloud-like center layer that makes the whole thing worth baking.
- Beat the Base: In a clean mixer bowl with the paddle attachment, beat the 1 cup softened butter and 1 cup vegetable shortening together on medium speed for 2-3 minutes until completely smooth and combined. The shortening is non-negotiable here — it gives the filling that stable, non-greasy mouthfeel you remember from the cookies.
- Add Sugar Gradually: With the mixer on low, add the sifted powdered sugar 1 cup at a time. After each addition, increase the speed to medium and beat for 30 seconds before adding the next cup. This gradual approach prevents a sugar cloud from exploding into your face.
- Finish With Cream: Add the 3 tablespoons of heavy cream and 1 teaspoon of vanilla extract. Beat on medium-high for 2 minutes until the filling is light, fluffy, and spreadable. Scrape the bowl and paddle well.
The filling should be thick enough to hold its shape when you dollop it, but soft enough to spread easily. If it’s too stiff, add another tablespoon of cream. If it’s too loose, beat in ¼ cup more sifted powdered sugar.
Assembling and Frosting the Cake
This is where everything comes together. I use a naked cake finish here because it lets the oat cake layers peek through, which feels more rustic and honest — like the cookie it’s based on.
- Level the Layers: Once the cakes are completely cool, use a serrated knife to level the tops if they’ve domed. Save the scraps for snacking or crumbling over the top.
- Layer One: Place one cake layer on your serving plate or cake board. Spread about ¾ cup of the vanilla cream filling evenly across the top, all the way to the edges. The filling should be about ¼ inch thick.
- Layer Two: Top with the second cake layer, pressing gently to adhere. Spread another ¾ cup of filling over it.
- Layer Three: Place the final cake layer on top, bottom-side up for a flat surface.
- Crumb Coat: Spread a thin layer of the prepared buttercream over the entire cake — just enough to catch any loose crumbs. Refrigerate for 20 minutes to set.
- Final Frosting: Apply a thicker layer of buttercream, using a bench scraper to create a naked or semi-naked finish. Leave some patches of cake visible for that rustic look.
- Garnish: Press cookie crumbs along the bottom edge of the cake. Top with whole and halved oatmeal cream pie cookies. A light dusting of cinnamon on the plate finishes the presentation.
My Best Tips for a Perfect Oatmeal Cream Pie Cake
- Grind the oats yourself. Pre-ground oat flour is too fine and won’t give you that characteristic nubby texture. Ten pulses in the food processor is all it takes.
- Check your oven temperature. An oven thermometer is cheap insurance. If your oven runs hot, the edges will brown before the center sets. If it runs cool, the cake will be dense.
- Don’t skip the shortening in the filling. All-butter fillings taste great but turn greasy at room temperature and get hard in the fridge. The shortening keeps the filling stable and silky for days.
- Let the cake rest after assembly. This one’s important. After you finish decorating, let the cake sit at room temperature for 30 minutes before slicing. The fillings settle, the layers absorb a bit of moisture, and the flavors meld together. It tastes noticeably better.
- Bring leftovers to room temperature before serving. Cold cake from the fridge loses the creamy magic. Five minutes on the counter restores it.
Storing and Making Ahead
This oatmeal cream pie cake keeps beautifully, which makes it a great make-ahead dessert for parties and holidays.
Room Temperature: The cake can sit at room temperature for up to 4 hours during serving. After that, refrigerate any leftovers.
Refrigerator: Store the fully assembled cake in an airtight cake carrier for up to 5 days. The flavors actually deepen on day two. Let slices sit at room temperature for 10 minutes before serving.
Freezer: You can freeze the unfrosted cake layers, tightly wrapped in plastic wrap and foil, for up to 3 months. Thaw at room temperature before filling and frosting. I’ve also frozen the assembled cake (minus the cookie garnish) for up to 3 months — wrap it well after the buttercream sets, then add the cookies after thawing.
Why This Recipe Works Every Time
This isn’t a fussy, overly precious cake. It’s sturdy enough to survive a three-year-old’s birthday party, impressive enough for a dinner party, and nostalgic enough to make you feel seven years old again, sitting on the kitchen floor, peeling apart an oatmeal cream pie and eating the cream first.
The toasted oat aroma as it bakes. The way the vanilla cream filling catches the light. The little crunch of cookie crumbs against the soft buttercream. That first bite where the cinnamon hits your tongue before the sweetness — that’s the moment this cake earns its place in your recipe box.
I hope you make this for someone you love. And I hope you eat the first slice standing up at the counter, with no witnesses, because that’s how oatmeal cream pie cake is meant to be enjoyed.
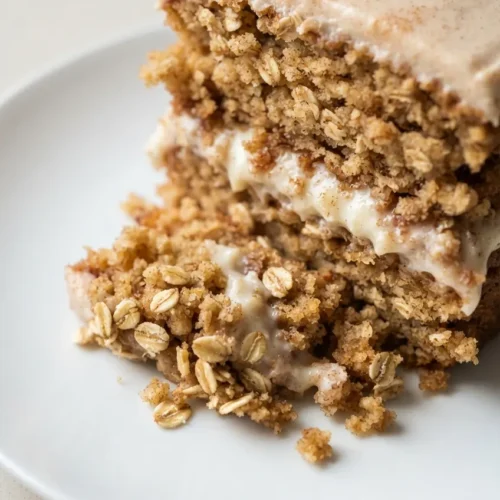
The Oatmeal Cream Pie Cake You’d Never Guess Is This Easy to Make at Home
Equipment
- Food processor
- Three 8-inch round cake pans
- Parchment Paper
- Wire racks
- Cake board or serving plate
- Bench scraper
- Electric Mixer
- Toothpick
Ingredients
Cake
- 2 cups old fashioned rolled oats coarsely ground
- 2 cups all-purpose flour
- 1.5 tsp baking powder
- 1 tsp baking soda
- 2 tsp ground cinnamon
- 0.5 tsp ground nutmeg
- 0.5 tsp salt
- 1 cup unsalted butter softened
- 1 cup granulated sugar
- 1 cup brown sugar packed
- 4 large eggs room temperature
- 2 tsp pure vanilla extract
- 1 cup buttermilk room temperature
Vanilla Cream Filling
- 1 cup unsalted butter softened
- 1 cup vegetable shortening
- 4 cups powdered sugar sifted
- 3 tbsp heavy cream
- 1 tsp pure vanilla extract
Buttercream
- 1.5 cups unsalted butter softened
- 5 cups powdered sugar sifted
- 3-4 tbsp heavy cream
Garnish
- 6-8 oatmeal cream pie cookies for garnish
- cookie crumbs for garnish
Instructions
- Preheat and Prep: Set the oven to 350°F. Grease the bottoms and sides of three 8-inch round cake pans, line the bottoms with parchment paper, and dust the sides lightly with flour.
- Grind the Oats: Pulse the rolled oats in a food processor 8-10 times until they look like a mix of coarse flour and small oat pieces. Don’t overdo it — you want texture, not dust.
- Whisk Dry Ingredients: In a large bowl, whisk together the ground oats, all-purpose flour, baking powder, baking soda, cinnamon, nutmeg, and salt. Set aside.
- Cream Butter and Sugars: In the bowl of a stand mixer fitted with the paddle attachment, beat the softened butter, granulated sugar, and brown sugar on medium speed for 4-5 minutes until it’s light, fluffy, and noticeably paler in color. Scrape the bowl down once during this process.
- Add Eggs and Vanilla: Add the room temperature eggs one at a time, beating well after each (about 30 seconds each). Mix in the vanilla extract.
- Alternate Dry and Wet: With the mixer on low, add the dry ingredients in three additions and the buttermilk in two additions, starting and ending with the dry ingredients. Mix until just combined — overmixing at this stage will make the cake tough.
- Divide and Bake: Divide the batter evenly among the three prepared pans. Bake for 28-32 minutes, until a toothpick inserted in the center comes out clean or with a few moist crumbs. Let the cakes cool in their pans on wire racks for 10 minutes, then turn them out onto the racks to cool completely. The smell of cinnamon and toasted oats will fill your kitchen.
- Beat the Base: In a clean mixer bowl with the paddle attachment, beat the 1 cup softened butter and 1 cup vegetable shortening together on medium speed for 2-3 minutes until completely smooth and combined. The shortening is non-negotiable here — it gives the filling that stable, non-greasy mouthfeel you remember from the cookies.
- Add Sugar Gradually: With the mixer on low, add the sifted powdered sugar 1 cup at a time. After each addition, increase the speed to medium and beat for 30 seconds before adding the next cup. This gradual approach prevents a sugar cloud from exploding into your face.
- Finish With Cream: Add the 3 tablespoons of heavy cream and 1 teaspoon of vanilla extract. Beat on medium-high for 2 minutes until the filling is light, fluffy, and spreadable. Scrape the bowl and paddle well.
- Level the Layers: Once the cakes are completely cool, use a serrated knife to level the tops if they’ve domed. Save the scraps for snacking or crumbling over the top.
- Layer One: Place one cake layer on your serving plate or cake board. Spread about ¾ cup of the vanilla cream filling evenly across the top, all the way to the edges. The filling should be about ¼ inch thick.
- Layer Two: Top with the second cake layer, pressing gently to adhere. Spread another ¾ cup of filling over it.
- Layer Three: Place the final cake layer on top, bottom-side up for a flat surface.
- Crumb Coat: Spread a thin layer of the prepared buttercream over the entire cake — just enough to catch any loose crumbs. Refrigerate for 20 minutes to set.
- Final Frosting: Apply a thicker layer of buttercream, using a bench scraper to create a naked or semi-naked finish. Leave some patches of cake visible for that rustic look.
- Garnish: Press cookie crumbs along the bottom edge of the cake. Top with whole and halved oatmeal cream pie cookies. A light dusting of cinnamon on the plate finishes the presentation.
Notes
- Grind the oats yourself. Pre-ground oat flour is too fine and won’t give you that characteristic nubby texture. Ten pulses in the food processor is all it takes.
- Check your oven temperature. An oven thermometer is cheap insurance. If your oven runs hot, the edges will brown before the center sets. If it runs cool, the cake will be dense.
- Don’t skip the shortening in the filling. All-butter fillings taste great but turn greasy at room temperature and get hard in the fridge. The shortening keeps the filling stable and silky for days.
- Let the cake rest after assembly. This one’s important. After you finish decorating, let the cake sit at room temperature for 30 minutes before slicing. The fillings settle, the layers absorb a bit of moisture, and the flavors meld together. It tastes noticeably better.
- Bring leftovers to room temperature before serving. Cold cake from the fridge loses the creamy magic. Five minutes on the counter restores it.
Related posts:
 This Raspberry Lemon Cake With White Chocolate Is the Only Layer Cake You Need for Spring Celebrations
 Peach Cobbler That Bakes Its Own Crust (Golden, Juicy, 40 Minutes)
 Snickerdoodle Zucchini Bread That’s Moist, Swirled, and Secretly Good for You
 The Gluten-Free Chocolate Zucchini Bread You’d Never Guess Is Gluten-Free (It’s Rich, Moist & Impossible to Stop Eating)