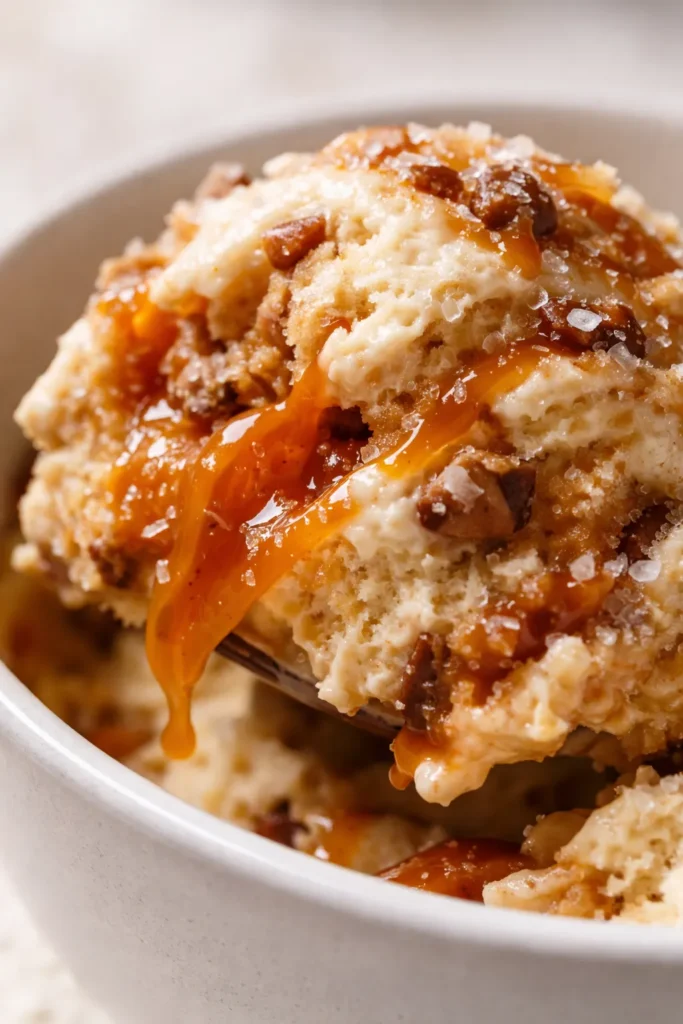
The first time I pulled the pint out of the Ninja Creami and watched that salted caramel ice cream swirl into something velvety and perfect, I actually let out a little gasp. And then I ate about half the pint standing at the counter. The balance between the sweet caramel and the flaky salt is exactly what I’d been chasing — that moment where each spoonful makes you close your eyes for a second. My husband walked in mid-spoon-lick and just said “oh, that one’s dangerous.” He wasn’t wrong.
The fat content here is doing the heavy lifting. Whole milk gives you body and structure, while heavy cream delivers that rich, coating mouthfeel you expect from good ice cream. Without that combination, the Ninja Creami can produce a texture that’s more snow cone than gelato — and nobody wants that.
Sweetened condensed milk is the secret weapon here. It adds sweetness and a silky viscosity that helps prevent ice crystals from forming during the freezing process. Think of it as the glue that holds everything together in a smooth, scoopable way. One serving provides roughly 15% of the daily recommended intake of calcium from the dairy, based on USDA nutritional data.
The result is ice cream that scoops without drama, melts slowly on your tongue, and makes you question why you’d ever buy the store-bought stuff again.
- Serves: 4 as dessert
- Hands-On Time: 10 min | Total Time: 24 hr 10 min
- Difficulty: Easy — mix, freeze, spin, done
- Cost per serving: ~$2.50
- Nutrition Estimate: 410 Calories, 6g Protein, 38g Carbs, 27g Fat, 16g Saturated Fat, 0g Fiber, 320mg Sodium per serving
- Dietary Notes: Vegetarian. Adaptable for lower sugar.
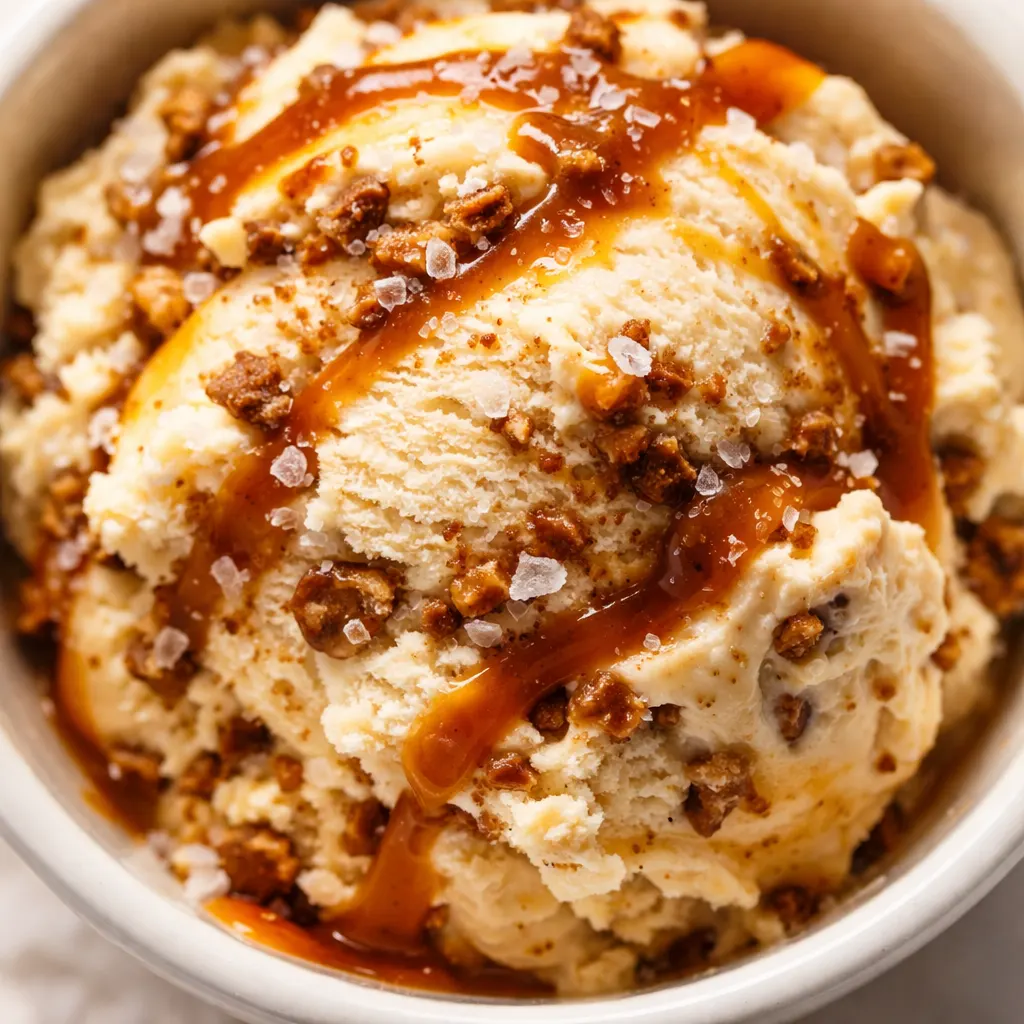
(Photo above: overhead shot of a pint of salted caramel ice cream with a glossy swirl on top, a small spoon resting beside it, soft morning light from the left, with a few sea salt flakes catching the light against the creamy surface.)
Ingredients Worth Talking About — Plus My Honest Notes
- 1 cup whole milk: Gives the base body without being too heavy. Full-fat is non-negotiable — skim milk makes the texture watery.
- 1 cup heavy cream: This is where the richness comes from. Don’t swap for half-and-half; you’ll lose the creamy finish.
- 1/2 cup sweetened condensed milk: The game-changer ingredient. It adds sweetness and helps prevent ice crystals. Make sure it’s sweetened condensed milk, not evaporated milk — they’re not the same and the texture will be completely off.
- 1/4 cup caramel sauce: Use a good-quality store-bought or homemade. Thin sauce works better than thick, sticky caramel because it blends evenly.
- Caramel sauce (extra for drizzling, optional): For that final swirl on top before serving.
- 1/2 teaspoon sea salt (adjust to taste): Flaky sea salt is best — it dissolves partially but leaves little bursts of saltiness. Start with 1/2 teaspoon and add more if you like a stronger salt punch.
- 1 teaspoon vanilla extract: Rounds out the caramel flavor. Pure vanilla is worth it here — imitation can taste flat next to the caramel.
- 1/4 cup mix-ins (optional, such as crushed toffee bits or chocolate chips): Totally optional but highly recommended. Toffee bits add crunch; chocolate chips add that classic candy-bar vibe. Room-temperature mix-ins blend more evenly than cold ones straight from the fridge.
What to Pull Out Before You Start
- Mixing bowl or large measuring cup: A 4-cup measuring cup works perfectly because the spout makes pouring into the pint container mess-free.
- Whisk: Any standard whisk — just make sure the sweetened condensed milk is fully incorporated with no streaks left.
- Ninja Creami pint container: The one that came with your machine. Make sure it’s clean and completely dry before filling.
- Ninja Creami machine: Obviously! Have it plugged in and ready to go when you pull the pint from the freezer.
One note: If you have the Ninja Creami Deluxe, the pint size is different — just use the appropriate container and the same ingredient ratios.
Let’s Make It — My Exact Process
This is the kind of recipe where you do almost all the work upfront and then the machine does the rest. I love that about it.
- Whisk together: In your mixing bowl or large measuring cup, combine the whole milk, heavy cream, sweetened condensed milk, caramel sauce, sea salt, and vanilla extract. Whisk vigorously for about 30 seconds until everything is fully combined and smooth. You shouldn’t see any streaks of condensed milk or caramel — it should look like a uniform tan liquid. The caramel smells warm and sweet as you whisk. If the caramel sauce clumps, keep whisking; it’ll break down.
- Pour into the pint: Carefully pour the mixture into the Ninja Creami pint container. Stop before you hit the max fill line — the mixture expands slightly as it freezes. If you have extra, save it for a second pint or just drink it (no judgment). Secure the lid tightly and place the pint on a level surface in your freezer.
- Freeze for 24 hours: This is the part you can’t rush. A full 24 hours at 0°F ensures the base is completely solid from center to edge. Less time and you’ll end up with a partially frozen mess that won’t process properly. I usually make the base the night before I want to serve it — that way it’s ready to spin the next evening.
- Spin it: Remove the frozen pint from the freezer, take off the lid, and install it into the Ninja Creami machine. Select the ‘Ice Cream’ function and let it run the full cycle. You’ll hear the machine whir and churn as the frozen block transforms into smooth, creamy ice cream right before your eyes — it’s honestly kind of magical.
- Check the texture: If the ice cream looks crumbly or powdery after the first spin, don’t panic. Use the ‘Re-Spin’ function. For extra creaminess, add 1–2 tablespoons of milk or cream before re-spinning. I usually add a tablespoon of cream — it makes the final texture even richer.
- Add mix-ins (if using): Using a spoon, create a small well in the center of the ice cream. Add your crushed toffee bits or chocolate chips, then select the ‘Mix-In’ function. The machine will fold them through evenly. If you prefer chunks of mix-ins, add them by hand with a spoon after spinning instead.
- Serve or store: Eat immediately for the softest, creamiest texture — this is my favorite way. Or return the pint to the freezer for a firmer, scoopable consistency later. When I’m serving right away, I drizzle a little extra caramel sauce and a pinch of flaky salt on top.
Testing This Recipe: What I Learned the Hard Way
I made this three times before I got it exactly how I wanted. Batch one? Too sweet — I’d overdone the caramel sauce. The smell was heavenly, but one bite and I knew the sweetness was overpowering the salt.
Batch two fixed the sweetness but came out a little icy, which is mortifying when you’re testing a Ninja Creami recipe. The texture was more like a snow cone than the velvety ice cream I was chasing.
The fix turned out to be stupidly simple: one extra tablespoon of heavy cream mixed in before freezing. That small change raised the fat content just enough to coat those ice crystals and deliver the smooth, scoopable texture I wanted. Batch three was the keeper — creamy, rich, with those little pockets of caramel and salt that hit your tongue at just the right moment.
The other thing I learned: don’t rush the freeze. I tried one batch at 18 hours thinking it would be fine, and the center was still slightly slushy. The Ninja Creami couldn’t process it properly, and I ended up with a soupy mess that had to go back in the freezer. A full 24 hours at 0°F is non-negotiable for the best results.
Sunday Prep = Stress-Free Dessert All Week
This recipe is perfect for make-ahead. I mix the base, pour it into the pint, and freeze it on Sunday evening. By Monday night, I can spin a pint in two minutes flat and have homemade ice cream ready to go. It’s the kind of prep that feels like cheating.
- Fridge: The mixed base can sit in the fridge for up to 24 hours before freezing. Just give it a quick whisk before pouring into the pint.
- Freezer: Yes — the frozen pint keeps for up to 3 months. After spinning, the ice cream will keep in the freezer for about 2 weeks before texture starts to decline.
- Reheat: Ice cream isn’t really reheated, but if you want that soft-serve texture after freezing the spun ice cream, let it sit at room temperature for 5–8 minutes before scooping.
Troubleshooting: Why Your Ninja Creami Salted Caramel Ice Cream Might Not Be Perfect
Q: Why did my salted caramel ice cream turn out crumbly instead of creamy?
A: This usually happens when the base isn’t fatty enough or the freezing time was slightly short. Add an extra tablespoon of heavy cream to your base next time, and make sure you freeze for a full 24 hours at 0°F. If it happens on the first spin, just use the Re-Spin function with a tablespoon of milk or cream — it usually fixes it completely.
Q: Can I use low-fat milk or half-and-half instead of whole milk and heavy cream?
A: You can, but the texture won’t be nearly as good. Low-fat milk creates a much icier, less creamy result because there isn’t enough fat to coat the ice crystals. Half-and-half is a decent middle ground, but the full-fat combination is what makes this recipe really shine.
Q: How do I know when the base is fully frozen and ready to spin?
A: The pint should feel rock-solid with no give at all — if you shake it, you shouldn’t hear any liquid sloshing. 24 hours in a standard freezer at 0°F is the benchmark. If your freezer runs cold or you open it a lot, give it an extra 2–4 hours to be safe.
Q: Can I make this vegan or dairy-free?
A: Yes, with the right swaps. Use full-fat oat milk and coconut cream (from a can, not a carton) in place of the dairy. Look for a dairy-free sweetened condensed milk — there are good options from brands like Nature’s Charm. The texture will be slightly denser and the coconut flavor will come through a little, but it’s genuinely delicious.
Swaps That Actually Work
- Lower sugar version: Use a sugar-free sweetened condensed milk (like the one from Nestlé or a brand using allulose). The texture will be very slightly less creamy but still entirely satisfying.
- Dairy-free version: Swap the whole milk and heavy cream for full-fat oat milk and coconut cream (the kind in a can, not the whipped stuff). Use a dairy-free sweetened condensed milk. The coconut flavor will come through a little, so this works best if you enjoy that pairing with caramel.
- Extra caramel swirl: After spinning, swirl in an extra 2 tablespoons of caramel sauce with a spoon instead of using the Mix-In function. This creates visible ribbons of caramel throughout the pint.
- Adult version: Add 1 tablespoon of bourbon or dark rum to the base before freezing. The alcohol lowers the freezing point slightly, giving you an even softer, more scoopable texture.
How to Store Your Homemade Salted Caramel Ice Cream
Q: How long does this ice cream last, and how should I store it?
A: Once spun, keep the pint sealed in the freezer for up to 2 weeks for best texture. Place a piece of plastic wrap directly on the surface of the ice cream before snapping on the lid to prevent freezer burn. After 2 weeks, the texture becomes icier and less creamy.
Q: Can I make this ahead of time and freeze it?
A: Absolutely. You can freeze the unspun base pint for up to 3 months. When you’re ready, just spin it directly from frozen — no need to thaw. You can also spin the ice cream, then refreeze it for up to 2 weeks. If it hardens too much, let it sit at room temperature for 5–8 minutes before scooping.
Q: What’s the best way to reheat (or rather, soften) this ice cream?
A: If the spun ice cream has been in the freezer for more than a few hours, let the pint sit on the counter for 5–8 minutes. For a quicker option, microwave the pint for 10–15 seconds on low power — just watch it carefully so you don’t melt the edges.
Q: What do you serve with this salted caramel ice cream?
A: It’s incredible on its own, but it also works beautifully over warm apple crisp or brownies — the temperature contrast is everything. For a simpler pairing, crumble a few shortbread cookies on top. My personal favorite is to serve it alongside a shot of espresso for a DIY affogato situation.
This recipe has become my go-to for those evenings when I want something that feels fancy but took almost no real effort. The hardest part is waiting those 24 hours — but I promise, that first spoonful is worth every minute.
TLDR: This Ninja Creami salted caramel ice cream combines whole milk, heavy cream, sweetened condensed milk, caramel sauce, sea salt, and vanilla for a perfectly scoopable treat. Freeze the pint for a full 24 hours at 0°F, then process on the Ice Cream function. Expect a rich, silky texture with balanced sweet-and-salty flavor in every bite.
If you give it a try, drop a comment below and let me know how it turned out — I genuinely love hearing about your batches!
📌 Ninja Creami salted caramel ice cream recipe that delivers rich, scoopable texture every time — save this for your next homemade ice cream craving and skip the store-bought pints.
Ninja Creami Salted Caramel Ice Cream
Equipment
- Mixing bowl or large measuring cup
- Whisk
- Ninja Creami pint container
- Ninja Creami machine
Ingredients
Ingredients
- 1 cup whole milk
- 1 cup heavy cream
- 1/2 cup sweetened condensed milk
- 1/4 cup caramel sauce
- caramel sauce extra for drizzling, optional
- 1/2 teaspoon sea salt adjust to taste
- 1 teaspoon vanilla extract
- 1/4 cup mix-ins optional – crushed toffee bits or chocolate chips
Instructions
- Whisk together: In your mixing bowl or large measuring cup, combine the whole milk, heavy cream, sweetened condensed milk, caramel sauce, sea salt, and vanilla extract. Whisk vigorously for about 30 seconds until everything is fully combined and smooth. You shouldn’t see any streaks of condensed milk or caramel — it should look like a uniform tan liquid.
- Pour into the pint: Carefully pour the mixture into the Ninja Creami pint container. Stop before you hit the max fill line — the mixture expands slightly as it freezes. Secure the lid tightly and place the pint on a level surface in your freezer.
- Freeze for 24 hours: This is the part you can’t rush. A full 24 hours at 0°F ensures the base is completely solid from center to edge. Less time and you’ll end up with a partially frozen mess that won’t process properly.
- Spin it: Remove the frozen pint from the freezer, take off the lid, and install it into the Ninja Creami machine. Select the ‘Ice Cream’ function and let it run the full cycle.
- Check the texture: If the ice cream looks crumbly or powdery after the first spin, don’t panic. Use the ‘Re-Spin’ function. For extra creaminess, add 1–2 tablespoons of milk or cream before re-spinning.
- Add mix-ins (if using): Using a spoon, create a small well in the center of the ice cream. Add your crushed toffee bits or chocolate chips, then select the ‘Mix-In’ function. The machine will fold them through evenly.
- Serve or store: Eat immediately for the softest, creamiest texture — this is my favorite way. Or return the pint to the freezer for a firmer, scoopable consistency later. When serving, drizzle extra caramel sauce and a pinch of flaky salt on top.