
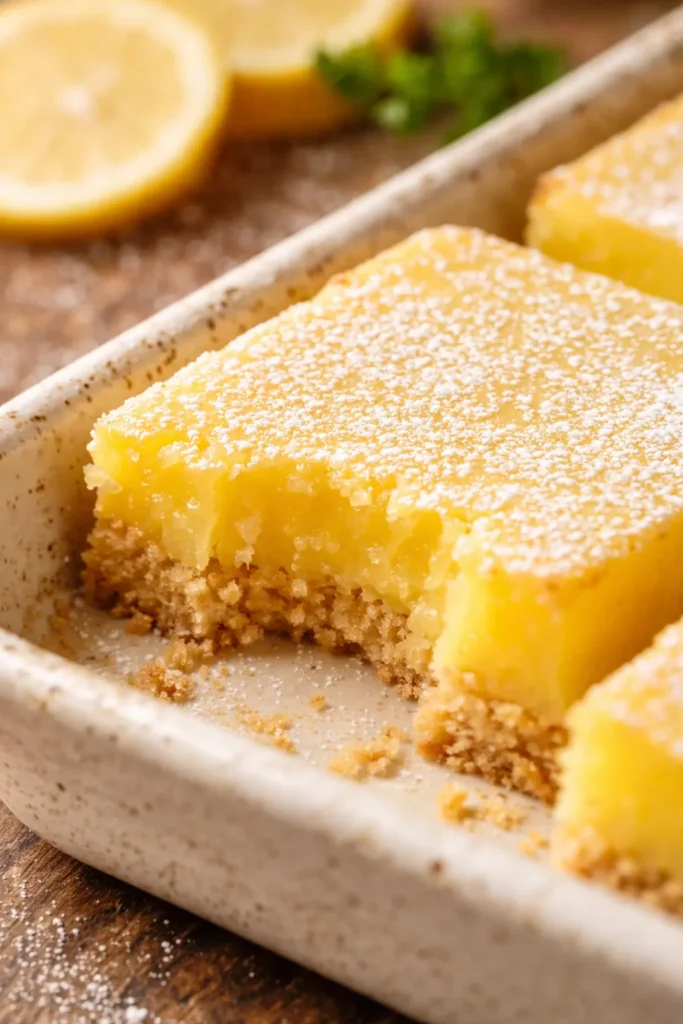
The crust isn’t just a base—it’s the structural and flavor anchor. A buttery shortbread made with powdered sugar instead of granulated bakes up tender, not crumbly, and lightly sweet so it doesn’t compete with the tart filling. Pre‑baking the crust at 350°F for about 18 minutes ensures it stays crisp even after you add the wet curd. Most bakers find that skipping a solid pre‑bake leads to a soggy bottom every time—I learned that the hard way.
The filling is where that bright lemon flavor shines. Using fresh lemon juice and zest gives a clean, zingy taste that bottled juice simply can’t match. According to USDA nutritional data, a single lemon provides more than 40% of your daily vitamin C—and that fresh, unprocessed flavor is non‑negotiable for these lemon bars. The scent of freshly zested lemon fills the kitchen—bright, sharp, and unmistakably real.
Together, the crisp crust and silky curd create the texture that makes these lemon bars so addictive: a snappy first bite, then a smooth, citrusy finish.
Here’s the quick version: These homemade lemon bars feature a buttery shortbread crust and a bright, tangy curd filling. The crust is pre-baked for crispness, and the filling sets in about 22 minutes at 350°F. Expect a perfect balance of sweet and tart, with a silky texture that slices cleanly.
I’ve been chasing the perfect lemon bar for years. The first batch I ever made? Total disaster—the crust turned into wet sand and the filling never set, just kind of wobbled sadly. But after maybe ten test runs (and a lot of happy neighbors), I landed on this version. It’s the one I text to friends who say they can’t bake. The crust stays crisp, the filling is smooth and tangy, and it all comes together in a single 8×8 pan. Trust me, you can do this.
The second time I tried these, I skipped pressing the crust down firmly enough—it crumbled into the filling. The fix? Use the flat bottom of a measuring cup to really pack the shortbread mixture into the pan. Batch three came out perfect: a sturdy, buttery base with a clear, bright lemon layer on top. That final slice, dusted with powdered sugar, was the moment I knew I’d cracked it.
- Serves: 9 to 12 as a dessert or snack
- Hands-On Time: 20 min | Total Time: 55 min (plus 2 hrs chilling)
- Difficulty: Easy—even on a busy weeknight
- Cost per serving: About $0.60
- Nutrition Estimate: 200 Calories, 3g Protein, 28g Carbs, 9g Fat, 5g Saturated Fat, 0.5g Fiber, 80mg Sodium per serving
- Dietary Notes: Naturally vegetarian. Adaptable for gluten-free and dairy-free.
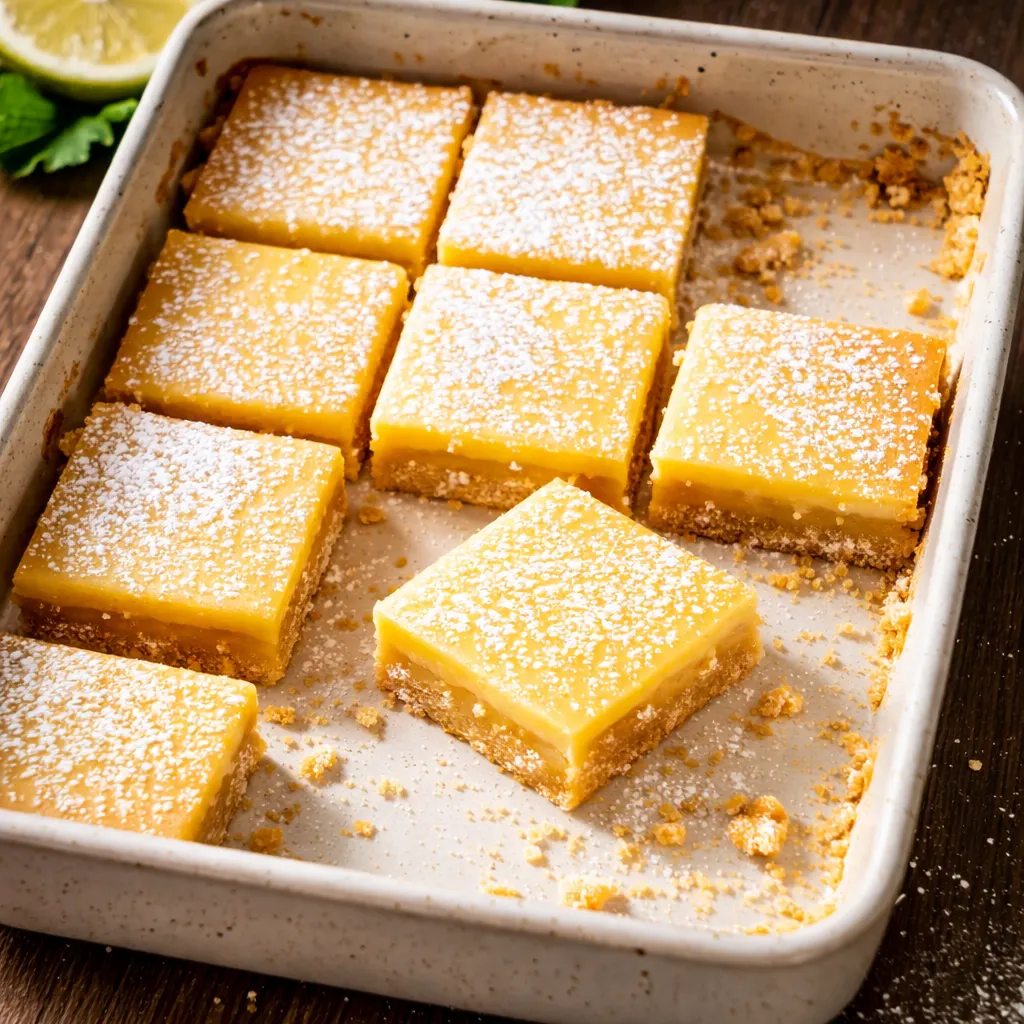
(Photo above: Overhead shot of lemon bars on a light wood board, dusted generously with powdered sugar, with a clean slice lifted to show the shortbread crust and smooth custard filling. A few lemon slices and fresh mint leaves frame the edge—bright, natural light from the left makes the golden filling glow.)
Everything You Need (And a Few Notes From Me) for Perfect Lemon Bars
- 1/2 cup Unsalted Butter (room temperature): Gives the crust richness and tenderness. Room‑temp butter creams evenly—if it’s too cold, the crust will be dense and hard to press.
- 1 cup All‑Purpose Flour (for the crust): Provides structure without making it tough. Don’t spoon it—fluff and level for accuracy.
- 1/4 cup Powdered Sugar: Melts into the butter more easily than granulated, resulting in a finer, melt‑in‑your‑mouth shortbread.
- 1/2 cup Lemon Juice (from 2‑3 lemons): Freshly squeezed is the star here. Bottled juice often has a flat, metallic taste that dulls the whole bar.
- 1 tbsp Lemon Zest (finely grated): Zest packs the volatile citrus oils—it’s where the bright, aromatic flavor lives. Grate only the yellow part; the white pith is bitter.
- 3 Large Eggs (room temperature): Room‑temp eggs blend smoothly into the sugar without seizing the mixture. Cold eggs can make the filling slightly lumpy.
- 1 1/2 cups Granulated Sugar: Sweetness to balance the tart lemons. This amount is just right—not cloying, not mouth‑puckering.
- 1/2 cup All‑Purpose Flour (sifted, for the filling): Sifting prevents lumps and helps the filling set evenly. Without it, you might get unbecoming flour pockets.
- Powdered Sugar (for dusting): The final flourish—adds a pretty finish and a whisper of extra sweetness.
What to Pull Out Before You Start
- 8″ x 8″ baking pan—metal or glass both work; line with parchment for easy lifting.
- Electric mixer (handheld or stand)—for creaming the crust butter.
- Mixing bowls—one medium, one large.
- Citrus juicer—a simple reamer is fine.
- Fine‑mesh strainer—for sifting flour and powdered sugar.
- Measuring cups and spoons—standard set.
No need for a food processor—a bowl and a fork work just as well for the crust.
Let’s Make Lemon Bars Step by Step
Preheat your oven to 350°F and line your pan with a long strip of parchment paper that hangs over two opposite sides—it’ll act as handles later.
- Make the shortbread crust: In a medium bowl, beat the room‑temperature butter and powdered sugar until creamy and light, about 1 minute. Add the 1 cup of flour and mix until just combined—the dough will be dry and crumbly. Turn it into the prepared pan and press it evenly into the bottom. Use the flat bottom of a measuring cup to really compact it. This step is crucial—a loose crust will fall apart when you cut the lemon bars.
- Bake the crust: Bake for 15–18 minutes, until it looks set and the edges are just barely golden. Don’t let it get too dark—we still have another bake. Remove from the oven but keep the oven on.
- Make the lemon filling: While the crust bakes, whisk the eggs and granulated sugar together in a large bowl until well blended. Add the lemon juice, lemon zest, and the sifted 1/2 cup of flour. Whisk until smooth—no lumps allowed.
- Assemble and bake: Pour the filling over the hot crust (this helps it set evenly). Bake for 20–25 minutes, until the filling is set around the edges but still has a slight jiggle in the center when you shake the pan. Think of a baked cheesecake—that gentle wobble is exactly what you want.
- Cool completely: Let the lemon bars cool in the pan on a wire rack for 15 minutes, then refrigerate for at least 2 hours—this is critical for clean slices. Once chilled, lift out using the parchment handles and transfer to a cutting board.
- Dust and serve: Sift a generous layer of powdered sugar over the top right before serving. Use a sharp, wet knife (wipe clean between cuts) for the neatest squares.
How I Meal Prep These Lemon Bars for the Week
I make a full batch on Sunday and tuck them into the fridge for afternoon snacks and impromptu guests. These lemon bars hold up beautifully—no sogginess, no weeping. I just dust the powdered sugar on right before serving to keep it looking fresh.
- Fridge: Store in an airtight container for up to 5 days. Layer with parchment between bars to prevent sticking.
- Freezer: Yes, these freeze well! Wrap individual lemon bars in plastic wrap and then foil. Freeze for up to 3 months. Thaw in the fridge for a few hours before dusting with sugar.
- Reheat: These are served chilled or at room temperature—no reheating needed. If you’ve frozen them, a quick 10‑minute rest at room temp is perfect.
Things I Wish I’d Known the First Time I Made Lemon Bars
- Line your pan properly: Use enough parchment to create paper “handles” over the sides. Without them, you’ll struggle to lift the lemon bars out cleanly. I learned this the hard way and ended up with broken edges.
- Don’t overmix the crust: Stop as soon as the flour disappears. Overworking develops gluten and makes the shortbread tough—we want tender, not tough.
- Room‑temperature eggs really matter: Cold eggs can cause the sugar mixture to seize, giving you a grainy texture. If you forget to pull them out, place them in a bowl of warm water for 5 minutes.
- Let the lemon bars chill fully before slicing: I know it’s tempting to cut into them while they’re still warm—but the filling needs that chill time to set. At least 2 hours in the fridge. Even if you mess up the timing, they’ll still taste amazing.
Swaps That Actually Work for These Lemon Bars
- Gluten‑Free: Substitute the all‑purpose flour with a 1:1 gluten‑free baking blend. The crust will be slightly more crumbly, but the filling works perfectly.
- Dairy‑Free: Use vegan butter in the crust (make sure it’s a stick, not a tub). The flavor will be a little less buttery, but still very good.
- Lime Bars: Swap the lemon juice and zest for equal amounts of lime. You’ll get a softer, more floral tartness—fantastic for summer.
- Herb‑Infused: Add 1 teaspoon of dried lavender or thyme to the sugar before making the filling. Let it sit for 10 minutes to infuse, then proceed.
Why Did My Lemon Bars Turn Out Soggy or Not Set?
Q: Why did my crust turn out crumbly and fall apart?
A: Most likely you didn’t press the dough firmly enough into the pan. Use the bottom of a flat measuring cup and really compress it—you want a solid, even layer without any loose patches. Also double‑check your butter was at room temperature; cold butter doesn’t blend as well.
Q: Can I use bottled lemon juice instead of fresh?
A: I don’t recommend it. Bottled juice lacks the bright, lively acidity of fresh lemons and often has a flat, artificial taste that dulls the lemon bars. For the best results, squeeze fresh lemons—you’ll need 2–3 of them.
Q: How do I know when the filling is done?
A: Look for the edges to be set and the center to have a gentle jiggle—like a cheesecake. If the entire filling is still liquid, bake another 2–3 minutes. If it’s fully firm and starting to crack, you’ve gone a bit too far (it’ll still taste good, just a little drier).
Q: Can I make these dairy‑free?
A: Yes, substitute the butter for a high‑quality vegan butter stick. The texture will be slightly less tender, but the flavor holds up. The filling is naturally dairy‑free, so you only need to change the crust.
How Do You Store Lemon Bars? Can You Freeze Them?
Q: How long do lemon bars last, and how should I store them?
A: Keep them in an airtight container in the fridge for up to 5 days. They actually taste even better on the second day as the flavors meld. Let them come to room temperature for about 10 minutes before serving for the best texture.
Q: Can I freeze lemon bars?
A: Absolutely. Freeze them whole or individually wrapped in plastic wrap and then foil for up to 3 months. Thaw in the fridge overnight, and dust with powdered sugar right before serving.
Q: What’s the best way to reheat lemon bars?
A: These are best served cold or at room temperature—no reheating needed. If they’ve been in the fridge, just let them sit out for 15 minutes before serving.
Q: What do you serve with lemon bars?
A: I love them with a hot cup of black tea or coffee—the bitterness balances the sweetness. For a dessert spread, pair them with a scoop of vanilla ice cream or a dollop of whipped cream. They also make a lovely bright finish after a heavy roast dinner.
That first bite—the crisp shortbread giving way to that silky, tart filling—is honestly why I keep a stash in my fridge all summer long. I hope you make these lemon bars, share them, and maybe even hoard a few for yourself.
If you try this recipe, drop a comment below—I’d love to hear how they turned out for you!
📌 Lemon bars with a buttery shortbread crust that stay perfectly crisp—save this recipe for your next spring brunch or weekend baking session.
Lemon Bars with a Buttery Shortbread Crust That’s Actually Easy to Make
Equipment
- 8×8 baking pan
- Electric Mixer
- Mixing Bowls
- Citrus juicer
- Fine-mesh strainer
- Measuring Cups and Spoons
- Parchment Paper
Ingredients
For the Crust
- 1/2 cup Unsalted Butter (room temperature)
- 1 cup All-Purpose Flour
- 1/4 cup Powdered Sugar
For the Filling
- 1/2 cup Lemon Juice from 2-3 lemons
- 1 tbsp Lemon Zest (finely grated)
- 3 large Eggs (room temperature)
- 1 1/2 cups Granulated Sugar
- 1/2 cup All-Purpose Flour (sifted)
- Powdered Sugar (for dusting)
Instructions
- Make the shortbread crust: In a medium bowl, beat the room‑temperature butter and powdered sugar until creamy and light, about 1 minute. Add the 1 cup of flour and mix until just combined—the dough will be dry and crumbly. Turn it into the prepared pan and press it evenly into the bottom. Use the flat bottom of a measuring cup to really compact it. This step is crucial—a loose crust will fall apart when you cut the lemon bars.
- Bake the crust: Bake for 15–18 minutes, until it looks set and the edges are just barely golden. Don’t let it get too dark—we still have another bake. Remove from the oven but keep the oven on.
- Make the lemon filling: While the crust bakes, whisk the eggs and granulated sugar together in a large bowl until well blended. Add the lemon juice, lemon zest, and the sifted 1/2 cup of flour. Whisk until smooth—no lumps allowed.
- Assemble and bake: Pour the filling over the hot crust (this helps it set evenly). Bake for 20–25 minutes, until the filling is set around the edges but still has a slight jiggle in the center when you shake the pan. Think of a baked cheesecake—that gentle wobble is exactly what you want.
- Cool completely: Let the lemon bars cool in the pan on a wire rack for 15 minutes, then refrigerate for at least 2 hours—this is critical for clean slices. Once chilled, lift out using the parchment handles and transfer to a cutting board.
- Dust and serve: Sift a generous layer of powdered sugar over the top right before serving. Use a sharp, wet knife (wipe clean between cuts) for the neatest squares.
Notes
Related posts:
 Frozen Chocolate Covered Strawberry Bites That Taste Like Pure Summer (3 Ingredients, No Oven)
 Blueberry Lemon Bars That Taste Like Spring in an 8×8 Pan
 Pumpkin Cream Cheese Swirl Muffins That Don’t Sink in the Middle — Finally
 Ninja Creami Salted Caramel Ice Cream That’s Creamy, Dreamy, and Ready in 24 Hours