
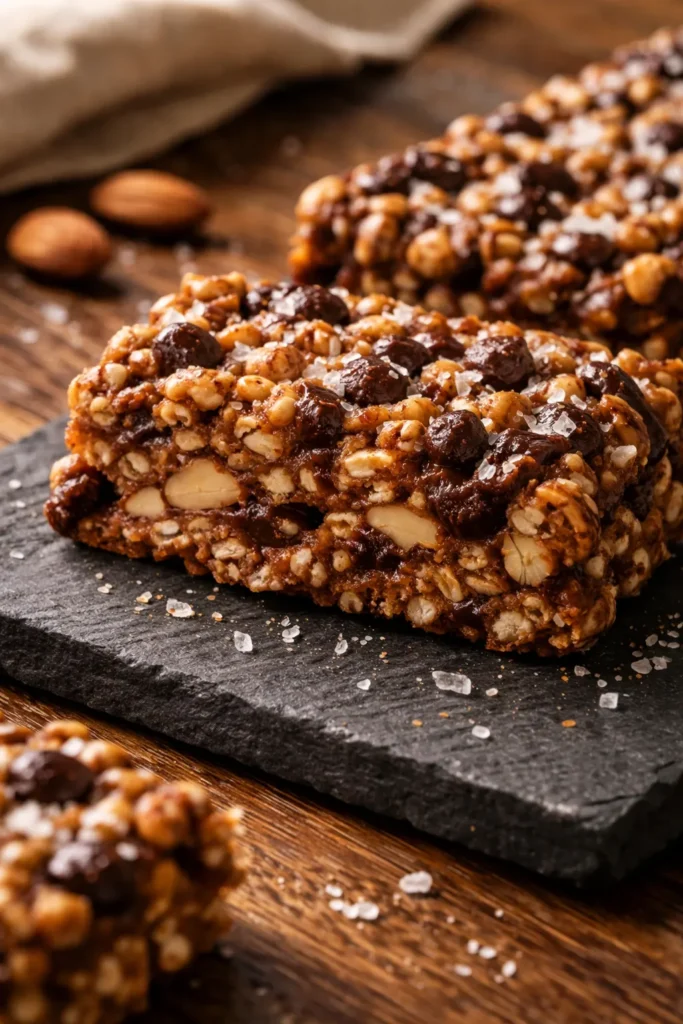
Five minutes in a hot oven wakes up flavors you didn’t know were hiding in those nuts. The moment they hit the heat, the kitchen fills with a rich, nutty aroma—almonds turning golden, cashews releasing their sweet oils, peanuts deepening into that classic roasted scent. Roasting deepens their natural oils and adds a warmth that raw nuts just can’t touch. It’s the difference between a bar that tastes “healthy” and one that tastes like a treat. I learned this the hard way: my first batch of dark chocolate sea salt nut bars used raw nuts, and the result was flat and flimsy—like eating a piece of cardboard with chocolate on top.
The puffed rice is the secret to that light, airy crunch. Without it, the bars feel dense and heavy, like a block of nut butter. Those tiny air pockets keep every bite crisp and snappy.
Everything You Need (And a Few Honest Notes)
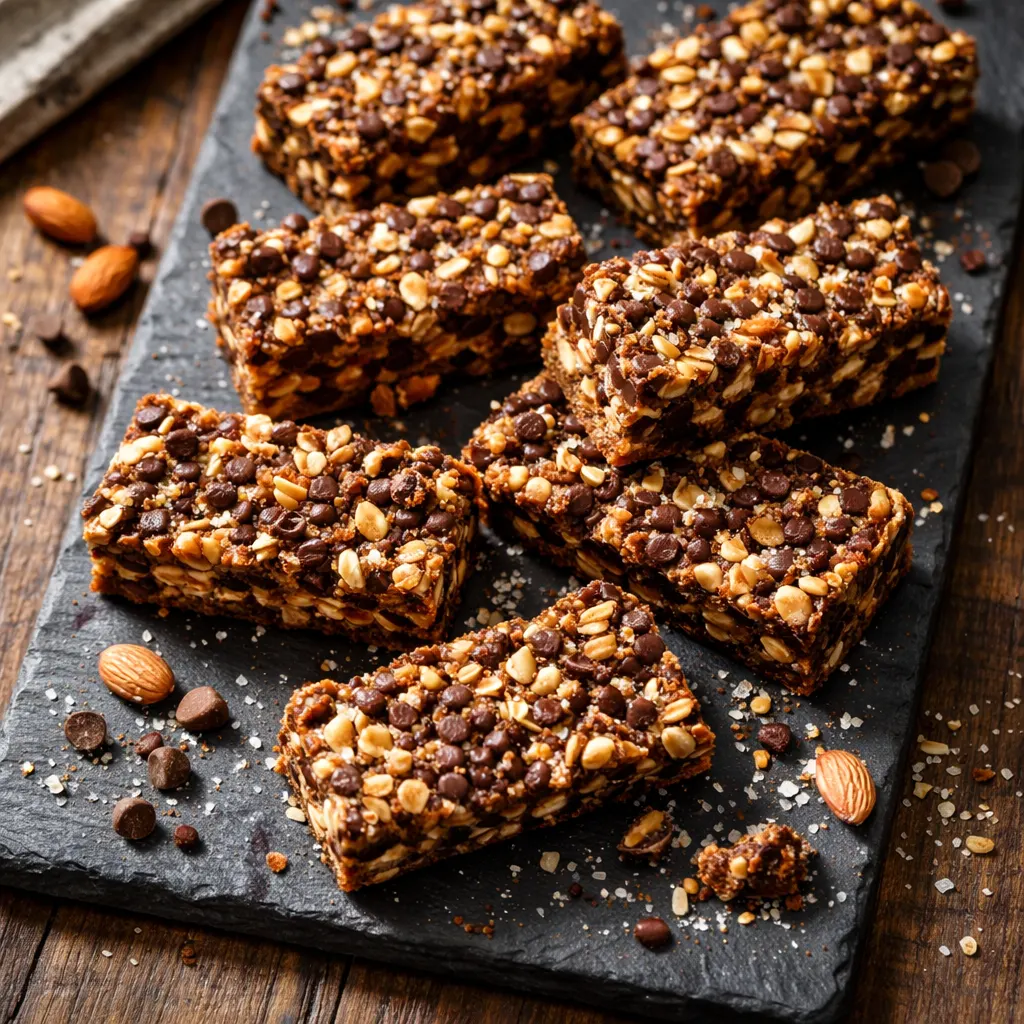
- 2 ½ cups unsalted nuts (¾ cup cashews, ¾ cup peanuts, 1 cup almonds): This mix gives you softness from the cashews, crunch from the almonds, and a classic peanut butter-like flavor from the peanuts. Use whatever nuts you have—just keep the total at 2 ½ cups.
- ½ cup puffed rice: This is your texture maker. Look for unsweetened puffed brown rice. If you skip it, the bars will be very dense, like a giant nut cluster.
- ¼ cup brown rice syrup: This is the glue that holds everything together. It’s less sweet than honey and stays slightly chewy. Substitute honey or maple syrup if needed, but note that the texture will be a bit softer.
- 1 ½ teaspoon vanilla extract: Rounds out the flavors and makes the chocolate taste richer.
- ½ teaspoon sea salt: Balances the sweetness. Don’t skip it—it makes the nuts pop.
- 1 cup dark chocolate chips: For the topping. Use a good quality bar or chips—it’s a star ingredient.
- 2 teaspoons coconut oil: Helps the chocolate melt smoothly and gives it a nice snap when it sets.
- Flaky salt for topping: The finishing touch. A little sprinkle on top hits that sweet-salty note we all love.
What to Pull Out Before You Start
- Rimmed baking sheet: For toasting the nuts. A half-sheet pan works perfectly.
- 8×8-inch pan: The mold for your bars. A metal pan works best for even chilling.
- Parchment paper: For easy removal. Let it hang over the edges like handles.
- Large bowl: For mixing everything together.
A small saucepan is also handy for warming the syrup mixture.
Let’s Make Them (Step by Step)
Start by preheating your oven to 350°F (175°C). While it’s heating up, line your 8×8 pan with parchment paper, leaving an overhang on two opposite sides—this will be your handle for lifting the finished bars.
- Toast the nuts: Spread the cashews, peanuts, and almonds on a rimmed baking sheet in a single layer. Roast for 5–8 minutes, until they smell amazing and look a shade darker. You’ll hear a faint sizzle as the oils release. Watch them closely—nuts go from toasted to burnt fast. For almonds, cut one open to check: it should be light golden inside.
- Warm the binder: In a small saucepan, combine the brown rice syrup, vanilla extract, and sea salt. Warm over low heat, stirring constantly with a silicone spatula, until the syrup is runny and smooth. Don’t let it boil—just warm it enough to make it pourable. It should look like honey flowing off a spoon.
- Mix the base: In your large bowl, combine the warm toasted nuts and puffed rice. Pour the warm syrup mixture over the top and stir well until everything is evenly coated. The smell is intoxicating—like a warm nut brittle without the sugar.
- Press into the pan: Transfer the mixture to your lined 8×8 pan. Using a spatula or a piece of parchment, press it down very firmly into an even layer. Use the bottom of a measuring cup to really pack it down—you should hear a satisfying crunch as the nuts settle. This step is critical—if it’s not packed tight, the bars will fall apart.
- Melt the chocolate: Combine the dark chocolate chips and coconut oil in a microwave-safe bowl. Microwave in 30-second bursts, stirring between each, until smooth and glossy. Alternatively, use a double boiler. The chocolate should be silky and completely uniform.
- Top with chocolate: Pour the melted chocolate over the pressed nut layer. Spread it into an even layer that reaches the edges.
- Sprinkle with sea salt: While the chocolate is still wet, sprinkle a generous pinch of flaky salt over the top. Watch the crystals catch the light—this is the moment the bars become truly beautiful.
- Chill until set: Place the pan in the refrigerator for at least 1 hour, or until the chocolate is fully firm. Lift the bars out using the parchment paper, and cut into 16 squares with a sharp chef’s knife. The knife should glide through—if it crumbles, the bars need more fridge time. For cleaner cuts, wipe the blade between each slice.
Testing This Recipe
I went through three batches before landing on this version of dark chocolate sea salt nut bars. The first batch taught me that raw nuts make for a flimsy bar—they never held together. When I tried to lift a piece, it just slid apart in my hand. The second batch was better, but cutting them was like mining for chocolate chunks; everything fell into a crumbly heap. It wasn’t until I let the brown rice syrup bubble at the edges for a solid minute—watching those tiny bubbles form and hearing the gentle pop—that the mixture became sticky enough to bind everything together. That third batch came out of the fridge in perfect squares, with the chocolate snapping cleanly when I bit into it. The texture is exactly what I wanted: firm enough to hold its shape, chewy from the syrup, and crunchy from the nuts and puffed rice. The sound of that first bite—crisp, clean, no crumbling—is pure satisfaction.
If you’re worried about the bars not setting, trust the process. The first time you press the nut mixture, it may feel loose, but after an hour in the fridge, everything aligns. I tested these with both honey and maple syrup—both work, but brown rice syrup gives the most reliable structure. For a vegan version of these dark chocolate sea salt nut bars, maple syrup is your best bet; just boil it down for 2-3 minutes to thicken it first.
Storage: Sunday Prep for All Week
I make a double batch of these on Sunday afternoons, and they disappear from the pantry by Wednesday. They’re my go-to for lunchboxes, afternoon slumps, and even a quick pre-dinner bite.
- Fridge: Store in an airtight container for up to 2 weeks. The bars stay firm and chewy right from the fridge.
- Freezer: Yes, they freeze beautifully. Place them in a single layer in a freezer bag for up to 3 months. I grab one straight from the freezer for a quick snack—they thaw in about five minutes, and the texture stays perfect.
- Reheat: No reheating needed. If you like a softer bar, let them sit at room temperature for 5 minutes before eating.
Things I Wish I’d Known the First Time
- Press hard enough to hurt your arm: The number one reason homemade nut bars fall apart is they aren’t pressed firmly enough into the pan. Use the bottom of a measuring cup to really pack it down. You want the nuts to feel almost compacted.
- Don’t overheat the syrup: Brown rice syrup gets thick again if you boil it. Just warm it until it flows like honey. If it seizes up, stir in a teaspoon of hot water.
- Use good chocolate: This is a bar with very few ingredients, so the chocolate matters. Use a bar or chip you genuinely enjoy eating on its own. The chocolate should snap when you crack it, not bend.
- Let them set completely: I know the wait is hard, but cutting into them too early is the fastest way to a crumbly mess. A full hour in the fridge is non-negotiable for clean cuts. If you’re impatient, try the freezer for 30 minutes instead.
Make It Yours: Easy Variations
- Dairy-Free / Vegan: This base recipe for dark chocolate sea salt nut bars is naturally dairy-free if you use dairy-free chocolate chips (most dark chips are) and maple syrup instead of honey.
- Nut-Free: Swap the nuts for 2 ½ cups of roasted seeds (pumpkin seeds, sunflower seeds, and chopped pepitas). The method stays the same.
- Spicy Kick: Add ¼ teaspoon of cayenne pepper to the warm syrup mixture. The heat with the dark chocolate is a fantastic contrast.
- Tropical Twist: Replace the almonds with macadamia nuts and use ½ cup unsweetened coconut flakes along with the puffed rice. The coconut adds a chewy texture that plays beautifully with the chocolate.
Troubleshooting
Why did my bars crumble when I cut them?
Chances are they weren’t pressed firmly enough into the pan, or the syrup mixture didn’t get warm enough to become sticky. Next time, warm the syrup until it’s bubbling slightly at the edges, and press the mixture with all your strength. A heavy-bottomed glass or measuring cup works wonders.
Can I use honey or maple syrup instead of brown rice syrup?
Yes, but the texture will be slightly different. Brown rice syrup is thick and chewy, which gives the bars their structure. Honey will make them a bit softer and stickier. Maple syrup is thinner, so you’ll want to boil it down for 2-3 minutes to reduce it before mixing. I’ve made this version and the bars are still delicious—just a little more delicate.
How do I know when the nuts are toasted enough?
Smell is your best indicator. When the nuts smell fragrant and toasty, and they’ve deepened in color by a shade or two, they’re done. For almonds, you can cut one open—it should be light golden inside. Also, listen for a gentle crackling sound—that’s the oils releasing.
Can I make these without puffed rice?
You can substitute crushed crispy rice cereal or even finely chopped dried fruit like apricots. Keep in mind the texture will change—puffed rice gives them a light, airy crunch that’s hard to duplicate. If you skip it entirely, the bars become dense and chewy, like a nut cluster. They’ll still taste good, but they won’t have that signature snap.
Frequently Asked Questions
How long do these bars last, and how should I store them?
They’ll last up to two weeks in an airtight container in the fridge. I actually prefer them cold—they stay firm and snappy. If you keep them at room temp, the chocolate may soften, especially in warm weather.
Can I freeze these bars?
Absolutely. Freeze them in a single layer on a baking sheet, then transfer to a freezer bag. They’ll keep for up to three months. I eat them straight from the freezer—they thaw in about five minutes. The texture stays perfect.
What’s the best way to cut these bars cleanly?
Use a sharp, large chef’s knife. Score the top of the chocolate first to crack it, then press down firmly in one smooth motion. Wipe the blade clean between cuts for the cleanest edges. If the chocolate splinters, the bars are too cold—let them sit at room temperature for 5 minutes.
What do you serve with these bars?
They’re fantastic on their own, but I love them crumbled over Greek yogurt with a drizzle of honey for breakfast. They also make an incredible dessert platter alongside fresh berries and a cup of espresso. For a savory twist, pair them with a sharp cheese like aged cheddar.
These dark chocolate sea salt nut bars are the snack I turn to every single week. They’re easy to make, packed with real ingredients, and they actually satisfy that candy bar craving—without the sugar crash. The combination of crunchy nuts, chewy puffed rice, and smooth dark chocolate with that final hit of flaky salt is something I never get tired of. And every time I make a batch, the smell of toasting nuts fills the kitchen and pulls everyone in. It’s become a little ritual.
If you give them a try, I’d love to hear how they turn out! Leave a comment below or tag me on Pinterest—it genuinely makes my day to see your creations.
Dark Chocolate Sea Salt Nut Bars That Don’t Fall Apart (Finally)
Equipment
- Rimmed Baking Sheet
- 8×8-inch pan
- Parchment Paper
- Large Bowl
- Small saucepan
- Microwave-safe bowl
Ingredients
- ¾ cup cashews unsalted
- ¾ cup peanuts unsalted
- 1 cup almonds unsalted
- ½ cup puffed rice unsweetened
- ¼ cup brown rice syrup
- 1 ½ teaspoon vanilla extract
- ½ teaspoon sea salt
- 1 cup dark chocolate chips good quality
- 2 teaspoons coconut oil
- flaky salt for topping
Instructions
- Preheat the oven to 350°F (175°C). Line an 8×8-inch pan with parchment paper, leaving an overhang on two opposite sides.
- Toast the nuts: Spread the cashews, peanuts, and almonds on a rimmed baking sheet in a single layer. Roast for 5–8 minutes, until fragrant and a shade darker. Watch them closely—nuts go from toasted to burnt fast. For almonds, cut one open to check: it should be light golden inside.
- Warm the binder: In a small saucepan, combine the brown rice syrup, vanilla extract, and sea salt. Warm over low heat, stirring constantly, until the syrup is runny and smooth. Don’t let it boil—just warm it enough to make it pourable.
- Mix the base: In a large bowl, combine the warm toasted nuts and puffed rice. Pour the warm syrup mixture over the top and stir well until everything is evenly coated.
- Press into the pan: Transfer the mixture to the lined 8×8 pan. Using a spatula or a piece of parchment, press it down very firmly into an even layer. Use the bottom of a measuring cup to really pack it down. This step is critical—if it’s not packed tight, the bars will fall apart.
- Melt the chocolate: Combine the dark chocolate chips and coconut oil in a microwave-safe bowl. Microwave in 30-second bursts, stirring between each, until smooth and glossy. Alternatively, use a double boiler.
- Top with chocolate: Pour the melted chocolate over the pressed nut layer. Spread it into an even layer that reaches the edges.
- Sprinkle with sea salt: While the chocolate is still wet, sprinkle a generous pinch of flaky salt over the top.
- Chill until set: Place the pan in the refrigerator for at least 1 hour, or until the chocolate is fully firm. Lift the bars out using the parchment paper, and cut into 16 squares with a sharp chef’s knife. For cleaner cuts, wipe the blade between each slice.
Notes
Related posts:
 Oatmeal Chocolate Chip Bars That Stay Soft for a Week — Ready in 30 Minutes
 Soft Pumpkin Oatmeal Sandwich Cookies with Maple Buttercream: The Fall Dessert You’ll Crave
 Blueberry Lemon Bars That Taste Like Spring in an 8×8 Pan
 High Protein Banana Pudding Yogurt That Doesn’t Taste Like a Protein Shake — Finally