
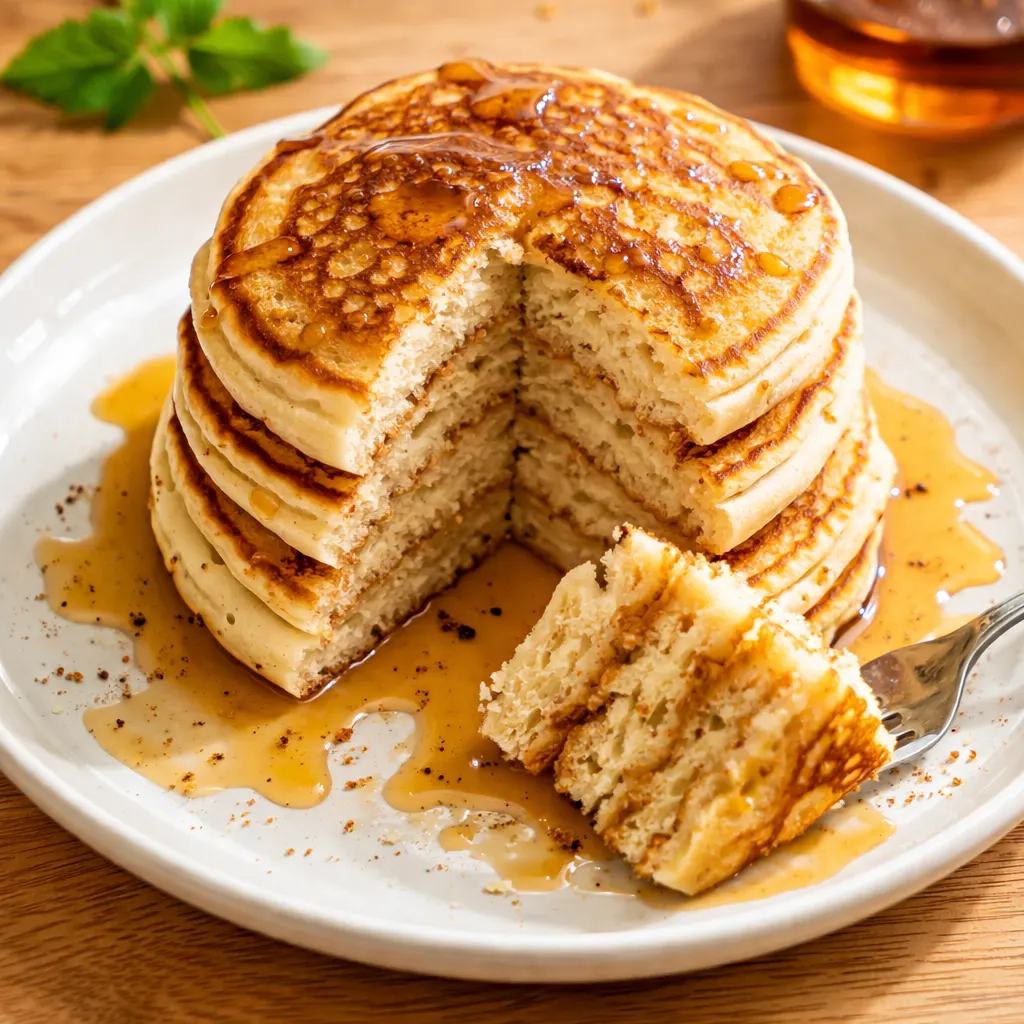
TLDR: These Japanese soufflé pancakes get their signature height from a stabilized meringue folded into a yolk batter and cooked low and slow under a lid. The two-step batter addition and covered cooking are the non-negotiable techniques. Expect pancakes that are jiggly, cloud-soft, and nearly 2 inches tall straight off the pan.
The first time these came off my pan, I actually laughed out loud. They were so tall and jiggly, like little golden clouds that had decided to sit down for breakfast. My partner walked in and said, “Are those from a restaurant?” Nope. Just my little non-stick pan and a bowl of egg whites that I’d coaxed into something magical. Every time I make them, someone asks for the recipe before they take the first bite.
The first batch I ever made looked like sad, deflated hockey pucks. I’d rushed the meringue folding and cooked them on medium heat because I was impatient. Batch two was better — I used my ring molds and was gentle with the fold. But batch three, the one where I finally trusted the low heat and the covered cooking? That’s the one that gave me those perfect, wobbling towers. My sister texted me a photo of her own batch the next week with “YOU WEREN’T KIDDING” in all caps, and that’s when I knew this was the version worth sharing.
- Serves: 4 as breakfast or dessert
- Hands-On Time: 15 min | Total Time: 25 min
- Difficulty: Medium — the meringue folding takes a little practice
- Cost per serving: ~$1.75
- Nutrition Estimate: 198 Calories, 7g Protein, 28g Carbs, 7g Fat, 3g Saturated Fat, 0.5g Fiber, 142mg Sodium per serving
- Dietary Notes: Adaptable for gluten-free
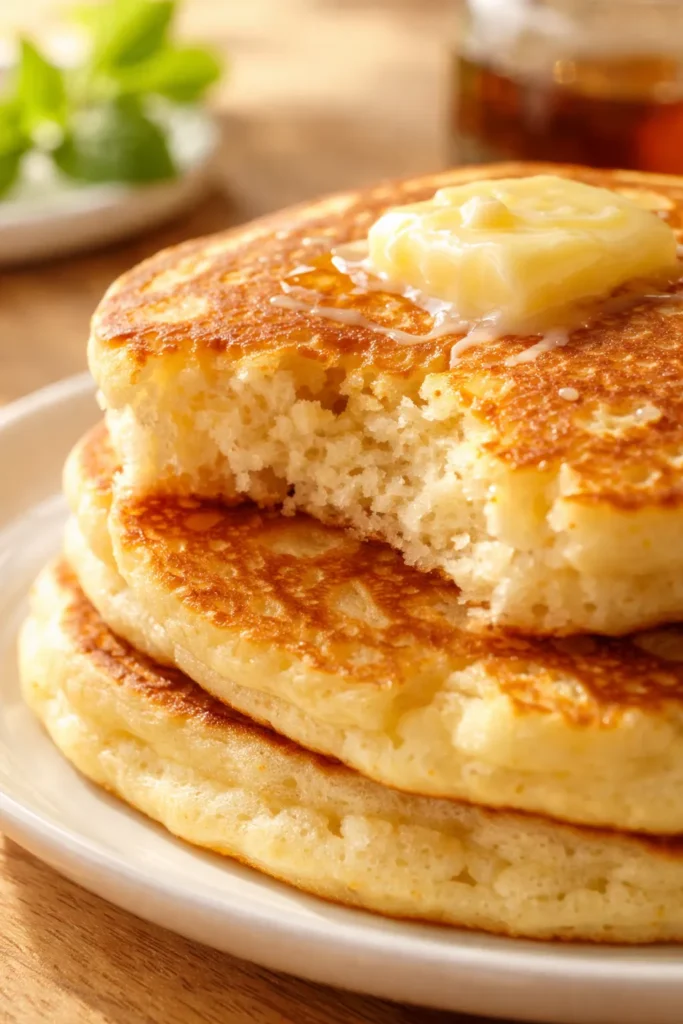
(Photo above: Overhead shot of two tall golden soufflé pancakes dusted with powdered sugar on a sage green plate, a small ramekin of maple syrup beside them, butter melting down the sides, morning light from a nearby window catching the steam rising off the top.)
Why the Meringue Method Makes Japanese Soufflé Pancakes Actually Rise (Not Fall)
The whole trick is in the egg whites. Most pancake batters rely on baking powder alone for lift, and you get a flat, even cook — fine, but not special. These get their height from a properly whipped meringue that’s folded in at the very end. The air bubbles in the whites expand as the batter warms, and because you’re cooking them covered at low heat, that steam stays trapped around the pancake, cooking the top and setting the structure before the bubbles have a chance to pop.
The cream of tartar is doing real work here. It’s not just a stabilizer — it keeps the egg white proteins from bonding too tightly, which means you can whip them to stiff peaks without them turning grainy or weeping liquid. Think of it as the insurance policy for your meringue. One eighth of a teaspoon and you’re golden.
What comes off the pan is a pancake that holds its height, jiggles when you tap the plate, and cuts like a warm cloud. It’s ridiculous. The first time you flip one and it doesn’t deflate, you’ll know exactly what I mean.
What Goes In — Plus My Honest Notes
- 1 egg yolk (18g): Adds richness and helps create a stable base for the batter. Use the freshest eggs you’ve got — they whip better.
- 1 tbsp sugar (12g) (for yolk mixture): Sweetens the yolk base and helps it thicken. I’ve used granulated and cane here, both work fine.
- 2 tbsp milk (30g): Adds moisture without thinning the batter too much. Whole milk gives the richest result, but 2% works too.
- 3 tbsp flour (30g): The structure. All-purpose is fine; cake flour makes them even more tender. If you’re gluten-free, a 1:1 blend with xanthan gum works.
- 1/4 tsp baking powder (1g): Extra lift alongside the meringue. Make sure it’s fresh — old baking powder is the #1 reason pancakes don’t rise.
- 2 large egg whites (60g): The star. Room temperature whites whip to a higher, more stable volume than cold ones. Separate your eggs while cold, then let the whites sit on the counter for 10 minutes.
- 1/8 tsp cream of tartar (0.4g): Stabilizes the meringue so it holds stiff peaks without separating. Don’t skip this unless you have some other acid — a squeeze of lemon works in a pinch.
- 1.5 tbsp sugar (18g) (for meringue): Stabilizes and sweetens the whipped whites. Adding it gradually is what gives you a glossy, resilient meringue.
- Powdered sugar (for serving): A light dusting right before you serve makes them look like a café creation.
- Butter (for serving): A pat of cold butter melting into the warm pancakes is non-negotiable.
- Whipped cream (for serving): Light, airy, and essential. Homemade is worth the extra 2 minutes.
- Maple syrup (for serving): The final touch. Warm it slightly so it doesn’t cool the pancakes down.
What to Pull Out Before You Start
- Non-stick frying pan with lid: This is key. The lid traps steam and cooks the pancake from above. A 10-inch pan works for two at a time — any larger and the lid won’t cover them well.
- Bowl (for egg yolks and flour mixture): Any medium bowl will do.
- Bowl (for egg whites): Make sure it’s completely clean and dry — any grease or yolk will ruin your meringue.
- Whisk: A balloon whisk is ideal. Hand whisking builds better volume than electric if you’ve got the arm strength.
- Spatula: A thin, flexible silicone spatula is best for folding and flipping.
- Ice cream scoop or measuring cup (1/3 cup): Ensures even, consistent pancakes.
- Paper towel: For applying the thinnest possible layer of oil.
- Sieve or sifter: For sifting the flour and baking powder — this prevents lumps and keeps the batter light.
- Plate (for serving): Warm your plate slightly (microwave for 15 seconds) so the pancakes stay hot.
Let’s Make It (Step by Step)
I’ve tested this method about a dozen times, and the timing below is exactly what gets me those tall, jiggly stacks every time. Set a timer so you can relax and let the heat do the work.
Prep your bowls and pan: Separate your eggs while they’re still cold — the yolks are less likely to break that way. Let the whites sit at room temperature for 10 minutes while you gather everything else. Line up your whisk, spatula, and scoop so you’re not scrambling mid-recipe.
- Whisk the yolk and sugar: In a medium bowl, whisk the egg yolk and 1 tablespoon (12g) sugar together until the mixture turns pale and frothy, about 1 minute of steady whisking. You’re looking for a color change — it should go from bright yellow to a lighter, creamy shade.
- Add the milk in batches: Pour in the 2 tablespoons (30g) milk a little at a time, whisking after each addition. This prevents the batter from getting watery all at once. Whisk until smooth and fully combined.
- Sift and whisk the dry ingredients: Sift the 3 tablespoons (30g) flour and 1/4 teaspoon (1g) baking powder directly over the yolk mixture. Whisk until everything is incorporated and no dry patches remain. Set this bowl aside.
- Whip the meringue: In a clean, dry bowl, whip the 2 large egg whites (60g) with the 1/8 teaspoon (0.4g) cream of tartar until frothy and pale. Start adding the 1.5 tablespoons (18g) sugar gradually, about a teaspoon at a time, while continuing to whip. Keep going until the whites form glossy, stiff peaks that hold their shape when you lift the whisk. This takes about 3–4 minutes of steady whisking. Avoid over-whipping — once the peaks look dry and start to separate, you’ve gone too far.
- Combine the batters — first stage: Take about one third of the whipped egg whites and whisk it into the yolk mixture until completely incorporated. This lightens the yolk base so the remaining whites can fold in more easily.
- Combine — second stage: Add half of the remaining whites to the yolk mixture and whisk gently until just combined. You want to see a few streaks of white still visible.
- Fold in the final whites: Transfer the yolk mixture to the bowl with the remaining egg whites. Whisk gently, then switch to a spatula and fold until no white streaks remain. Be careful not to over-mix — you want a thick, fluffy batter that holds air.
- Heat the pan: Set your non-stick frying pan over low heat (the lowest setting your stove can maintain, about 250°F/120°C if you have an infrared thermometer). Lightly brush the surface with oil, then use a paper towel to rub it into a very thin, even film. You don’t want excess oil — just enough to prevent sticking.
- Cook the first layer: Using an ice cream scoop or 1/3 cup measuring cup, scoop the batter onto the pan (make two pancakes at a time unless you have a large pan). Cover with the lid and cook for 4–5 minutes. The batter should start to puff and set at the edges.
- Add the second layer: Remove the lid and add another scoop of batter directly on top of each pancake. Cover and cook for another 4–5 minutes. The second layer should blend into the first, giving you a tall, even pancake.
- Check and flip: Lift the lid and gently peek under one pancake with a spatula. It should release easily and be golden brown on the bottom. Don’t force it — if it’s not releasing, give it another 30 seconds. If you have any remaining batter, pile it on top of the pancakes now, then gently flip them over. Cover and cook for 5–6 more minutes. The pancakes will puff even taller during this stage.
- Serve immediately: Gently remove the pancakes to a warm plate. Dust with powdered sugar, add a pat of butter, a dollop of whipped cream, and a drizzle of maple syrup. Eat right away — these don’t hold, and they shouldn’t. The magic is in that first warm, jiggly bite.
Sunday Prep = Stress-Free Morning Pancakes
I know breakfast on a weekday feels impossible, so here’s my honest system: I make the full batch on Sunday morning, and I prep the mix-ahead components so weekday me can take shortcuts.
- Fridge storage: Cooked pancakes keep in an airtight container for up to two days. Reheat in a dry non-stick pan over low heat with the lid on for 3–4 minutes — don’t microwave them, they go rubbery.
- Freezer: Freeze the fully cooked, cooled pancakes in a single layer on a baking sheet, then transfer to a freezer bag. They last about a month. Reheat straight from frozen in a covered non-stick pan over low heat for 6–7 minutes.
- Reheat note: The microwave destroys the texture. I know it’s faster, but it’s not worth it. Low heat with a lid brings back the softness without the rubber.
What I Learned Testing This Recipe
I went through about a dozen test batches before I got the method right. Here are the four things that made the biggest difference, from the ones that nearly made me give up (I didn’t) to the tip that finally gave me that perfect jiggle.
- Low heat is the whole secret: I know it’s tempting to turn the pan up to medium and save a few minutes, but here’s what happens: the bottom burns before the top sets, and when you try to flip, you get a flat, dark mess. Low heat, covered, is non-negotiable. I set a timer and walk away.
- Don’t skip the cream of tartar: The first time I made these, I thought “it’s just 1/8 teaspoon, surely it’s fine without it.” It was not fine. The whites deflated as soon as I added the sugar, and the batter was runny. Cream of tartar is not optional in this recipe. Even if you’ve never used it before, buy it for this.
- Warm your serving plates: This sounds fussy, but it’s the one thing that keeps the pancakes hot while you finish the batch. Pop the plates in the microwave for 15 seconds or in a 200°F oven for 5 minutes. The butter melts properly, and the first bite tastes like it just came off the pan.
- If the first pancake sticks, don’t panic: Your pan might need a second application of oil. Use the paper towel method — a thin film, not a pool. If the first pancake isn’t releasing after 5 minutes, remove the pan from heat, let it sit for 30 seconds, and try again. The cooling helps release it.
Swaps That Actually Work
- Gluten-free: Use a 1:1 gluten-free flour blend that contains xanthan gum. The texture is slightly less airy, but the height is still impressive. I use Bob’s Red Mill 1:1 and it works well.
- Dairy-free: Swap the milk for oat milk or full-fat canned coconut milk thinned with water. Oat milk gives the closest texture. Coconut adds a slight sweetness that pairs well with maple syrup.
- Egg-less version: I’ve tried this with aquafaba and it does not work. The structure relies too heavily on the egg proteins. Honestly, this recipe is not adaptable for vegan — make a different pancake and save yourself the frustration.
- Flavor variation — matcha or cocoa: Replace 1 tablespoon (8g) of the flour with matcha powder or cocoa powder. Sift together with the flour and baking powder. The texture stays the same, but you get a gorgeous green or chocolate-colored pancake. Dust with powdered sugar to finish.
- Kid-friendly version: Skip the maple syrup and serve with fresh berries and a drizzle of honey. My nephew calls these “cloud pancakes” and demands them every weekend.
Why Did My Japanese Soufflé Pancakes Deflate When I Flipped Them?
Q: Why did my pancake deflate as soon as I tried to flip it?
A: This happened to me the first four times. The culprit is almost always the pan temperature. If the heat is too high, the bottom sets too quickly while the top stays raw and heavy. When you flip, the weight of the uncooked batter collapses the air pockets. Fix it by cooking on the lowest heat your stove can maintain, and make sure your lid seals well so the steam does the top-cooking for you. If your pan is running too hot, pull it off the stove for a minute to let the temperature drop before you start the next batch.
Q: Can I use a different type of sugar?
A: Yes, but not all sugars behave the same. Granulated white sugar dissolves cleanly and gives the best meringue stability. Cane sugar works fine. Powdered sugar in the meringue (which I tried once) doesn’t dissolve properly and the whites take much longer to whip. If all you have is brown sugar, leave out the sugar in the yolk mixture and use the full amount of brown sugar in the meringue — the flavor will be deeper, and the color will be slightly darker.
Q: How do I know when the pancake is done on the inside?
A: The best indicator is the jiggle. Gently shake the pan — the pancake should wobble like a set custard on top. If it’s firm and doesn’t jiggle, it’s overcooking and will be dry. The internal texture should be soft and almost custard-like. If you’re nervous, slide a very thin skewer into the center — it should come out clean with a few moist crumbs. If it’s wet batter, give it another 2 minutes covered.
Q: Can I make these without the cream of tartar?
A: Short answer: you can, but you shouldn’t. The cream of tartar stabilizes the egg white proteins and makes the meringue far more forgiving. Without it, the whites are more prone to weeping moisture and losing volume, which means flatter pancakes. If you absolutely don’t have it, add 1/2 teaspoon of fresh lemon juice or white vinegar to the whites before you start whipping. It’s not as effective, but it’s better than nothing.
Can You Freeze Japanese Soufflé Pancakes?
Q: How long do these last, and how should I store them?
A: Cooked pancakes keep in an airtight container in the fridge for up to 2 days. The texture softens over time — they go from “jiggly cloud” to “soft and fluffy” after 24 hours. That’s not a bad thing; they’re still delicious, just different. Always reheat in a covered non-stick pan over low heat, not the microwave.
Q: Can I make these ahead and freeze them?
A: Yes. Let the pancakes cool completely on a wire rack (about 20 minutes). Place them in a single layer on a baking sheet lined with parchment and freeze for 1 hour until solid. Transfer to a freezer bag or airtight container and freeze for up to one month. To reheat, place frozen pancakes in a covered non-stick pan over the lowest heat for 6–7 minutes, flipping once. They won’t be as tall as fresh, but they’ll still be soft and light.
Q: What’s the best way to reheat these?
A: A covered non-stick frying pan over low heat is the only method I recommend. The microwave makes them tough and rubbery within seconds, and the oven dries them out. Reheat for 3–4 minutes per side if thawed, or 6–7 minutes per side if frozen. Add a tiny splash of water to the pan (a teaspoon, not more) and cover to create steam — this helps restore the softness.
Q: What do you serve with these?
A: The classic trio is butter, whipped cream, and maple syrup — that’s my weekend version. For something brighter I do fresh strawberries and a dollop of crème fraîche instead of cream. My favorite unexpected pairing is a drizzle of honey and a few flakes of flaky sea salt — the sweet-salty contrast is incredible with the soft, airy pancakes. And honestly, they’re also incredible just with a dusting of powdered sugar and a strong cup of coffee, no sides needed.
There’s something about these pancakes that feels like a little celebration. They take 15 minutes of active work, and what you get back is a stack of pancakes that wobbles on the plate and melts in your mouth. I’ve made them for birthday breakfasts, lazy Saturday mornings, and one particularly rainy Tuesday when I needed something to feel good about. They always deliver.
If you try them, drop a comment below and let me know how they turned out — I genuinely love hearing about the first time someone flips one and it stays tall.
📌 This fluffy Japanese soufflé pancake recipe that rises 2 inches tall with a jiggly, cloud-soft center — save it for your next special weekend breakfast or birthday morning surprise.
Fluffy Japanese Soufflé Pancakes That Rise 2 Inches Tall — in 25 Minutes
Equipment
- Non-stick frying pan with lid
- Medium Bowl
- Clean bowl for egg whites
- Balloon whisk
- Thin flexible silicone spatula
- Ice cream scoop or 1/3 cup measuring cup
- Paper towel
- Sieve or sifter
- Plate
Ingredients
- 1 large egg yolk Use the freshest eggs you’ve got — they whip better.
- 1 tbsp sugar
- 2 tbsp milk Whole milk gives the richest result, but 2% works too.
- 3 tbsp all-purpose flour Cake flour makes them even more tender. If you’re gluten-free, a 1:1 blend with xanthan gum works.
- 1/4 tsp baking powder Make sure it’s fresh — old baking powder is the #1 reason pancakes don’t rise.
- 2 large egg whites Room temperature whites whip to a higher, more stable volume than cold ones. Separate your eggs while cold, then let the whites sit on the counter for 10 minutes.
- 1/8 tsp cream of tartar Don’t skip this unless you have some other acid — a squeeze of lemon works in a pinch.
- 1.5 tbsp sugar Adding it gradually is what gives you a glossy, resilient meringue.
- powdered sugar for serving
- butter for serving
- whipped cream for serving
- maple syrup for serving
Instructions
- Prep your bowls and pan: Separate your eggs while they’re still cold — the yolks are less likely to break that way. Let the whites sit at room temperature for 10 minutes while you gather everything else. Line up your whisk, spatula, and scoop so you’re not scrambling mid-recipe.
- Whisk the yolk and sugar: In a medium bowl, whisk the egg yolk and 1 tablespoon (12g) sugar together until the mixture turns pale and frothy, about 1 minute of steady whisking. You’re looking for a color change — it should go from bright yellow to a lighter, creamy shade.
- Add the milk in batches: Pour in the 2 tablespoons (30g) milk a little at a time, whisking after each addition. This prevents the batter from getting watery all at once. Whisk until smooth and fully combined.
- Sift and whisk the dry ingredients: Sift the 3 tablespoons (30g) flour and 1/4 teaspoon (1g) baking powder directly over the yolk mixture. Whisk until everything is incorporated and no dry patches remain. Set this bowl aside.
- Whip the meringue: In a clean, dry bowl, whip the 2 large egg whites (60g) with the 1/8 teaspoon (0.4g) cream of tartar until frothy and pale. Start adding the 1.5 tablespoons (18g) sugar gradually, about a teaspoon at a time, while continuing to whip. Keep going until the whites form glossy, stiff peaks that hold their shape when you lift the whisk. This takes about 3–4 minutes of steady whisking. Avoid over-whipping — once the peaks look dry and start to separate, you’ve gone too far.
- Combine the batters — first stage: Take about one third of the whipped egg whites and whisk it into the yolk mixture until completely incorporated. This lightens the yolk base so the remaining whites can fold in more easily.
- Combine — second stage: Add half of the remaining whites to the yolk mixture and whisk gently until just combined. You want to see a few streaks of white still visible.
- Fold in the final whites: Transfer the yolk mixture to the bowl with the remaining egg whites. Whisk gently, then switch to a spatula and fold until no white streaks remain. Be careful not to over-mix — you want a thick, fluffy batter that holds air.
- Heat the pan: Set your non-stick frying pan over low heat (the lowest setting your stove can maintain, about 250°F/120°C if you have an infrared thermometer). Lightly brush the surface with oil, then use a paper towel to rub it into a very thin, even film. You don’t want excess oil — just enough to prevent sticking.
- Cook the first layer: Using an ice cream scoop or 1/3 cup measuring cup, scoop the batter onto the pan (make two pancakes at a time unless you have a large pan). Cover with the lid and cook for 4–5 minutes. The batter should start to puff and set at the edges.
- Add the second layer: Remove the lid and add another scoop of batter directly on top of each pancake. Cover and cook for another 4–5 minutes. The second layer should blend into the first, giving you a tall, even pancake.
- Check and flip: Lift the lid and gently peek under one pancake with a spatula. It should release easily and be golden brown on the bottom. Don’t force it — if it’s not releasing, give it another 30 seconds. If you have any remaining batter, pile it on top of the pancakes now, then gently flip them over. Cover and cook for 5–6 more minutes. The pancakes will puff even taller during this stage.
- Serve immediately: Gently remove the pancakes to a warm plate. Dust with powdered sugar, add a pat of butter, a dollop of whipped cream, and a drizzle of maple syrup. Eat right away — these don’t hold, and they shouldn’t. The magic is in that first warm, jiggly bite.
Notes
Related posts:
 Baked Protein Pancake Bowls That Don’t Taste Like Cardboard — Finally
 Savory Red Lentil Pancakes That Stay Crispy and Keep You Full Until Lunch
 Low Calorie Banana Bread That Doesn’t Taste Like a Compromise — Finally
 This Raspberry Lemon Cake With White Chocolate Is the Only Layer Cake You Need for Spring Celebrations