
The first time I made these sliders, I was trying to use up a package of chicken thighs before they turned. Marcus walked into the kitchen halfway through and said, “Whatever you’re making for dinner, make double.” I made them again the next week. And the week after that. By the third week, Simone was requesting them for her school lunch — and she’s my picky one.
The short version: These taste like you spent hours on them, but they’re on the table in 30 minutes flat, and my kid has never once left leftovers.
I’ve made this about 30 times now, tweaking the balance of honey against the chipotle, and this version is the one that disappears fastest.
- Serves: 6 (2 sliders each) as a main
- Hands-On Time: 15 min | Total Time: 30 min
- Difficulty: Easy enough for a Wednesday night, impressive enough for Sunday football
- Cost per serving: ~$3.50
- Calories: ~480 per serving
- Dietary Notes: Can be made dairy-free with a quick swap
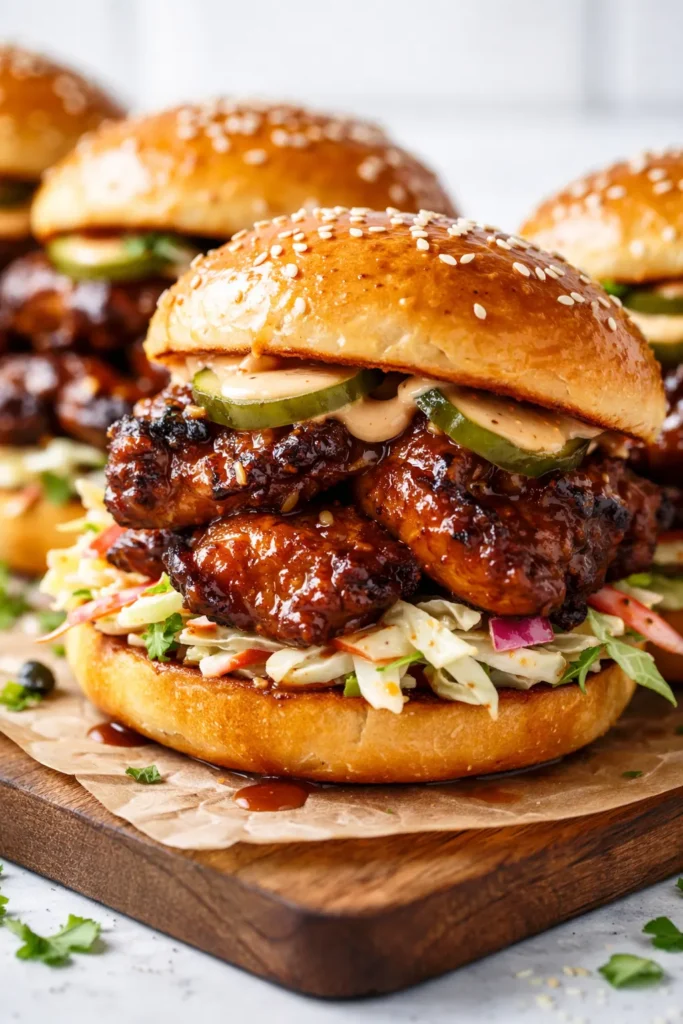
(Photo above: a low-angle shot of two sliders stacked on a dark slate board, the glossy honey-chipotle glaze catching the kitchen light, shredded lettuce and a thin slice of tomato peeking out, a small pile of crispy sweet potato fries in the corner.)
The Trick That Makes These Taste Way Harder Than They Are
The secret isn’t a long marinade or a complicated spice rub. It’s letting the chicken get a real sear on it before you even think about the sauce. Most people crowd the pan and end up steaming the meat. That’s not what we’re doing here.
I sear the thighs in batches, getting that deep brown crust, then build the sauce right in the same pan. The honey and chipotle glaze the chicken while it finishes cooking under the broiler. The result is sticky, spicy, sweet, and completely foolproof.
This produces a slider that’s juicy, messy, and exactly what you want when you’re craving something that feels like a treat but doesn’t require a nap afterwards.
The Ingredients That Matter (And My Notes on Each)
- 1.5 lbs boneless, skinless chicken thighs (about 6): Thighs stay juicy under the high heat of the broiler. Breasts dry out. I’ve tested both. Use thighs.
Simone doesn’t love dark meat in most things, but she eats these without complaint. That’s the honey-chipotle magic. - 1/3 cup honey: The backbone of the sweetness. It caramelizes under the broiler and helps the glaze stick.
If your honey is crystallized, warm it up for 10 seconds in the microwave. It’ll mix into the sauce much better. - 2 chipotle peppers in adobo sauce, minced + 1 tbsp adobo sauce: This gives you smoky heat and depth. Don’t skip the sauce from the can.
I freeze leftover chipotles flat in a baggie so I can break off what I need later. - 4 cloves garlic, grated (not minced): Grating it on a microplane melts it into the sauce. Minced garlic can burn under the broiler. Grated garlic doesn’t.
Yes, it’s worth the extra 20 seconds to grate it. I learned this one the hard way. - 2 tbsp soy sauce (or tamari): The salt component. Balances the sweetness and umami.
Don’t use low-sodium here. The regular kind gives it the right punch. - 2 tbsp butter (or vegan butter): Round out the sauce and makes it shiny.
I’ve made it with plant-based butter for my sister-in-law and it worked great. - 6 slider buns: Get good ones. Brioche buns are perfect here.
- Optional toppings: Pickled red onions, shredded lettuce, tomato, ranch dressing. I always do pickled onions.
What You’ll Pull Out of the Drawers
- A 12-inch cast iron skillet or heavy stainless steel pan
- A microplane or fine grater (for that garlic)
- Tongs
- A small bowl for the sauce
- A baking sheet (if you don’t want to use a cast iron under the broiler)
Making These Sliders: My Exact Process
This moves fast once you start, so have your ingredients measured and ready. It’s worth it.
Get the chicken ready: Pat the chicken thighs dry with a paper towel. Season generously with salt and pepper on both sides.
- Sear the chicken: Heat a drizzle of oil in your skillet over medium-high heat. Working in batches so you don’t crowd the pan, sear the chicken thighs for 4-5 minutes per side, until deeply golden and crispy. Transfer to a plate. Don’t wash the pan.
(📸 Photo tip: Your chicken should look like it’s wearing a dark brown jacket. If it’s pale, your pan wasn’t hot enough.) - Make the sauce: Reduce the heat to medium. Add the butter to the pan. Once it melts, add the grated garlic and cook for 30 seconds until fragrant. Add the honey, minced chipotle, adobo sauce, and soy sauce. Whisk it together and let it bubble for 1-2 minutes until it thickens slightly.
- Coat the chicken: Return the seared thighs to the pan. Toss them in the sauce to coat completely. Let them cook in the glaze for another 2 minutes, spooning the sauce over the top.
(📸 Photo tip: The sauce should look like thick syrup clinging to the chicken. If it’s too thin, let it reduce another minute.) - Broil (optional, but do it): Transfer the chicken to a baking sheet or leave in the skillet if it’s oven-safe. Spoon extra sauce over the top. Broil on high for 2-3 minutes, watching carefully, until the glaze is bubbly and charring in spots. This step is what makes them taste like they came off a grill.
- Rest and slice: Let the chicken rest for 5 minutes, then slice each thigh against the grain into thick strips.
- Assemble: Toast the buns if you want. Pile the sliced chicken onto the bottoms, spoon any remaining pan sauce over the top, and add your toppings. Close the buns and serve immediately.
How I Make These for the Week Ahead
I make a double batch on Sunday and we eat them for lunch or quick dinners through Wednesday. The chicken stays juicy if you store it properly.
- Fridge: Store the sliced chicken and sauce in an airtight container for up to 4 days. Keep the buns separate to avoid sogginess.
- Freezer: Yes! Freeze the sauced chicken flat in a freezer bag for up to 3 months. Thaw overnight in the fridge.
- Reheat: Reheat in a skillet over medium heat with a splash of water to loosen the sauce. The microwave works in a pinch, but the skillet keeps the edges crisp.
Stuff I Learned After Making These 30 Times
- Don’t skip drying the chicken: Wet chicken won’t sear. It’ll steam. Pat it dry with paper towels and let it sit out for 5 minutes before it hits the pan. That dry surface is what gives you the crust.
- Grate the garlic, don’t mince it: I know I said it already, but I’m saying it again. Minced garlic burns under the broiler. Grated garlic blends into the sauce and won’t leave bitter burnt bits.
- Watch the broiler like a hawk: Broilers vary wildly. Your sliders can go from perfectly charred to burnt in about 45 seconds. I stand right in front of the oven and watch them the whole time. Trust me, it’s worth it.
- Let the meat rest: If you slice the chicken right out of the oven, all the juices run out onto the cutting board. Give it 5 minutes. The juice stays in the meat where it belongs.
Make It Yours: What Else I’ve Tried
- Dairy-Free: Use vegan butter or a good olive oil in the sauce. My sister-in-law has no idea I use plant-based butter when she comes over.
- Gluten-Free: Use tamari instead of soy sauce and serve on gluten-free buns or over rice. My neighbor swears by this version.
- Extra Spicy: Add a minced jalapeño with the garlic, or use 3 chipotle peppers instead of 2. My husband adds hot sauce to his even after I’ve made it spicy. He’s a monster.
- Kid-Friendly (Mild): Use only 1 chipotle pepper and 1 tbsp adobo sauce, or omit entirely and just use honey and garlic. My daughter won’t eat it if it’s too smoky.
- Make it a salad: Slice the chicken and serve over romaine with avocado, corn, and a drizzle of ranch. This is my go-to for lunch the next day.
Questions I Get About This Recipe All the Time
Q: Why did my sauce turn out bitter?
A: Ugh, I’ve been there. It’s almost always the garlic. If you minced it instead of grating it, the bigger pieces burn under the broiler and turn bitter. Grating it into the sauce is a game-changer. You’ve got this next time.
Q: Can I make this with chicken breast?
A: You can, but I don’t recommend it. Chicken breasts dry out under the broiler. If you’re set on using breasts, pound them to an even thickness and watch the broiler time carefully — check at 1.5 minutes instead of 2. I prefer thighs for the juiciness factor.
Q: How long do these keep? Can I freeze them?
A: Store the sauced chicken in an airtight container in the fridge for up to 4 days. You can freeze it for up to 3 months. The trick is to freeze the chicken and sauce separately from the buns. Reheat in a skillet with a splash of water to bring the sauce back to life.
Q: What do you serve with these sliders?
A: My go-to sides are crispy sweet potato fries, a simple coleslaw with lime, or roasted broccoli. For game days, I’ll do a big bowl of chips and guacamole. My kids love them with a side of mac and cheese — who am I to argue?
More Recipes My Family Makes on Repeat
If these sliders are a hit at your table (and I’m betting they will be), here are a few other recipes that get the same reaction at ours:
- Crispy Oven-Baked Chicken Thighs — My go-to method for juicy, shatteringly crisp chicken thighs without all the mess of frying.
- Sweet Potato Fries with Chipotle Ranch — The perfect sidekick to these sliders, with a dipping sauce that’ll disappear before the fries do.
- Easy Slow Cooker Pulled Chicken — Set it and forget it pulled chicken that’s perfect for sandwiches, tacos, or meal prep bowls.
These honey chipotle garlic chicken sliders are the kind of recipe I make when I want to feel like I pulled off something impressive without actually spending all day in the kitchen. They’re sticky, messy, and exactly what a busy weeknight deserves.
If you try them, drop a comment below and let me know how they turned out — I love hearing about the dinners that actually work for real families. Tag me on Pinterest so I can see your beautiful sliders!
📌 Easy honey chipotle garlic chicken sliders that taste like you braised them all day — save this recipe for your next busy weeknight dinner that needs to feel special.
Easy Honey Chipotle Garlic Chicken Sliders That Taste Like You Braised Them All Day (30 Minutes)
Equipment
- 12-inch Cast Iron Skillet or Heavy Stainless Steel Pan
- Microplane or fine grater
- Tongs
- Small Bowl
- Baking Sheet (optional)
Ingredients
Chicken
- 1.5 lbs boneless skinless chicken thighs (about 6)
- Salt and black pepper
- 1 tbsp vegetable oil (for searing)
Sauce
- 1/3 cup honey (if crystallized, warm slightly)
- 2 chipotle peppers in adobo sauce, minced
- 1 tbsp adobo sauce (from the can)
- 4 cloves garlic, grated on a microplane
- 2 tbsp soy sauce (or tamari; regular, not low-sodium)
- 2 tbsp butter (or vegan butter)
For Serving
- 6 slider buns (brioche recommended)
- Optional toppings: pickled red onions, shredded lettuce, tomato slices, ranch dressing
Instructions
- Pat the chicken thighs dry with paper towels. Season generously with salt and pepper on both sides.
- Heat a drizzle of oil in a 12-inch cast iron skillet over medium-high heat. Working in batches to avoid crowding, sear the thighs for 4-5 minutes per side until deeply golden and crispy. Transfer to a plate. Do not wash the pan.
- Reduce heat to medium. Add the butter to the skillet. Once melted, add the grated garlic and cook for 30 seconds until fragrant. Add the honey, minced chipotle, adobo sauce, and soy sauce. Whisk together and let bubble for 1-2 minutes until the sauce thickens slightly.
- Return the seared thighs to the pan. Toss in the sauce to coat completely. Let cook in the glaze for another 2 minutes, spooning sauce over the top.
- Broil (optional but do it): Transfer the chicken to a baking sheet or leave in the skillet if oven-safe. Spoon extra sauce over the top. Broil on high for 2-3 minutes, watching carefully, until the glaze is bubbly and charring in spots.
- Let the chicken rest for 5 minutes. Slice each thigh against the grain into thick strips.
- Toast the buns if desired. Pile the sliced chicken onto the bottoms, spoon any remaining pan sauce over the top, add toppings, close buns, and serve immediately.
Notes
- Dry the chicken thoroughly — wet chicken steams instead of searing. Pat dry and let sit 5 minutes before cooking.
- Grate the garlic, don’t mince it. Minced garlic burns under the broiler; grated garlic melts into the sauce.
- Watch the broiler like a hawk — the glaze can go from perfectly charred to burnt in 45 seconds.
- Let the meat rest 5 minutes before slicing. Keeps the juices in.
Related posts:
 California Club Wraps That Actually Stay Crisp for Lunch — 20 Minutes
 Honey Garlic Sausage and Sweet Potato Sheet Pan Dinner That’s Actually Crispy — in 35 Minutes
 The Best Crockpot BBQ Chicken for Busy Weeknights: Tender, Tangy, Minimal Effort
 Buffalo Chicken Dip That Doesn’t Turn Into a Greasy Mess — Finally