
I tried six different versions of stuffed pepper casserole before I landed on this one. Some were too watery. Some had rice that turned to paste. Some were fine — the kind of fine you eat and forget you ate. This one? Simone ate two bowls and asked if it could be her birthday dinner. That is not something she says about casseroles. That is something she says about cake.
The short version: All the flavor of classic stuffed peppers — the beef, the rice, the tomatoes, the melty cheese on top — in one dish that bakes itself while you do literally anything else.
I’ve been making this for about three years now, tweaking it every time until the proportions stopped needing adjustment. My mother-in-law requested the recipe after one bite, which is the highest compliment her side of the family gives.
- Serves: 6 as a main dish
- Hands-On Time: 20 min | Total Time: 45 min
- Difficulty: Easy enough for a Tuesday — looks like you tried harder than you did
- Cost per serving: ~$3.50
- Calories: ~410 per serving
- Dietary Notes: Naturally gluten-free. Adaptable for dairy-free.
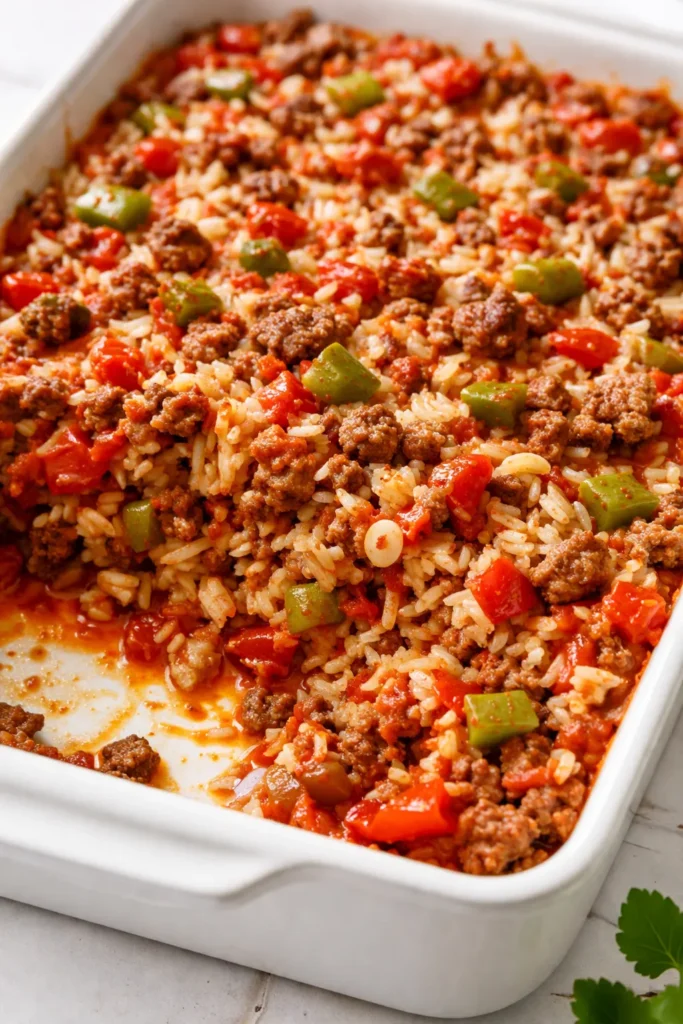
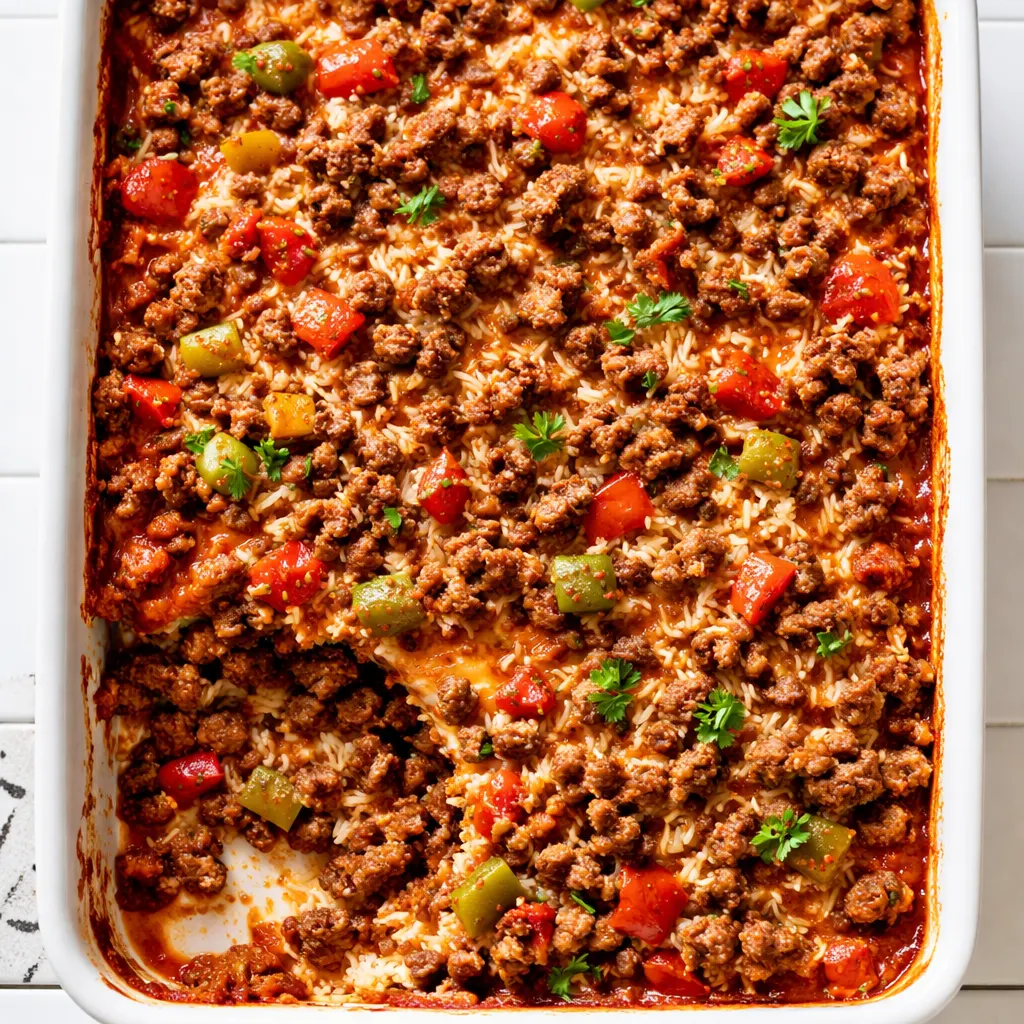
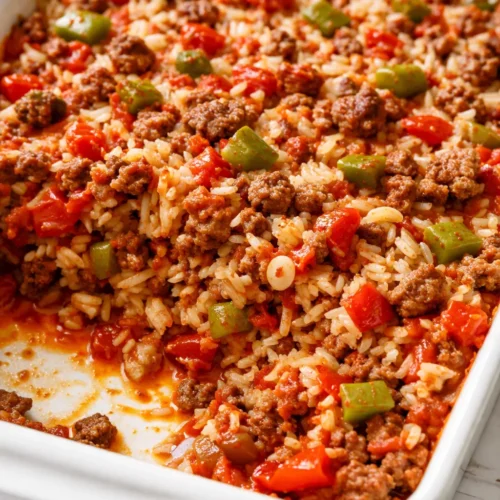
(Photo above: Overhead shot of the casserole in a white ceramic dish, the top a blanket of melted mozzarella and cheddar with browned edges, bell pepper slices peeking through the cheese, steam rising, served with a ladle on a wooden trivet in golden afternoon light from a south-facing window.)
The Thing That Makes This Work (And Not Mushy and Sad)
The problem with most stuffed pepper casseroles is the rice situation. You either pre-cook it and it gets mushy during baking, or you add it raw and it stays too firm. Neither is the answer. I cook the rice to just under al dente — about two minutes short of the package direction — so it finishes absorbing liquid in the oven without turning into porridge. That one adjustment changed everything.
The other trick is cooking the peppers twice. You soften them in the skillet first with the aromatics, then they go into the oven with everything else. That double cook means they’re tender without being limp, and they still have that slight bite that makes them taste like actual peppers instead of wet green fabric.
The result is a casserole that holds together when you scoop it, cheese pulls in long strands, and the whole thing tastes like the dinner your grandmother made on nights she wanted everyone to stop arguing and just eat.
Ingredients Worth Talking About
- 1 ½ pounds ground beef (80/20): The fat matters here. Lean beef will make the casserole dry because there’s not enough rendered fat to carry the flavor through the rice. If you insist on lean, add a tablespoon of olive oil when you brown it.
My daughter can tell when I use the lean stuff. She’s eight and she can tell. That’s how much it matters. - 3 bell peppers (any colors, but at least one red): Red and orange peppers are sweeter and hold their texture better. Green is fine but use it alongside at least one sweeter pepper so the dish doesn’t taste bitter.
My husband Marcus insists on “at least one red” — he lost that argument until I realized he was right. - 1 cup long-grain white rice (uncooked): Basmati or jasmine work great. Do not use minute rice or parboiled — they’ll turn to mush. Do not use brown rice unless you want to add 30 minutes and a separate pre-cook situation.
I learned this the hard way with a bag of instant rice I was trying to use up. Never again. - 1 can (15 oz) crushed tomatoes: Crushed, not diced. Diced tomatoes don’t break down enough in the short bake time, and you end up with weird tomato chunks instead of a cohesive sauce.
Celestine always said “if you want diced, dice them yourself.” She was right, but I’m busy and crushed works. - 1 can (8 oz) tomato sauce: This is the liquid that cooks the rice. Don’t skip it or add more stock instead — the tomato flavor is the backbone of the dish.
- 1 cup low-sodium beef broth: Use chicken in a pinch. The sodium level matters here — too much salt and you can’t fix it because the rice absorbs everything.
- 1 ½ cups shredded mozzarella and cheddar mix: The mozzarella pulls, the cheddar flavors. Pre-shredded is fine for this — the casserole is forgiving enough that the anti-caking coating won’t ruin anything.
- 1 medium yellow onion, diced: Fine dice, not chunks. It melts into the background.
Simone once said she doesn’t like onions. I told her that’s fine, they’re not for her — they’re for the dish. She doesn’t ask anymore. - 3 cloves garlic, minced: Fresh only. The jarred stuff has a flat taste that gets weird in the oven.
- 1 teaspoon dried oregano: Rubbed between your palms before adding to release the oils.
- 1 teaspoon smoked paprika: Regular is fine but smoked adds something that makes people ask “what’s in this?”
- ½ teaspoon black pepper: Fresh-cracked.
- Salt: You’ll season at three stages — the beef, the tomato mixture, and the finish. Trust the system.
- Fresh parsley or basil for topping: Optional, but it makes the dish look like you have your life together.
What to Pull Out Before You Start
- A 12-inch skillet or Dutch oven that can go from stovetop to oven (or you’ll transfer to a baking dish — both work)
- A 9×13-inch baking dish if you’re not using an oven-safe skillet
- A wooden spoon or spatula for breaking up the beef
- A cutting board and a sharp knife
- A small pot for pre-cooking the rice
If you’re using a skillet that can go in the oven, you save exactly one dish. I am a fan of saving exactly one dish.
Let’s Make It (Step by Step)
This goes fast once you start, so read through once before you begin. The oven does most of the actual work.
Preheat and prep: Preheat your oven to 375°F. Chop your onion and peppers into a ½-inch dice — about the size of a pencil eraser. Mince the garlic. Grate the cheese if you’re doing it yourself.
- Start the rice: Cook 1 cup of rice in 2 cups of salted water for about 10 minutes — just under al dente. The grains should still have a tiny white core when you bite one. Drain and set aside.
(📸 Photo tip: You should see individual grains that are plump but not splitting — they’ll look slightly underdone compared to normal rice.) - Brown the beef: In your largest skillet over medium-high heat, add the ground beef and season with ½ teaspoon salt and ¼ teaspoon pepper. Cook, breaking it up, until browned and no longer pink — about 6 minutes. Do not drain all the fat. Leave about a tablespoon in the pan. It’s carrying flavor.
This is the first seasoning moment. The fat absorbs the salt and pepper, and that base goes into everything else. - Cook the vegetables: Add the diced onion and bell peppers to the pan with the beef. Cook for 5-7 minutes, stirring occasionally, until the peppers soften and the onion turns translucent. Add the garlic, oregano, and smoked paprika. Cook one minute more until the kitchen smells like somewhere you want to be.
(📸 Photo tip: The peppers should look slightly wilted at the edges but still have their shape — like they’ve been in a steam room, not a fire.) - Build the sauce: Pour in the crushed tomatoes, tomato sauce, and beef broth. Stir to combine, scraping any browned bits from the bottom of the pan. Add another ¼ teaspoon salt and ¼ teaspoon pepper. Let it come to a simmer — about 2 minutes.
This is the second seasoning moment. The sauce needs to taste slightly too salty at this stage because the rice will absorb a lot of it. - Add the rice: Fold in the partially cooked rice until it’s evenly distributed throughout the mixture. The pan will look very liquidy — that’s correct. The rice needs that liquid to finish cooking.
If you’re thinking “this looks too wet,” good. That’s the right reaction. - Transfer and top: If your skillet is oven-safe, you’re done here. Sprinkle the shredded cheese evenly over the top. If you’re using a baking dish, pour the mixture in, spread it even, then add the cheese.
I use my 12-inch cast iron for this. One pan from stovetop to table. That’s my kind of cooking. - Bake: Place the dish in the preheated oven and bake uncovered for 20 minutes. The cheese should be melted and bubbly, with brown spots on top. Let it rest for 5 minutes before serving — the rice finishes absorbing during this rest and the texture sets up properly.
If the cheese isn’t browned enough, turn on the broiler for the last 2 minutes. Watch it like a hawk — broilers do not negotiate.
Scoop it into bowls, top with fresh parsley or basil if you’re feeling fancy, and serve it with a spoon. You don’t need a knife. The whole thing is tender.
How I Meal Prep This for the Week
I make a double batch on Sundays and we eat it for lunches through Wednesday. It reheats beautifully, which is the thing I care most about in a casserole. If I’m feeling especially organized, I chop the peppers and onion the night before and store them in a zip-top bag in the fridge. That saves about 8 minutes on cooking day, which is 8 minutes I can spend sitting down while my coffee is hot.
- Fridge: Store in an airtight container for up to 4 days. The flavors actually get better on day two — the rice finishes absorbing and everything melds together.
- Freezer: Yes, it freezes well. Portion into individual containers and freeze for up to 3 months. Thaw overnight in the fridge before reheating.
- Reheat: Microwave in 30-second bursts, stirring between, until hot. Or reheat in a covered skillet over medium-low with a splash of water or broth to loosen it up. The oven works too — 350°F for 15 minutes in a covered dish — but the microwave is what actually happens on a Tuesday.
Things I Wish I’d Known the First Time
- Don’t over-stir after adding the rice: Stir it in gently and stop. If you keep mixing, the rice releases starch and the casserole gets gummy. Fold it in like you’re handling something delicate — even though it’s just rice.
- The rest step is not optional: I know you want to eat it immediately. We all do. But that 5-minute rest is when the rice finishes absorbing and the casserole goes from “soupy” to “cohesive.” If you skip it, you’ll be disappointed and the dish will have been right and you will have been wrong.
- Season the beef first, then the sauce: This is two different seasoning moments and they serve two different purposes. The beef needs salt to draw out its flavor. The sauce needs salt to balance the acid from the tomatoes. If you try to do all the seasoning at the end, you’ll oversalt the rice trying to fix the beef. I’ve done it. It’s not good.
- Even if you forget the rice until it’s fully cooked, it’s still fine: Use it anyway. It’ll be a little softer in the final dish but nobody will complain. The cheese covers a multitude of minor sins.
Swaps That Actually Work
- Ground turkey or chicken: Use 93/7 and add 1 tablespoon olive oil when browning. The flavor is milder, so bump the smoked paprika to 1 ½ teaspoons. My sister makes it this way and her kids don’t notice the difference.
- Dairy-free version: Use a good dairy-free shredded cheese — I like the Follow Your Heart mozzarella style. Add it in the last 10 minutes of baking so it melts without burning. The rest of the casserole is naturally dairy-free.
- Spicy version for adults: Add 1 diced jalapeño with the bell peppers and a pinch of cayenne with the paprika. I do a separate pan for the kids’ portion and add heat to mine after dishing theirs.
- Vegetarian version: Swap the beef for two cans of black beans (drained and rinsed) or 1 ½ cups cooked lentils. Use vegetable broth instead of beef. The texture is different but the flavor is solid. Marcus didn’t even ask if there was meat the first time I made it this way.
- Extra vegetable version: Add 1 cup diced zucchini or mushrooms with the peppers. They cook down and almost disappear, but they add depth. Simone has never noticed the zucchini. That is a win.
Questions I Get About This Recipe All the Time
Q: Why did my rice turn out mushy?
A: Two possible reasons. One: you cooked the rice too long before adding it to the casserole. It should be underdone — think “slightly crunchy” — so it finishes in the oven. Two: you over-stirred. Once the rice is in, fold gently and stop. The casserole will be fine, just a little softer than intended. It still tastes good, I promise.
Q: Can I make this with brown rice?
A: Yes, but you need to adjust. Pre-cook the brown rice for 20 minutes instead of 15 (it needs a head start), and add ½ cup extra broth to the casserole. The bake time stays the same. I’ve tested it and it works — it’s just nuttier and more toothsome.
Q: How long does this last in the fridge? Can I freeze it?
A: Four days in the fridge in an airtight container. Freeze for up to 3 months — I portion it into individual containers so I can grab one for lunch. Reheat in the microwave with a damp paper towel over the bowl to keep it from drying out. The oven works too: 350°F, covered, for 15-20 minutes.
Q: What do you serve with this?
A: My go-to sides are a simple green salad with lemon vinaigrette (the acid cuts the richness) or roasted broccoli with garlic. My kids love it with cornbread on the side — the sweetness balances the savory casserole. If I’m really tired, I just put a bagged salad on the table and call it a day.
More Recipes My Family Makes on Repeat
If you liked this one, here are a few others that get the same reaction at our table:
- One-Pot Cajun Chicken and Rice — Smoky, spicy, and done in one pan with minimal cleanup
- Celestine’s Sunday Red Beans — The recipe I measure everything else against
- Weeknight Skillet Lasagna — All the flavor of layered lasagna without the layering
This is the casserole I make when I want dinner to feel like a hug. It’s not fancy. It’s not complicated. It’s just the version of stuffed peppers that actually works for a real weeknight — where the rice is tender, the cheese is melted, and nobody’s standing at the stove for an hour while everyone else eats.
If you try it, drop a comment below — I love hearing how it goes for your family. And if your kids ask for it again, you’ll know you did it right.
📌 This stuffed pepper casserole recipe stays tender and never gets mushy — save it for the weeknight dinner you want to actually look forward to.
Stuffed Pepper Casserole That Tastes Like Sunday Dinner — in Under an Hour
Equipment
- 12-inch skillet or Dutch oven
- 9×13 baking dish
- Wooden Spoon
- Cutting Board
- Small Pot for rice
Ingredients
Main
- 1.5 pounds ground beef (80/20)
- 1 cup long-grain white rice
- 1 can (15 oz) crushed tomatoes
- 1 can (8 oz) tomato sauce
- 1 cup low-sodium beef broth
- 1.5 cups shredded mozzarella and cheddar mix
Produce
- 3 bell peppers (any colors, at least one red)
- 1 medium yellow onion, diced
- 3 cloves garlic, minced
Spices
- 1 teaspoon dried oregano
- 1 teaspoon smoked paprika
- 0.5 teaspoon black pepper
- to taste salt
For Topping (Optional)
- fresh parsley or basil
Instructions
- Preheat your oven to 375°F. Chop the onion and bell peppers into ½-inch dice. Mince the garlic. Grate the cheese if using block cheese.
- Start the rice: Cook 1 cup of rice in 2 cups of salted water for about 10 minutes — just under al dente. The grains should still have a tiny white core when you bite one. Drain and set aside.
- Brown the beef: In your largest skillet over medium-high heat, add the ground beef and season with ½ teaspoon salt and ¼ teaspoon pepper. Cook, breaking it up, until browned and no longer pink — about 6 minutes. Do not drain all the fat. Leave about a tablespoon in the pan.
- Cook the vegetables: Add the diced onion and bell peppers to the pan with the beef. Cook for 5-7 minutes, stirring occasionally, until the peppers soften and the onion turns translucent. Add the garlic, oregano, and smoked paprika. Cook one minute more until fragrant.
- Build the sauce: Pour in the crushed tomatoes, tomato sauce, and beef broth. Stir to combine, scraping any browned bits from the bottom of the pan. Add another ¼ teaspoon salt and ¼ teaspoon pepper. Let it come to a simmer — about 2 minutes.
- Add the rice: Fold in the partially cooked rice until it’s evenly distributed throughout the mixture. The pan will look very liquidy — that’s correct. The rice needs that liquid to finish cooking.
- Transfer and top: If your skillet is oven-safe, you’re done here. Sprinkle the shredded cheese evenly over the top. If you’re using a baking dish, pour the mixture in, spread it even, then add the cheese.
- Bake: Place the dish in the preheated oven and bake uncovered for 20 minutes. The cheese should be melted and bubbly, with brown spots on top. Let it rest for 5 minutes before serving — the rice finishes absorbing during this rest and the texture sets up properly. If the cheese isn’t browned enough, turn on the broiler for the last 2 minutes. Watch it carefully.
Notes
Related posts:
 High Protein Banana Pudding Yogurt That Doesn’t Taste Like a Protein Shake — Finally
 Easy High-Protein Philly Cheesesteak Mac That Beats Takeout Every Time (30 Minutes)
 Crock Pot Mississippi Beef Noodles That Never Turn Out Watery — Finally
 My Go-To Asian-Style Ground Beef Lettuce Wraps: Faster Than Delivery, Crispier Than Restaurant Versions