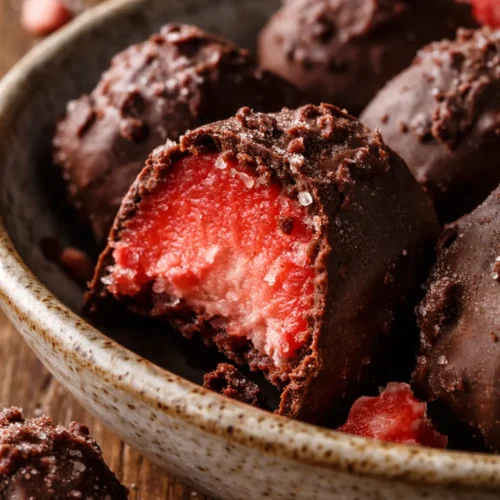
Frozen Chocolate Covered Strawberry Bites That Taste Like Pure Summer (3 Ingredients, No Oven)
The first time I made these frozen chocolate covered strawberry bites, I was desperately trying to save a flat of berries that was about to turn. My grandmother used to make something similar, though she called them "strawberry nibbles" and kept a secret stash in her deep freezer for surprise grandkid visits.
Equipment
- Mixing Bowl
- Fork
- Parchment Paper
- Freezer-safe baking sheet
Ingredients
Ingredients
- 16 oz fresh strawberries The heart of the whole operation. Please don't use frozen berries here—they release too much water when they thaw, which makes the filling icy and bland. You want ripe, fragrant, sweet berries. If they don't smell like strawberries at the store, they won't taste like them at home. If your berries are a bit tart, add an extra half tablespoon of sugar to balance them out.
- 1 tablespoon sugar This tiny amount makes a huge difference. It's not just about sweetness—sugar actually lowers the freezing point of the berries, giving you that creamy, scoopable texture instead of a hard, crunchy ice cube. Trust me on this one, don't skip it. Your freezer will thank you.
- 16 oz chocolate candy coating I use almond bark or Candiquik for convenience. It melts smoothly and hardens with a beautiful snap without needing to be tempered, which is a huge time-saver. If you want to use real chocolate, you'll need to temper it properly or it may bloom in the freezer. I've done it, but candy coating is the foolproof route for busy home cooks.
Instructions
- Mash the berries: Toss your 16 oz of fresh strawberries and 1 tablespoon of sugar into a medium bowl. Use a fork to mash them until they form a chunky puree. I like to leave a few small chunks for texture—it feels more like eating real fruit when there's a little something to bite into. You're looking for a consistency similar to a loose, rustic jam.
- Scoop and shape: Spoon 2-tablespoon-sized piles of the strawberry mixture onto your parchment-lined baking sheet. You should get exactly 6 even piles. Use the back of the spoon to gently shape them into round, flat-ish discs. A flat shape means a much better chocolate coating later, so take an extra second here to flatten them out a bit.
- Freeze until solid: Pop the baking sheet into your freezer (set to 0°F or below) and let them freeze for 3-4 hours. Don't rush this step. They need to be completely frozen solid all the way through. If you try to dip semi-frozen berries, the chocolate will slide right off into a puddle, and you'll be right back where I started with my first batch.
- Melt the chocolate: When your berries are rock-solid, it's time to melt your chocolate candy coating. Follow the package directions, but generally, this means microwaving in 30-second bursts at 50% power, stirring well between each burst. Patience here is absolutely key. Overheating the chocolate will make it thick and gloppy and impossible to work with.
- Dip and coat: Working one at a time, drop a frozen strawberry cluster into the melted chocolate. Use a fork to gently turn it and coat it completely. Lift it out, letting the excess chocolate drip back into the bowl, then place it back on the parchment paper. Don't worry if it's not perfect—the rustic look is part of the charm.
- Harden and enjoy: Once all 6 clusters are dipped, return the baking sheet to the freezer. Let the chocolate harden completely, which usually takes about 15-20 minutes. They're ready to eat immediately, or you can transfer them to an airtight container for long-term storage. I won't judge if you eat one right there over the sink.
Notes
Patience is a virtue, especially with the chocolate. Work in batches if it's hot out. Flatten the strawberry piles before freezing for best results. Store in an airtight container in the freezer for up to 3 months.