
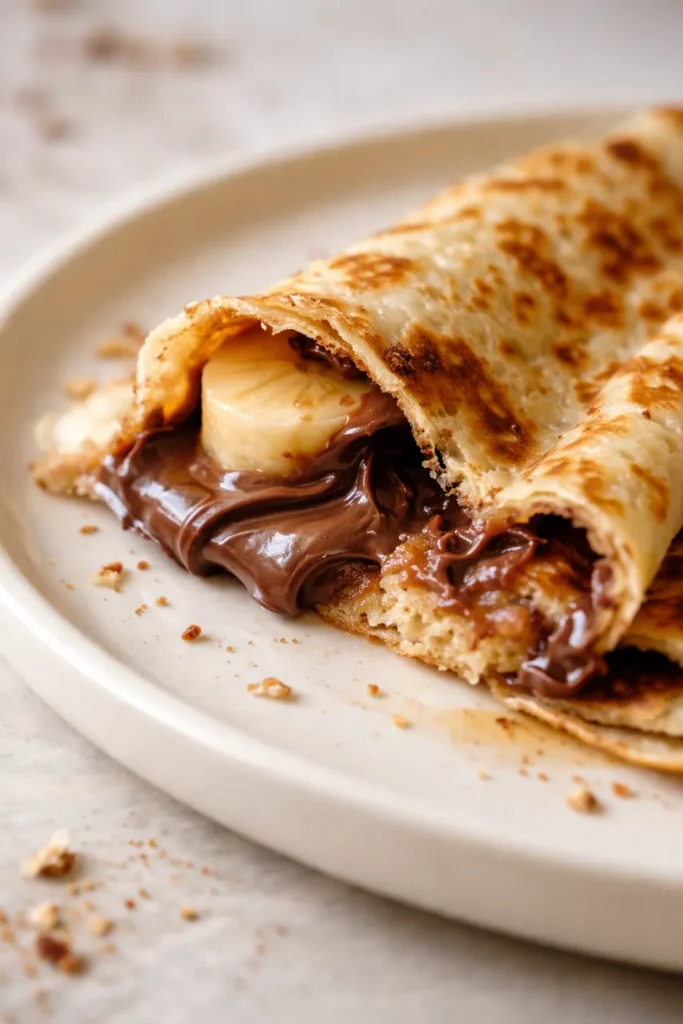
I tested this recipe six times over two weekends. The first batch had too much banana — the crepes were heavy and didn’t set properly. The second batch had too little — you couldn’t taste it at all. By batch four, I found the sweet spot: half a cup of mashed very ripe banana (about one medium banana with brown spots). That amount gives the batter natural sweetness and a subtle banana flavor without making the crepes soggy.
I also tested rest times: 15 minutes, 30 minutes, 1 hour, and overnight. The 15-minute rest produced crepes that were slightly chewy. The 30-minute rest was the turning point — tender, flexible, easy to fold. The overnight rest was even better, with a perfectly hydrated batter and zero bubbles. The 1-hour rest was fine but didn’t improve much over 30 minutes. So 30 minutes is the practical minimum, and overnight is the gold standard.
For the pan temperature, I tested low, medium-low, medium, and medium-high. Low heat made pale, rubbery crepes that stuck. Medium-high heat browned them in 30 seconds with raw spots. Medium heat was the winner — about 1 to 1½ minutes per side for a golden, lacy result. I also tested butter versus oil for greasing the pan. Butter wins for flavor and those crispy, golden edges.
The blender method was a breakthrough. The first time I whisked by hand, I had lumps that wouldn’t smooth out. The blender emulsifies everything in 20 seconds flat. If you try this recipe, start with the blender — it’s the easiest path to a perfect, silky batter.
Why the Blender Makes Perfect Crepe Batter
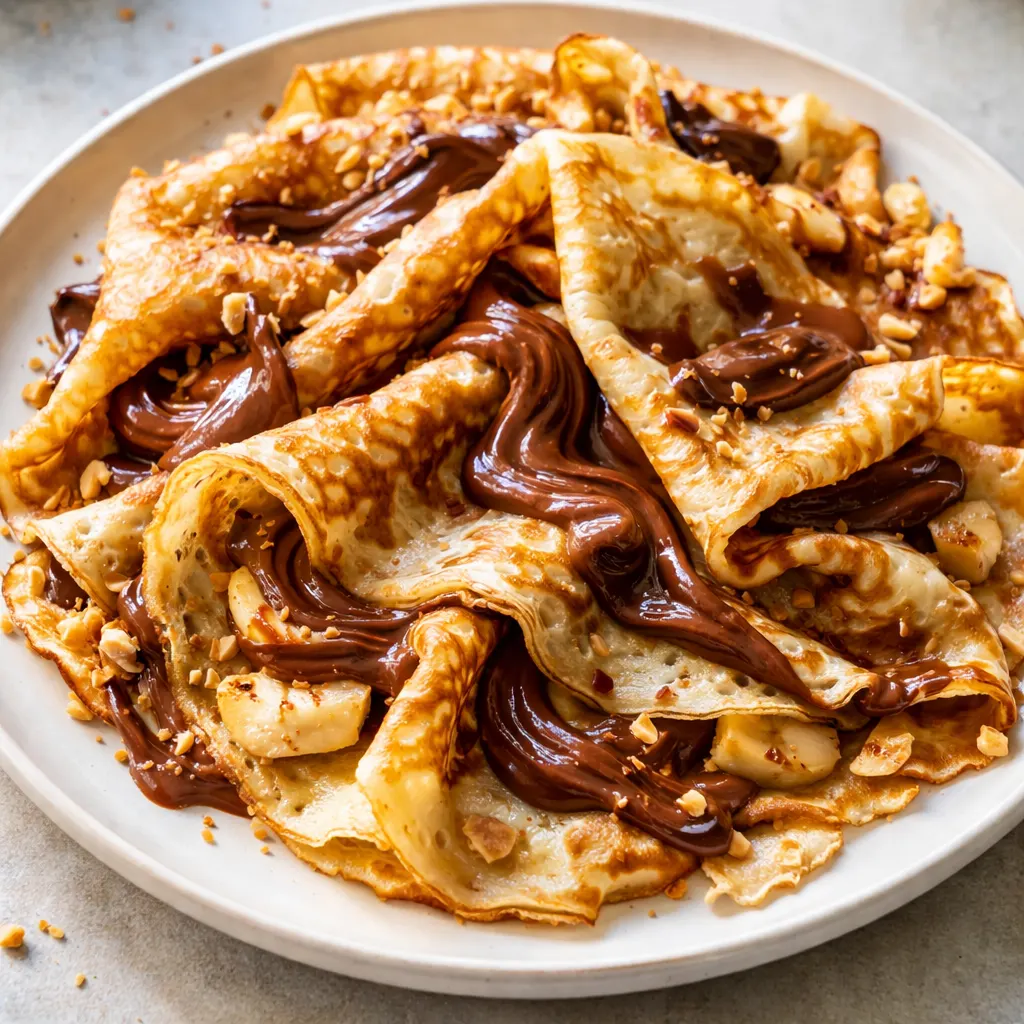
Dump everything in, blitz it smooth, and you’ve got a perfectly emulsified batter in 30 seconds. No lumps, no fuss, and no messy whisking. The blender aerates the batter just enough to give the crepes a slight tenderness without making them puff up like pancakes.
That rest time in the fridge is non-negotiable if you want tender crepes. It lets the gluten relax and the flour hydrate fully, which means your crepes bend instead of break when you fold them around the warm Nutella filling. Most home cooks find that 30 minutes is the sweet spot, but overnight is even better.
Everything You Need (And a Few Notes From Me)
- 1 cup all-purpose flour: Forms the base of the crepes. Don’t over-measure — spoon it into the cup and level it off.
- 2 tsp granulated sugar: Just enough sweetness to balance the Nutella. I sometimes use vanilla sugar for a little extra flavor.
- 1/4 tsp salt: Essential for balancing the sweet fillings.
- 1 1/2 cups whole milk: Whole milk gives the crepes a richer flavor and more tender texture than skim or plant-based milk will.
- 1/2 cup mashed banana (about 1 medium banana): Adds natural sweetness and moisture to the batter. Bananas are a great source of potassium, which you can read more about in the USDA nutritional data. Make sure it’s very ripe with brown spots for the best flavor.
- 3 large eggs: They give the crepes structure and richness. Cold eggs can seize the melted butter, so try to have them at room temperature if you remember.
- 3 Tbsp unsalted butter, melted (plus more for pan): Melted in the batter and used to grease the pan is the secret to the golden, crispy edges. I use salted butter sometimes and just omit the added salt.
- 1 Tbsp vanilla extract: A generous amount that rounds out the banana and hazelnut flavors beautifully.
- Nutella, for spreading: The star of the show. Use as much or as little as you like.
- 2 bananas, sliced: For the filling and the topping. Slice them right before you assemble to prevent browning.
- Confectioners’ sugar, for topping: That final snowy dusting that makes everything look bakery-worthy.
What to Pull Out Before You Start
- Blender: Any standard countertop blender works perfectly here. A high-speed blender isn’t necessary.
- 7- or 8-inch nonstick skillet (or crepe pan): The nonstick surface is critical for easy flipping and that perfect golden crust.
- Spatula: A thin, flexible silicone or metal spatula works best for loosening the edges.
- Plate: For stacking your finished crepes as you go.
A nonstick skillet is really the only way to go here — a stainless steel pan will work in a pinch but requires more butter and careful attention to keep them from sticking.
Let’s Make It (Step by Step)
This comes together faster than you’d think. Here’s my exact process, from blender to plate.
Rest the batter: This is the most important step. Give it at least 30 minutes or make it the night before.
- Blend: Place the flour, sugar, salt, milk, mashed banana, eggs, melted butter, and vanilla in your blender. Process until completely smooth, about 20-30 seconds. If possible, let the batter rest for at least 30 minutes in the fridge. Overnight is even better — the batter will be perfectly hydrated and any bubbles will settle.
- Heat: Place your 7- or 8-inch nonstick skillet over medium heat. Let it get hot — about a minute. Coat the pan with a thin layer of butter. If the butter immediately sizzles and foams, you’re at the right temperature.
- Swirl: Pour about ¼ cup of batter into the center of the pan. Immediately lift the pan off the heat and tilt and swirl it until the batter evenly coats the bottom. If you’re using a 7-inch pan, use slightly less than ¼ cup — you want them thin.
- Cook: Let it cook for about 1 to 1 ½ minutes. When the bottom is golden brown and the edges start pulling away from the pan and look lacy and dry, it’s ready. Use your fingers or a spatula to gently pull the edges up.
- Flip: Flip the crepe confidently. Cook for another minute on the second side. Transfer it to a plate. You can stack them right on top of each other — they won’t stick.
- Repeat: Continue with the remaining batter. Add a tiny pat of butter to the pan between each crepe to keep them from sticking and to maintain that golden color.
- Fill: Take a cooled crepe and spread a generous layer of Nutella over one half. Top with a few slices of fresh banana. Fold the crepe over to enclose the filling, then fold it in half again into a quarter-circle.
- Serve: Dust generously with confectioners’ sugar and add a few extra banana slices on top right before serving.
How I Meal Prep These for the Week
I love making a double batch of just the crepes on Sunday evening. That way, we have a fancy-feeling breakfast ready to go all week long. Just fill and fold when you’re ready to eat.
- Fridge: Stack the unfilled crepes with a small piece of parchment paper between each one. Wrap the stack tightly in plastic wrap. They’ll stay fresh for up to 3 days.
- Freezer: Yes! Freeze the same way — parchment between crepes, wrapped tightly, in a freezer bag — for up to 2 months. Thaw in the fridge overnight.
- Reheat: The best way is in a dry nonstick skillet over medium heat for about 20 seconds per side. It brings back the crispy edges. The microwave works but makes them soft and steamy.
Things I Wish I’d Known the First Time
- Rest the batter: I know it’s tempting to skip this, but don’t. The 30-minute rest is the difference between tender, flexible crepes and tough, rubbery ones. The flour needs time to fully hydrate.
- Pan temperature matters: Medium heat is the sweet spot. If the first crepe sticks or looks pale, your pan wasn’t hot enough. If it bubbles aggressively and browns in 30 seconds, the pan is too hot. Adjust as you go.
- Flip with confidence: Loosen the edges completely with your spatula. Slide it under the center, lift it slightly, and flip in one swift motion. It’s okay if the first one isn’t pretty — that’s the cook’s tax. Even if you mess this part up a little, it’ll still taste good — I’ve done it.
- Use the right pan: A 7- or 8-inch nonstick skillet is ideal. A larger pan will make crepes that are too thin and delicate to handle, while a smaller one might make them too thick.
Swaps That Actually Work
- Strawberry Nutella: Swap the banana for thinly sliced strawberries. The tartness of the berries cuts through the sweetness of the Nutella perfectly.
- Peanut Butter Banana: Spread a thin layer of creamy or chunky peanut butter on the crepe before adding the Nutella. The salty peanut butter is a game changer.
- Gluten-Free: Use a 1:1 gluten-free baking flour blend. Add an extra tablespoon of milk if the batter seems too thick — different blends absorb liquid differently.
- Lemon Sugar: Skip the Nutella and bananas. Fill the crepe with a squeeze of lemon juice and a sprinkle of granulated sugar, then fold. It’s the classic French version and it’s divine.
Troubleshooting Common Issues
Crepes Are Thick and Rubbery
Your batter was too thick. Add a splash of milk to thin it out until it’s the consistency of heavy cream. Also, make sure you didn’t over-mix it in the blender — a quick 20-second blitz is all you need. If you skipped the rest time, that will also cause toughness — the flour needs time to hydrate.
Crepes Stick to the Pan
The pan might not be hot enough, or it needs a fresh coat of butter. Make sure you’re using a nonstick skillet and heating it over medium for a full minute before adding the first batch of batter. If the butter doesn’t sizzle when you add it, the pan isn’t ready. Re-butter between every crepe for best results.
Crepes Tear When Flipping
Let the crepe cook longer on the first side — wait until the edges are lacy and dry and the bottom is golden brown. Loosen the entire edge with a thin spatula before flipping. If they’re still tearing, your batter might be too thin; add a tablespoon of flour.
Batter Has Lumps
The blender should eliminate lumps in 20-30 seconds. If you’re still seeing lumps, scrape down the sides of the blender jar and blitz again for 10 seconds. Make sure you add the liquid ingredients first, then the dry — this helps the blender pull everything down into the blade.
Crepes Cook Unevenly
Your pan might have hot spots. Rotate the pan while swirling the batter to distribute it evenly. If the center browns faster than the edges, try a slightly lower heat. If the edges brown before the center sets, the heat is too high.
How Do You Store These Crepes?
Q: How long does this last, and how should I store it?
A: Store unfilled crepes in an airtight container in the fridge for up to 3 days. Use parchment paper between each crepe so they don’t stick together.
Q: Can I make this ahead of time / freeze it?
A: Absolutely. You can freeze the unfilled crepes for up to 2 months. Layer them with parchment, wrap tightly in plastic wrap, and place in a freezer bag. Thaw in the fridge overnight before filling.
Q: What’s the best way to reheat crepes with Nutella and banana?
A: Reheat unfilled crepes in a dry nonstick skillet over medium heat for 20 seconds per side. It brings back the crispy edges perfectly. The microwave works but makes them soft.
Q: What do you serve with Nutella banana crepes?
A: A dollop of whipped cream and a side of fresh berries is my favorite pairing. For a bigger brunch spread, I love serving them with crispy bacon and a hot latte.
These banana crepes with Nutella have become my go-to for lazy weekend mornings, and I hope they become yours too. There’s something so special about pulling a warm, Nutella-filled crepe apart at the table — the softness of the crepe, the gooey hazelnut chocolate, the sweet banana slices all in one bite.
If you make these, drop a comment below and let me know how they turned out. I love hearing about your crepe adventures!
📌 Easy crepes with banana and Nutella — a silky blender batter makes them quick — save this for your next cozy weekend brunch or breakfast-for-dessert night.
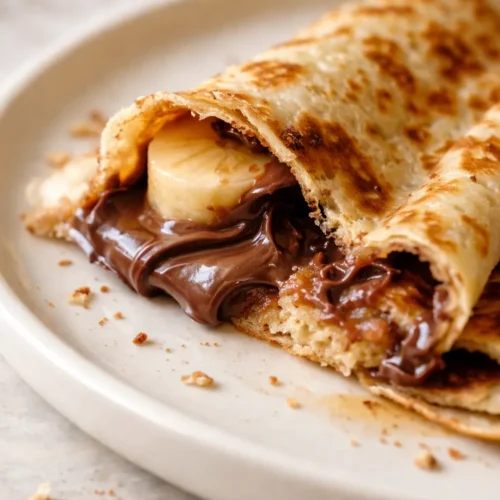
Nutella Banana Crepes So Easy You’ll Make Them Every Weekend
Equipment
- Blender
- 7- or 8-inch Nonstick Skillet
- Spatula
- Plate
Ingredients
For the Crepe Batter
- 1 cup all-purpose flour Spoon into cup and level off.
- 2 tsp granulated sugar I sometimes use vanilla sugar for a little extra flavor.
- 1/4 tsp salt
- 1.5 cups whole milk Whole milk gives the crepes a richer flavor and more tender texture.
- 0.5 cup mashed banana Make sure it’s very ripe with brown spots for the best flavor.
- 3 large eggs Room temperature recommended.
- 3 Tbsp unsalted butter plus more for greasing the pan
- 1 Tbsp vanilla extract
For the Filling and Topping
- Nutella for spreading
- 2 bananas sliced
- confectioner’s sugar for dusting
Instructions
- Blend: Place the flour, sugar, salt, milk, mashed banana, eggs, melted butter, and vanilla in your blender. Process until completely smooth, about 20-30 seconds. If possible, let the batter rest for at least 30 minutes in the fridge. Overnight is even better — the batter will be perfectly hydrated and any bubbles will settle.
- Heat: Place your 7- or 8-inch nonstick skillet over medium heat. Let it get hot — about a minute. Coat the pan with a thin layer of butter. If the butter immediately sizzles and foams, you’re at the right temperature.
- Swirl: Pour about ¼ cup of batter into the center of the pan. Immediately lift the pan off the heat and tilt and swirl it until the batter evenly coats the bottom. If you’re using a 7-inch pan, use slightly less than ¼ cup — you want them thin.
- Cook: Let it cook for about 1 to 1 ½ minutes. When the bottom is golden brown and the edges start pulling away from the pan and look lacy and dry, it’s ready. Use your fingers or a spatula to gently pull the edges up.
- Flip: Flip the crepe confidently. Cook for another minute on the second side. Transfer it to a plate. You can stack them right on top of each other — they won’t stick.
- Repeat: Continue with the remaining batter. Add a tiny pat of butter to the pan between each crepe to keep them from sticking and to maintain that golden color.
- Fill: Take a cooled crepe and spread a generous layer of Nutella over one half. Top with a few slices of fresh banana. Fold the crepe over to enclose the filling, then fold it in half again into a quarter-circle.
- Serve: Dust generously with confectioners’ sugar and add a few extra banana slices on top right before serving.
Related posts:
 Low Calorie Banana Bread That Doesn’t Taste Like a Compromise — Finally
 Puff Pastry Apple Tarts That Look Like a Bakery Made Them — with Only 15 Minutes of Effort
 Soft, Pillowy White Chocolate Pumpkin Snickerdoodles with a Cinnamon-Sugar Crunch
 White Chocolate Pumpkin Snickerdoodles: The Soft, Bakery-Style Version That Actually Works