
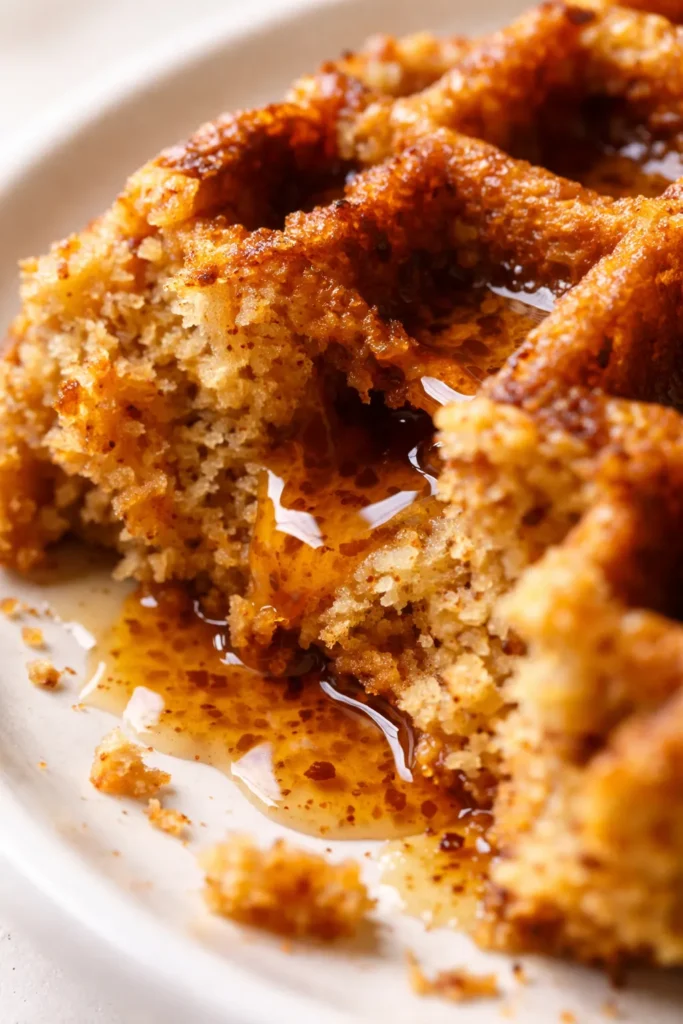
TLDR: These gluten free almond flour pumpkin waffles use a simple trick—arrowroot starch—to get that perfect crisp-on-the-outside, tender-inside texture. They come together in one bowl, take about 15 minutes hands-on, and freeze beautifully for busy mornings.
Testing These Waffles: The Journey to Crispy Perfection
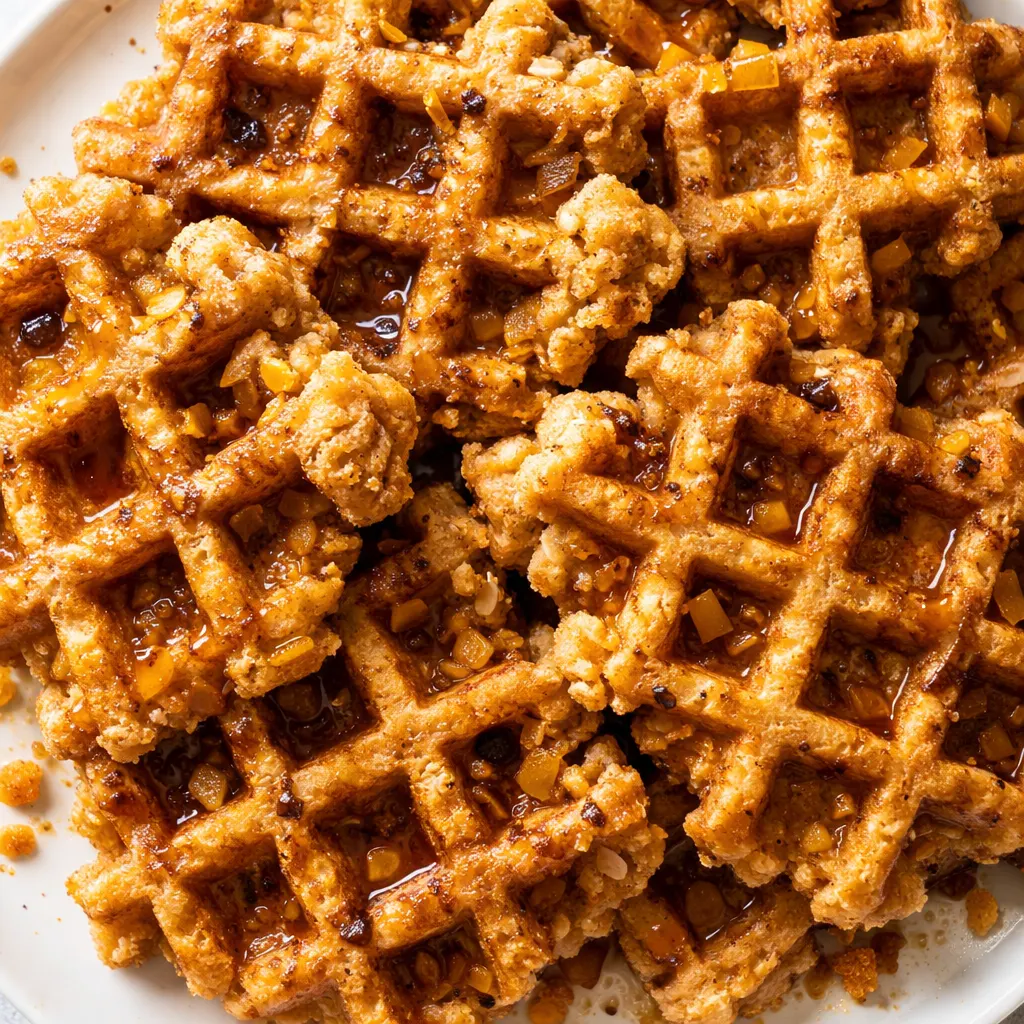
The very first time I made a batch of gluten free pumpkin waffles, I pulled them out of the iron and they looked beautiful—golden, puffed, exactly what I’d dreamed of. Then I took a bite. Soggy. Like I was eating pumpkin-flavored bread that’d been left out in the rain. I was so frustrated because the flavor was spot-on: warm cinnamon and nutmeg, sweet pumpkin, that cozy fall feeling. But the texture just wasn’t there. So I went back to the kitchen and started testing.
After four batches over two weekends, I finally cracked it. The winning combination was swapping out the standard gluten free flour blend for blanched almond flour, which gives you a naturally tender crumb, and adding just enough arrowroot starch to create that golden crisp. These gluten free almond flour pumpkin waffles are now my go-to fall breakfast—the ones my husband requests every single Saturday from October through December. They’re crisp on the outside, fluffy on the inside, and packed with exactly the right amount of pumpkin spice flavor. No soggy waffles here.
(Photo above: A stack of four golden-brown gluten free almond flour pumpkin waffles on a white plate, drizzled with maple syrup and sprinkled with a light dusting of cinnamon, shot from a slight overhead angle in warm morning light with a copper mug of coffee in the background.)
- Serves: 4 (about 8–10 waffles, depending on your iron) as breakfast or brunch
- Hands-On Time: 15 min | Total Time: 30 min
- Difficulty: Easy—if you can whisk, you can make these
- Cost per serving: ~$2.50 (almond flour adds a bit, but it’s still budget-friendly)
- Nutrition Estimate: 340 Calories, 12g Protein, 28g Carbs, 24g Fat, 3g Saturated Fat, 6g Fiber, 280mg Sodium per serving (2 waffles)
- Dietary Notes: Naturally gluten free and grain free; adaptable for dairy free
Why Arrowroot Starch Makes These Actually Crispy (Not Soggy)
The biggest challenge with gluten free waffles—especially ones made with almond flour—is that they tend to steam rather than crisp. Almond flour holds onto moisture, which means your waffle can end up soft and limp, the opposite of what you want. The fix is arrowroot starch (or tapioca starch), which absorbs excess moisture and creates that shatteringly crisp exterior. It’s the same trick pastry chefs use to lighten gluten-free baked goods, and it works beautifully here. When you cook the waffle at high heat—most waffle irons hit about 375–400°F—the starch quickly crisps the outside while the almond flour keeps the inside tender. Most bakers find that waffles cooked at a medium-high heat setting produce the best golden-brown crust without burning. The result is a waffle that holds its shape, doesn’t sog out under syrup, and actually tastes like a real weekend breakfast.
Another reason this method works: the eggs and avocado oil (or butter) create structure and fat, which means the waffle puffs up nicely in the iron and releases easily. If you skip the fat, the waffle will be dry and dense. If you skip the starch, you’ll get a lump that looks more like a pancake than a waffle. Each ingredient has a specific job, and together they make something that’s honestly better than most standard waffles I’ve had.
Everything You Need (Plus My Honest Notes)
- 1 2/3 cup blanched almond flour: This is your base. Blanched means the skins are removed, giving you a fine, light texture. Do not use almond meal (which has skins) or it’ll be gritty. I buy mine in bulk from Costco—it’s way cheaper per cup.
- 1/2 cup arrowroot powder (or tapioca starch): The secret to crisp waffles. Without this, you’ll get a soft, bread-like texture. I’ve used both arrowroot and tapioca and honestly can’t tell the difference—use whichever you have.
- 2 teaspoons baking powder: The lift. Make sure it’s fresh—old baking powder won’t give you puffy waffles. I keep mine in the fridge and replace every six months.
- 1 teaspoon cinnamon: Warm, cozy, classic. Freshly ground is best but pre-ground works fine.
- 1/2 teaspoon nutmeg: Adds that deep, slightly sweet spice note. Freshly grated is incredible here if you have it.
- 1/4 teaspoon salt: Don’t skip it—it balances the sweetness and brings out the pumpkin. Fine sea salt dissolves best.
- 1/2 cup pumpkin puree: Not pumpkin pie filling—just pure pumpkin. I always buy canned because from-scratch pumpkin takes forever and doesn’t taste noticeably better in waffles. A can is about 15 ounces, so you’ll have a little left over.
- 1/2 cup unsweetened almond milk (or your favorite milk): Adds moisture without heaviness. Regular milk, oat milk, or cashew milk all work—just don’t use sweetened vanilla milk or the waffles will be too sweet.
- 1/4 cup pure maple syrup: Sweetens the batter without refined sugar. Don’t use pancake syrup—it’s corn syrup-based and will alter the texture.
- 2 eggs: They bind everything together and give structure. Room temperature eggs mix more evenly—pull them out when you preheat the waffle iron.
- 3 tablespoons avocado oil (or melted butter): The fat that makes these crisp and tender. I use avocado oil because it’s neutral and dairy-free, but melted butter adds a wonderful richness. If you use butter, let it cool slightly so it doesn’t cook the eggs when you mix.
- 1 teaspoon vanilla extract: A flavor enhancer. Pure vanilla is best but imitation is fine in a pinch.
What to Pull Out Before You Start
- Waffle iron: A standard Belgian waffle iron works great. I use one that makes square waffles with deep pockets. If your iron is nonstick, you’ll still want a light coating of oil—more on that below.
- Large bowl: Big enough to whisk everything without splashing.
- Whisk: A wire whisk is all you need—no mixer required. A fork works in a pinch but will take a little more arm strength.
Let’s Make It (My Exact Process)
This comes together so fast that I usually preheat my waffle iron first, then mix everything while it’s heating. Timing works out perfectly.
Preheat and Prep: Turn your waffle iron on and let it heat up fully. Most irons take about 5 minutes. While it heats, gather your ingredients. Grease the iron with nonstick spray or brush it with a very thin layer of oil. I don’t recommend aerosol cooking spray—it can gum up your waffle iron over time and leave a sticky residue. Instead, use a pastry brush with a little avocado oil or a paper towel dipped in melted butter. It takes an extra 10 seconds and keeps your iron in good shape for years.
- Whisk: In a large bowl, combine 1 2/3 cup almond flour, 1/2 cup arrowroot, 2 teaspoons baking powder, 1 teaspoon cinnamon, 1/2 teaspoon nutmeg, and 1/4 teaspoon salt. Whisk until there are no clumps—almond flour can be a little stubborn, so take 30 seconds to break up any lumps. I like to sift the almond flour if I’m feeling fancy, but straight whisking works just fine.
- Add: Drop in 1/2 cup pumpkin puree, 1/2 cup almond milk, 1/4 cup maple syrup, 2 eggs, 3 tablespoons avocado oil, and 1 teaspoon vanilla. Whisk everything together until the batter is smooth and fully combined. It’ll be thicker than regular waffle batter—more like a thick pancake batter. That’s exactly right. Don’t overmix—just until there are no dry streaks. Overmixing can make the waffles tough.
- Scoop: Ladle or pour the batter into your hot, greased waffle iron. How much? Most standard irons use about 1/3 cup per waffle, but check your manufacturer’s instructions. It’s better to start with less—you don’t want batter seeping out the sides. I use a 1/3-cup scoop for my iron and get perfectly formed waffles. Trying not to overfill is key—a little batter goes a long way with almond flour because it puffs up nicely.
- Cook: Close the lid and cook according to your waffle maker’s instructions, typically 3–5 minutes. You’ll know it’s done when the steam slows down and the waffle is golden brown. If you peek too early, the waffle might stick or tear—let it cook fully before opening. My iron has a light that goes from red to green when it’s ready—super handy.
- Repeat: Transfer the cooked waffle to a wire rack (not a plate—a rack keeps them crisp). Repeat with the remaining batter. You’ll get about 8–10 waffles depending on your iron size. If you’re making a big batch, keep cooked waffles in a 200°F oven on a baking sheet lined with paper towels to stay warm and crisp while you finish the rest.
How I Meal Prep These for the Week
On Sunday afternoons, I make a double batch and stash them in the freezer. Then on busy mornings—when my alarm didn’t go off or I just don’t feel like cooking—I grab two waffles, pop them in the toaster, and have breakfast on the table in under 5 minutes. My husband calls them “emergency waffles” and he’s not wrong. They’re lifesavers for those mornings when you need something substantial but don’t have time to cook from scratch.
- Fridge: Store cooked and cooled waffles in an airtight container or zip-top bag in the fridge for up to 3 days. Place a paper towel at the bottom to absorb any excess moisture. Reheat in a toaster or toaster oven—the microwave makes them rubbery.
- Freezer: Yes, they freeze beautifully. Lay cooled waffles in a single layer on a baking sheet and freeze for 1 hour until solid. Then stack them in a freezer bag with parchment paper between each waffle. They keep for 2–3 months.
- Reheat: Pop frozen waffles directly into a toaster or toaster oven on a medium setting. No need to thaw. They come out perfectly crisp in 2–3 minutes.
Things I Wish I’d Known the First Time
- Don’t skip the arrowroot: The first batch I tried without it tasted great but the waffles were flat and soft. Arrowroot (or tapioca) is the magic ingredient that gives these waffles that bakery-style crisp. Trust me on this one—it makes all the difference.
- Let the batter rest for 5 minutes: After you whisk everything together, let the batter sit for 5 minutes before cooking. This gives the almond flour time to absorb some of the liquid, which helps the waffles hold together better. Even if you forget this step, it’ll still taste good—I’ve done it many times.
- Grease the iron well (but not too much): Almond flour waffles can stick a little more than standard ones because they’re lower in gluten. A thin, even layer of oil brushed on between each batch is your best bet. A paper towel dipped in melted butter works beautifully.
- Use a wire rack, not a plate: When you stack hot waffles on a plate, they steam and get soft. Transfer them to a wire rack immediately to keep that crisp exterior intact. If you’re making a big batch, the 200°F oven trick is gold.
Swaps That Actually Work
- Dairy-Free: Already dairy-free if you use avocado oil and a plant-based milk like almond, oat, or cashew. If you want to add richness, use coconut oil (melted and slightly cooled) instead of butter.
- Nut-Free: Almond flour is the star here, so this variation is tricky. You can try sunflower seed flour (not seed meal) but note that it will turn a greenish-gray when baked due to the chlorophyll reacting—still tastes fine, just not as pretty. A better option: swap the almond flour for an equal amount of oat flour (certified gluten free if needed). The texture will be a little denser but still delicious.
- Vegan: I’ve tested this with flax eggs (2 tablespoons ground flax + 6 tablespoons water) and it works okay, but the waffles are less tender. The texture is slightly more cake-like. Use maple syrup as the sweetener and avocado oil for fat. It’s still good, just different.
- Spiced-Up Version: Add 1/4 teaspoon ground ginger, 1/4 teaspoon cloves, and 1/4 teaspoon allspice to the dry ingredients for a full pumpkin pie spice blend. My mom makes these for Thanksgiving morning and they’re basically dessert.
- Pancake Variation: This batter works beautifully as pancakes too—just pour about 1/4 cup per pancake onto a greased griddle over medium heat. Cook 2–3 minutes per side until golden. The texture is fluffier than traditional pancakes.
Troubleshooting: Why Did My Waffles Not Get Crispy?
Q: Why did my waffles come out soft instead of crisp?
A: The most common reason is not using enough arrowroot starch. If you accidentally grabbed more almond flour instead of arrowroot, the batter will be too moist. Check your measurements—exactly 1/2 cup arrowroot is non-negotiable. Another possible cause: your waffle iron isn’t hot enough. Let it preheat fully—some irons take 5–7 minutes to reach the right temperature. The batter should sizzle slightly when it hits the plates. If all else fails, try cooking 30 seconds longer—a slightly darker waffle is a crispier waffle.
Q: Can I use coconut flour instead of almond flour?
A: No—they’re completely different beasts. Coconut flour is incredibly absorbent (it needs about 4 times the liquid) and would turn these waffles into dry, crumbly hockey pucks. If you need a coconut flour recipe, I’d find a specifically developed one rather than trying to substitute. For almond flour, stick with what’s listed here.
Q: How do I know when the waffle is done?
A: The steamer is your best friend here. When the waffle is actively cooking, steam billows out of the sides of the iron. When it’s nearly done, the steam significantly slows down or stops entirely. That’s your cue—the waffle is ready. Also, peek carefully: the waffle should be golden brown all over. If you open the iron too early and the waffle looks pale or wet, it’s not done yet. Close it and give it another 30–60 seconds. A fully cooked waffle will release easily from the plates; if it resists, it needs more time.
Q: Can I make these without eggs?
A: You can try using flax eggs (2 tablespoons ground flax mixed with 6 tablespoons water, left to sit for 5 minutes), but the texture will be noticeably different. The waffles will be less fluffy and more dense—more like a flatbread than a waffle. For the best results, I’d stick with eggs. If you’re vegan, go for the flax egg version but expect a heartier texture.
How Do You Store Gluten Free Almond Flour Pumpkin Waffles?
Q: How long do these waffles last, and how should I store them?
A: In the fridge, they’ll keep for 3 days in an airtight container or zip-top bag. Put a paper towel in the bottom to catch moisture so they don’t get soggy. In the freezer, they last 2–3 months. I like to wrap each waffle individually in plastic wrap before putting them in a freezer bag—that way I can grab just one or two without thawing the whole batch.
Q: Can I make the batter ahead of time?
A: You can, but the texture changes. Almond flour absorbs liquid over time, so the batter will thicken significantly if refrigerated. The waffles won’t puff up as nicely and might be denser. If you want to prep ahead, I strongly recommend cooking the waffles first and storing them in the fridge or freezer. It takes the same amount of time to reheat as it does to make fresh batter, and the results are much better.
Q: What’s the best way to reheat refrigerated or frozen waffles?
A: Toaster or toaster oven, hands down. Microwave makes them rubbery and sad. For refrigerated waffles, one cycle on medium-high is perfect. For frozen ones, use the toaster’s “frozen” setting if it has one, or just toast on medium-high for 2–3 minutes. The waffles should heat through and the edges should crisp up again. An air fryer at 350°F for 2–3 minutes also works well. Don’t oil them again before reheating—they’ll crisp up fine on their own.
Q: What do you serve with these waffles?
A: Pure maple syrup is non-negotiable for me—the real stuff, not the imitation. My favorite combos: a drizzle of maple syrup, a dollop of Greek yogurt, and a handful of toasted pecans on top. Or go savory-sweet: a fried egg, some sautéed greens, and a sprinkle of red pepper flakes. And if you’re feeling extra decadent, a pat of butter melting into the waffle cavities is pure heaven. For a fall brunch, I serve these with a side of bacon or turkey sausage, fresh fruit (pomegranate seeds are gorgeous here), and a cup of hot coffee.
These gluten free almond flour pumpkin waffles have become my secret weapon for fall breakfasts. They’re crisp, they’re flavorful, and they make me feel like I have my life together even on the most chaotic mornings.
If you try them, drop a comment below—I love hearing how they turn out for you!
📌 These gluten free almond flour pumpkin waffles turn perfectly crisp every time—save this autumn breakfast recipe for your next cozy weekend brunch.
Gluten Free Almond Flour Pumpkin Waffles That Are Actually Crispy (Not Soggy)
Equipment
- Waffle Iron
- Large Bowl
- Whisk
Ingredients
Main Ingredients
- 1 2/3 cup blanched almond flour Blanched, fine texture. Do not use almond meal.
- 1/2 cup arrowroot powder Or tapioca starch. Essential for crispness.
- 2 teaspoons baking powder Make sure it’s fresh.
- 1 teaspoon cinnamon
- 1/2 teaspoon nutmeg
- 1/4 teaspoon salt Fine sea salt
- 1/2 cup pumpkin puree Not pumpkin pie filling.
- 1/2 cup unsweetened almond milk Or your favorite milk. Not sweetened vanilla.
- 1/4 cup pure maple syrup Not pancake syrup.
- 2 eggs Room temperature.
- 3 tablespoons avocado oil Or melted butter, slightly cooled.
- 1 teaspoon vanilla extract Pure vanilla preferred.
Instructions
- Preheat and Prep: Turn your waffle iron on and let it heat up fully. Grease the iron with nonstick spray or brush it with a very thin layer of oil.
- Whisk: In a large bowl, combine the almond flour, arrowroot, baking powder, cinnamon, nutmeg, and salt. Whisk until there are no clumps.
- Add: Add the pumpkin puree, almond milk, maple syrup, eggs, avocado oil, and vanilla. Whisk until smooth and combined. Do not overmix.
- Scoop: Ladle or pour the batter into the hot, greased waffle iron. Use about 1/3 cup per waffle. Do not overfill.
- Cook: Close the lid and cook for 3-5 minutes until golden brown and steam slows down. Do not open the lid early.
- Repeat: Transfer the cooked waffle to a wire rack to keep crisp. Repeat with the remaining batter. Keep warm in a 200°F oven if desired.
Notes
Related posts:
 Low Calorie Banana Bread That Doesn’t Taste Like a Compromise — Finally
 Puff Pastry Apple Tarts That Look Like a Bakery Made Them — with Only 15 Minutes of Effort
 Soft, Pillowy White Chocolate Pumpkin Snickerdoodles with a Cinnamon-Sugar Crunch
 White Chocolate Pumpkin Snickerdoodles: The Soft, Bakery-Style Version That Actually Works