
- Serves: 2 as a dessert
- Hands-On Time: 5 min | Total Time: 24 hours 5 min
- Difficulty: Easy, even for a weeknight prep
- Cost per serving: ~$1.50
- Nutrition Estimate: ~160 Calories, 20g Protein, 12g Carbs, 3g Fat, 1g Saturated Fat, 1g Fiber, 280mg Sodium per serving
- Dietary Notes: Gluten-Free, High-Protein, Lower Sugar
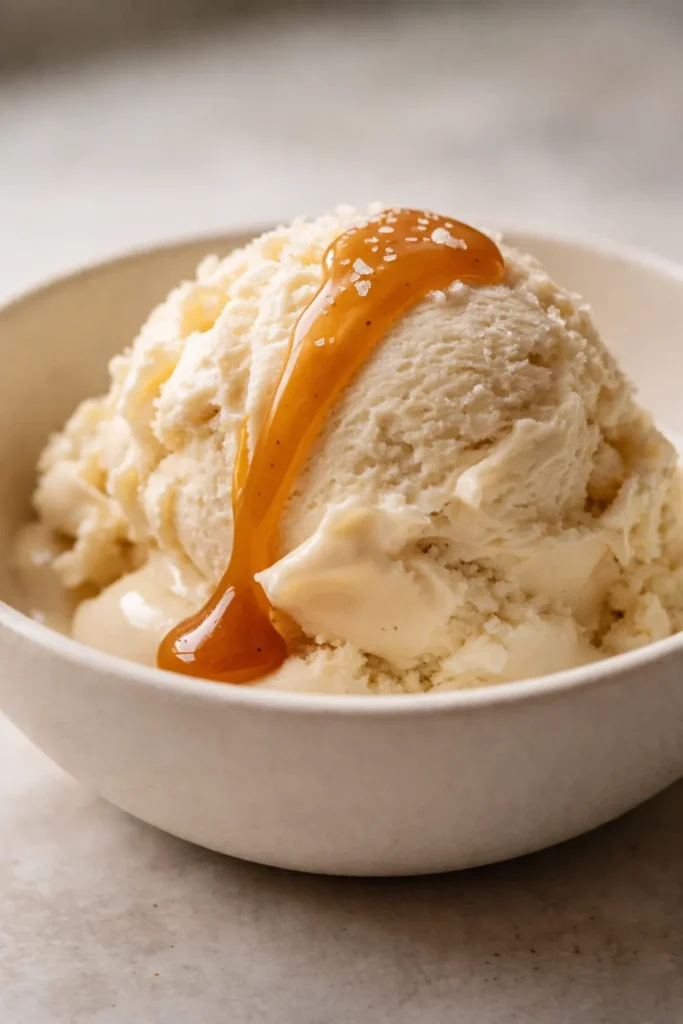
(Photo above: Top-down shot of a Ninja Creami pint filled with smooth, golden salted caramel ice cream, drizzled with warm caramel sauce and a sprinkle of flaky sea salt. A scoop rests on a dark marble countertop next to a small ceramic bowl holding a second scoop. Natural window lighting from the left casts soft shadows.)
Why Vanilla Pudding Mix Changes Your Salted Caramel Protein Ice Cream
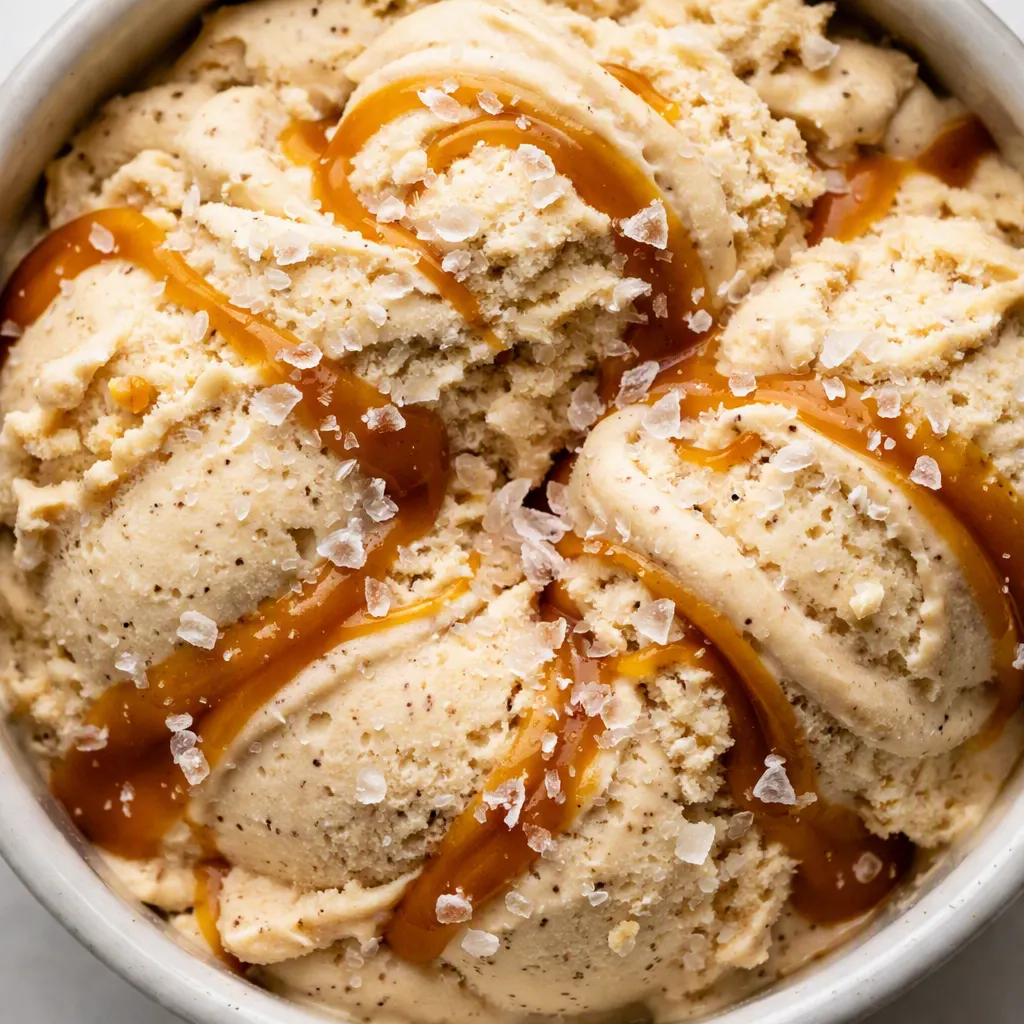
Ice cream texture comes down to two things: fat and stabilizers. Since we’re using skim milk and almond milk—both very low in fat—we need something to mimic that creamy mouthfeel. Vanilla pudding mix contains cornstarch and gums that bind the water in the milk, preventing the large ice crystals that cause iciness. A single tablespoon is all you need to go from a granita-like texture to something that scoops like Häagen-Dazs.
Fairlife skim milk is the other MVP here. It’s ultra-filtered, which means it has more protein and less sugar than regular milk. According to USDA nutritional data, products like ultra-filtered milk can contain nearly twice the protein of regular skim milk. More protein means a better, thicker base for your Ninja Creami to work with.
The 24-hour freeze isn’t a suggestion—it’s a requirement. If you rush it, the center won’t freeze solid enough, and you’ll end up with a soupy mess. Trust the process on this one.
Testing the Perfect Salted Caramel Protein Ice Cream: What I Learned
I didn’t nail this recipe on the first try. I tested five different stabilizers: xanthan gum, guar gum, cornstarch, gelatin, and instant vanilla pudding mix. The pudding mix won hands-down because it’s already formulated to work with dairy and non-dairy milks, and it adds just a hint of vanilla that complements the salted caramel. I also tested freeze times: 18 hours, 24 hours, and 36 hours. The 24-hour mark consistently produced the creamiest result with the fewest ice crystals. Anything less and the center was too soft; anything more and the outer edges became too hard for the blade to cut smoothly without the hot water bath. This is the recipe I’ve made over a dozen times since, and it never disappoints.
Everything You Need (Plus My Honest Notes)
- 1 cup Fairlife skim milk: The high protein content gives the ice cream a richer body than regular skim milk. Don’t swap this for plain skim milk—it really makes a difference in texture.
- 3/4 cup unsweetened almond milk: Keeps the calories low and adds a subtle nuttiness. Any unsweetened non-dairy milk works here—cashew or oat would be great too.
- 1 scoop salted caramel protein powder: A good-tasting protein powder is crucial here. I use a whey or whey-casein blend for the best texture. If your powder is very sweet, you might want to skip the extra syrup.
- 1 tbsp vanilla jello pudding mix: This is the secret weapon. Don’t skip it! It stabilizes the ice cream and gives it that classic creamy mouthfeel. It’s the difference between a successful pint and a frozen powder block.
- 1 tbsp sugar-free salted caramel syrup: Adds sweetness and that salted caramel flavor without the sugar. Torani or Skinny Syrup both work well. Regular caramel syrup works too, but it will add sugar and calories.
- Flaky sea salt (optional): The flaky salt on top is non-negotiable in my house—it makes the caramel flavor pop and adds a satisfying crunch against the smooth ice cream.
- Caramel sauce (optional): If you’re feeling fancy, a drizzle of warm caramel sauce over the top is pure magic.
What to Pull Out Before You Start
- Ninja Creami pint container: The one that comes with the machine—make sure it’s clean and dry.
- Handheld frother: A whisk works too, but a frother mixes the pudding mix in without clumps in seconds.
- Ninja Creami machine: Outer bowl and lid assembly required for the spin.
- Hot water: To run over the frozen pint before spinning. This helps the blade cut through smoothly and prevents motor strain.
Let’s Make It (Step by Step)
This is about as easy as it gets. A few minutes of mixing, a day of waiting, and about 5 minutes of spinning. The smell of caramel and vanilla as you mix the base is the first hint of what’s to come. By the time you hear the Creami whir to life, the anticipation is real.
- Mix: Add the Fairlife milk, almond milk, protein powder, pudding mix, and salted caramel syrup directly into the Ninja Creami pint container. Use your handheld frother to mix until everything is completely dissolved and smooth—no clumps allowed. This is crucial for the final texture. The base should look like a thin milkshake, pale golden and perfectly blended.
- Freeze: Place the pint container in your freezer on a completely level surface. Freeze for exactly 24 hours. Don’t rush this—if it’s not frozen solid, the Creami won’t process it correctly and you’ll end up with soup. When you pull it out, the top should be hard to the touch and not give at all when you press gently.
- Prep the spin: Remove the frozen pint from the freezer. Run it under hot tap water for exactly 60 seconds. This creates a thin layer of melt around the edges, which helps the blade cut through the frozen block without straining the motor. You’ll hear it start to crackle slightly as the water hits the container—that’s exactly what you want.
- First spin: Install the outer bowl and lid into your Ninja Creami machine. Lock the pint into the outer bowl. Press the “Lite Ice Cream” button. Watch it work its magic—the sound goes from a low grind to a smooth whir as the blade works through the frozen base.
- Check and respin: Remove the outer bowl lid. If the top looks powdery or crumbly (this happens sometimes depending on your protein powder), simply add it back into the machine and press the “Re-spin” button. This usually smooths it right out. If it’s still a bit dry, add a tablespoon of almond milk to the top before respinning.
- Enjoy: Once it’s creamy, scoop it into a bowl. Top with flaky sea salt and a drizzle of caramel sauce. Dig in immediately for the best soft-serve texture, or pop it in the freezer for 15-20 minutes for a firmer, scoopable consistency. The first bite should feel velvety on your tongue, with the salt cutting through the sweetness of the caramel.
Meal Prep Like a Pro
This recipe is tailor-made for meal prep. I usually make two or three pint containers at once so I always have one ready when the sweet tooth hits. It’s a lifesaver on busy weeks.
- Fridge: You don’t store the base in the fridge—freeze it immediately after mixing. The base can sit in the fridge for up to 3 days, but it’s best to freeze it right away to lock in the freshness.
- Freezer: Yes! The frozen, un-spun base stores beautifully in the freezer for up to 3 months. Just make sure the lid is on tight to prevent freezer burn.
- Reheat: Not applicable here. Just let the frozen pint sit at room temperature for 5 minutes before spinning if it’s been frozen for more than 24 hours, as over-freezing can make it too hard.
Things I Wish I’d Known the First Time
- Don’t skip the 60-second hot water bath. I know it sounds weird, but running the frozen pint under hot water ensures the blade doesn’t struggle. It’s the difference between a smooth spin and a machine that sounds like it’s dying. Trust me on this one.
- If it’s powdery after the first spin, respin it. Some protein powders are thirstier than others. The respin button is your best friend. If it’s still dry, add a tablespoon of almond milk to the top and spin again. It will come together like a dream.
- Use a level freezer. If your freezer is tilted, the ice cream will freeze unevenly. This can cause the blades to hit a hard spot and fail to process properly. I learned this the hard way after a very loud failure.
- Let it sit out for 5 minutes if it’s been frozen longer than 24 hours. Over-freezing can make it too hard for the first spin. A quick rest on the counter before the hot water bath makes all the difference.
Swaps That Actually Work
- Nut-Free: Use oat milk instead of almond milk. It’s creamier too and gives a fantastic texture.
- Vegan: Use a vegan protein powder (pea or soy-based) and oat milk. The pudding mix is usually not vegan, so try a cornstarch slurry (1/2 tbsp cornstarch + 1 tbsp water) as a stabilizer instead.
- Chocolate Salted Caramel: Use chocolate protein powder instead of salted caramel. Add 1 tbsp of unsweetened cocoa powder for an even deeper chocolate flavor.
- Peanut Butter: Swirl in 1 tbsp of powdered peanut butter or a little regular peanut butter after the first spin for a Reese’s-style treat that is absolutely incredible.
- Cookie Monster: Crush up a few Oreo thins and fold them in after the respin for a cookies-and-cream vibe that feels super indulgent.
- Ninja Creami pint container
- Handheld frother
- Ninja Creami machine
- Hot water (for running over pint before spinning)
- 1 cup Fairlife skim milk
- 3/4 cup unsweetened almond milk
- 1 scoop salted caramel protein powder
- 1 tbsp vanilla jello pudding mix
- 1 tbsp sugar-free salted caramel syrup
- Flaky sea salt optional
- Caramel sauce optional
- Mix: Add the Fairlife milk, almond milk, protein powder, pudding mix, and salted caramel syrup directly into the Ninja Creami pint container. Use your handheld frother to mix until everything is completely dissolved and smooth—no clumps allowed. This is crucial for the final texture. The base should look like a thin milkshake, pale golden and perfectly blended.
- Freeze: Place the pint container in your freezer on a completely level surface. Freeze for exactly 24 hours. Don’t rush this—if it’s not frozen solid, the Creami won’t process it correctly and you’ll end up with soup. When you pull it out, the top should be hard to the touch and not give at all when you press gently.
- Prep the spin: Remove the frozen pint from the freezer. Run it under hot tap water for exactly 60 seconds. This creates a thin layer of melt around the edges, which helps the blade cut through the frozen block without straining the motor. You’ll hear it start to crackle slightly as the water hits the container—that’s exactly what you want.
- First spin: Install the outer bowl and lid into your Ninja Creami machine. Lock the pint into the outer bowl. Press the “Lite Ice Cream” button. Watch it work its magic—the sound goes from a low grind to a smooth whir as the blade works through the frozen base.
- Check and respin: Remove the outer bowl lid. If the top looks powdery or crumbly (this happens sometimes depending on your protein powder), simply add it back into the machine and press the “Re-spin” button. This usually smooths it right out. If it’s still a bit dry, add a tablespoon of almond milk to the top before respinning.
- Enjoy: Once it’s creamy, scoop it into a bowl. Top with flaky sea salt and a drizzle of caramel sauce. Dig in immediately for the best soft-serve texture, or pop it in the freezer for 15-20 minutes for a firmer, scoopable consistency. The first bite should feel velvety on your tongue, with the salt cutting through the sweetness of the caramel.
- Don’t skip the 60-second hot water bath. I know it sounds weird, but running the frozen pint under hot water ensures the blade doesn’t struggle. It’s the difference between a smooth spin and a machine that sounds like it’s dying. Trust me on this one.
- If it’s powdery after the first spin, respin it. Some protein powders are thirstier than others. The respin button is your best friend. If it’s still dry, add a tablespoon of almond milk to the top and spin again. It will come together like a dream.
- Use a level freezer. If your freezer is tilted, the ice cream will freeze unevenly. This can cause the blades to hit a hard spot and fail to process properly. I learned this the hard way after a very loud failure.
- Let it sit out for 5 minutes if it’s been frozen longer than 24 hours. Over-freezing can make it too hard for the first spin. A quick rest on the counter before the hot water bath makes all the difference.
Troubleshooting Your Salted Caramel Protein Ice Cream
Even with a perfect recipe, things can go sideways. Here are the most common issues I’ve run into and how to fix them fast.
Why Is My Ice Cream Still Powdery After the First Spin?
This usually happens when there isn’t enough liquid in the base for your specific protein powder. Whey isolates are notorious for this. The fix is easy—add a tablespoon of almond milk to the top of the spun ice cream and hit the “Re-spin” button. It should come together perfectly into a creamy soft serve.
Why Is My Ice Cream Icy After Spinning?
Icing usually means the pudding mix was skipped or the pint wasn’t frozen solid enough. The stabilizers in the pudding mix are crucial for preventing ice crystals. Make sure you’re using exactly 1 tablespoon and that your freezer is cold enough (0°F or below). If you’ve already frozen it and it’s icy, try respinning with a teaspoon of melted coconut oil mixed in.
Why Does My Ice Cream Taste Like Protein Powder?
This happens when the protein powder isn’t fully mixed in, or if you’re using a low-quality powder. Make sure you whisk or froth the base until completely smooth—no streaks of white powder left. If your powder has an artificial aftertaste, the pudding mix and caramel syrup help mask it nicely. You can also add a drop of vanilla extract to round out the flavor.
Can I Use Regular Skim Milk Instead of Fairlife?
You can, but the texture won’t be as creamy. Fairlife has more protein and less water, which gives you a much better ice cream structure. If you use regular skim, I recommend adding 1 extra tablespoon of pudding mix to help with stabilization.
Can I Make This Dairy-Free?
Yes! Use a dairy-free protein powder (pea or soy-based) and swap the Fairlife for full-fat oat milk. Oat milk’s higher fat content will help mimic the creamy texture. Skip the milk-based pudding mix and use 1/2 tbsp of cornstarch as a stabilizer instead.
Can You Freeze Ninja Creami Ice Cream After Spinning?
How long does this ice cream last in the freezer after spinning?
You can store it in the freezer for up to 2 weeks. Just be aware that it will freeze solid again. When you want to eat it, run the pint under hot water for 30 seconds and re-spin it on the “Lite Ice Cream” setting. It will come back to life beautifully.
Can I make the base ahead of time before freezing?
Absolutely. You can mix the base and keep it in the fridge for up to 3 days before freezing. Just make sure to shake it well or re-froth it before pouring it into the pint container to freeze so the ingredients are evenly distributed.
What’s the best way to re-spin leftovers?
The Creami is designed to handle frozen blocks, so yes! If you have leftovers, level the top of the ice cream by pressing it down with a spoon, run the pint under hot water for 30 seconds, and spin on “Lite Ice Cream” again. It works beautifully.
What do you serve with this ice cream?
Honestly, it stands alone perfectly with just the flaky salt. But if you want to gild the lily, serve it alongside a warm brownie, some fresh berries, or a slice of warm apple crisp. The contrast between the cold, smooth ice cream and the warm, gooey brownie is pure comfort.
Ninja Creami Salted Caramel Protein Ice Cream That’s Actually Creamy (Not Icy or Powdery)
Equipment
Ingredients
Ingredients
Instructions
Notes
Related posts:
 Frozen Chocolate Covered Strawberry Bites That Taste Like Pure Summer (3 Ingredients, No Oven)
 Apple Pie Rice Krispie Treats for Last-Minute Fall Desserts: 5 Minutes, No Oven, All the Flavor
 Cherry Rice Krispie Treats That Taste Like a Chocolate-Covered Cherry — in 20 Minutes Flat
 Creamy Pumpkin Protein Shake for Busy Mornings: Tastes Like Pie, Takes 5 Minutes