
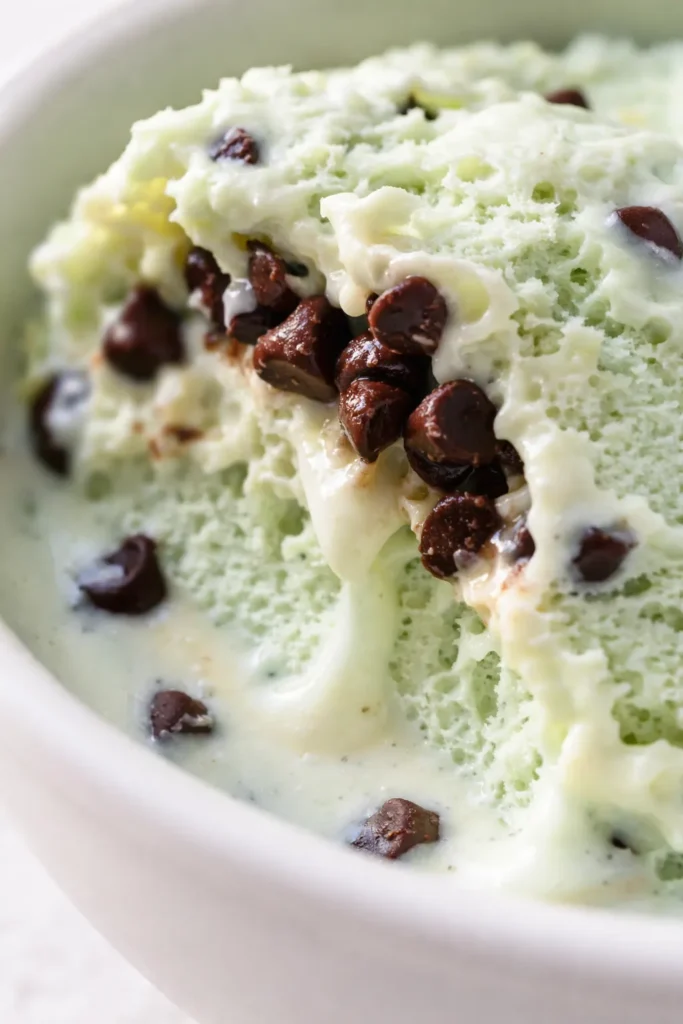
TLDR: This Ninja Creami mint chip ice cream requires just 5 minutes of hands-on prep. The secret to a smooth, scoopable texture is a single tablespoon of cream cheese whisked into the base before freezing. Expect a rich, creamy mint base loaded with dark chocolate chips in every bite.
The first time I made mint chip in my Ninja Creami, I was so excited I practically hovered over the machine. It spun up beautifully, but the texture? Icy. Crumbly. Not the creamy, scoopable pint I was dreaming of. I stood there, spoon in hand, feeling that familiar pang of homemade ice cream failure. You know the one. I was determined to crack the code. After a few test batches—okay, honestly, it was four—I realized the missing link was fat, and not just from the milk and cream. A single tablespoon of cream cheese, whisked into the base, changes everything. It adds a velvety richness without any cheesecake flavor, and it keeps the ice cream smooth even after a few days in the freezer. This homemade mint chocolate chip is now on permanent rotation in our house. The scent of peppermint extract filling the kitchen instantly transports me to childhood summers. It’s naturally green from a few drops of coloring (or leave it out!), and packed with so many mini chocolate chips that you get some in every single bite. The first spoonful yields that satisfying crunch of chocolate against a silky, cold base—pure bliss.
- Serves: 2 as a dessert
- Hands-On Time: 5 min | Total Time: 8 hrs 5 min (includes freezing)
- Difficulty: Easy—super straightforward, mostly hands-off freezing
- Cost per serving: ~$1.50
- Nutrition Estimate: 450 Calories, 6g Protein, 52g Carbs, 17g Fat, 10g Saturated Fat, 1g Fiber, 160mg Sodium per serving
- Dietary Notes: Vegetarian. Naturally gluten-free (check your chocolate chips).
(Photo above: An overhead shot of a Ninja Creami pint of mint chip ice cream resting on a marble countertop. A scoop is resting inside the pint, revealing a perfectly smooth, pale green surface generously studded with mini chocolate chips. Natural daylight from the side highlights the creamy, dense texture.)
Why Cream Cheese Makes Ninja Creami Mint Chip So Creamy (Not Icy)
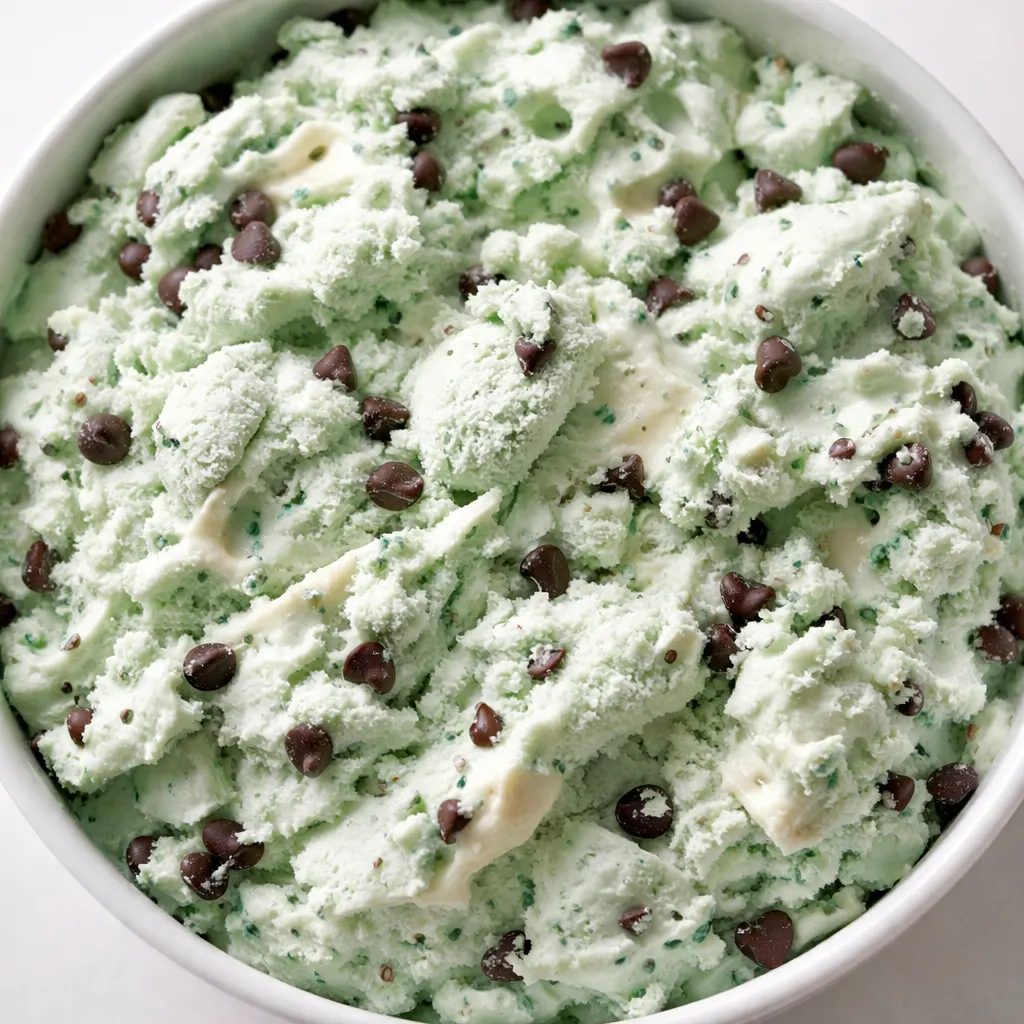
If you’ve been making Ninja Creami recipes for a while, you know the struggle: sometimes they come out perfectly, and sometimes you’re left with a crumbly, icy mess. The secret to a consistently creamy texture lies in stabilizers and fat content. Cream cheese is the perfect solution because it contains both. It adds a small amount of fat and a lot of stabilizing power, which binds the water in the milk and half and half. This prevents large ice crystals from forming while the base freezes solid. Most home ice cream machines struggle with ice crystals forming when the water content is too high, and the cream cheese helps bind that water so you get a silky scoop every time. I was genuinely skeptical about putting cream cheese in a sweet ice cream, but you truly cannot taste it at all. It simply makes the base incredibly lush and scoopable straight out of the freezer—no need to let it sit on the counter for ten minutes before you can dig in.
Testing the Recipe: How I Got the Perfect Ninja Creami Mint Chip Texture
The first two times I made this Ninja Creami mint chip, the texture came out brittle and icy—a classic sign of too much water and not enough stabilizer. I tried swapping in an extra egg yolk for batch three, which helped a little, but it still wasn’t that dense, premium scoop I was chasing. Batch four was the winner. I whisked in a single tablespoon of room-temperature cream cheese until it was completely smooth before freezing. The difference was immediate. Even before it hit the freezer, the base looked glossier and felt thicker on the spoon. After a full 24-hour freeze and a spin on the “ICE CREAM” setting, it scooped like a dream: creamy, dense, and perfectly smooth with no ice crystals.
But I didn’t stop there. I tested the same base with different freezing times: 8 hours, 12 hours, and 24 hours. The 8-hour pint was still slightly soft in the center and didn’t process evenly—the machine struggled and left dry, crumbly bits. The 12-hour pint was better but still had a slightly uneven texture after spinning. Only the fully 24-hour frozen pint gave that luscious, uniform scoop. So yes, patience pays off. I also tested leaving out the cream cheese entirely in one control batch—that batch went straight into the trash after one bite. The cream cheese is non-negotiable.
Everything You Need for Ninja Creami Mint Chip (Plus My Honest Notes)
- 1 Cup Milk (Whole Milk preferred): This forms the base of your ice cream. Whole milk gives the best creamy texture and mouthfeel, but honestly, 2% works perfectly if that’s what you have in the fridge.
- ⅔ Cup Half and Half: This is where most of the fat comes from. Don’t skip it or swap it for more milk—if you do, you’ll miss that rich, creamy mouthfeel and end up with a much icier result.
- ⅓ Cup Sugar: Standard granulated sugar dissolves easily into the cold liquid and is essential for keeping the base scoopable at freezer temperatures. It acts as an anti-freeze so your ice cream isn’t a rock.
- 1 Tablespoon Cream Cheese, room temperature: The hero ingredient. Room temperature is absolutely crucial here—if it’s cold, it will leave tiny white lumps in your base. Let it sit out for 20 minutes before you start.
- ½ Teaspoon Peppermint Extract: The star of the show. Peppermint extract is stronger and more “candy-like” than spearmint, giving you that classic mint chip flavor. Start with ½ teaspoon and taste the base—you can always add a tiny drop more after processing if you want it stronger.
- 4 Drops Green Food Coloring (Optional): Totally optional for flavor, but it does make it look like the classic mint chip we all grew up loving. I add it when I’m feeling nostalgic, and leave it out when I want a more “natural” look. Use gel or liquid coloring.
- ¼ Cup Mini Chocolate Chips: You need the “chip” in your mint chip! I highly recommend mini chocolate chips for this. They distribute much more evenly throughout the pint than full-size chips, so you get chocolate in almost every single bite.
What to Pull Out Before You Start
- Ninja Creami machine: Obviously! This recipe is designed specifically for this appliance.
- Ninja Creami Pint Container (with lid): Where the magic happens. Make sure it’s clean and completely dry before you pour in the base.
- Mixing bowl & whisk: To combine the ingredients thoroughly. A small bowl is fine.
- Measuring cups & spoons: Accuracy is your friend here, especially with the cream cheese and peppermint extract.
- Fine mesh strainer (optional but recommended): If you’re worried about your cream cheese being slightly lumpy, straining the base before pouring it into the pint guarantees a perfectly smooth final texture.
Making Ninja Creami Mint Chip: My Exact Process
This method is dead simple. The hardest part is waiting for the pint to freeze solid!
Prep the Base: Make sure your Ninja Creami pint container is clean and completely dry. You want absolutely no water droplets in there.
- Mix the liquids: In your mixing bowl, whisk together the milk, half and half, and granulated sugar. Whisk until the sugar is fully dissolved—about 30 seconds to a minute. Listen for the gentle slosh of the liquid as it comes together.
- Add cream cheese: Toss in the room-temperature cream cheese. Whisk vigorously until it is completely smooth and fully incorporated. This is the most important step—no lumps allowed! If you see any tiny white specks, keep whisking. The base should feel silky between your fingers.
- Flavor & color: Whisk in the peppermint extract and the green food coloring (if using). Taste the base here—it should taste slightly sweeter and more intensely minty than you want the final ice cream, because freezing dulls both the sweetness and the flavor.
- Freeze: Pour the mixture into your Ninja Creami pint container. Place it on a perfectly level surface in your freezer. This is surprisingly important—if it’s tilted, the final ice cream will spin unevenly. Freeze for a minimum of 8 hours, but 24 hours is ideal. The pint must be completely solid all the way through for the Creami to work properly.
- Process the ice cream: Remove the pint from the freezer. Take off the lid and place it into the outer bowl of the Ninja Creami machine. Lock the handle into place and select the “ICE CREAM” setting. Let it do its thing! You’ll hear the machine whir as it transforms the frozen block into a creamy delight.
- Add the mix-ins: Once the ice cream base is fully processed, remove the pint from the outer bowl. Use a spoon to create a well (a hole) in the very center of the ice cream, all the way down to the bottom. Pour the mini chocolate chips into this well. Lock the lid back on and select the “MIX-IN” setting.
- Enjoy: Your Ninja Creami mint chip is ready to eat immediately! It will have a soft-serve, perfectly scoopable texture. If you prefer a firmer, more traditional scoop, just place the lid back on the pint and pop it in the freezer for 2-3 hours.
Make-Ahead Notes for Your Ninja Creami Mint Chip
If you’re anything like me, you want to do the work once and reap the rewards all week. This recipe is perfect for a Sunday prep session. I usually make two pints at a time so we have one for now and one for later in the month.
- Fridge: N/A. The base needs to be frozen solid before you can even think about processing it.
- Freezer (unprocessed base): Yes! You can make the base, pour it into your Creami pint, and freeze it for up to 2 months. Just make sure the lid is tightly sealed so it doesn’t pick up any freezer smells.
- Freezer (processed ice cream): Yes. If you have leftovers after processing, simply press a piece of plastic wrap directly onto the surface of the ice cream before putting the lid on. This prevents ice crystals from forming on top. It will keep well for 2-3 weeks.
- Reheat/Re-spin: If the processed ice cream freezes into a really hard block, just add a splash of milk (about a tablespoon) and run it through the “ICE CREAM” or “LIGHT ICE CREAM” setting again. It comes right back to creamy perfection.
Troubleshooting Your Ninja Creami Mint Chip
Even after dozens of batches, things can still go sideways. Here are the most common issues I’ve encountered and how to fix them:
- The ice cream turned out icy or crumbly: This almost always means your base didn’t have enough fat or stabilizer. Next time, be sure to use cream cheese and don’t swap the half-and-half for milk. Also check that you froze the pint for a full 24 hours—a partially frozen center can cause uneven processing.
- The pint didn’t spin all the way through: The machine stopped and left a powdery top? This usually happens when the base is too cold or too dry. Add a tablespoon of milk, lock it back in, and run the “RE-SPIN” setting. If it’s still dry, add another splash and try again.
- Little white lumps of cream cheese in the ice cream: Your cream cheese was too cold. Next time, let it sit out for 20 minutes before whisking. You can also push the base through a fine-mesh strainer before freezing to catch any stray lumps.
- The mint flavor is too weak or too strong: Peppermint extract varies in potency. I recommend starting with ½ teaspoon and tasting the base. If it’s not minty enough after processing, you can stir in a few more drops by hand (but be careful—a little goes a long way).
- The chocolate chips all sank to the bottom: This happens if your base is too thin before the mix-in cycle. Try making sure the base is fully chilled before processing (not just frozen). Also, using mini chips helps them suspend better than full-size chips.
Things I Wish I’d Known the First Time
- The cream cheese must be room temp: I know I’ve said this a few times, but it’s truly the key. I almost ruined a batch by using cold cream cheese—it left tiny white specks throughout my beautiful green base. Let it sit on the counter for 20 minutes, or if you’re in a rush, microwave it for 5 seconds.
- Don’t overdo the peppermint extract: Peppermint extract is potent stuff. It’s easy to go overboard thinking “more flavor is better,” but too much will make your ice cream taste like toothpaste. Start with ½ teaspoon and taste it. You can always add a couple more drops after it’s processed if needed.
- Freeze the pint on a level surface: This is something I learned the hard way. My freezer has a slight tilt to one side, and the first batch of ice cream I made was noticeably thicker on one side when it came out of the Creami. Now I place the pint on a small, level cutting board in the freezer, and it works like a charm.
- Reserve some chips for the top: After the mix-in cycle finishes, I like to sprinkle a few extra mini chocolate chips on top of the pint. It makes the finished ice cream look absolutely gorgeous for serving, and it gives you that little chocolate crunch right at the first bite.
Make It Yours: Easy Variations for Your Ninja Creami Mint Chip
- Dairy-Free / Lactose-Free: Yes, you can make this vegan! Swap the milk for full-fat oat milk and the half and half for a can of full-fat coconut cream (the solid part from the top of a can). Omit the cream cheese or use a vegan cream cheese alternative (make sure it’s at room temperature). The texture will be slightly different—more coconutty—but still delicious.
- Chocolate Mint Chip: Want a double-chocolate experience? Add 1 tablespoon of unsweetened cocoa powder to the base when you whisk the sugar. You’ll get a subtle chocolate undertone that pairs beautifully with the mint and chocolate chips.
- Mint Oreo: Instead of (or in addition to) chocolate chips, use crushed Oreo cookies. Add them in the mix-in cycle and you’ll have a cookies-and-cream mint dream.
- Mint & Fudge Swirl: After processing, spoon a layer of hot fudge sauce (slightly cooled) into the middle of the pint and use a knife to gently swirl it through. Freeze for another hour and enjoy ribbons of fudge in every scoop.
- Alcohol-Infused: A tablespoon of crème de menthe liqueur adds extra mint flavor and helps keep the ice cream scoopable at lower temperatures. Reduce the peppermint extract to ¼ teaspoon if adding the liqueur.
Final Thoughts: Go Make This Ninja Creami Mint Chip
I don’t say this lightly—this is the best homemade mint chip I’ve ever eaten, and it comes from a machine I was skeptical of at first. The cream cheese trick is a game-changer, and once you taste the creamy, non-icy texture, you’ll never go back to store-bought pints. Whether you’re a Ninja Creami veteran or a newbie, this recipe for Ninja Creami mint chip ice cream is foolproof as long as you follow the steps: room-temp cream cheese, a full 24-hour freeze, and a level surface. I’d love to hear how your batch turns out. Drop a comment below or tag me in your photos—nothing makes my day like seeing someone else enjoy a scoop of homemade perfection. If you’re looking for more Ninja Creami inspiration, check out my other recipes like strawberry cheesecake or salted caramel—each one uses the same creamy base technique. Happy churning!
Ninja Creami Mint Chip Ice Cream: The 5-Minute Prep Version That’s Perfectly Creamy Every Time
Equipment
- Ninja Creami machine
- Ninja Creami pint container
- Mixing Bowl
- Whisk
- Measuring cups
- Measuring spoons
- Fine-mesh strainer
Ingredients
For the Ice Cream
- 1 cup whole milk Whole milk preferred, 2% also works
- ⅔ cup half and half
- ⅓ cup granulated sugar
- 1 tablespoon cream cheese room temperature
- ½ teaspoon peppermint extract
- 4 drops green food coloring optional
- ¼ cup mini chocolate chips
Instructions
- Prepare the base: Make sure your Ninja Creami pint container is clean and completely dry. You want absolutely no water droplets in there.
- Mix the liquids: In your mixing bowl, whisk together the milk, half and half, and granulated sugar. Whisk until the sugar is fully dissolved—about 30 seconds to a minute. Listen for the gentle slosh of the liquid as it comes together.
- Add cream cheese: Toss in the room-temperature cream cheese. Whisk vigorously until it is completely smooth and fully incorporated. This is the most important step—no lumps allowed! If you see any tiny white specks, keep whisking. The base should feel silky between your fingers.
- Flavor & color: Whisk in the peppermint extract and the green food coloring (if using). Taste the base here—it should taste slightly sweeter and more intensely minty than you want the final ice cream, because freezing dulls both the sweetness and the flavor.
- Freeze: Pour the mixture into your Ninja Creami pint container. Place it on a perfectly level surface in your freezer. This is surprisingly important—if it’s tilted, the final ice cream will spin unevenly. Freeze for a minimum of 8 hours, but 24 hours is ideal. The pint must be completely solid all the way through for the Creami to work properly.
- Process the ice cream: Remove the pint from the freezer. Take off the lid and place it into the outer bowl of the Ninja Creami machine. Lock the handle into place and select the “ICE CREAM” setting. Let it do its thing! You’ll hear the machine whir as it transforms the frozen block into a creamy delight.
- Add the mix-ins: Once the ice cream base is fully processed, remove the pint from the outer bowl. Use a spoon to create a well (a hole) in the very center of the ice cream, all the way down to the bottom. Pour the mini chocolate chips into this well. Lock the lid back on and select the “MIX-IN” setting.
- Enjoy: Your Ninja Creami mint chip is ready to eat immediately! It will have a soft-serve, perfectly scoopable texture. If you prefer a firmer, more traditional scoop, just place the lid back on the pint and pop it in the freezer for 2-3 hours.
Related posts:
 Frozen Chocolate Covered Strawberry Bites That Taste Like Pure Summer (3 Ingredients, No Oven)
 Apple Pie Rice Krispie Treats for Last-Minute Fall Desserts: 5 Minutes, No Oven, All the Flavor
 Cherry Rice Krispie Treats That Taste Like a Chocolate-Covered Cherry — in 20 Minutes Flat
 Ninja Creami Salted Caramel Ice Cream That’s Creamy, Dreamy, and Ready in 24 Hours