
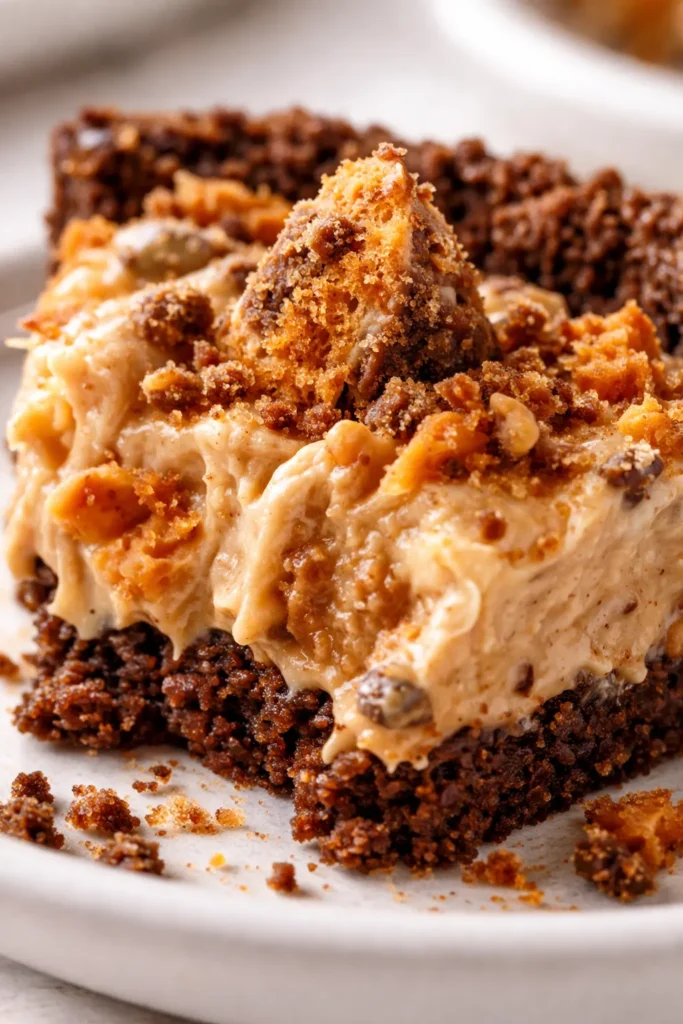
I’ll be honest — I didn’t think a no-bake pie could compete with the real thing. Then I made this one for a friend’s birthday, and she texted me the next morning asking for the recipe before I’d even had coffee. The peanut butter filling is so light it almost floats, and that crackly Butterfinger topping? It stays crunchy for days. My nine-year-old neighbor literally licked the spatula. I’m not mad about it.
The first time I made this, the filling was too dense — I hadn’t whipped the cream to stiff peaks, so it deflated when I folded it in. Batch two I learned: cream needs to be cold, and you need those stiff peaks that stand up on the whisk. The third attempt? Perfect. Light, airy, with just enough peanut butter heft and those little bits of Butterfinger in every bite.
- Serves: 8 as dessert
- Hands-On Time: 20 min | Total Time: 3 hr 20 min (frozen) or 5 hr 20 min (refrigerated)
- Difficulty: Easy — no baking, no water baths, no fuss
- Cost per serving: ~$2.75
- Nutrition Estimate: 545 Calories, 11g Protein, 44g Carbs, 38g Fat, 18g Saturated Fat, 3g Fiber, 410mg Sodium per serving
- Dietary Notes: Vegetarian. Adaptable for gluten-free with certified GF graham crackers.
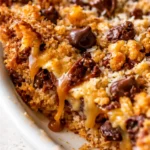
(Photo above: overhead shot of the finished pie on a white cake stand, sliced into wedges so you can see the layers — chocolate crust, creamy peanut butter filling studded with candy pieces, and a generous topping of crushed Butterfinger bars with a drizzle of melted peanut butter catching the light from a kitchen window at golden hour.)
Why the No-Chill Factor Makes This Pie So Good
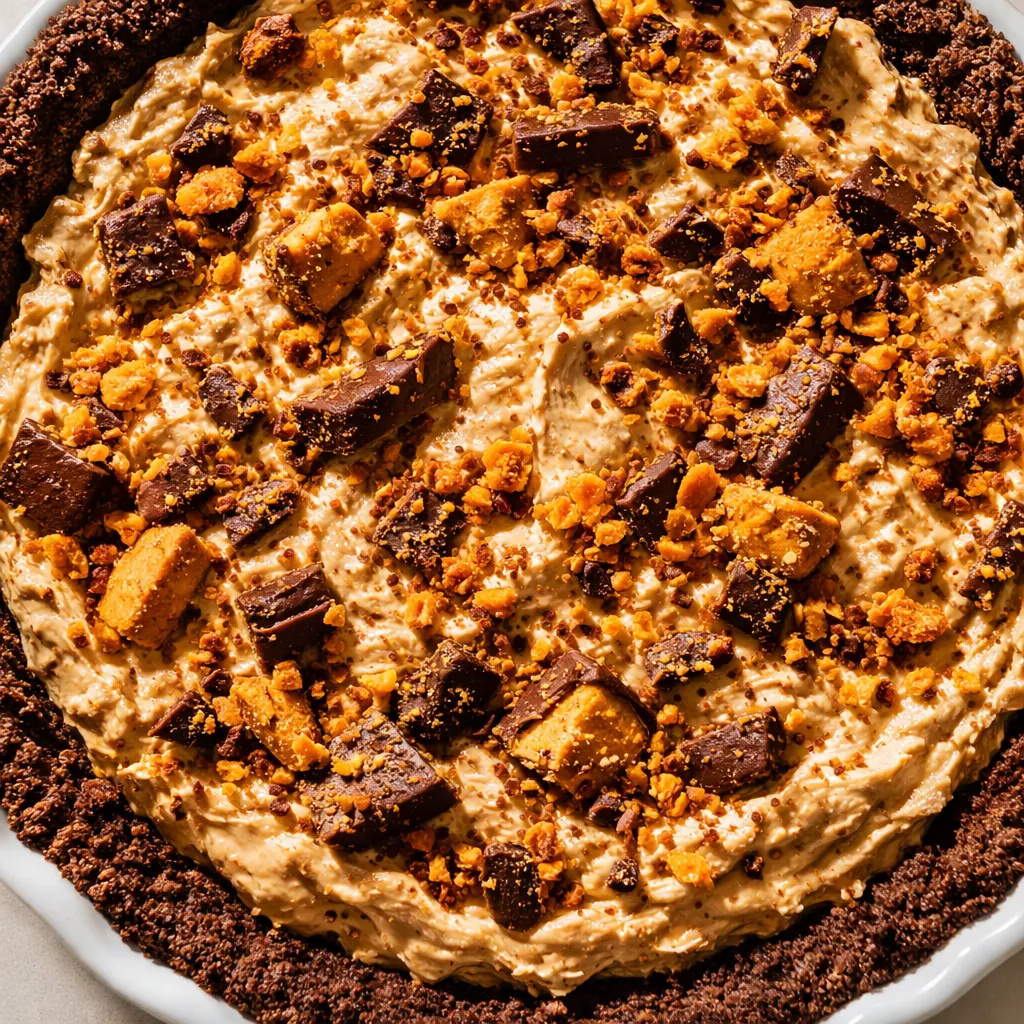
Most no-bake pies rely on gelatin or cornstarch to set. This one uses stiffly whipped cream and cold cream cheese — no heat, no fuss. The cream forms a stable matrix that holds the filling together without collapsing. When you fold it into the peanut butter base, the result is mousse-like: light, airy, but still rich enough to feel indulgent. I’ve found that chilling the bowl and beaters for 10 minutes before whipping the cream helps it reach stiff peaks faster — about 4 minutes instead of 5. That small prep step shaves off real time.
The crust matters more than you think. A standard graham cracker crust can turn sandy or crumbly. Adding cocoa powder and packing it firmly — using the bottom of a measuring cup — gives it a structure that holds up against the moist filling. Without that, you’d get a soggy bottom every time.
This no-bake Butterfinger pie delivers crunch from the candy pieces in every bite, a creamy peanut butter center that doesn’t cloy, and a chocolate base that ties it all together. It’s the dessert that gets requested for every potluck, every birthday, and every Tuesday that needs a pick-me-up.
Everything You Need (And a Few Notes From Me)
- 1 1/2 cups graham cracker crumbs (about 10 full-sheet graham crackers): The structural base. Don’t use pre-crushed crumbs from a box — they’re too fine and won’t create the right texture. I crush mine in a zip-top bag with a rolling pin; the sound of those crackers breaking is oddly satisfying.
- 1/4 cup cocoa powder: Turns an ordinary graham crust into a chocolate one. Natural or Dutch-process both work here. I use natural because I always have it on hand.
- 1/4 cup light brown sugar: Adds a tiny bit of molasses depth that plain white sugar can’t match. If you only have dark brown, use it — the flavor will be slightly richer.
- 5 tbsp unsalted butter, melted: Binds the crust. Salted butter works too — just reduce any added salt elsewhere. I always melt mine in the microwave in 20-second bursts; the smell of melted butter is the first hint of what’s coming.
- 1 cup heavy cream, chilled: The backbone of the filling. It must be cold — if it’s even slightly warm, it won’t whip to stiff peaks. I pop my bowl and beaters in the freezer for 10 minutes before starting; you can feel the chill when you touch the metal.
- 1 cup powdered sugar, divided: Sweetens the cream (1/4 cup) and the peanut butter base (3/4 cup). Use sifted if yours is super clumpy. I don’t bother sifting, but I break up lumps with a fork.
- 8 oz cream cheese, softened: Adds tang and body to the filling. Room temperature is crucial — cold cream cheese won’t blend smoothly and leaves lumps. Set it out 30 minutes ahead; it should give slightly when pressed.
- 1 cup creamy peanut butter: The main flavor driver. Use a brand you like eating straight from the jar — that’s the flavor your pie will have. Natural or processed both work, but natural ones separate; stir them well first, and watch the aroma release.
- 1 tsp vanilla extract: Rounds out the peanut butter and cream cheese flavors. Use real vanilla here — the flavor is worth it.
- 4 oz BUTTERFINGER® Bars (2 full-sized bars), crushed or chopped: Folded into the filling for crunch in every bite. I crush mine in the same zip-top bag I used for the graham crackers — less mess, and you get that satisfying crunch sound.
- 6 oz BUTTERFINGER® Bars (3 full-sized bars), for topping: A generous crown of candy. I reserve the smallest pieces for the center and arrange the bigger ones around the edge.
- creamy peanut butter, melted for drizzling (optional): A pretty finish. Microwave 2 tablespoons in a small bowl for 20 seconds, then drizzle from a spoon with a steady hand.
- creamy peanut butter + 1 tbsp cocoa powder, melted for drizzling (optional): A chocolate-peanut butter drizzle. Whisk the cocoa into the melted peanut butter before drizzling; it’s like painting with flavor.
What to Pull Out Before You Start
- 9-inch pie dish — glass or ceramic both work; glass lets you see how the crust is compacting
- Nonstick spray or butter for greasing the dish
- Medium bowl for the crust mixture
- Hand mixer or stand mixer with whisk attachment — you need power for the whipped cream and thick peanut butter base
- Small bowl for holding the whipped cream while you make the filling
- Spatula for folding
- Measuring cups and spoons
- Freezer or refrigerator for setting
Let’s Make It (Step by Step)
Here’s the thing about no-bake pies: the order matters. If you whip the cream first, then clean the bowl, then beat the peanut butter — you’re wasting time. I do the crust, then whip the cream, then reuse the same bowl for the filling. One bowl, less cleanup, and the residual fat from the cream actually helps the peanut butter base come together.
- Prep the pan: Spray a 9-inch pie dish with nonstick spray or grease lightly with butter. Set it aside while you make the crust. This step takes 10 seconds and guarantees the crust won’t stick.
- Make the crust: In a medium bowl, whisk together the graham cracker crumbs, cocoa powder, and light brown sugar until evenly combined — the brown sugar should be broken up, no clumps. The cocoa will smell deeply chocolatey. Stir in the melted butter with a fork until every crumb is moistened; the mixture should clump together when squeezed. Press the mixture firmly and evenly into the bottom and up the sides of the prepared dish. I use the bottom of a measuring cup to really pack it down — spend a full 2 minutes on this. Chill the crust in the freezer while you make the filling — at least 15 minutes, but it can hang out longer if you need.
- Whip the cream: Using a hand mixer or a stand mixer fitted with the whisk attachment, beat the heavy cream and ¼ cup of the powdered sugar on medium-high speed until stiff peaks form — about 4-5 minutes. You’ll hear the sound change as the cream thickens, from a slosh to a soft whoosh. When you lift the whisk, the cream should hold a peak that doesn’t droop. Spoon the whipped cream into a small bowl and set it aside in the fridge. Do NOT wash the mixing bowl — you’ll use it next.
- Make the peanut butter base: Using the same mixing bowl (no need to clean it!), beat the cream cheese, peanut butter, vanilla, and remaining ¾ cup powdered sugar together on medium-high speed until well combined and completely smooth. Stop and scrape down the sides with a spatula once or twice. The mixture will be thick and look almost like frosting. This step takes about 2-3 minutes — don’t rush it, because lumps of cream cheese are not pleasant. The aroma of peanut butter and vanilla will fill your kitchen.
- Fold it together: Fold in the crushed Butterfinger pieces and the reserved whipped cream until smooth and combined. Use a gentle folding motion — start from the bottom, lift, and turn the bowl. Don’t stir; you don’t want to deflate all that air you just whipped into the cream. The mixture will be light, fluffy, and full of crunchy bits. You’ll see tiny flecks of Butterfinger throughout.
- Fill and chill: Pour the filling into the prepared pie shell and spread it evenly with a spatula. Smooth the top. Freeze for 3 hours or chill in the fridge at least 5 hours or overnight. I usually do freezer if I’m in a hurry — the texture is firmer, almost like an icebox pie. Fridge gives you a softer, mousse-like texture. The pie will look glossy and set.
- Top and serve: Once thoroughly chilled, top with the remaining Butterfinger pieces and drizzle with melted peanut butter (optional plain or mixed with cocoa powder). The drizzle looks fancy and adds another layer of flavor, but it’s completely optional. Serve frozen (slice with a warm knife) or refrigerated. When you cut, listen for the slight crackle of the candy topping.
- Store leftovers: Store in the fridge, covered, for up to 3 days, or in the freezer for up to 1 month. If frozen, let it sit at room temperature for 10 minutes before slicing.
How I Meal Prep This for the Week
I make two pies at once sometimes — one for now, one for later. The crust can be made a day ahead and kept covered in the fridge. The filling comes together fast, so if I’m prepping for a party, I’ll do the crust the night before and the filling the morning of. It actually tastes better after a full day in the fridge.
- Fridge: Keep covered with plastic wrap or a dome for up to 3 days. The crust stays firm, the filling stays creamy, and the topping stays crunchy for about 2 days.
- Freezer: Yes — freeze the whole pie (without topping) for up to 1 month. Wrap it in 2 layers of plastic then foil. Add the Butterfinger topping and drizzle after thawing for maximum crunch.
- Reheat: This is a cold pie — no reheating needed. If frozen, let it sit on the counter for 10 minutes before slicing to soften slightly.
Things I Wish I’d Known the First Time
- Cold cream is non-negotiable: If your heavy cream isn’t thoroughly chilled, it won’t whip properly. I keep my cream in the coldest part of the fridge, and I chill the bowl and beaters in the freezer for 10 minutes before starting. This shaves a full minute off whipping time and gives you stiffer peaks.
- Press the crust firmly: A loose crust means a crumbly mess when you slice. Use the bottom of a measuring cup and really compact it — the edges too. I spend about 2 minutes on pressing, not 30 seconds. It makes the difference between a crust that stays together and one that falls apart on the plate.
- Don’t over-fold: When you combine the peanut butter base and the whipped cream, fold gently and stop as soon as you don’t see white streaks. Over-folding deflates the air and makes the filling dense. Even if you mess this up a little, it’ll still taste good — I’ve done it.
- Warm knife for clean slices: Run your knife under hot water, dry it, then slice. Wipe the blade clean between cuts. This gives you those clean, Instagram-worthy slices with no dragging through the filling.
Swaps That Actually Work
- Gluten-Free: Use certified gluten-free graham crackers or gluten-free digestive biscuits. The recipe works exactly the same — no other changes needed.
- Dairy-Free: Use dairy-free cream cheese (like Tofutti or Kite Hill), a plant-based heavy cream alternative that whips (like Country Crock Plant Cream or coconut cream), and dairy-free butter. The texture will be slightly less rich but still delicious. I’ve made it with oat-based cream and it worked surprisingly well, though the flavor is a bit different.
- Nut-Free (sort of): Swap peanut butter for sunflower seed butter (like SunButter) or WowButter. The filling will be slightly less thick and the flavor will change, but it’s still good. Be aware that the Butterfinger bars themselves contain peanuts — for fully nut-free, omit the candy and use a nut-free crunch element like chopped pretzels or mini chocolate chips.
- Fancier Version: Drizzle with melted dark chocolate and flaky sea salt instead of the peanut butter drizzle. A little extra salt really makes the peanut butter and candy pop.
- Kid-Friendly: Leave off the optional peanut butter drizzle and let the kids add their own sprinkles or mini chocolate chips on top.
Why Did My No-Bake Butterfinger Pie Not Set Firmly?
Q: Why did my pie filling come out too soft or runny?
A: The most common reason is that the cream wasn’t whipped to stiff peaks. If you only got soft peaks, the filling won’t have enough structure to hold up. Fix it next time by whipping until the cream holds a peak that doesn’t droop when you lift the whisk. Also make sure your cream cheese is softened — cold cream cheese makes lumps that never fully incorporate, and those lumps can break the emulsion. I’ve been there — it’s frustrating, but easy to fix next batch.
Q: Can I use crunchy peanut butter instead of creamy?
A: Yes, but the texture changes. Crunchy peanut butter has small nut pieces that add extra texture, but they can make the filling slightly grainier. I’d recommend using creamy and adding your own crushed Butterfinger pieces — you get more control over the crunch distribution.
Q: How do I know when the pie is fully set?
A: Gently jiggle the pie dish. If the filling barely moves in the center, it’s set. For the fridge method (5 hours), the center will still have a slight give but should hold its shape when you slice. For the freezer method (3 hours), it should be firm to the touch. If it’s too frozen to slice cleanly, let it sit at room temperature for 10 minutes. A toothpick inserted near the edge should come out clean, but the center is supposed to be creamy.
Q: Can I make this vegan?
A: Partially. See the swaps above — use plant-based cream cheese, a whippable plant cream (coconut cream works well), and vegan butter. The Butterfinger bars are not vegan (they contain milk), so you’d need a vegan candy bar. The texture will be softer and the flavor slightly different, but it’s doable and still tasty.
How Do You Store This No-Bake Butterfinger Pie?
Q: How long does this pie last, and how should I store it?
A: Keep it covered in the fridge for up to 3 days. The crust stays firm and the filling stays creamy for those 3 days. The Butterfinger topping will start to soften after day 2 but still tastes great. If you want to make it ahead for a party, it’s actually better after a full day in the fridge — the flavors meld and the texture becomes perfectly mousse-like.
Q: Can I make this pie ahead of time / freeze it?
A: Yes, absolutely. You can make the entire pie (without topping) up to a month ahead and freeze it. Wrap it tightly in two layers of plastic wrap then foil. When ready to serve, thaw it overnight in the fridge, then add the Butterfinger topping and drizzle. The crust stays crisp, the filling stays creamy, and the topping stays crunchy because it’s added fresh.
Q: What’s the best way to reheat this pie?
A: This is a cold pie — you don’t reheat it. If it’s frozen, let it sit at room temperature for 10-15 minutes before slicing. If it’s been in the fridge, slice straight from cold with a warm knife. The texture is meant to be cool and creamy.
Q: What do you serve with this pie?
A: It’s rich, so a small slice goes a long way. I like it with a dollop of lightly sweetened whipped cream to cut the richness. A drizzle of extra chocolate sauce on the plate feels fancy. For brunch, I’ve served it alongside a cup of strong black coffee — the bitterness is a perfect contrast. For a summer party, a simple berry salad on the side (I use strawberries and blueberries) adds freshness. Honestly, my favorite way is just a slice by itself with no distractions — let the peanut butter and candy shine.
This no-bake Butterfinger pie has become my official “I need a showstopper but I have zero time” dessert. Every time I bring it somewhere, someone asks for the recipe. It’s the kind of thing that gets passed around text threads and saved to boards. I keep the ingredients on hand now — you never know when you’ll need a last-minute dessert that looks like you planned it for weeks.
If you try it, drop a comment below — I love hearing how it goes for you! Tag me on Pinterest so I can see yours!
📌 This no-bake Butterfinger pie with peanut butter cream cheese filling stays crunchy and creamy for days — save it for your next potluck or holiday dessert table.
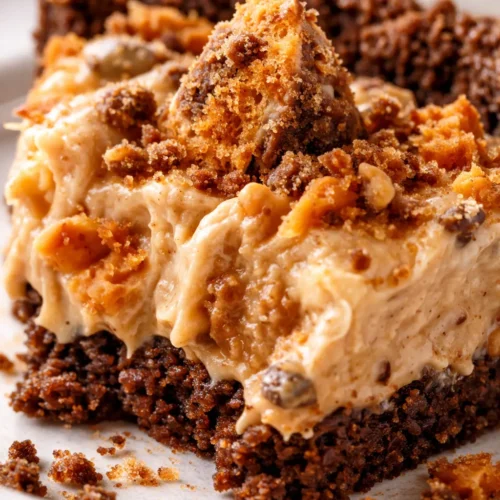
No-Bake Butterfinger Pie That’s Creamy, Crunchy, and Ready in 20 Minutes
Equipment
- 9-inch pie dish
- Hand mixer or stand mixer
- Spatula
- Medium Bowl
- Small Bowl
- Measuring Cups and Spoons
Ingredients
Crust
- 1 1/2 cups graham cracker crumbs about 10 full-sheet graham crackers
- 1/4 cup cocoa powder
- 1/4 cup light brown sugar
- 5 tbsp unsalted butter melted
Filling
- 1 cup heavy cream chilled
- 1/4 cup powdered sugar for the whipped cream
- 8 oz cream cheese softened
- 1 cup creamy peanut butter
- 1 tsp vanilla extract
- 3/4 cup powdered sugar for the peanut butter base
- 4 oz Butterfinger bars crushed or chopped (2 full-sized bars)
Topping
- 6 oz Butterfinger bars for topping (3 full-sized bars)
- 2 tbsp creamy peanut butter melted, for drizzling (optional)
- 1 tbsp cocoa powder optional, for chocolate-peanut butter drizzle
Instructions
- Prep the pan: Spray a 9-inch pie dish with nonstick spray or grease lightly with butter. Set it aside while you make the crust. This step takes 10 seconds and guarantees the crust won’t stick.
- Make the crust: In a medium bowl, whisk together the graham cracker crumbs, cocoa powder, and light brown sugar until evenly combined — the brown sugar should be broken up, no clumps. The cocoa will smell deeply chocolatey. Stir in the melted butter with a fork until every crumb is moistened; the mixture should clump together when squeezed. Press the mixture firmly and evenly into the bottom and up the sides of the prepared dish. I use the bottom of a measuring cup to really pack it down — spend a full 2 minutes on this. Chill the crust in the freezer while you make the filling — at least 15 minutes, but it can hang out longer if you need.
- Whip the cream: Using a hand mixer or a stand mixer fitted with the whisk attachment, beat the heavy cream and ¼ cup of the powdered sugar on medium-high speed until stiff peaks form — about 4-5 minutes. You’ll hear the sound change as the cream thickens, from a slosh to a soft whoosh. When you lift the whisk, the cream should hold a peak that doesn’t droop. Spoon the whipped cream into a small bowl and set it aside in the fridge. Do NOT wash the mixing bowl — you’ll use it next.
- Make the peanut butter base: Using the same mixing bowl (no need to clean it!), beat the cream cheese, peanut butter, vanilla, and remaining ¾ cup powdered sugar together on medium-high speed until well combined and completely smooth. Stop and scrape down the sides with a spatula once or twice. The mixture will be thick and look almost like frosting. This step takes about 2-3 minutes — don’t rush it, because lumps of cream cheese are not pleasant. The aroma of peanut butter and vanilla will fill your kitchen.
- Fold it together: Fold in the crushed Butterfinger pieces and the reserved whipped cream until smooth and combined. Use a gentle folding motion — start from the bottom, lift, and turn the bowl. Don’t stir; you don’t want to deflate all that air you just whipped into the cream. The mixture will be light, fluffy, and full of crunchy bits. You’ll see tiny flecks of Butterfinger throughout.
- Fill and chill: Pour the filling into the prepared pie shell and spread it evenly with a spatula. Smooth the top. Freeze for 3 hours or chill in the fridge at least 5 hours or overnight. I usually do freezer if I’m in a hurry — the texture is firmer, almost like an icebox pie. Fridge gives you a softer, mousse-like texture. The pie will look glossy and set.
- Top and serve: Once thoroughly chilled, top with the remaining Butterfinger pieces and drizzle with melted peanut butter (optional plain or mixed with cocoa powder). The drizzle looks fancy and adds another layer of flavor, but it’s completely optional. Serve frozen (slice with a warm knife) or refrigerated. When you cut, listen for the slight crackle of the candy topping.
- Store leftovers: Store in the fridge, covered, for up to 3 days, or in the freezer for up to 1 month. If frozen, let it sit at room temperature for 10 minutes before slicing.
Notes
- Cold cream is non-negotiable: If your heavy cream isn’t thoroughly chilled, it won’t whip properly. I keep my cream in the coldest part of the fridge, and I chill the bowl and beaters in the freezer for 10 minutes before starting. This shaves a full minute off whipping time and gives you stiffer peaks.
- Press the crust firmly: A loose crust means a crumbly mess when you slice. Use the bottom of a measuring cup and really compact it — the edges too. I spend about 2 minutes on pressing, not 30 seconds. It makes the difference between a crust that stays together and one that falls apart on the plate.
- Don’t over-fold: When you combine the peanut butter base and the whipped cream, fold gently and stop as soon as you don’t see white streaks. Over-folding deflates the air and makes the filling dense. Even if you mess this up a little, it’ll still taste good — I’ve done it.
- Warm knife for clean slices: Run your knife under hot water, dry it, then slice. Wipe the blade clean between cuts. This gives you those clean, Instagram-worthy slices with no dragging through the filling.
- Gluten-Free: Use certified gluten-free graham crackers or gluten-free digestive biscuits. The recipe works exactly the same — no other changes needed.
- Dairy-Free: Use dairy-free cream cheese (like Tofutti or Kite Hill), a plant-based heavy cream alternative that whips (like Country Crock Plant Cream or coconut cream), and dairy-free butter. The texture will be slightly less rich but still delicious. I’ve made it with oat-based cream and it worked surprisingly well, though the flavor is a bit different.
- Nut-Free (sort of): Swap peanut butter for sunflower seed butter (like SunButter) or WowButter. The filling will be slightly less thick and the flavor will change, but it’s still good. Be aware that the Butterfinger bars themselves contain peanuts — for fully nut-free, omit the candy and use a nut-free crunch element like chopped pretzels or mini chocolate chips.
- Fancier Version: Drizzle with melted dark chocolate and flaky sea salt instead of the peanut butter drizzle. A little extra salt really makes the peanut butter and candy pop.
- Kid-Friendly: Leave off the optional peanut butter drizzle and let the kids add their own sprinkles or mini chocolate chips on top.
Related posts:
 Low Calorie Banana Bread That Doesn’t Taste Like a Compromise — Finally
 Puff Pastry Apple Tarts That Look Like a Bakery Made Them — with Only 15 Minutes of Effort
 Peach Cobbler That Bakes Its Own Crust (Golden, Juicy, 40 Minutes)
 The Samoas Cookie Pie That Tastes Just Like the Box (Without the Wait)