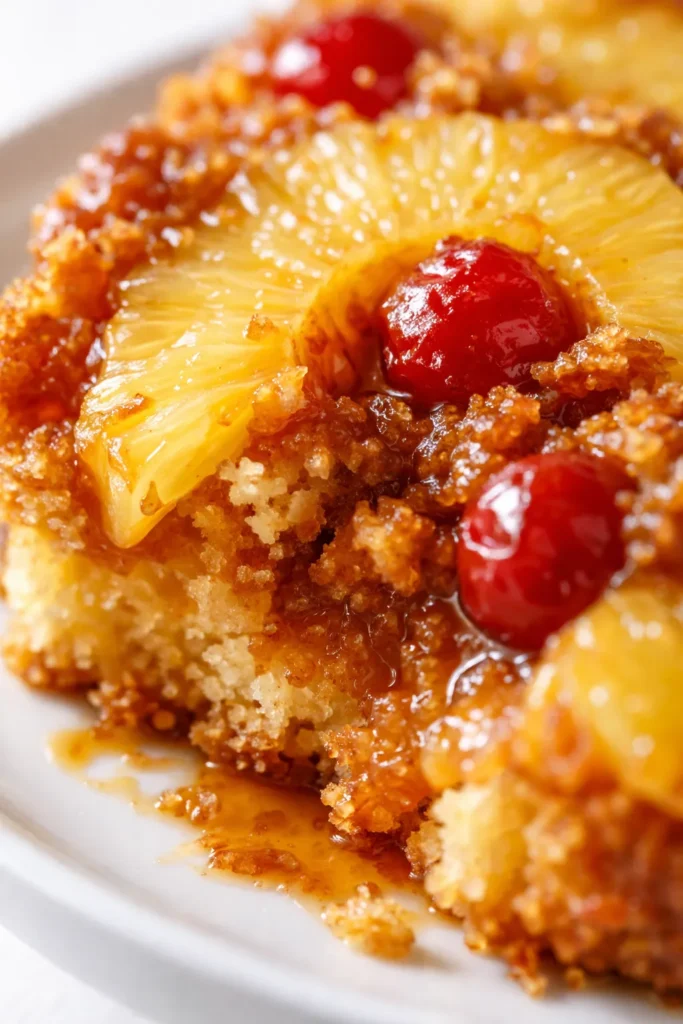
TLDR: This classic pineapple upside down cake bakes at 350°F for 40–45 minutes. The key is pouring melted butter and brown sugar into the pan before arranging the pineapple rings and cherries. Expect a tender, buttery cake with a sticky caramelized topping that flips out beautifully every time.
I still remember the first time I flipped a pineapple upside down cake onto a plate and watched the caramel syrup drip slowly down the sides. That moment—when the golden pineapple rings slide out with their shiny maraschino cherry centers—is pure kitchen magic. This is the recipe I’ve made for every birthday, every potluck, every time I need a dessert that stops conversation cold. The cake itself is simple, almost plain—which is exactly what you want. It doesn’t compete with the topping. It just holds it up, soft and tender, soaking up a little of that brown sugar butter as it sits. I’ve tested this version at least five times to get the balance exactly right: enough butter in the pan so the sugar doesn’t burn, enough time in the oven so the topping caramelizes without turning brittle, and a five-minute cooling window that lets you flip cleanly every single time. If you’ve ever ended up with half your topping stuck to the pan, you’ll know exactly what I mean.
The first two times I made a pineapple upside down cake, the sugar stuck to the pan and the pineapple rings came off looking patchy. I thought I’d under-buttered, so I added more. That made it worse—too much butter made the caramel greasy. The fix turned out to be simpler: let the cake cool exactly five minutes after baking, no more, no less. That short rest lets the caramel set just enough to hold together when you flip, but keeps it loose enough to slide out cleanly. The batch that worked gave me a glossy, mahogany-colored topping with each ring centered perfectly around its cherry. I ate two slices standing up at the counter.
- Serves: 7 as a dessert
- Hands-On Time: 20 min | Total Time: 65 min
- Difficulty: Easy once you know the 5-minute cooling rule
- Cost per serving: ~$1.50
- Nutrition Estimate: 320 Calories, 4g Protein, 46g Carbs, 14g Fat, 8g Saturated Fat, 1g Fiber, 190mg Sodium per serving
- Dietary Notes: Contains dairy, gluten, eggs; adaptable with gluten-free 1:1 blend
(Photo above: overhead shot of the cake on a white cake stand, a slice removed to show the tender crumb and caramelized pineapple ring, warm afternoon light from the window.)
Why the Brown Sugar Layer Makes Pineapple Upside Down Cake Unforgettable
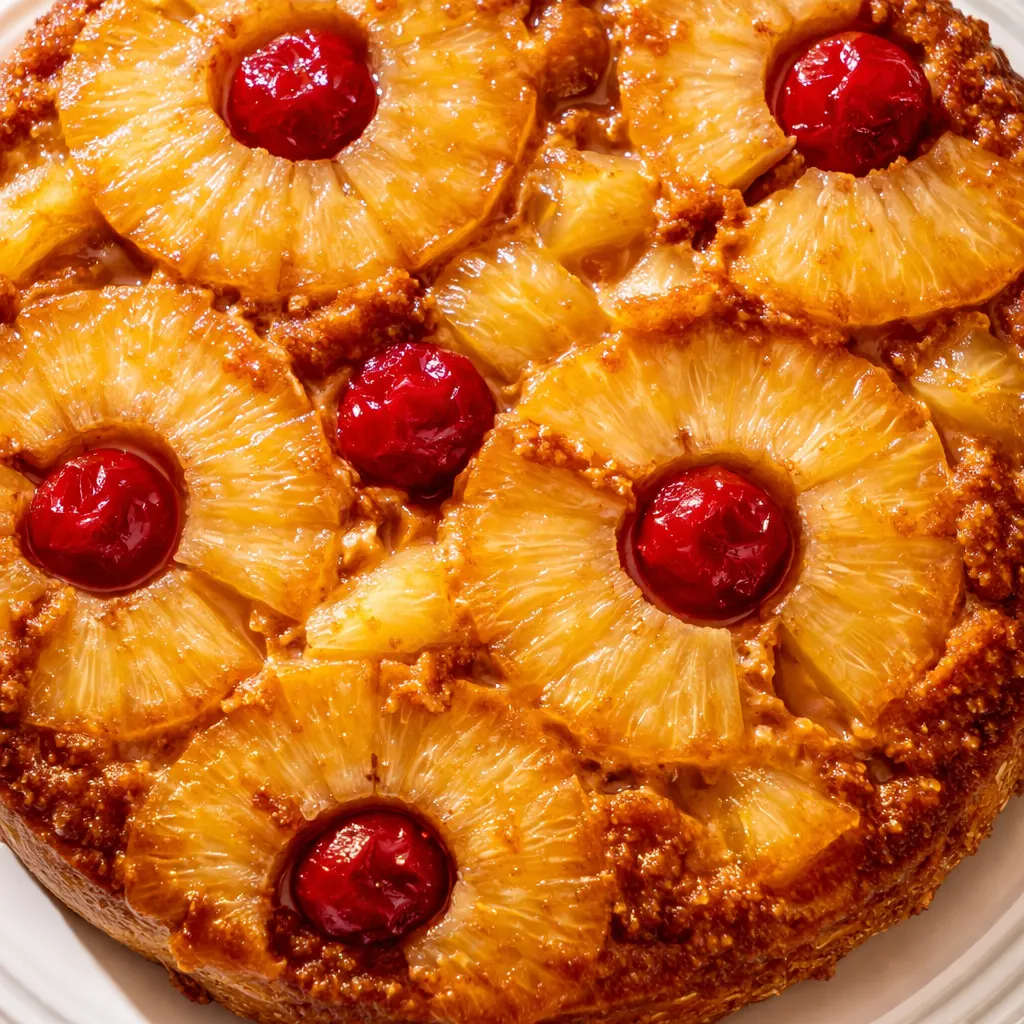
The magic of a pineapple upside down cake happens before the batter even goes in. Melting butter in the pan and sprinkling brown sugar over it creates a simple caramel that bakes into the cake as it rises. Most home bakers find that 350°F is the ideal temperature here—it’s hot enough to caramelize the sugar without burning it, and gentle enough to let the cake set evenly. The pineapple rings act like a barrier between the sticky topping and the batter, so the caramel stays glossy and doesn’t get absorbed into the crumb. That’s why you get that beautiful stained-glass effect when you flip it: the fruit holds the color, and the sugar stays where it belongs. According to USDA nutritional data, canned pineapple provides consistent natural sweetness, which means you don’t have to guess how much sugar to add.
Everything You Need (And a Few Notes From Me)
- 1/4 cup unsalted butter, melted: This is the base of your caramel. Use salted if that’s all you have—just skip the added salt in the dry ingredients. Don’t skip melting it; cold butter won’t mix evenly with the brown sugar.
- 1/2 cup packed brown sugar: Pack it firmly into the cup. Loose brown sugar won’t give you enough caramel layer. Dark brown sugar adds a deeper, almost molasses-like flavor, but light works beautifully too.
- 7 pineapple rings (canned, drained): Drain them well and pat dry with a paper towel. Extra moisture makes the caramel watery. Use rings, not chunks—they lay flat and create that classic pattern.
- 7 maraschino cherries: Drain and pat dry too. Most store-bought cherries are dyed, but the color holds up perfectly. If you want a more natural cherry, look for fancy cherries in syrup.
- 1 1/2 cups all-purpose flour (or gluten-free 1:1 blend): Standard flour gives a soft, tender crumb. The gluten-free blend works with no other changes—I’ve tested it. Spoon and level the flour; don’t scoop from the bag.
- 2 tsp baking powder: Check the date—old baking powder leads to a dense cake. Yes, this matters more than you think.
- 1/4 tsp salt: Balances the sweetness. If you used salted butter for the caramel, skip this. Fine sea salt dissolves best.
- 1/2 cup unsalted butter, softened: Cold butter will leave you with lumps that never cream properly. Let it sit out for about an hour. Softened means you can press a finger into it and leave a dent.
- 3/4 cup granulated sugar: Adds sweetness and tenderness. Don’t reduce it—the cake needs the structure. That’s a lesson I learned the hard way.
- 2 large eggs: Room temperature. Cold eggs seize the butter and make the batter stiff and hard to work with. If you forget, put them in a bowl of warm water for 5 minutes.
- 1 tsp vanilla extract: Pure vanilla, not imitation—though in a cake this simple, imitation still works. I use Mexican vanilla when I’m feeling fancy.
- 1/2 cup milk (dairy or non-dairy): Whole milk gives the richest crumb, but oat milk or almond milk work too. Not buttermilk—it’s too acidic here.
What to Pull Out Before You Start
- 9-inch round cake pan: A heavy aluminum pan works best for even heat. Glass or ceramic can cause the edges to overbake before the center sets. If you only have a glass pan, lower the oven temp to 325°F and bake 5–10 minutes longer.
- Mixing bowls: One large, one medium.
- Whisk for the dry ingredients.
- Electric mixer: Handheld or stand mixer. Creaming by hand works but takes elbow grease.
- Spatula: Rubber or silicone for scraping the bowl and smoothing the batter.
- Toothpick for testing doneness.
- Plate: Larger than the cake pan, with a lip to catch any caramel drips. Trust me, you want a rim.
Let’s Make It (Step by Step)
Start by getting your pan ready—this is the part that makes the whole thing work.
Prep the topping: Melt the butter in a small saucepan or the microwave, then pour it into your 9-inch round cake pan. Tilt the pan to coat the bottom evenly. Sprinkle the brown sugar over the melted butter—don’t stir, just let it sit. Arrange the 7 pineapple rings on top of the sugar. Place one cherry in the center of each ring and one in the center of the pan if there’s room.
- Preheat: Set your oven to 350°F (175°C) and make sure a rack is in the middle. While it heats, whisk together the flour, baking powder, and salt in a medium bowl. Set aside.
- Cream butter and sugar: In a large bowl, beat the softened butter and sugar with an electric mixer on medium speed until the mixture looks pale and fluffy—about 2 to 3 minutes. Scrape down the bowl once during mixing. This step builds the cake’s structure.
- Add eggs and vanilla: Beat in the eggs one at a time, making sure each is fully incorporated before adding the next. Stir in the vanilla. The batter should look smooth and slightly glossy at this point.
- Alternate dry and wet: Turn the mixer to low and add the flour mixture in three additions, alternating with the milk—start and end with flour. Mix just until the last streak of flour disappears. Overmixing makes the cake tough.
- Pour and spread: Spoon the batter over the pineapple layer, being careful not to disturb the fruit. Use your spatula to spread it evenly to the edges. The batter will be thick—that’s correct.
- Bake: Slide the pan into the oven and bake for 40 to 45 minutes, or until the top is golden and a toothpick inserted into the center of the cake comes out clean. You may see a few moist crumbs but no wet batter. The edges should just begin to pull away from the pan. The smell of caramelized sugar and vanilla will fill your kitchen.
- Cool and invert: Let the cake cool in the pan on a wire rack for exactly 5 minutes. Place your serving plate upside down over the pan, then flip the whole thing over in one quick motion. Lift the pan off carefully. If any sugar sticks, just scrape it onto the cake. Serve warm or at room temperature.
How I Meal Prep This for the Week
I usually make this cake the night before I need it, because it actually gets better after a few hours—the caramel soaks into the top layer of cake just enough to make it extra moist. If I’m serving it the next day, I tell myself that one less thing to do in the morning.
- Fridge: Store the cake tightly covered at room temperature for up to 2 days. It stays moist because the butter and sugar keep the crumb tender. Don’t refrigerate unless you live in a hot kitchen—the fridge dries the cake out.
- Freezer: Yes, you can freeze it. Wrap the whole cake (or individual slices) tightly in plastic wrap, then foil, and freeze for up to a month. Thaw at room temperature for about an hour before serving.
- Reheat: The best way is a low oven—300°F for about 10 minutes on a baking sheet. The microwave softens the topping too much and turns the cake gummy.
Things I Wish I’d Known the First Time
- Pat the fruit dry every time: Even if the pineapple rings look dry out of the can, they’re still wet. Blot them with a paper towel before placing them in the pan. Extra moisture dilutes the caramel and makes the cake soggy around the edges. I know it seems fussy, but it’s the difference between a perfect caramel and a watery one.
- Don’t overmix the batter—ever: Once you add the flour, mix just until you can’t see any white streaks. Overmixing develops gluten and gives you a tough, dense cake that won’t rise properly. Even if you mess this part up a little, it’ll still taste good—I’ve done it—but for the best texture, stop early.
- Cool exactly 5 minutes on the timer: Two minutes is too short—the caramel is still liquid and will spill everywhere. Ten minutes is too long—the sugar hardens and sticks to the pan. Set a timer the second the pan comes out of the oven. That 5-minute window is your sweet spot.
- Use a hot knife for clean slices: Run a long, thin knife under hot water, dry it, then slice. The heat cuts through the sticky pineapple without dragging the caramel. Wipe the blade clean between cuts. This is the trick that makes dessert look bakery-perfect.
Swaps That Actually Work
- Gluten-Free: Use a cup-for-cup gluten-free flour blend like Bob’s Red Mill 1-to-1. No other changes needed. The crumb is slightly more delicate, so let the cake cool the full 5 minutes before flipping.
- Dairy-Free: Substitute the butter in the caramel with vegan butter (I use Miyoko’s) and use oat or soy milk in the batter. Skip the softened butter for the cake—use a vegan butter that creams well. The texture is nearly identical.
- Cherry variation: Swap maraschino cherries for fresh or frozen pitted cherries. If using fresh, halve them and place cut-side down. They’ll be less sweet, so add a teaspoon of honey or maple syrup to the brown sugar layer.
- Spiced version: Add 1/2 teaspoon of cinnamon and a pinch of nutmeg to the flour mixture. It gives the cake a cozy, almost gingerbread-like warmth that pairs beautifully with the pineapple.
Why Did My Pineapple Upside Down Cake Stick to the Pan?
Q: Why did my cake stick to the pan, leaving half the topping behind?
A: This is almost always a cooling-time issue. If you flip the cake after less than 3 minutes, the caramel is too runny and slides off. If you wait more than 7 minutes, the sugar hardens like a candy shell and bonds to the pan. The exact fix is a 5-minute rest—set a timer and don’t peek. If you’ve already done that and it still sticks, you might have used a pan with a dark nonstick coating that holds heat longer. In that case, try 4 minutes next time.
Q: Can I use fresh pineapple instead of canned?
A: You can, but you’ll need to prep it first. Fresh pineapple is more acidic and contains an enzyme that can break down the cake’s structure if used raw. Slice the fresh pieces 1/4-inch thick, then arrange them on a baking sheet and bake at 350°F for 10 minutes to soften and reduce the moisture. Drain off any liquid before placing them in the pan. The flavor is brighter, but the texture is slightly less tender than the canned version.
Q: How do I know when the cake is done without guessing?
A: The toothpick test is the best friend here—insert a wooden toothpick into the center of the cake (avoiding the pineapple rings). It should come out clean or with a few dry crumbs. Another visual cue: the cake will start to pull away from the sides of the pan, and the top will be a deep golden brown. If you’re nervous, give it the full 45 minutes. It’s better to overbake slightly than to underbake and have a sunken center.
Q: Can I make this vegan?
A: Yes, with some smart swaps. Use vegan butter in the caramel and the cake. Replace the eggs with two flax eggs (2 tbsp ground flaxseed + 6 tbsp water, let sit for 5 minutes). Use a creamy oat milk in the batter. The texture will be a bit denser and less fluffy, but the caramel topping works just as well. I’ve made it for dairy-free friends and they went back for seconds.
Can You Freeze Pineapple Upside Down Cake?
Q: How long does pineapple upside down cake last, and how should I store it?
A: At room temperature, tightly covered, it stays moist and delicious for up to 2 days. The caramel will soften the top layer of cake just a little, which I really like. If you live in a warm climate, refrigerate it—but bring it back to room temperature before serving to let the caramel soften again.
Q: Can I freeze it?
A: Yes—freeze the whole cake or individual slices. First, chill it completely in the fridge (at least 1 hour) so the caramel firms up. Wrap tightly in plastic wrap, then again in foil. Freeze for up to 1 month. Thaw in the fridge overnight or at room temperature for a few hours. Don’t reheat in the microwave from frozen—it makes the caramel separate.
Q: What’s the best way to reheat leftover cake?
A: The oven is your best bet. Place slices on a baking sheet and warm at 300°F for 8–10 minutes. The caramel re-melts and the cake comes back to life. The microwave works in a pinch (20 seconds on medium), but the texture goes a little soft. If you’re serving it for dessert, the oven method is worth the extra few minutes.
Q: What do you serve with pineapple upside down cake?
A: The classic pairing is lightly sweetened whipped cream or vanilla ice cream—the cool cream melts into the warm caramel and balances the sweetness. I also love serving it with a dollop of Greek yogurt for a tangy contrast, or a drizzle of coconut cream if I’m feeling tropical. For a brunch twist, my friend serves it with a side of crispy bacon—salty, sweet, and completely unexpected.
This cake has a way of making people smile the minute it hits the table. I hope it becomes a star in your kitchen the way it has in mine. If you try it, drop a comment below—I love hearing how it goes for you! Tag me on Pinterest so I can see yours!
📌 This pineapple upside down cake recipe stays moist for days and makes the perfect weekend treat — save it for your next family gathering!
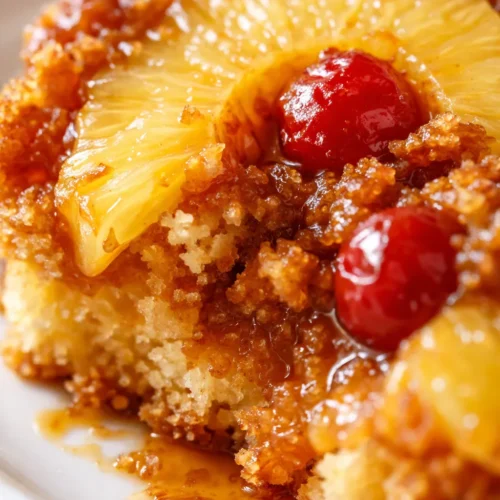
Pineapple Upside Down Cake That’s Perfectly Caramelized in Under an Hour
Equipment
- 9-inch round cake pan
- Mixing Bowls
- Whisk
- Electric Mixer
- Spatula
- Toothpick
- Plate
Ingredients
Topping
- 1/4 cup unsalted butter, melted Don’t skip melting it; cold butter won’t mix evenly with the brown sugar.
- 1/2 cup packed brown sugar Pack it firmly into the cup. Loose brown sugar won’t give you enough caramel layer. Dark brown sugar adds a deeper, almost molasses-like flavor, but light works beautifully too.
- 7 pineapple rings (canned, drained) Drain them well and pat dry with a paper towel. Extra moisture makes the caramel watery. Use rings, not chunks—they lay flat and create that classic pattern.
- 7 maraschino cherries Drain and pat dry too. Most store-bought cherries are dyed, but the color holds up perfectly. If you want a more natural cherry, look for fancy cherries in syrup.
Cake
- 1 1/2 cups all-purpose flour Spoon and level the flour; don’t scoop from the bag. A gluten-free 1:1 blend can be substituted.
- 2 tsp baking powder Check the date—old baking powder leads to a dense cake.
- 1/4 tsp salt If you used salted butter for the caramel, skip this. Fine sea salt dissolves best.
- 1/2 cup unsalted butter, softened Cold butter will leave you with lumps that never cream properly. Let it sit out for about an hour. Softened means you can press a finger into it and leave a dent.
- 3/4 cup granulated sugar Don’t reduce it—the cake needs the structure. That’s a lesson I learned the hard way.
- 2 large eggs Room temperature. Cold eggs seize the butter and make the batter stiff and hard to work with. If you forget, put them in a bowl of warm water for 5 minutes.
- 1 tsp vanilla extract Pure vanilla, not imitation—though in a cake this simple, imitation still works. I use Mexican vanilla when I’m feeling fancy.
- 1/2 cup milk Whole milk gives the richest crumb, but oat milk or almond milk work too. Not buttermilk—it’s too acidic here.
Instructions
- Start by getting your pan ready—this is the part that makes the whole thing work. Prep the topping: Melt the butter in a small saucepan or the microwave, then pour it into your 9-inch round cake pan. Tilt the pan to coat the bottom evenly. Sprinkle the brown sugar over the melted butter—don’t stir, just let it sit. Arrange the 7 pineapple rings on top of the sugar. Place one cherry in the center of each ring and one in the center of the pan if there’s room.
- Preheat: Set your oven to 350°F (175°C) and make sure a rack is in the middle. While it heats, whisk together the flour, baking powder, and salt in a medium bowl. Set aside.
- Cream butter and sugar: In a large bowl, beat the softened butter and sugar with an electric mixer on medium speed until the mixture looks pale and fluffy—about 2 to 3 minutes. Scrape down the bowl once during mixing. This step builds the cake’s structure.
- Add eggs and vanilla: Beat in the eggs one at a time, making sure each is fully incorporated before adding the next. Stir in the vanilla. The batter should look smooth and slightly glossy at this point.
- Alternate dry and wet: Turn the mixer to low and add the flour mixture in three additions, alternating with the milk—start and end with flour. Mix just until the last streak of flour disappears. Overmixing makes the cake tough.
- Pour and spread: Spoon the batter over the pineapple layer, being careful not to disturb the fruit. Use your spatula to spread it evenly to the edges. The batter will be thick—that’s correct.
- Bake: Slide the pan into the oven and bake for 40 to 45 minutes, or until the top is golden and a toothpick inserted into the center of the cake comes out clean. You may see a few moist crumbs but no wet batter. The edges should just begin to pull away from the pan. The smell of caramelized sugar and vanilla will fill your kitchen.
- Cool and invert: Let the cake cool in the pan on a wire rack for exactly 5 minutes. Place your serving plate upside down over the pan, then flip the whole thing over in one quick motion. Lift the pan off carefully. If any sugar sticks, just scrape it onto the cake. Serve warm or at room temperature.