
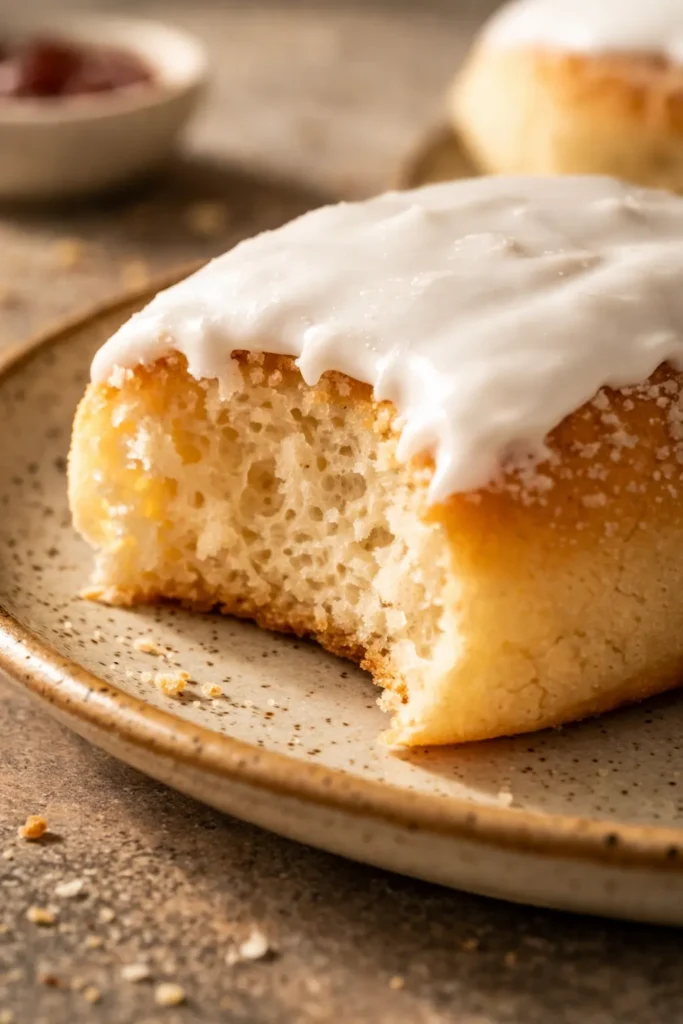
TL;DR: These Brave Iced Buns are soft, yeasted rolls topped with a simple powdered sugar glaze and a candied cherry. The trick is using bread flour for structure and a milk-egg wash for that bakery-style golden top. Expect a pillowy interior with a sweet, crackly icing.
I still remember the first time I made Brave Iced Buns. I was chasing a memory from a little bakery in Savannah that closed down years ago. The kind of place where the glass case had a smear of butter on it and the lady behind the counter called everyone “honey.” That first batch? Dense. Dense as little flour hockey pucks, I’m tellin’ y’all. I sobbed into my stand mixer. But I wouldn’t be writing this if I’d given up. The fix was simpler than you’d think — bread flour instead of all-purpose, and a full, uninterrupted hour for that first rise. The result is a bun that pulls apart like a cloud, with a soft, golden crust that catches the glaze just right. I’ve made this recipe about twenty times since that first sad batch, and it has never let me down since. If you need a sweet, nostalgic treat that makes your kitchen smell like Sunday morning, these are it.
I’m not exaggerating when I say my nine-year-old, who usually just picks at bread, ate three of them warm from the oven. He said they tasted like “the buns from the bakery in that cartoon.” High praise, honestly. What I love most is how approachable they are. This isn’t finicky French pastry. It’s a cozy, forgiving yeasted dough that just happens to look fancy with a cherry on top. Let me walk you through everything I’ve learned so yours turn out perfect the very first time.
- Serves: 8 as a sweet breakfast bun or snack
- Hands-On Time: 25 min | Total Time: 2 hrs 15 min
- Difficulty: Easy enough for a beginner, but patience with rising is key
- Cost per serving: Roughly $0.85 per bun
- Nutrition Estimate: 280 Calories, 6g Protein, 45g Carbs, 8g Fat, 4g Saturated Fat, 1g Fiber, 210mg Sodium per serving
- Dietary Notes: Naturally vegetarian. Can be adapted for dairy-free with margarine and plant milk.
(Photo above: Overhead shot of the finished iced buns on a vintage floral plate, soft morning light streaming in from the left, the glaze slightly crackled, a single bright red candied cherry perched on top of each golden bun.)
How I Landed on the Perfect Batch
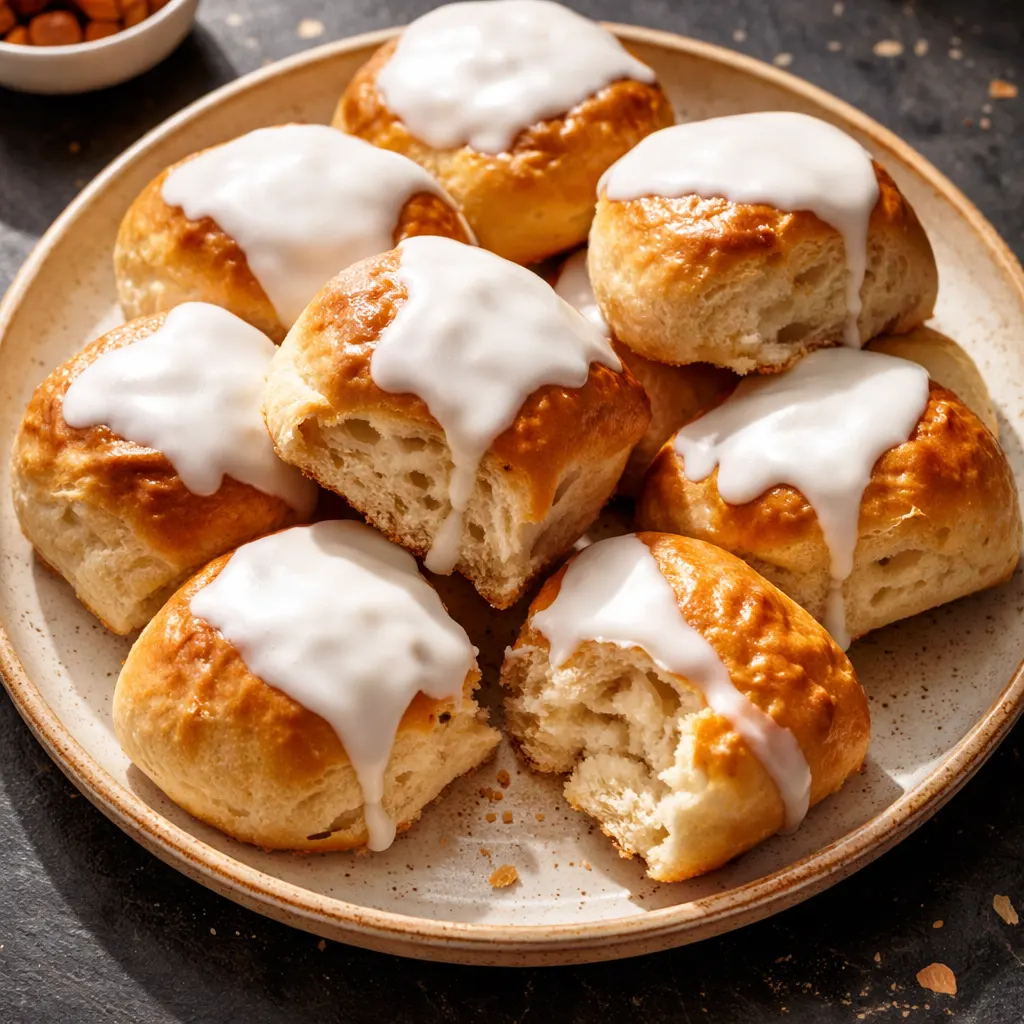
The first two times I made these, the buns came out dense and pale. I was rushing the yeast — using cold milk straight from the fridge — and using all-purpose flour because that’s all I had. The fix was two-fold: I switched to bread flour for the extra protein, and I started warming my milk to about 110°F before mixing. The difference was immediate. The dough felt alive, springy, and smooth. After baking, the buns were light, golden, and the glaze settled into a perfect, crackly shell. Now I won’t skip warming the liquid, and I promise you won’t either once you feel the dough spring back at you.
Why Bread Flour Makes These Brave Iced Buns a Weekday Win
Here’s the thing about yeasted doughs: the protein content in your flour matters more than almost anything else. Bread flour has a higher protein content — around 12-13% according to standard USDA nutritional data. All-purpose flour sits closer to 9-10%. More protein means more gluten formation. More gluten means a stronger, chewier, more pillowy bun. That’s the exact texture you’re looking for here — something soft enough to pull apart with your fingers, but structured enough to hold that thick glaze without disintegrating.
I also use a combination of milk and water in the dough. Milk adds a little fat and sugar, which tenderizes the bread and gives it a richer color when it bakes. Water keeps it from being too heavy. The result is a bun that’s tender but not cakey, and it stays soft for three full days if stored properly. I’ve tested this at 350°F and 375°F. Baking at the higher temperature — 375°F — browns the edges faster and sets the shape before it has a chance to spread out into a flat pancake. You get a taller, more defined bun with a shatteringly crisp bottom and a soft center.
Everything You Need (And a Few Notes From Me)
- 1 ¾ cups bread flour: I know it’s tempting to use all-purpose, but don’t. Bread flour gives these their signature chew and structure. If you only have all-purpose, add 1 tablespoon of vital wheat gluten to mimic the protein content.
- 1 ½ tablespoons granulated sugar: Just enough to feed the yeast and add a whisper of sweetness. These aren’t overly sugary buns — the icing handles the sweet part.
- 2 teaspoons instant yeast: Instant yeast means you don’t need to proof it in water first. Just toss it in with the flour. If you only have active dry yeast, dissolve it in the warm milk first and let it sit for 5 minutes.
- ½ teaspoon salt: Don’t skip it. Salt controls yeast activity and strengthens the gluten so the buns don’t collapse.
- 1 ½ tablespoons unsalted butter, soft: Room temperature butter is crucial. Cold butter won’t incorporate properly and will leave greasy spots in the dough.
- 1 large egg, beaten: Adds richness and structure. Eggless versions work but produce a denser, less tender bun.
- ⅓ cup milk, warmed: Warm milk wakes up the yeast and creates a tender crumb. Aim for about 110°F — warm but not hot to the touch.
- ¼ cup water: Helps balance the hydration so the dough isn’t too heavy.
- For the wash: 1 large egg, beaten + 1 teaspoon water: This is what gives buns that deep, golden brown shine. Skip this and you’ll get a pale, matte finish.
- 1 ¼ cups powdered sugar: The base for the icing. Sift it if it’s lumpy.
- 2 tablespoons water (as needed): You might need a little less or a little more. The goal is a thick, drizzly consistency that sets up firm.
- Candied cherries: The classic finish. They add a pop of color and a little sweet-tart chew. If you hate candied cherries, try a freeze-dried raspberry or a slivered almond.
What to Pull Out Before You Start
- A stand mixer with a dough hook (or a strong arm and a big bowl)
- A large, clean bowl for rising (glass or ceramic is best so you can see the dough double)
- A baking sheet (I prefer a light-colored metal pan for even browning)
- Parchment paper (don’t skip this — it makes cleanup so much easier)
- A small saucepan for warming the milk
- A whisk for the icing
Let’s Make Brave Iced Buns (Step by Step)
Alright, grab your ingredients and let’s get some flour on our hands. I promise this is easier than it looks.
Prep: Warm the milk to about 110°F. Take the butter out so it can soften if it isn’t already. Line your baking sheet with parchment paper.
- Mix the Dry Ingredients: In the bowl of your stand mixer (or a large bowl), whisk together the bread flour, sugar, instant yeast, and salt. Make sure the salt doesn’t touch the yeast directly if you’re letting it sit — salt can kill yeast if they’re pressed together too long.
- Add the Fat and Liquid: Add the softened butter, beaten egg, warm milk, and water. Use a spatula to give it a quick stir so the flour doesn’t fly everywhere when you turn the mixer on.
- Knead the Dough: Attach the dough hook and knead on medium-low speed for about 8 minutes. The dough should pull away from the sides of the bowl and feel smooth and elastic. If it’s too sticky, add a tablespoon of flour at a time. If it’s too dry, add a splash of water. You know it’s ready when you press a finger into it and the dough springs back slowly. It should feel like a baby’s bottom — soft and smooth.
- First Rise: Transfer the dough to a lightly greased bowl. Cover it with plastic wrap or a clean kitchen towel. Let it rise in a warm spot for about 1 hour, or until doubled in size. I like to put it in my microwave with the door cracked — it’s draft-free and stays warm from the pilot light or just a cup of hot water inside. If your kitchen is cold at 65°F, it might take 90 minutes. Be patient. This is the step that makes them fluffy.
- Shape the Buns: Gently punch the dough down to deflate it. Turn it out onto a lightly floured surface. Divide the dough into 8 equal pieces. I use a kitchen scale for accuracy — each piece should be about 60 grams. Roll each piece into a ball, then use your cupped hand to gently roll it against the counter into a smooth, tight ball. Place them on the prepared baking sheet, leaving about 2 inches of space between them. They’ll spread and rise into each other, which gives them that pull-apart texture.
- Second Rise: Cover the shaped buns with a towel and let them rise for 30-45 minutes, until they are puffy and almost doubled. They should look pillowy and soft.
- Preheat and Glaze: While they’re rising, preheat your oven to 375°F. In a small bowl, mix the remaining beaten egg with 1 teaspoon of water to make the egg wash. Right before they go into the oven, brush the tops of the buns gently with the egg wash. Be careful not to puncture the dough.
- Bake: Bake for 15-18 minutes, or until the tops are a deep, golden brown and the buns sound hollow when tapped on the bottom. I usually rotate the pan halfway through to ensure even browning. Your kitchen is about to smell like a legit bakery.
- Cool: Let the buns cool on the baking sheet for 5 minutes, then transfer them to a wire rack to cool completely. It’s tempting, but do not ice them while they’re hot — the icing will melt right off and soak into the bread. Trust me, I’ve done it.
- Make the Icing: Whisk together the powdered sugar and water. Start with 1 tablespoon of water and add more until you get a thick, drizzly consistency. You want it to be thick enough that it doesn’t just soak into the bun, but thin enough that it settles into a smooth, flat cap.
- Assemble: Once the buns are completely cool, dip the top of each bun into the icing, letting the excess drip back into the bowl. Place them back on the wire rack. Immediately press a candied cherry into the center of the icing before it sets. Let the icing firm up for about 20 minutes at room temperature.
How I Make These Ahead for Sunday Mornings
If you’re like me and want fresh-baked buns without waking up at 5 a.m., here’s how I do it. I make the dough through Step 6 (the second rise on the baking sheet). Then I cover the baking sheet tightly with plastic wrap and put the whole thing in the fridge overnight. The next morning, I take it out of the fridge. Let the buns sit at room temperature for about 30 minutes while the oven preheats. Then proceed with the egg wash and bake. Fresh iced buns for Sunday brunch with zero morning chaos.
- Fridge: Store baked, iced buns in an airtight container at room temperature for up to 3 days. Do not refrigerate them — it dries out the bread.
- Freezer: Yes! Freeze the buns BEFORE icing. Wrap them tightly in plastic wrap and then foil for up to 3 months. Thaw at room temperature, then make the icing fresh.
- Reheat: To revive a day-old bun, pop it in a 300°F oven for about 5 minutes. The microwave works too (about 15 seconds), but it makes the icing sticky and soft. If you use the microwave, the glaze will get melty.
Troubleshooting
Even after testing this recipe dozens of times, I still get questions. Here are the most common issues and how to fix them.
Why Did My Brave Iced Buns Turn Out Dense?
Q: Why did my buns come out so dense and heavy?
A: This is almost always a yeast or kneading problem. First, check your yeast. If it’s old or expired, it won’t produce enough gas to lift the dough. Second, make sure you kneaded it enough. The dough needs to develop that strong gluten network. If you’re using a stand mixer, 8 minutes on medium-low is my sweet spot. If you’re kneading by hand, give it a good 10-12 minutes. You should be able to stretch a small piece of dough into a thin “windowpane” without it tearing.
Can I use all-purpose flour instead of bread flour?
Q: Can I use all-purpose flour instead of bread flour?
A: Yes, you can. I won’t stop you. But the texture will be noticeably softer and less chewy. It will still taste good, it just won’t have that signature bakery-style bite. If you have vital wheat gluten, add 1 tablespoon to your all-purpose flour to boost the protein. It works like a charm.
How do I know when the buns are fully baked?
Q: How do I know when the buns are fully baked?
A: I look for two things. The first is color — a deep, even golden brown on top. The second is the tap test. Take one out of the oven and carefully turn it over. Tap the bottom with your finger. If it sounds hollow, it’s done. If it sounds solid and dense, give it another 2-3 minutes. An internal temperature of 190°F on an instant-read thermometer is your guaranteed win.
Can I make these vegan?
Q: Can I make these vegan?
A: I tried a vegan version using flax eggs (1 tablespoon ground flax + 3 tablespoons water per egg) and plant-based butter. It worked, but the texture was slightly more dense and a little more crumbly. The icing is naturally vegan as long as you use water and organic powdered sugar (some brands use bone char). They won’t be as puffy, but they’ll still hit the spot for a sweet breakfast treat.
How do you store Brave Iced Buns?
Q: How long do these last, and how should I store them?
A: They keep beautifully at room temperature for up to 3 days. Place them in a single layer in an airtight container. Do not stack them if the icing is still wet. I love adding a piece of bread to the container — it sounds weird, but the bread absorbs excess air and keeps the buns soft. Replace the bread slice every day.
Can I freeze the baked and iced buns?
Q: Can I freeze the baked and iced buns?
A: I don’t recommend freezing them once they’re iced. The icing can get weepy and sticky when it thaws. Instead, freeze the un-iced buns. Wrap each one individually in plastic wrap, then place them in a freezer bag. When you want one, thaw it at room temperature for about an hour, then make the icing. It takes 2 minutes and the buns taste fresh-baked.
What’s the best way to reheat these buns?
Q: What’s the best way to reheat these buns?
A: The oven is your best friend here. A 300°F oven for about 5-7 minutes will crisp the bottom and warm the center without melting the glaze. The microwave is faster (about 15 seconds), but it will make the icing sticky and soft. If you’re okay with that, go for it. I won’t judge. Sometimes I zap mine for 10 seconds in the microwave because I have zero patience.
What do you serve with Brave Iced Buns?
Q: What do you serve with Brave Iced Buns?
A: Honestly, these are perfect on their own with a hot cup of coffee or a tall glass of cold milk. But if I’m serving them for a brunch spread, I love pairing them with a simple scrambled egg on the side — the rich, savory egg balances the sweet bun. A fresh fruit salad is also a beautiful contrast. For a real Southern twist, serve them alongside some crispy bacon. The salty-sweet combo is unbeatable.
Swaps That Actually Work (Because I’ve Tried Them)
- Dairy-Free: Swap the butter for margarine or a plant-based butter stick, and use oat milk or almond milk warmed. The buns will be slightly less tender but still really good.
- Gluten-Free: I tested this with a 1:1 gluten-free flour blend. It worked, but the buns were denser and didn’t rise as tall. If you are gluten-free, add an extra teaspoon of yeast and let the first rise go for 90 minutes instead of 60.
- Different Glaze Flavors: Add ½ teaspoon of vanilla extract or almond extract to the icing. The almond extract especially pairs beautifully with the candied cherry on top.
- No Candied Cherries: Not a fan of maraschino or candied cherries? Me either, sometimes. Use a fresh raspberry, a dried sour cherry, or a sprinkle of nonpareils. Even a little chopped pistachio on top is beautiful and gives a lovely color contrast.
I hope these buns bring a little warmth and sweetness to your kitchen the way they do to mine. There’s something about the smell of yeast dough and the look of that perfect white icing cap with the bright red cherry that feels like a hug. If you make them, drop a comment below and let me know how they turned out. I love hearing about your baking wins!
📌 Pin these Brave Iced Buns for your next Sunday brunch — they’re pillowy soft, topped with a crackly glaze, and stay delicious for days.
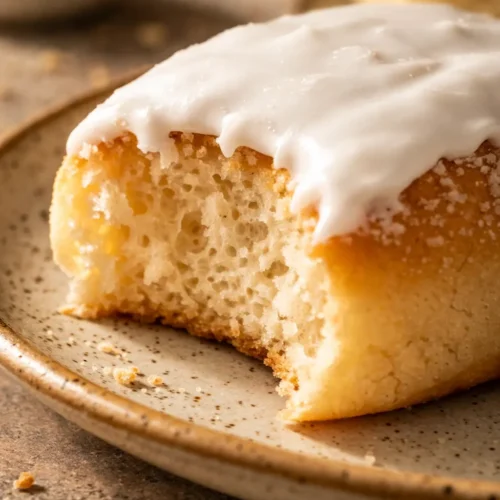
My Brave Iced Buns Recipe: Soft, Pillowy, and Topped with a Cherry on Top
Equipment
- Stand mixer with dough hook
- Large Bowl
- Baking Sheet
- Parchment Paper
- Small saucepan
- Whisk
- Wire rack
Ingredients
Dough
- 1 ¾ cups bread flour
- 1 ½ tablespoons granulated sugar
- 2 teaspoons instant yeast
- ½ teaspoon salt
- 1 ½ tablespoons unsalted butter softened
- 1 large egg beaten
- ⅓ cup milk warmed
- ¼ cup water
Egg Wash
- 1 large egg beaten
- 1 teaspoon water
Icing
- 1 ¼ cups powdered sugar sifted if lumpy
- 2 tablespoons water as needed
Topping
- 8 candied cherries
Instructions
- Prep: Warm the milk to about 110°F. Take the butter out so it can soften if it isn’t already. Line your baking sheet with parchment paper.
- Mix the Dry Ingredients: In the bowl of your stand mixer (or a large bowl), whisk together the bread flour, sugar, instant yeast, and salt. Make sure the salt doesn’t touch the yeast directly if you’re letting it sit — salt can kill yeast if they’re pressed together too long.
- Add the Fat and Liquid: Add the softened butter, beaten egg, warm milk, and water. Use a spatula to give it a quick stir so the flour doesn’t fly everywhere when you turn the mixer on.
- Knead the Dough: Attach the dough hook and knead on medium-low speed for about 8 minutes. The dough should pull away from the sides of the bowl and feel smooth and elastic. If it’s too sticky, add a tablespoon of flour at a time. If it’s too dry, add a splash of water. You know it’s ready when you press a finger into it and the dough springs back slowly. It should feel like a baby’s bottom — soft and smooth.
- First Rise: Transfer the dough to a lightly greased bowl. Cover it with plastic wrap or a clean kitchen towel. Let it rise in a warm spot for about 1 hour, or until doubled in size. I like to put it in my microwave with the door cracked — it’s draft-free and stays warm from the pilot light or just a cup of hot water inside. If your kitchen is cold at 65°F, it might take 90 minutes. Be patient. This is the step that makes them fluffy.
- Shape the Buns: Gently punch the dough down to deflate it. Turn it out onto a lightly floured surface. Divide the dough into 8 equal pieces. I use a kitchen scale for accuracy — each piece should be about 60 grams. Roll each piece into a ball, then use your cupped hand to gently roll it against the counter into a smooth, tight ball. Place them on the prepared baking sheet, leaving about 2 inches of space between them. They’ll spread and rise into each other, which gives them that pull-apart texture.
- Second Rise: Cover the shaped buns with a towel and let them rise for 30-45 minutes, until they are puffy and almost doubled. They should look pillowy and soft.
- Preheat and Glaze: While they’re rising, preheat your oven to 375°F. In a small bowl, mix the remaining beaten egg with 1 teaspoon of water to make the egg wash. Right before they go into the oven, brush the tops of the buns gently with the egg wash. Be careful not to puncture the dough.
- Bake: Bake for 15-18 minutes, or until the tops are a deep, golden brown and the buns sound hollow when tapped on the bottom. I usually rotate the pan halfway through to ensure even browning. Your kitchen is about to smell like a legit bakery.
- Cool: Let the buns cool on the baking sheet for 5 minutes, then transfer them to a wire rack to cool completely. It’s tempting, but do not ice them while they’re hot — the icing will melt right off and soak into the bread. Trust me, I’ve done it.
- Make the Icing: Whisk together the powdered sugar and water. Start with 1 tablespoon of water and add more until you get a thick, drizzly consistency. You want it to be thick enough that it doesn’t just soak into the bun, but thin enough that it settles into a smooth, flat cap.
- Assemble: Once the buns are completely cool, dip the top of each bun into the icing, letting the excess drip back into the bowl. Place them back on the wire rack. Immediately press a candied cherry into the center of the icing before it sets. Let the icing firm up for about 20 minutes at room temperature.
Notes
Related posts:
 Homemade Fudge That’s Creamy, Set, and Ready in 10 Minutes
 Homemade Kit Kat Bars: The No-Bake Version That Actually Tastes Like the Real Thing
 Frozen Chocolate Covered Strawberry Bites That Taste Like Pure Summer (3 Ingredients, No Oven)
 Ninja Creami Salted Caramel Ice Cream That’s Creamy, Dreamy, and Ready in 24 Hours