

The first time I pulled a tray of these pansy sugar cookies out of the oven, I actually gasped. They looked like little stained-glass windows — purple, pink, and yellow petals catching the light, edges just barely golden. My sister said they looked “too pretty to eat.” She changed her mind about three minutes later, when the butter and vanilla hit her tongue. I knew right then I’d be making these every spring for the rest of my life.
The first batch I made was a crumbly mess. The dough was too warm, the colors bled together, and my pansies looked more like sad blobs. I almost gave up. Then I realized the dough needed a solid two-hour chill — no shortcuts. The second batch changed everything. The petals stayed distinct, the centers held their shape, and the texture went from tough to perfectly tender. Now I won’t even touch the dough until it’s been in the fridge for at least two hours.
These are not your average decorated sugar cookie. The dough itself is colored, so every single bite — not just the icing — delivers flavor. The butter and vanilla sing together, the edges are just crisp enough, and the centers stay soft and tender. After 20 years of testing recipes, this is the one I come back to every single spring.
- Serves: 24 cookies as a dessert or tea-time treat
- Hands-On Time: 45 min | Total Time: 2 hrs 55 min (includes chilling)
- Difficulty: Medium — requires patience, but no special skills
- Cost per serving: ~$0.35
- Nutrition Estimate: 145 Calories, 2g Protein, 19g Carbs, 7g Fat, 4g Saturated Fat, 0g Fiber, 85mg Sodium per serving
- Dietary Notes: Vegetarian. Adaptable for gluten-free.
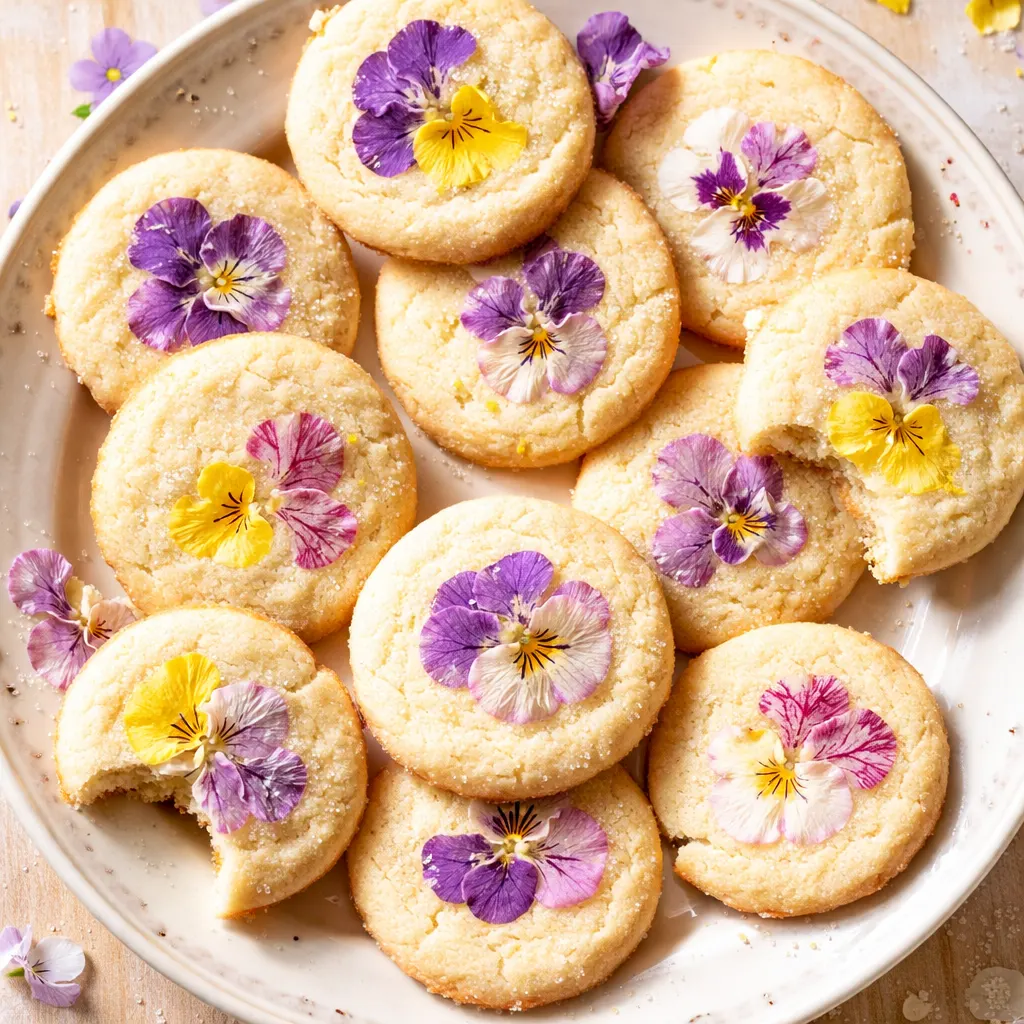
(Photo above: Overhead shot of a vintage ceramic plate piled high with purple, pink, and yellow pansy sugar cookies. Soft, diffused morning light from the left casts a gentle shadow. A few loose blossoms are scattered on the linen napkin next to the plate.)
Why the Dough-Log Method Beats Royal Icing Every Time
Most decorated sugar cookies taste like sweet cardboard. The icing is often rock-hard or overly sweet. By coloring the dough itself and building the flower shape from inside the cookie, every single bite is tender, buttery, and flavorful. The first time you bite into one, you’ll notice that the sweetness is even and the texture is consistent — no hard icing shell hiding a bland cookie underneath.
Rolling thinner ropes of dough inside wider rolled sheets creates those perfect double-colored petals without any artistic talent. It’s like making a tiny edible sculpture — but way easier than piping. The 350°F baking temperature is low enough to keep the centers pale and soft while the edges just barely set. The kitchen fills with the scent of vanilla and butter as they bake, and that aroma alone is worth the effort.
The result is a cookie that’s as beautiful as a decorated sugar cookie, but tastes like the real thing: soft, rich, and melt-in-your-mouth. No one ever picks the icing off these.
What Goes Into These Pansy Sugar Cookies (Plus My Honest Notes)
- 1 cup unsalted butter, softened: Butter is the heart of this cookie. Use the good stuff. If it’s too cold, your dough will be lumpy — leave it on the counter for 30 minutes. When you cream it with sugar, the mixture should look like pale, fluffy clouds. The sound of the paddle scraping the bowl as it aerates the butter is one of the most satisfying sounds in baking.
- 1 cup granulated sugar: White sugar keeps the cookies crisp-edged and tender. Don’t swap for powdered sugar here — the structure won’t hold. The sugar crystals also help create tiny air pockets during creaming, which gives the cookies their lift.
- 1 large egg, room temperature: A cold egg will seize the butter and make the dough stiff and hard to work with. Pop it in a bowl of warm water for 5 minutes if you forget. Room temperature eggs incorporate more evenly into the batter.
- 1 teaspoon vanilla extract: Pure vanilla gives a warmth that carries the whole cookie. The smell alone when you open the bottle — rich, floral, slightly smoky — is the promise of something good.
- 2 1/2 cups all-purpose flour: Spoon and level your flour. Scooping directly can add 20% more flour and make your cookies dry. The dough should feel soft but not sticky, like Play-Doh that’s been sitting out for a few minutes.
- 1 teaspoon baking powder & 1/2 teaspoon baking soda: The combo gives the perfect lift — not too puffy, not too flat. Most bakers find this ratio produces the ideal 1/3-inch height for a sugar cookie base.
- 1/2 teaspoon salt: Balances the sweetness. I use fine sea salt. It dissolves more evenly and doesn’t leave tiny crunchy bits in the dough.
- Gel food coloring (purple, pink, yellow): Gel is non-negotiable. Liquid drops will change the dough consistency and give you muddy colors. Spend the $4 — it lasts forever. The first time you knead purple gel into white dough, the color blooms like a watercolor painting, and that’s when the magic starts.
The Tools You’ll Actually Need
- Stand mixer with paddle attachment (a hand mixer works, but you’ll cream longer)
- Medium bowl and whisk for the dry ingredients
- Rolling pin (even thickness guides help a ton!)
- Baking sheet and parchment paper
- Wire racks for cooling
- Storage wrap (plastic wrap) for the dough logs
- A sharp knife for slicing the logs
- Refrigerator space for a baking sheet (make room!)
Let’s Make Pansy Sugar Cookies: My Exact Process
I’ll walk you through it like we’re side-by-side in my kitchen. Trust the process — especially the chilling parts. The sound of the paddle scraping the bowl, the smell of vanilla mixing with butter, the feel of cool dough in your hands — this is baking therapy at its finest.
Start with the dough: In your stand mixer with the paddle attachment, beat the softened butter and sugar on medium-high until it’s pale and fluffy, about 5 minutes. Scrape the bowl halfway through. When it’s ready, it should look like whipped frosting and feel light as air when you touch it.
- Mix in the wet ingredients: Add the room-temperature egg and vanilla extract. Mix on low until just combined. Don’t overmix here — you want the egg to be incorporated but not beaten into oblivion.
- Whisk the dry ingredients: In a separate medium bowl, whisk together the flour, baking powder, baking soda, and salt. This evenly distributes the leavening agents and aerates the flour so it blends in more easily. You’ll hear the whisk scraping the bottom of the bowl — that’s how you know everything is mixed.
- Combine everything: Gradually add the dry ingredients to the creamed mixture. Mix on low until the dough just comes together. It should look shaggy, then smooth. If it looks dry, add a teaspoon of milk. The dough should feel soft and supple, not crumbly or sticky.
- Divide and color: Divide the dough into equal sections — one for each color you’re using. Add a few drops of gel coloring to each section and knead it in on a clean surface. Wear gloves if you don’t want stained hands for a day. Watch as the color streaks through the dough and then evens out into a smooth, vibrant hue — this is the most satisfying part.
- Shape the logs: Form each colored portion into a log about 1 inch in diameter. Wrap each tightly in storage wrap. Refrigerate for at least two hours. This is non-negotiable for clean petals. The dough will feel firm and cool when you unwrap it — that’s what you want.
- Prep for assembly: Preheat the oven to 350°F. Line a baking sheet with parchment. Take the chilled logs out of the fridge. They should feel firm to the touch, like cold butter.
- Make the double-colored petals: Unwrap one log. Using a rolling pin, roll it into a rectangle about 1/4-inch thick. Take another log (a different color) and roll it into a thin rope about 1/2-inch in diameter. Place the rope on one end of the rectangle, then roll the rectangle around the rope like a tiny cinnamon roll. This gives you a log with a colored center and contrasting exterior. The cross-section should look like a bullseye.
- Slice and shape petals: Slice the double-colored log into 1/4-inch-thick coins. Using your fingers, gently pinch one side to form a petal shape — slightly elongated and pointed at one end. Keep some of the plain logs as-is to slice into single-color petals. The coins should look like tiny disks with a colorful center.
- Assemble the pansies: On the prepared baking sheet, arrange three double-colored petals around a center point, slightly overlapping. Add two single-colored petals on top, offset from the first layer. Roll a tiny ball of dough from a leftover scrap — about the size of a pea — and press it in the middle for the flower center. This is where the cookie comes to life — you’ll see the flower take shape right there on the sheet.
- Chill before baking: Pop the assembled cookies into the fridge for at least 10 minutes. This resets the butter and prevents spreading. If you skip this, the petals will merge into a blob. You’ll feel the dough firm up again as it chills.
- Bake to perfection: Bake for 8 to 10 minutes at 350°F, until the edges are just set and the bottoms are lightly golden. The center will look pale — that’s perfect. The kitchen will smell like vanilla and butter, and the cookies will look like they’re barely done. Trust the process.
- Cool completely: Let the cookies rest on the baking sheet for 10 minutes, then transfer them to a wire rack to cool completely. They’ll firm up as they cool. You’ll hear a gentle sizzle as they settle on the rack, and the smell will intensify as they cool.
Make-Ahead Magic (For Stress-Free Baking)
I love making the dough logs the night before a bake sale or spring party. Once they’re wrapped in the fridge, they’re ready to slice and assemble whenever I am. There’s something deeply satisfying about opening the fridge and seeing those colorful logs waiting for you — like having a secret weapon for entertaining.
- Fridge: Wrapped dough logs keep for up to 3 days. Baked cookies keep in an airtight container at room temperature for up to a week. Layer them between sheets of parchment to protect the petals.
- Freezer: Freeze the shaped, unbaked cookies on a sheet pan, then transfer to a zip-top bag. Bake from frozen, adding 2 minutes to the bake time. Baked cookies freeze beautifully for up to 3 months. This is my secret for last-minute spring parties — I always have a batch in the freezer.
- Reheat: No need if stored properly. If you want a warm cookie, pop it in a 300°F oven for 3 minutes. The microwave will make them tough — trust me, I’ve learned that lesson the hard way.
Things I Wish I’d Known the First Time
- Don’t skip the gel colors. Liquid food coloring will make the dough sticky and the colors will look washed out. Gels are concentrated and won’t mess with the texture. The first time I used liquid drops, the dough felt like wet cement and the colors looked like sad pastels. Never again.
- Keep your work surface cool. If the dough gets too warm from handling, it will smear. Pop it back in the fridge for 10 minutes if it starts to feel soft. The dough should feel firm and cool, like cold butter straight from the fridge. I keep a small bowl of ice water nearby to dip my hands in if they get too warm.
- Even thickness matters. When rolling out the rectangle for the double-colored petals, keep it as even as possible. Uneven thickness means uneven petals. Use guide rings if you have them — they’re worth the investment. A consistent 1/4-inch thickness gives you petals that bake evenly and look professional.
- Trust the chill. I know two hours feels like forever. But if you skip it, your colors will bleed together and the flowers won’t hold their shape. It’s worth every minute. Even if you mess up a few petals, they’ll still taste fantastic — I’ve eaten plenty of my own “ugly” ones. The flavor is always forgiving, even when the shape isn’t perfect.
Make Them Your Own: Easy Variations
- Different color palettes: Try blue and purple for a twilight pansy, or red and yellow for a warm sunset look. The technique stays the same. I once made a batch with orange and deep red for a fall-themed party — they looked like little marigolds and everyone raved about them.
- Gluten-free version: Use a 1:1 gluten-free baking flour (like Bob’s Red Mill). Add 1 extra tablespoon of milk to the dough for moisture. The texture will be slightly more delicate, but the flavor is just as good. Extend the chilling time to 3 hours since gluten-free dough tends to be softer.
- Citrus zest: Add the zest of half a lemon or orange to the sugar when creaming. It brightens the whole cookie. The tiny specks of zest look beautiful in the pale dough, and the aroma when you bake them is incredible — like a spring garden in your kitchen.
- Almond extract: Swap 1/2 teaspoon of vanilla for almond extract for a marzipan-like flavor that pairs beautifully with the shortbread base. The floral notes of almond work perfectly with the flower theme. A friend of mine calls these her “Parisian pansies” because they remind her of a patisserie in Lyon.
Why Are My Pansy Sugar Cookies Spreading Too Much?
Q: Why did my petals bleed into each other and lose their shape?
A: Warm dough is the culprit here. If your kitchen is warm or you handled the dough too long, the butter softens too much. The fix is simple: after assembling each cookie, pop the whole baking sheet into the fridge for 15 minutes before baking. I keep my dough logs in the fridge between batches, too. Also, check your oven temperature with an oven thermometer — an oven that runs cool can cause spreading. Most home ovens are off by 25°F or more.
Q: Can I use natural food coloring instead of gel?
A: I wouldn’t recommend it. Natural powders (like beet or turmeric) don’t have the same saturation and can dry out the dough. Beet powder might also react with the baking soda and turn your dough greenish. Stick with professional gel colors for best results. The investment is small, and the payoff in vibrant, clear colors is huge. I’ve been using the same set of gel colors for three years, and they’re still going strong.
Q: How do I know when the cookies are done without overbaking?
A: Look for the edges to look “set” — they won’t look wet or shiny anymore. The centers will still be pale and slightly soft to the touch. They will firm up as they cool on the sheet. If the edges are golden brown, they’ve been in too long. I always set my timer for 8 minutes and check — it’s better to underbake slightly than to overbake. The cookies should look barely done when you pull them out.
Q: Can I make these cookies vegan?
A: Yes. Use a flax egg (1 tablespoon ground flax + 3 tablespoons water, let sit for 5 minutes until it forms a gel) and a good vegan butter block (like Miyoko’s). The dough will be slightly softer, so increase the chilling time to 3 hours before slicing. The flavor will still be rich and buttery, thanks to the vegan butter. I’ve made them for vegan friends, and they disappeared just as fast as the original version.
How Do You Store Pansy Sugar Cookies?
Q: How long do these cookies last, and how should I store them?
A: Store them in an airtight container at room temperature for up to 1 week. Layer them between sheets of parchment paper to protect the petals. Don’t refrigerate after baking — the fridge dries them out and can cause condensation that makes the colors bleed. I use a wide, flat container so the cookies can sit in a single layer without stacking. If you must stack them, keep it to two layers with plenty of parchment between them.
Q: Can I make the dough ahead of time?
A: Absolutely. I do it all the time. Wrap the colored dough logs tightly in plastic wrap and refrigerate for up to 3 days. You can also freeze the logs for up to 3 months. Thaw overnight in the fridge before slicing. This is the secret to stress-free holiday baking — I often prep the dough on a Sunday and bake midweek when I have more time.
Q: What’s the best way to reheat these cookies?
A: They’re best at room temperature. If you must have them warm, pop them in a 300°F oven for 3-4 minutes. The microwave will make them tough and rubbery. The oven method brings back the buttery aroma and softens the cookie just enough. I do this when serving them with tea — the warmth makes the vanilla flavor bloom.
Q: What do you serve with these cookies?
A: They’re stunning on a spring brunch table alongside fresh berries and a hot cup of Earl Grey tea. I also love serving them with a simple vanilla ice cream for dessert — the soft cookie against the cold cream is magic. For a tea party, arrange them on a tiered stand with scones and petit fours. They’re also wonderful with a glass of cold milk — my kids devour them that way.
I hope these pansy sugar cookies bring as much joy to your kitchen as they’ve brought to mine. There’s something deeply satisfying about creating something so beautiful with your own hands — and watching it disappear just as quickly. The first time you pull a tray from the oven and see those perfect little flowers staring back at you, you’ll understand why I keep a batch in my freezer year-round.
If you make them, tag me on Pinterest so I can see your gorgeous petals — I love seeing the color combinations you come up with. And don’t worry if your first batch isn’t perfect. Mine wasn’t either. But the beauty of these cookies is that even the imperfect ones taste amazing. That’s the real secret — the flavor is always forgiving, even when the shape isn’t.
📌 Pansy sugar cookie recipe that’s actually a cut-out, no royal icing needed — save it for your next spring tea party or bake sale.
Pansy Sugar Cookies
Equipment
- Stand mixer with paddle attachment
- Medium bowl and whisk
- Rolling Pin
- Baking sheet and parchment paper
- Wire racks for cooling
- Storage wrap (plastic wrap)
- Sharp knife
- Refrigerator space for a baking sheet
Ingredients
- 1 cup unsalted butter, softened
- 1 cup granulated sugar
- 1 large egg, room temperature
- 1 teaspoon vanilla extract
- 2 1/2 cups all-purpose flour spoon and level your flour
- 1 teaspoon baking powder
- 1/2 teaspoon baking soda
- 1/2 teaspoon salt fine sea salt
- Gel food coloring (purple, pink, yellow)
Instructions
- Start with the dough: In your stand mixer with the paddle attachment, beat the softened butter and sugar on medium-high until it’s pale and fluffy, about 5 minutes. Scrape the bowl halfway through. When it’s ready, it should look like whipped frosting and feel light as air when you touch it.
- Mix in the wet ingredients: Add the room-temperature egg and vanilla extract. Mix on low until just combined. Don’t overmix here — you want the egg to be incorporated but not beaten into oblivion.
- Whisk the dry ingredients: In a separate medium bowl, whisk together the flour, baking powder, baking soda, and salt. This evenly distributes the leavening agents and aerates the flour so it blends in more easily. You’ll hear the whisk scraping the bottom of the bowl — that’s how you know everything is mixed.
- Combine everything: Gradually add the dry ingredients to the creamed mixture. Mix on low until the dough just comes together. It should look shaggy, then smooth. If it looks dry, add a teaspoon of milk. The dough should feel soft and supple, not crumbly or sticky.
- Divide and color: Divide the dough into equal sections — one for each color you’re using. Add a few drops of gel coloring to each section and knead it in on a clean surface. Wear gloves if you don’t want stained hands for a day. Watch as the color streaks through the dough and then evens out into a smooth, vibrant hue — this is the most satisfying part.
- Shape the logs: Form each colored portion into a log about 1 inch in diameter. Wrap each tightly in storage wrap. Refrigerate for at least two hours. This is non-negotiable for clean petals. The dough will feel firm and cool when you unwrap it — that’s what you want.
- Prep for assembly: Preheat the oven to 350°F. Line a baking sheet with parchment. Take the chilled logs out of the fridge. They should feel firm to the touch, like cold butter.
- Make the double-colored petals: Unwrap one log. Using a rolling pin, roll it into a rectangle about 1/4-inch thick. Take another log (a different color) and roll it into a thin rope about 1/2-inch in diameter. Place the rope on one end of the rectangle, then roll the rectangle around the rope like a tiny cinnamon roll. This gives you a log with a colored center and contrasting exterior. The cross-section should look like a bullseye.
- Slice and shape petals: Slice the double-colored log into 1/4-inch-thick coins. Using your fingers, gently pinch one side to form a petal shape — slightly elongated and pointed at one end. Keep some of the plain logs as-is to slice into single-color petals. The coins should look like tiny disks with a colorful center.
- Assemble the pansies: On the prepared baking sheet, arrange three double-colored petals around a center point, slightly overlapping. Add two single-colored petals on top, offset from the first layer. Roll a tiny ball of dough from a leftover scrap — about the size of a pea — and press it in the middle for the flower center. This is where the cookie comes to life — you’ll see the flower take shape right there on the sheet.
- Chill before baking: Pop the assembled cookies into the fridge for at least 10 minutes. This resets the butter and prevents spreading. If you skip this, the petals will merge into a blob. You’ll feel the dough firm up again as it chills.
- Bake to perfection: Bake for 8 to 10 minutes at 350°F, until the edges are just set and the bottoms are lightly golden. The center will look pale — that’s perfect. The kitchen will smell like vanilla and butter, and the cookies will look like they’re barely done. Trust the process.
- Cool completely: Let the cookies rest on the baking sheet for 10 minutes, then transfer them to a wire rack to cool completely. They’ll firm up as they cool. You’ll hear a gentle sizzle as they settle on the rack, and the smell will intensify as they cool.
Related posts:
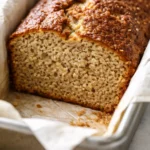 Low Calorie Banana Bread That Doesn’t Taste Like a Compromise — Finally
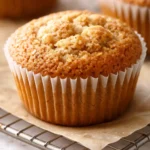 Coconut Flour Banana Bread Muffins That Stay Moist for Days (Not Crumbly)
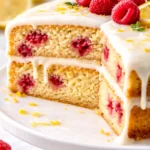 This Raspberry Lemon Cake With White Chocolate Is the Only Layer Cake You Need for Spring Celebrations
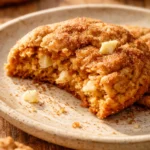 Soft, Pillowy White Chocolate Pumpkin Snickerdoodles with a Cinnamon-Sugar Crunch